
Victorian Footstool Before and After with a Bold Brass Finish
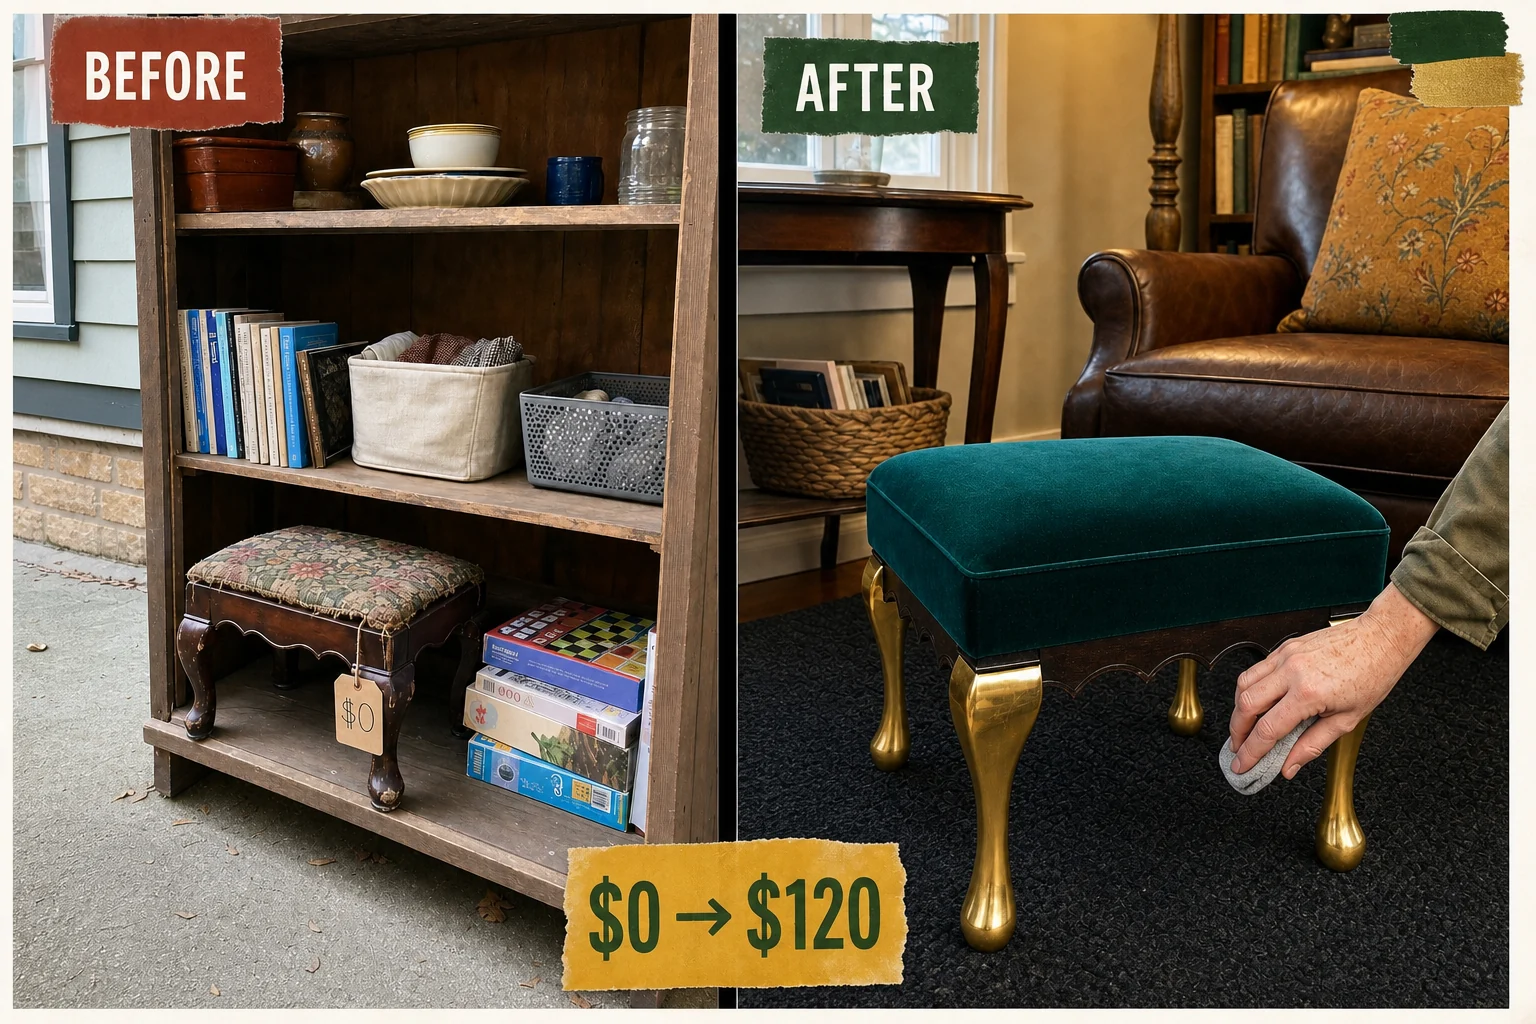
I found this wobbly Victorian footstool sitting for free on our neighborhood swap shelf. By repairing the frame and applying a liquid brass finish, it transformed into a modern statement piece.
Assessing the Swap Shelf Find
I spotted this Victorian-style footstool sitting on the bottom rack of a covered wooden neighborhood exchange cabinet beside a local community center. It had a torn masking tape label reading ‘FREE – Wobbly!’ slapped across its faded needlepoint top, but the classic cabriole legs and scalloped apron had too much potential to leave behind. A quick inspection revealed three primary issues.
- Visible gap between the top of one cabriole leg and the apron, making the stool unsafe to bear weight.
- Sun-bleached floral needlepoint with worn threads along the top edges that dates the piece.
- Chipped dark stain and deep scratches around the feet requiring thorough scuff-sanding.
Valuation and Resale Potential
Victorian-style footstools with modern, high-contrast finishes and luxury fabrics like velvet regularly sell for over $100 in boutique vintage shops. This combination of a durable faux-brass finish and jewel-toned upholstery transforms a free structural piece into a premium accent. The resale value below is an editorial estimate rather than a completed sale, highlighting the impressive return on a modest material investment.
| Item | Cost |
|---|---|
| Purchase Price | $0 |
| Wood Glue | $4 |
| Sanding Sponge | $3 |
| Brass Enamel | $12 |
| Velvet Remnant | $8 |
| Heavy-Duty Staples | $3 |
| Total Investment | $30 |
| Estimated Resale Value | $120 |
| Value Gain | $90 |
Materials checklist
Step 1: Safely Detach the Old Seat
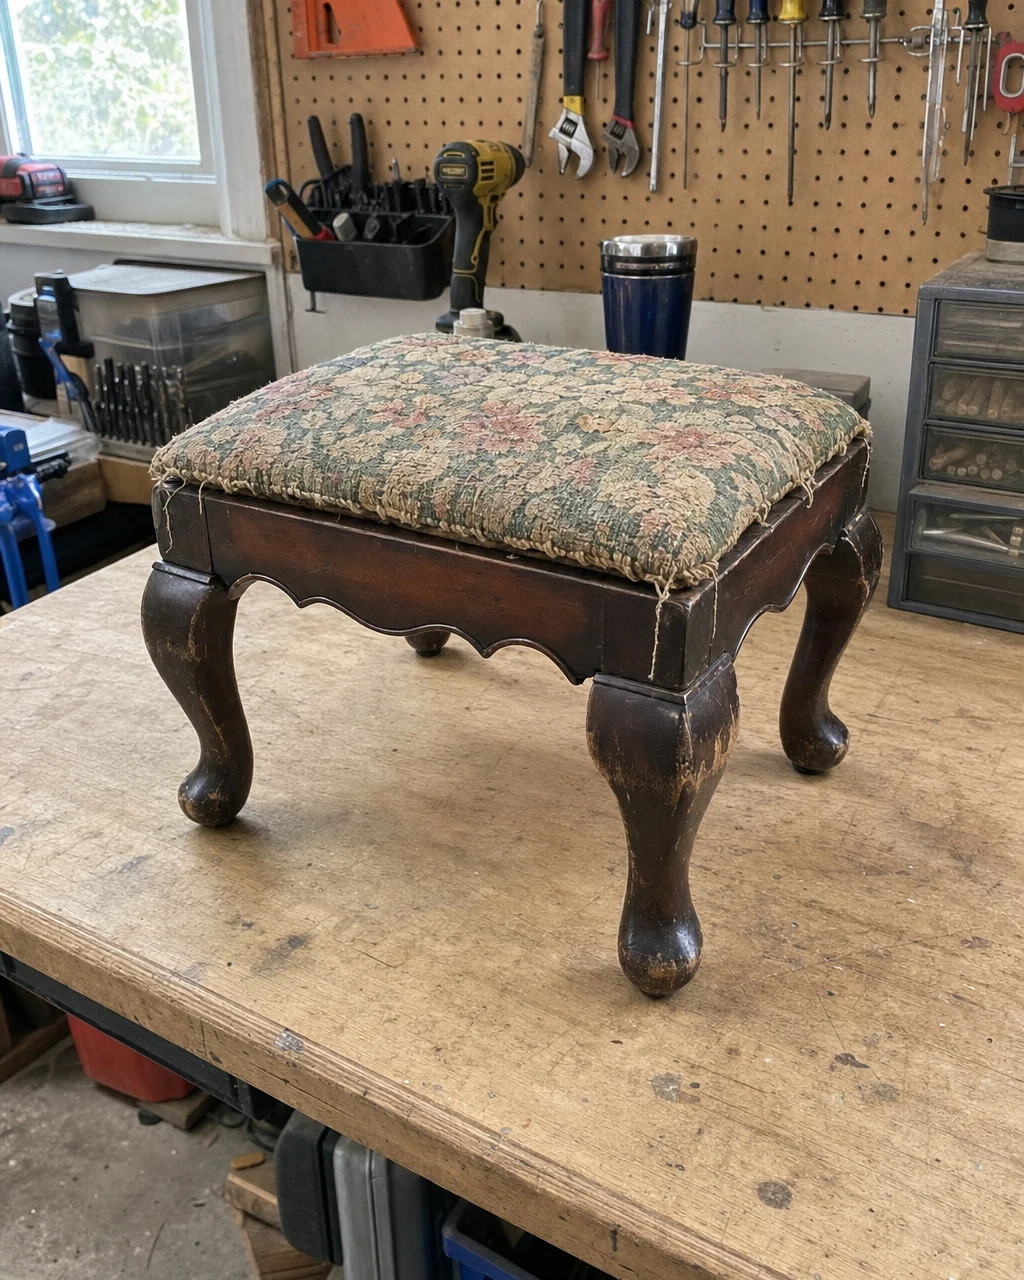
Inspect the wobbly frame on the workbench to identify all loose joints and structural issues before beginning the messy work. Unscrew the drop-in seat board from the base using a manual screwdriver so you can work on the wooden components and upholstery separately.
Frame Disassembly Details
The underside of the footstool shows the corner blocks and steel screws securing the drop-in upholstered seat board. Wear safety glasses when working with old screws that may strip or snap. Separating the components prevents accidental damage to the original 14-inch high, 16-inch wide frame while granting clear access to the scalloped wooden apron.
Step 2: Secure the Wobbly Leg Joints
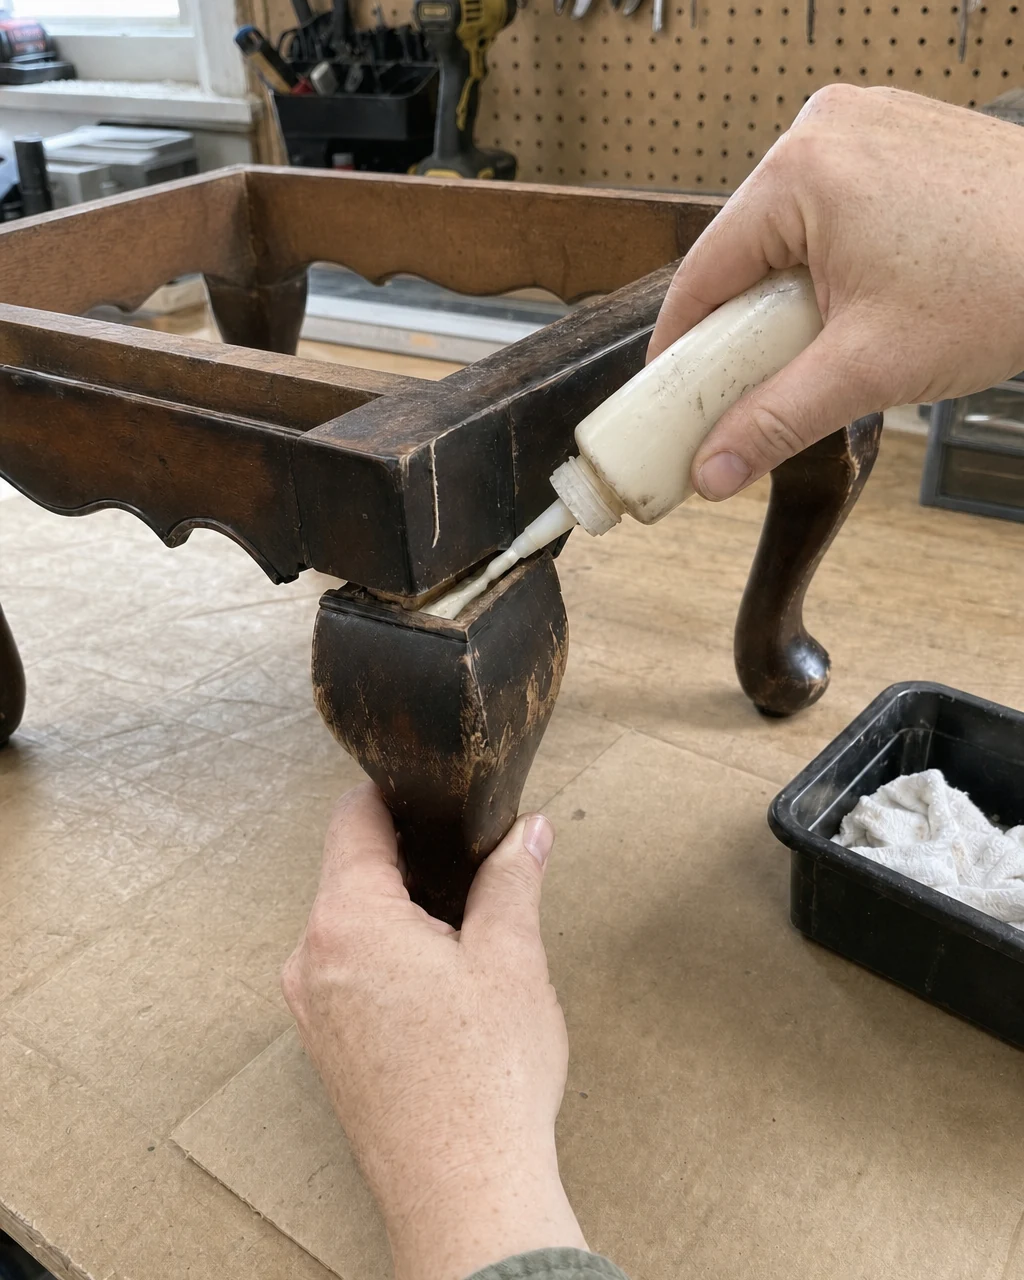
Inject high-quality wood glue directly into the loose dowel joints of the cabriole legs. Secure the freshly glued joints with bar clamps and leave them to cure undisturbed for 24 hours. Modern wood glue creates a bond stronger than the timber itself, completely resolving the visible gap between the top of the leg and the apron.
Wipe away excess glue immediately to prevent it from sealing the wood pores. A close-up of one loose cabriole leg joint reveals where the adhesive must penetrate to make the stool safe to bear weight again.
Step 3: Scuff-Sand for Perfect Adhesion
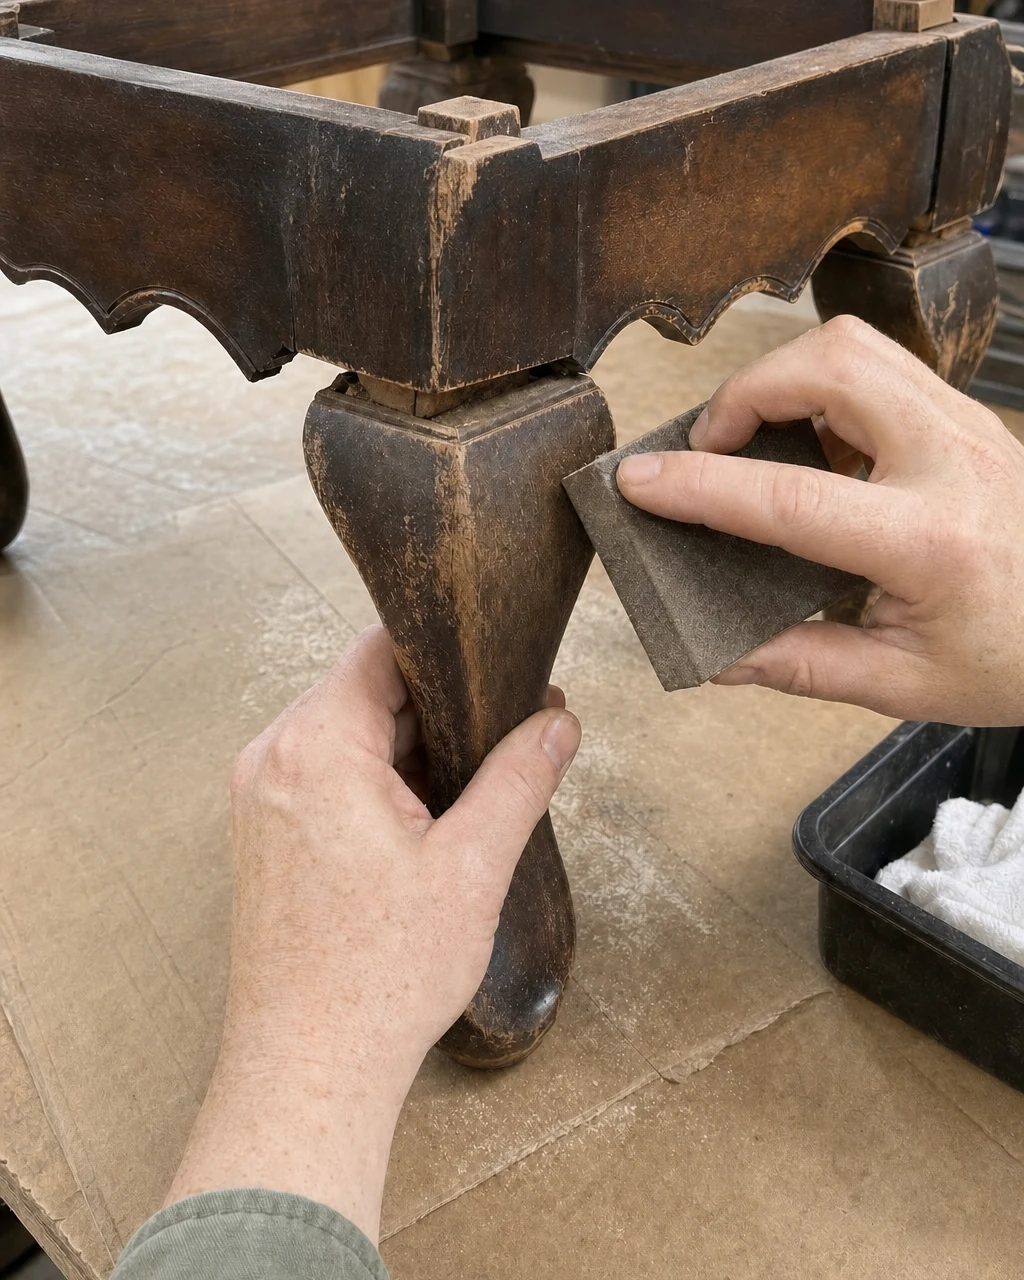
Scuff-sand the entire wooden base using a medium-grit sanding sponge to remove the flaking clear coat. This crucial abrasive prep creates a grippy, dull wooden surface ready for paint, ensuring the new metallic finish will adhere properly without peeling. Rub the sponge carefully along the curved outer edge of each dark-stained cabriole leg.
Surface Preparation Safety
Wear a dust mask to avoid inhaling old clear coat particles while working on the structurally sound wooden base. Use a dust brush to sweep away the debris, leaving a perfectly clean foundation. Skipping this abrasive prep guarantees the metallic finish will eventually peel away from the carved curvature of the legs.
Step 4: Brush on Liquid Brass Enamel
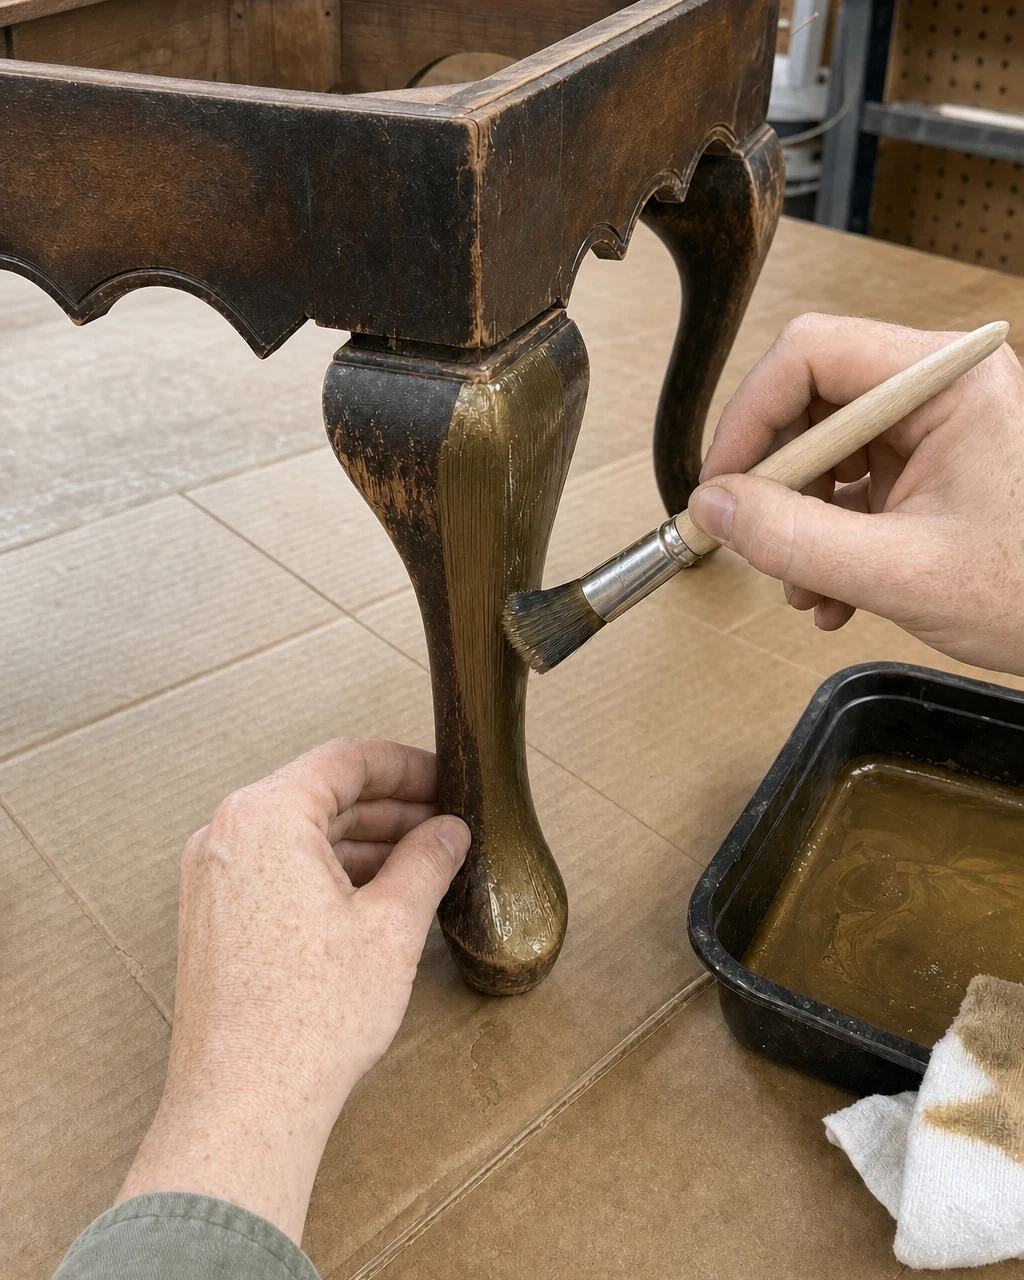
Brush on a thin, even coat of liquid brass enamel over the sanded wooden legs using a soft synthetic paintbrush. Allow two hours of drying time before applying a second thin coat to achieve a brilliant, realistic metal sheen. Liquid enamel provides a realistic metal sheen for twelve dollars, completely transforming the scuffed and dusted wooden base.
Achieving a Metallic Finish
Work in a well-ventilated area when applying solvent-based enamel to the cabriole legs. The signature detail of this makeover relies on the smooth application of the bright liquid brass enamel. Once the second coat is applied, you will have one leg fully coated in wet brass enamel, ready to cure into a sleek, metallic accent.
Step 5: Staple the New Velvet Cover
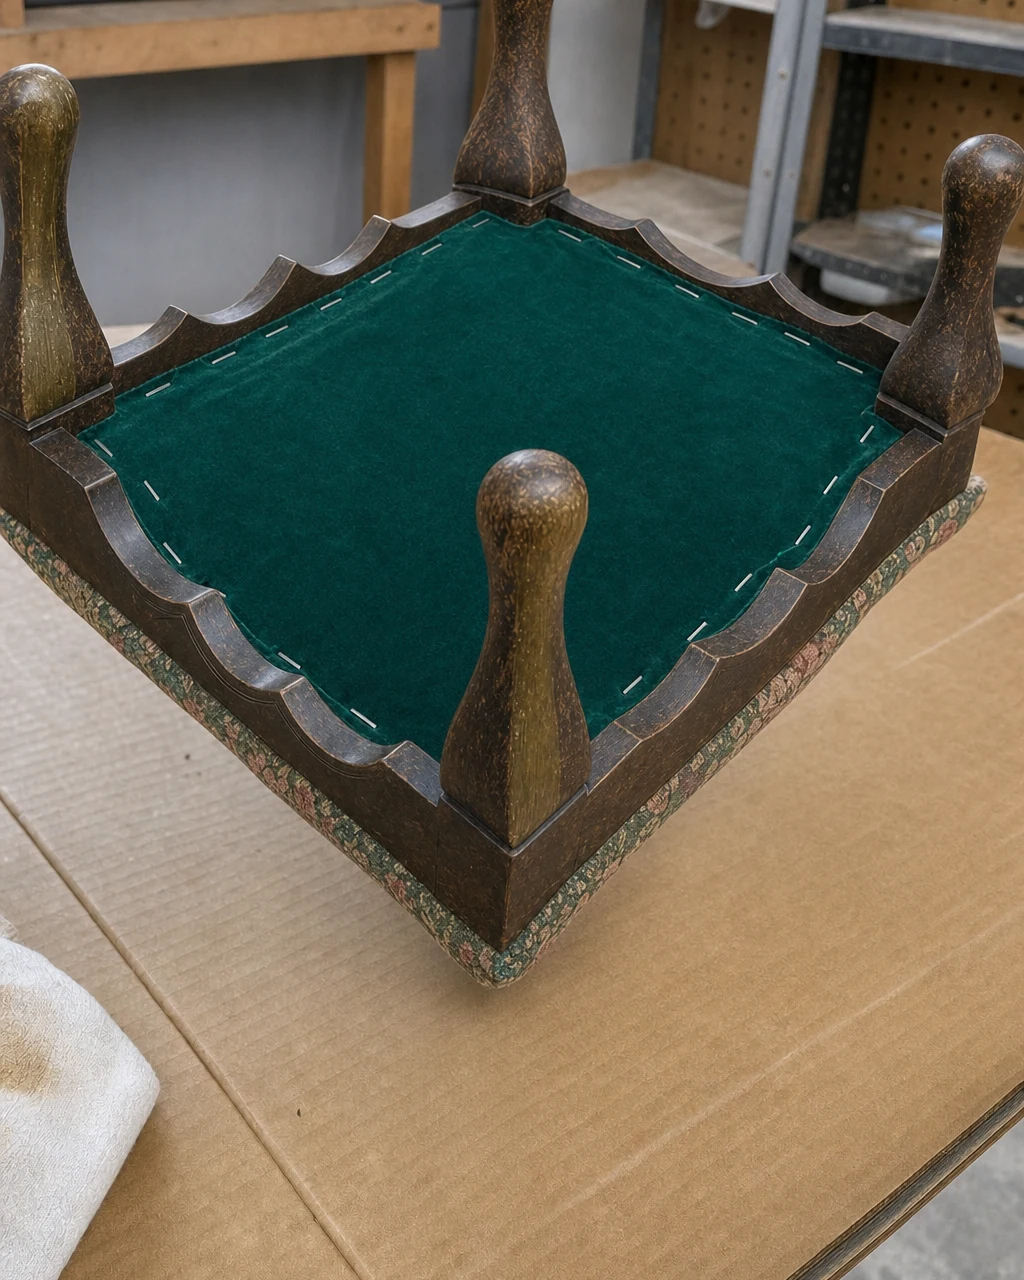
Wrap the original seat board in the emerald green velvet remnant, ensuring the fabric grain is straight. Pull the heavy velvet taut over the edges and secure it firmly beneath the board with heavy-duty staples to prevent future wrinkles. Keep fingers clear of the staple gun discharge area while working on the underside of the seat board.
Heavy velvet requires extra tension to prevent future fabric wrinkles over the foam padding. The smooth velvet covering the top of the seat board replaces the sun-bleached floral needlepoint, upgrading the piece from a faded antique to a jewel-toned modern accent.
Step 6: Reattach the Finished Components
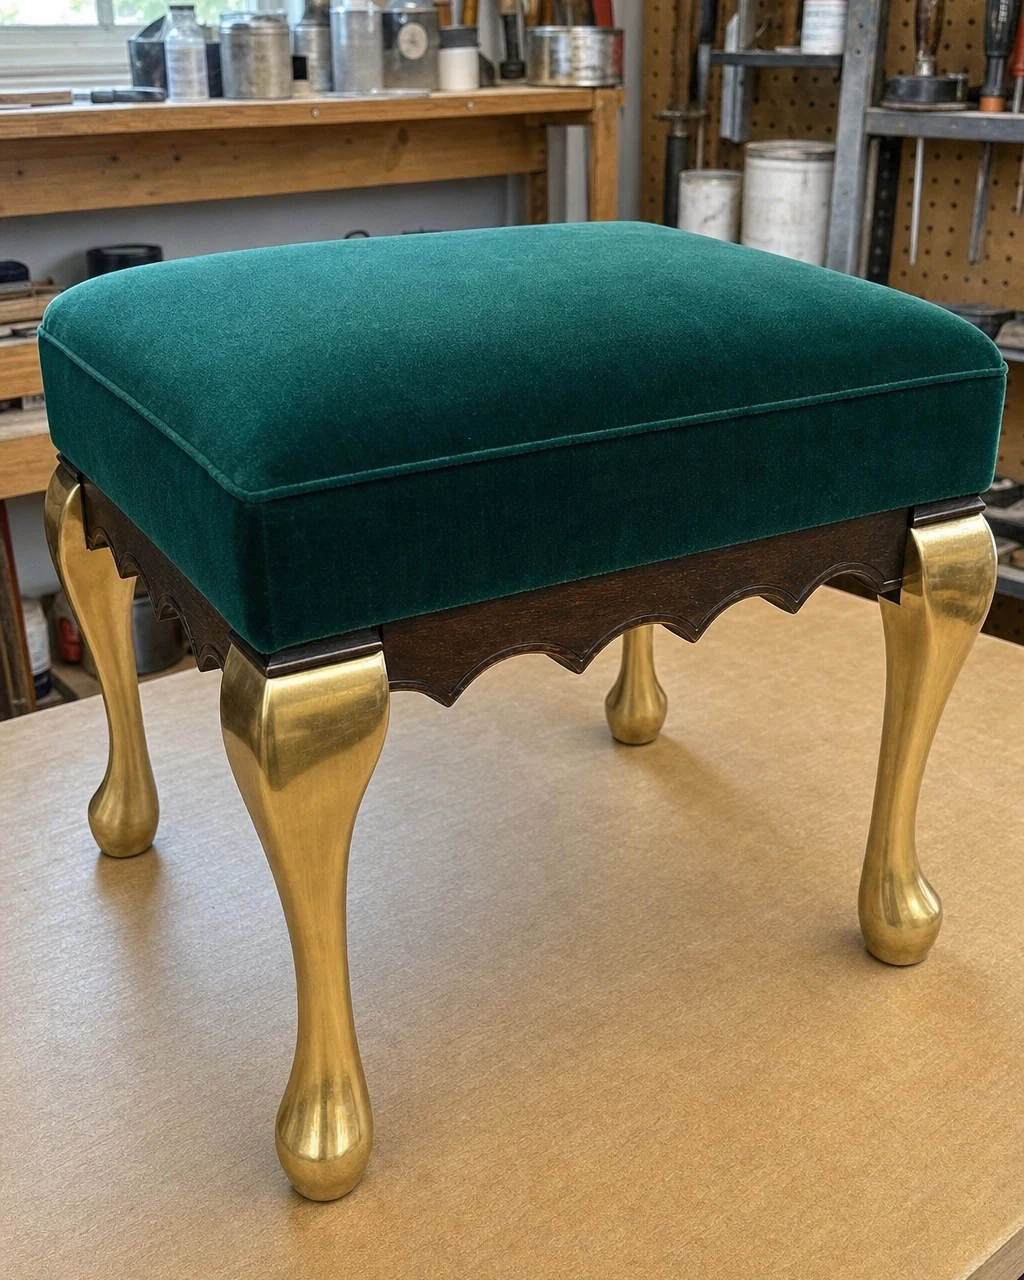
Reattach the newly upholstered velvet seat to the cured brass base using the original bottom screws. Set the fully assembled footstool upright on the cleared workbench to inspect the final piece for stability and finish consistency. The cured brass finish easily withstands daily kicks and scuffs, ensuring the piece remains a durable faux-brass statement.
Final Assembly Inspection
Avoid over-tightening screws into old wood to prevent stripping the holes during the final assembly. The completed footstool resting on the workbench showcases the brilliant brass legs contrasting with the rich emerald velvet. This combination successfully transforms the dark, faded floral antique into a sleek, metallic and jewel-toned modern accent.
Step 7: Style the Modern Metallic Accent
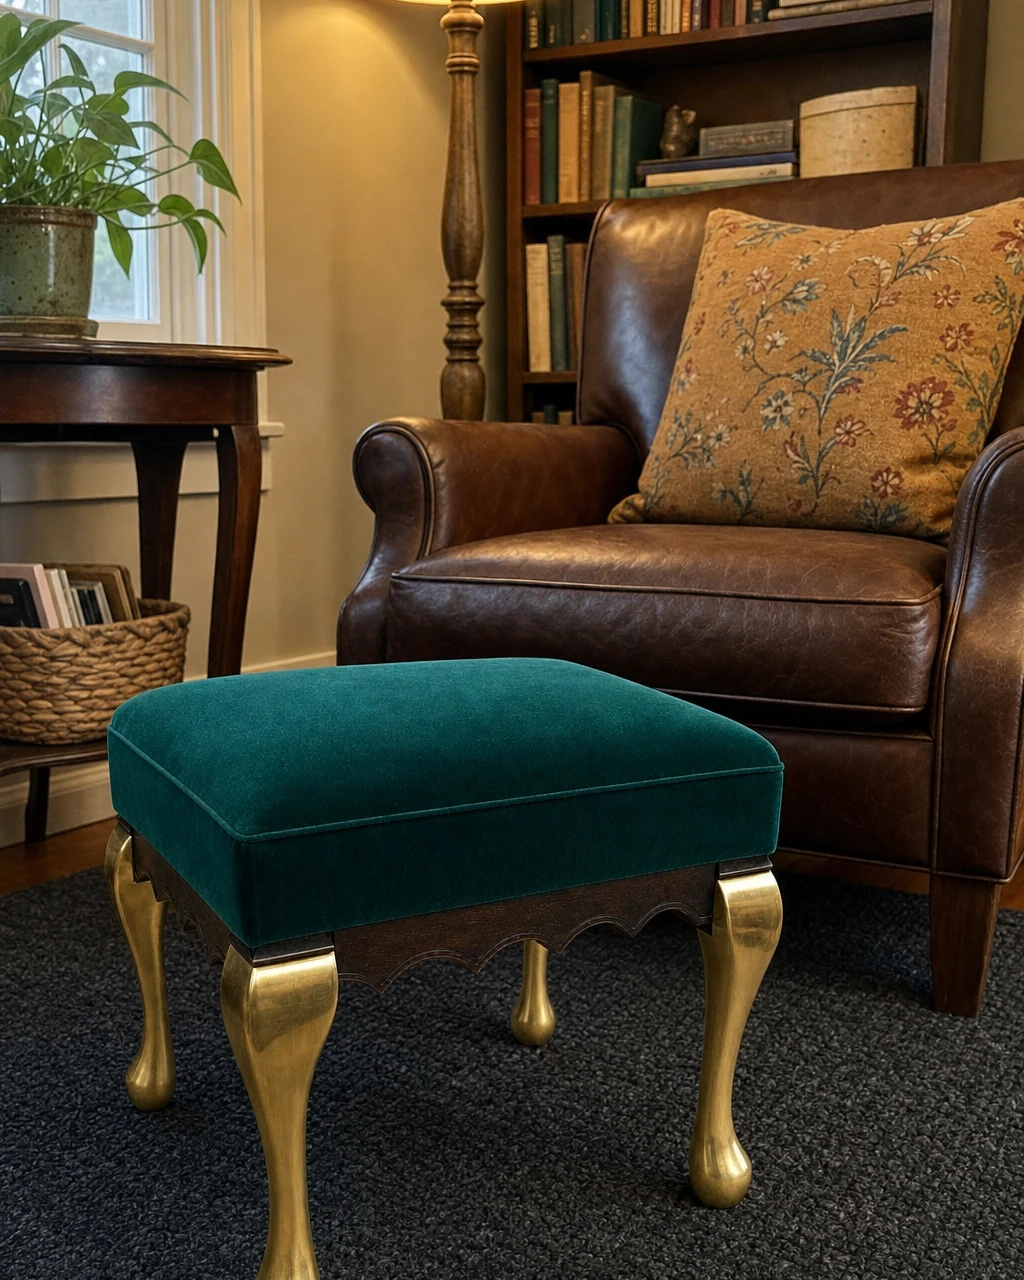
Move the completed footstool into a living space to serve as a striking metallic accent piece. Position it on a dark wool rug beside a leather reading chair to highlight the brilliant brass legs contrasting with the rich emerald velvet. This zero-dollar find now looks exactly like a luxury antique reproduction.
Room Placement
Ensure the newly painted legs are fully cured before placing the footstool on rugs. The finished brass and emerald velvet footstool styled in a functional room setting proves that a discarded swap shelf find can become a premium accent. The warm floor lamp lighting beautifully catches the metallic brass finish on the curved cabriole legs.