
Porch Bench Before and After with a Pale Nordic Finish
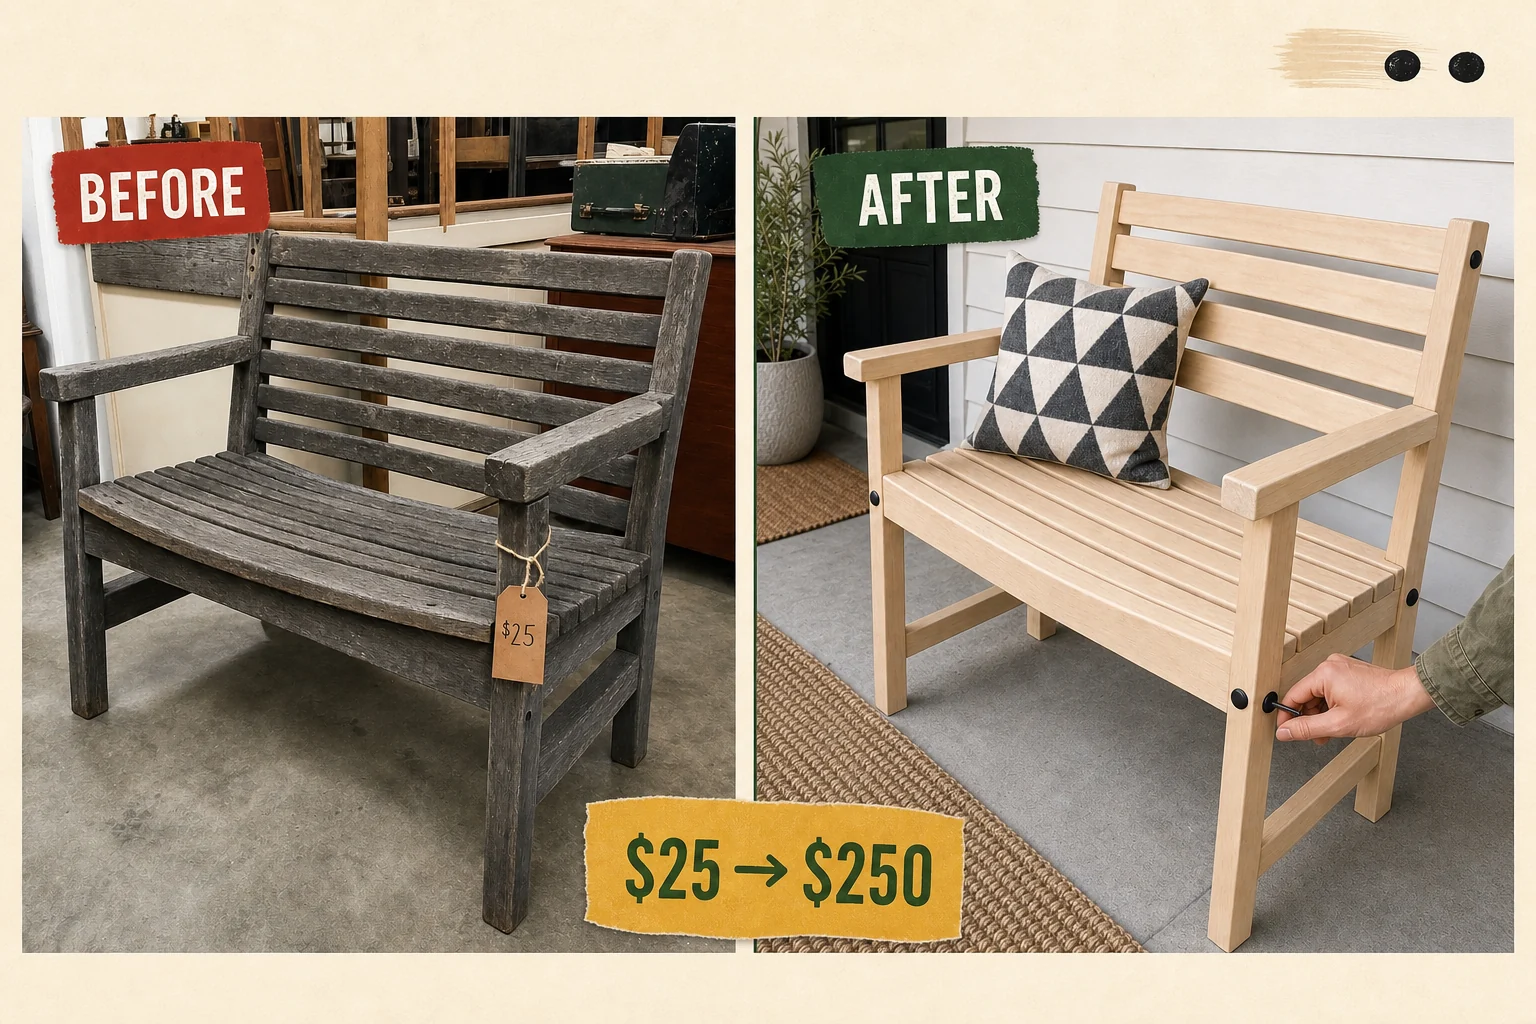
Tucked behind vintage crates at an antique market, this weathered pine bench was missing crucial bolts and priced to move. The neglected frame became a sleek, pale blonde minimalist statement piece using white-tinted oil and oversized matte black hardware.
Auditing the Weathered Pine Frame
Finding a structurally sound silhouette often means looking past severe surface degradation and missing parts. This classic slatted backrest bench measured a substantial 48 inches wide, 36 inches tall, and 24 inches deep, featuring straight armrests and a gently curved seat profile.
- The bench wobbled dangerously due to empty bolt holes on the left backrest support, making it entirely unsafe to sit on without immediate intervention.
- Deep grey oxidation hid the natural wood grain and presented a significant splinter hazard for daily use.
- Shallow hairline cracks along the seat slat end-grain left the wood highly vulnerable to deep moisture penetration and winter rot.
Project Costs and Materials
Reviving this solid pine frame requires specific abrasives, protective finishes, and heavy-duty structural replacements. The total investment remains low because the original antique market price tag was heavily discounted due to the missing components. The allowed transformations include sanding away the oxidized layer and installing new structural hardware.
| Item | Cost |
|---|---|
| Purchase Price | $25 |
| 80-Grit Sanding Discs | $10 |
| Exterior Wood Filler | $8 |
| White-Tinted Exterior Oil | $22 |
| Matte Black Carriage Bolts | $12 |
| Total Investment | $77 |
| Estimated Resale Value | $250 |
| Value Gain | $173 |
Gather the necessary supplies before beginning the restoration to ensure the weathered, grey-toned pine is properly sealed against outdoor elements.
Materials checklist
Step 1: Plan the Repair Sequence
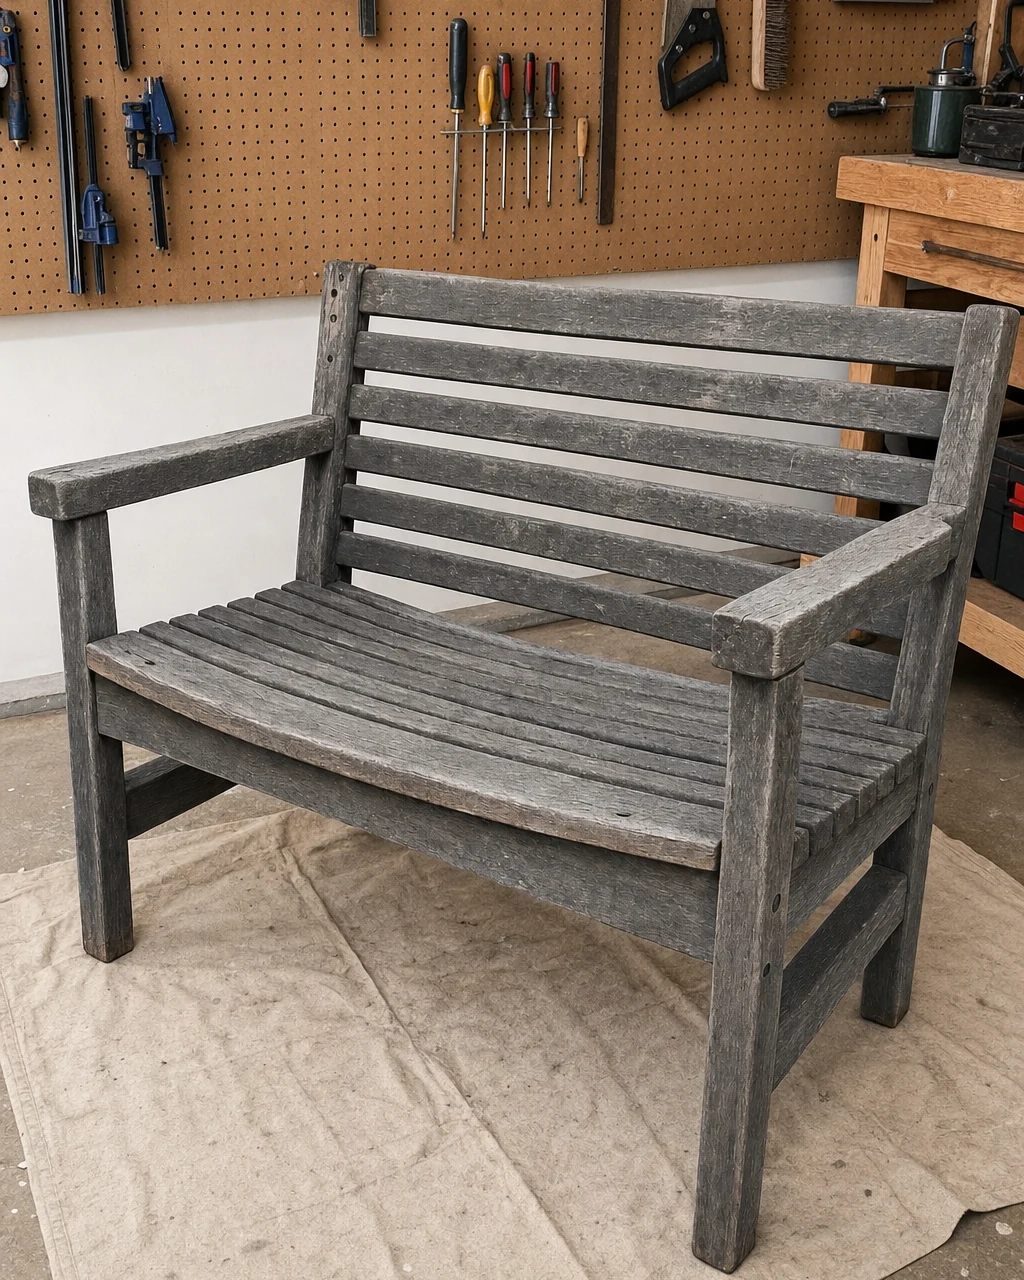
Evaluate the missing hardware and surface checking to determine the exact repair sequence for the weathered, wobbly bench resting on a garage drop cloth. Inspecting the empty bolt holes on the left backrest support by hand confirms the required hardware sizes and establishes a clear repair plan.
Addressing Structural Deficits
The solid pine slats are screwed to a thick wooden frame with bolt-through backrest supports, making this joint critical. The bench wobbles dangerously and cannot safely support a seated person. Use a measuring tape to verify dimensions. Do not sit on the bench until the missing structural bolts are fully replaced.
Step 2: Strip the Weathered Grey Layer
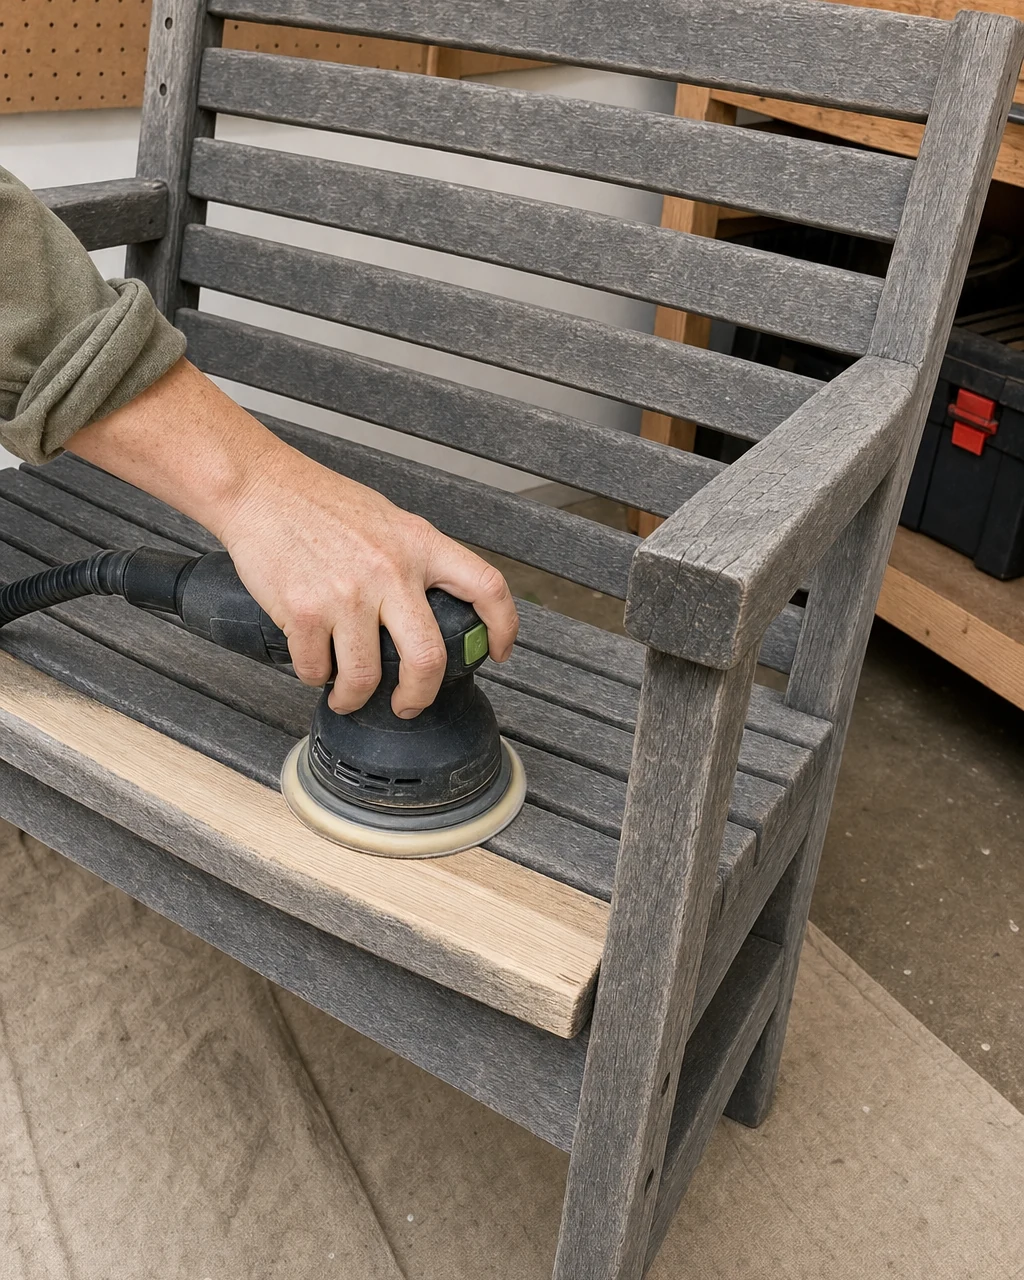
Strip the oxidized grey layer using a random orbital sander to reveal the healthy raw pine beneath. Guiding the sander along the top seat slat exposes the bright, pale raw wood, completely removing the deep grey tone and raised, rough grain on all exposed pine slats.
This crucial step eliminates the splinter hazard for daily use and prepares the surface for a new finish. Always wear a dust mask and safety glasses when sanding heavily oxidized wood, as the 80-grit sanding discs will generate significant fine dust.
Step 3: Seal the End Grain Cracks
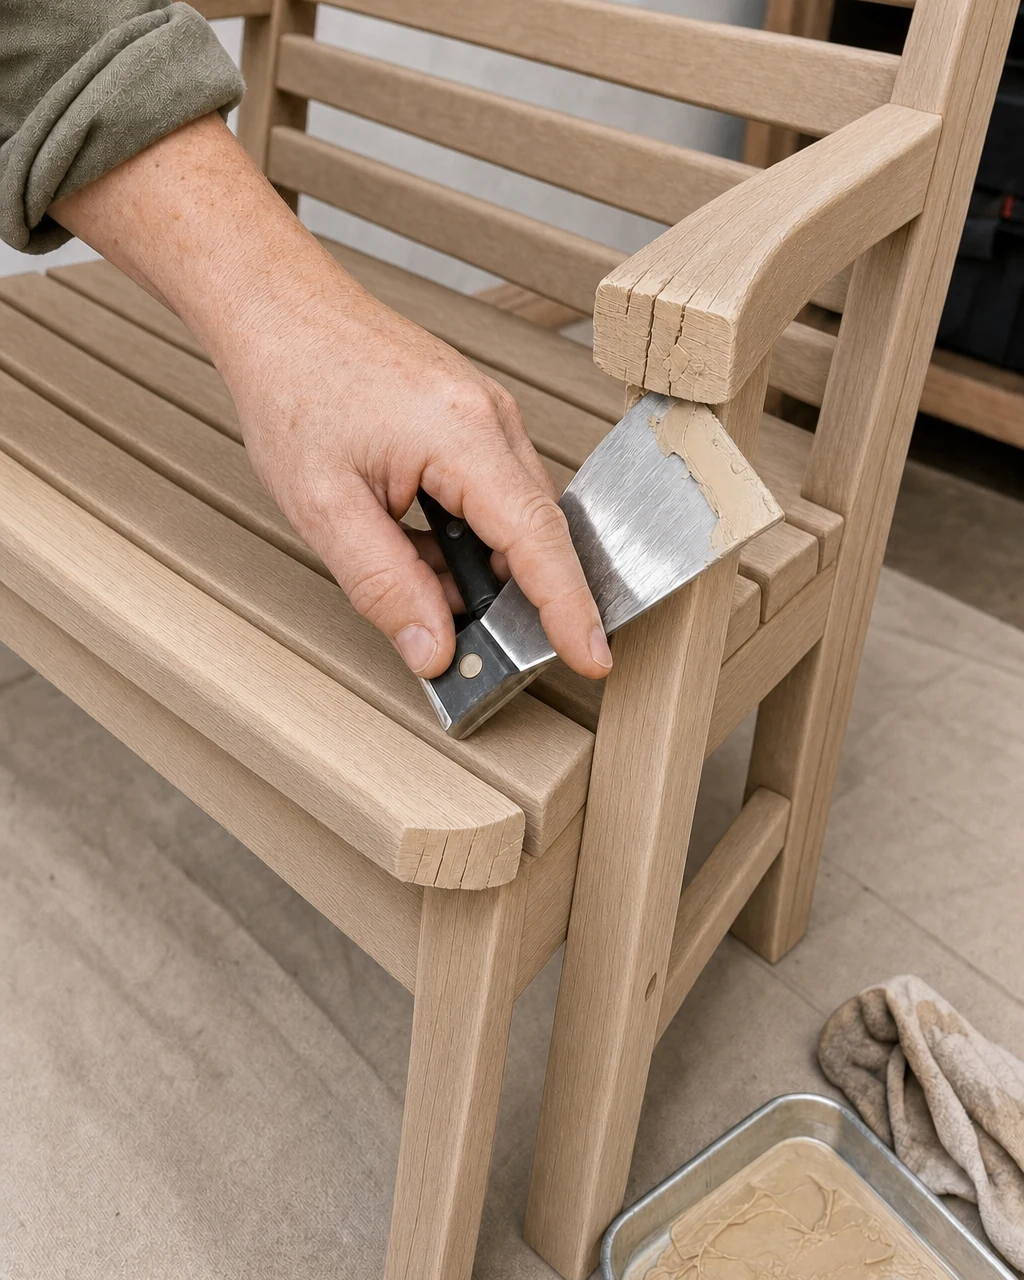
Press exterior wood filler flush into the hairline checks using a metal putty knife. These shallow hairline cracks along the exposed end-grain of the seat slats leave the wood vulnerable to deep moisture penetration and winter rot if left untreated.
Smoothing the Filler
Wipe away any excess filler before it hardens to ensure the cracks are packed flush and smooth. Pressing the natural-tinted wood filler deeply into the end-grain cracks restores the integrity of the raw sanded pine. Work in a well-ventilated area if the filler contains strong solvents.
Step 4: Get That Pale Nordic Tone
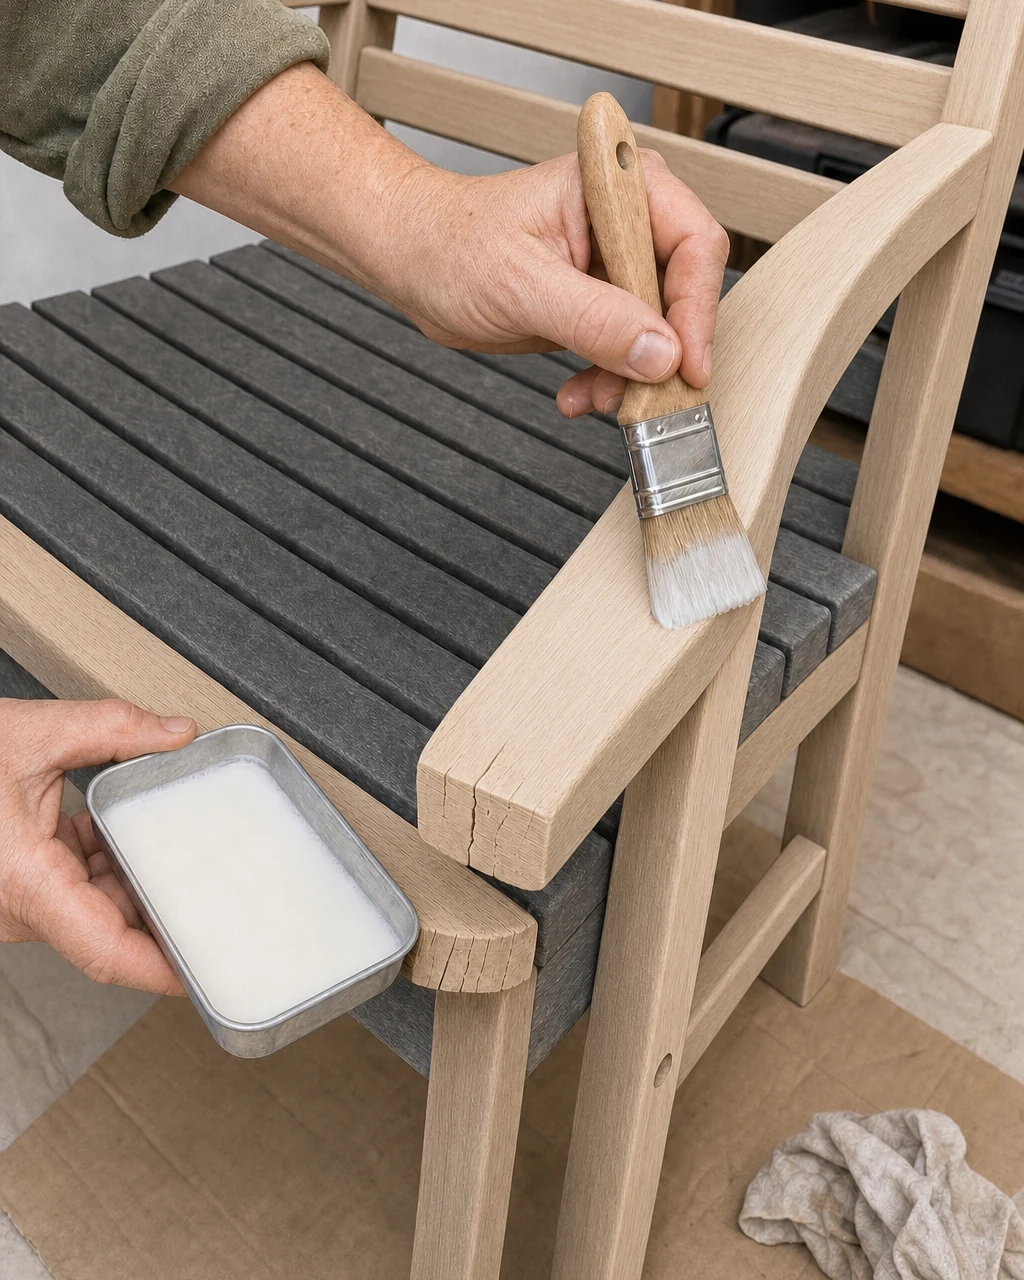
Brush on a white-tinted exterior penetrating oil using a synthetic bristle brush to protect the wood from UV damage. This creates a pale Nordic finish, leaving the raw pine armrest coated in a beautiful milky sheen that highlights the natural wood grain.
Applying this protective finish ensures the wood remains resilient against the elements while imparting a pale Nordic tone. Lay a drop cloth to catch oil drips and dispose of oily rags safely to prevent spontaneous combustion in the workshop.
Step 5: Add High-Contrast Hardware
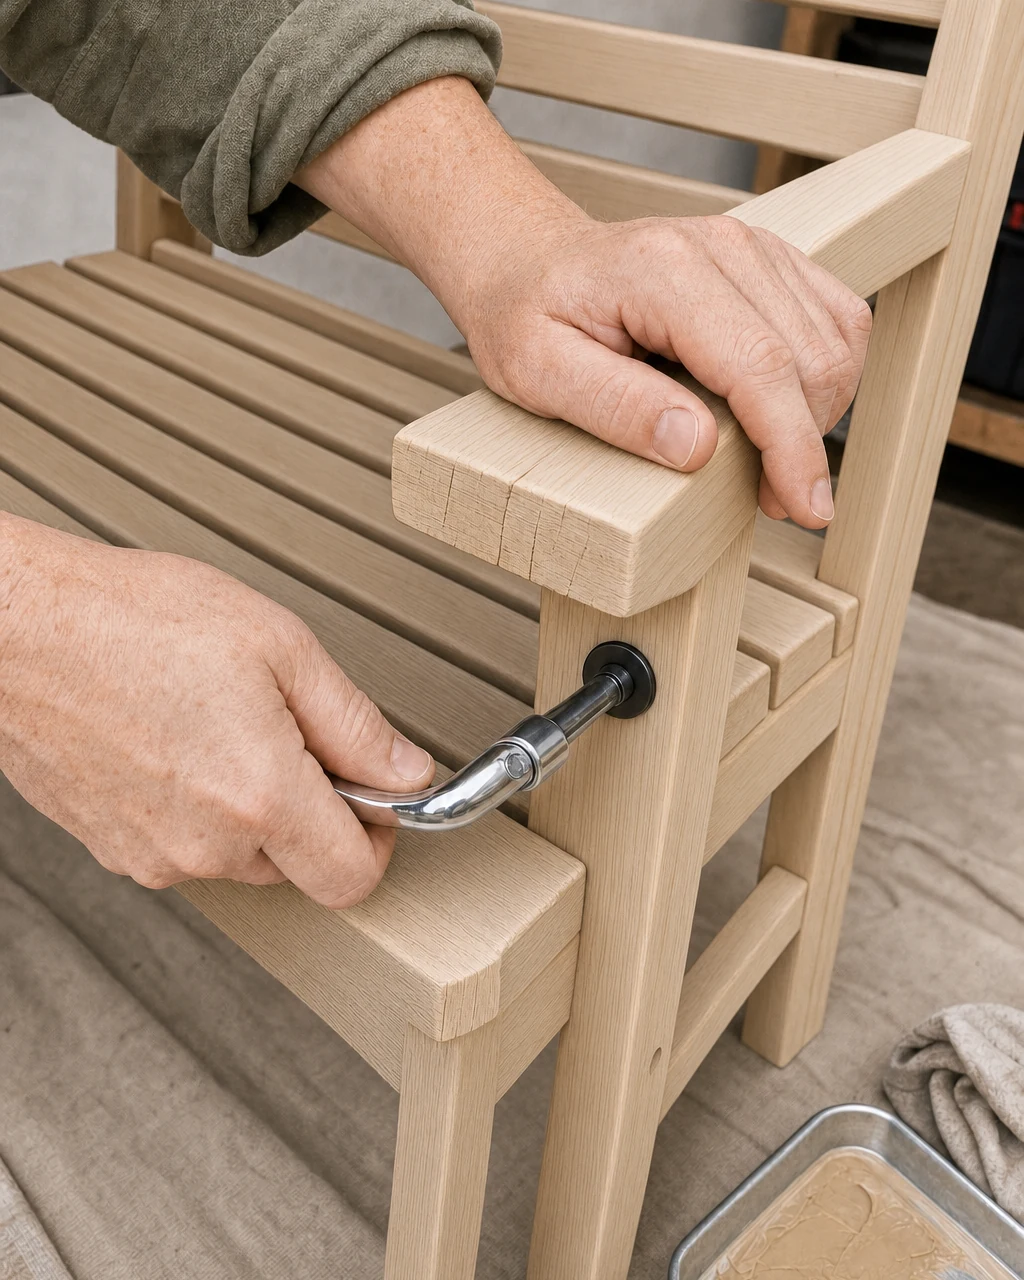
Secure the backrest and frame using new matte black carriage bolts for structural integrity and visual contrast. Tightening the chunky bolts through the backrest support with a socket wrench leaves the black hardware fully seated against the pale wood.
Securing the Joints
Replacing the rusted, missing original hardware with oversized carriage bolts provides a striking visual hook. Ensure the bolts are tightened sufficiently to eliminate wobble without crushing the wood fibers. This step completely resolves the dangerous instability of the backrest support joint.
Step 6: Let the Finish Cure
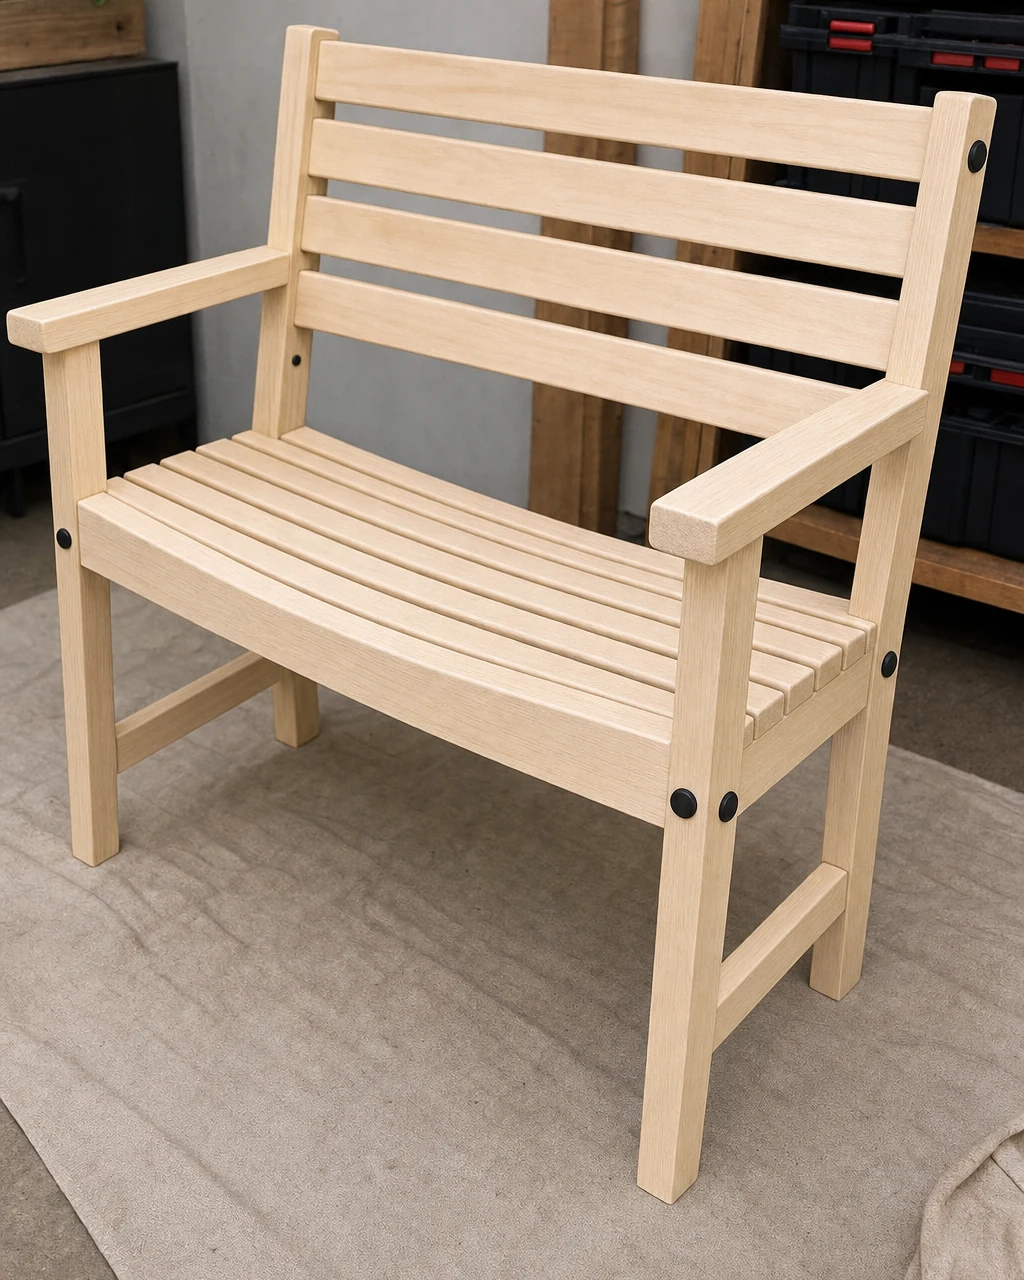
Allow the penetrating oil to cure completely in the ventilated workshop for 24 hours before outdoor exposure. The fully assembled pale bench now sits on the workshop drop cloth, structurally sound and featuring contrasting black hardware.
Preparing for Outdoor Use
Proper curing time is essential for the white-tinted exterior oil to harden and provide maximum moisture resistance. Maintain good ventilation in the workshop while the oil cures, ensuring the sleek, pale blonde minimalist statement piece is fully ready for daily outdoor use.
Step 7: Style the Finished Piece
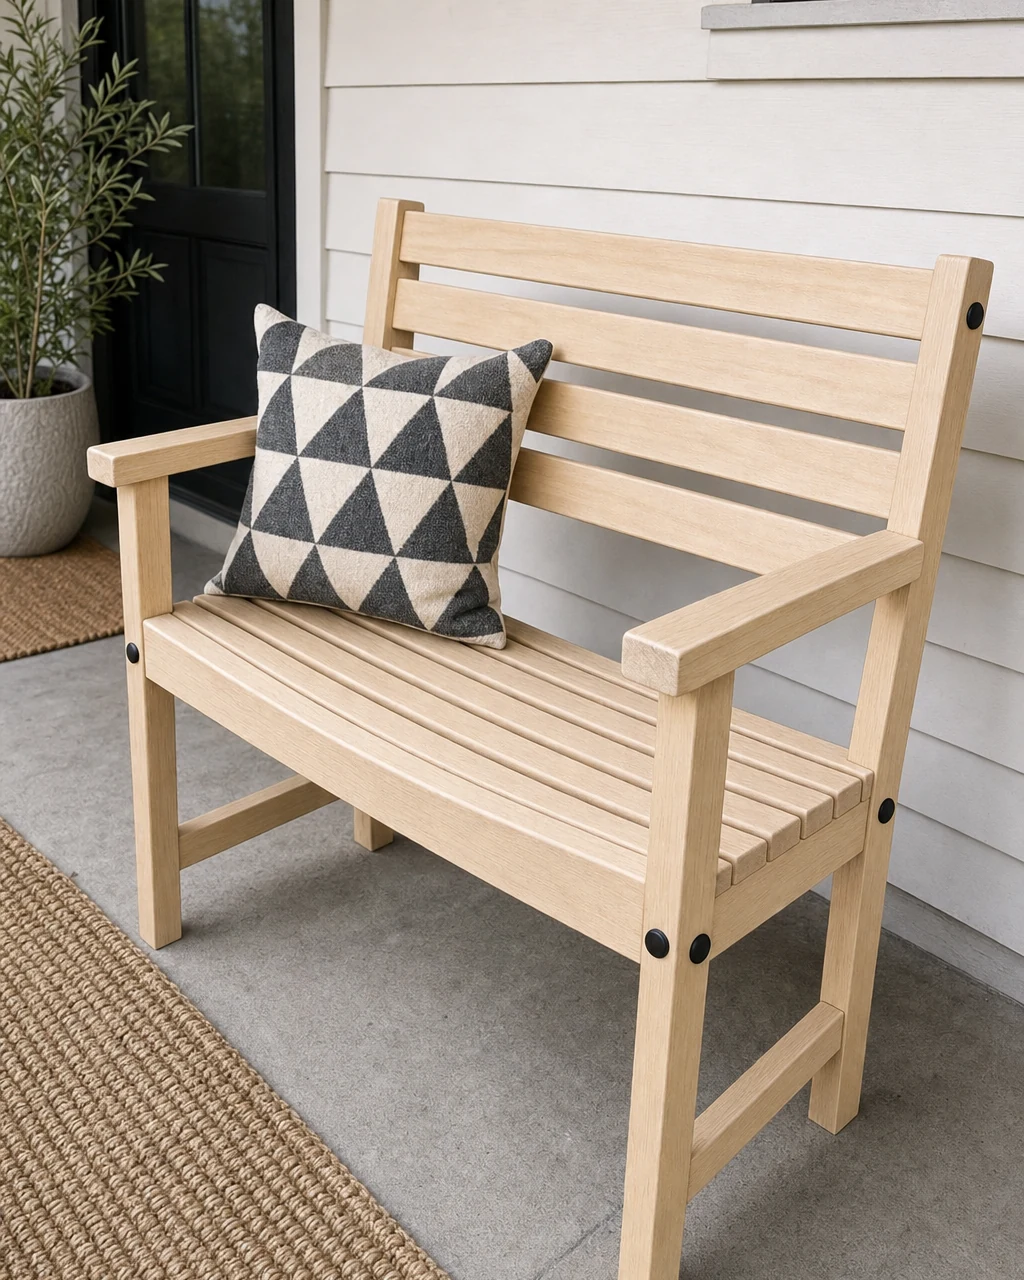
Move the cured bench to a covered porch and style it with minimalist Nordic textiles. Positioning the finished piece on a modern concrete porch with a simple geometric throw pillow integrates it perfectly into a functional outdoor living space.
Final Placement
The pale, white-oiled pine contrasts sharply with the oversized matte black carriage bolts, completing the Scandinavian-inspired raw wood restoration. Lift the solid wood bench from the lower frame, not the armrests, when moving it to protect the newly secured joints.
Valuation and Resale Potential
The transition from weathered grey to a highly desirable pale Nordic finish elevates this from a yard-sale castoff to a boutique-quality outdoor piece. The estimated resale value is an editorial estimate rather than an actual completed sale, reflecting the dramatic transformation.
- The structural upgrade of heavy-duty matte black hardware provides immediate modern visual weight and safety.
- Sealing the end-grain and applying a UV-protective finish ensures long-term durability for outdoor use.
- The sleek, pale blonde minimalist aesthetic appeals strongly to contemporary outdoor furniture buyers.