One-Weekend Women's Bedroom Makeover: The Complete Plan
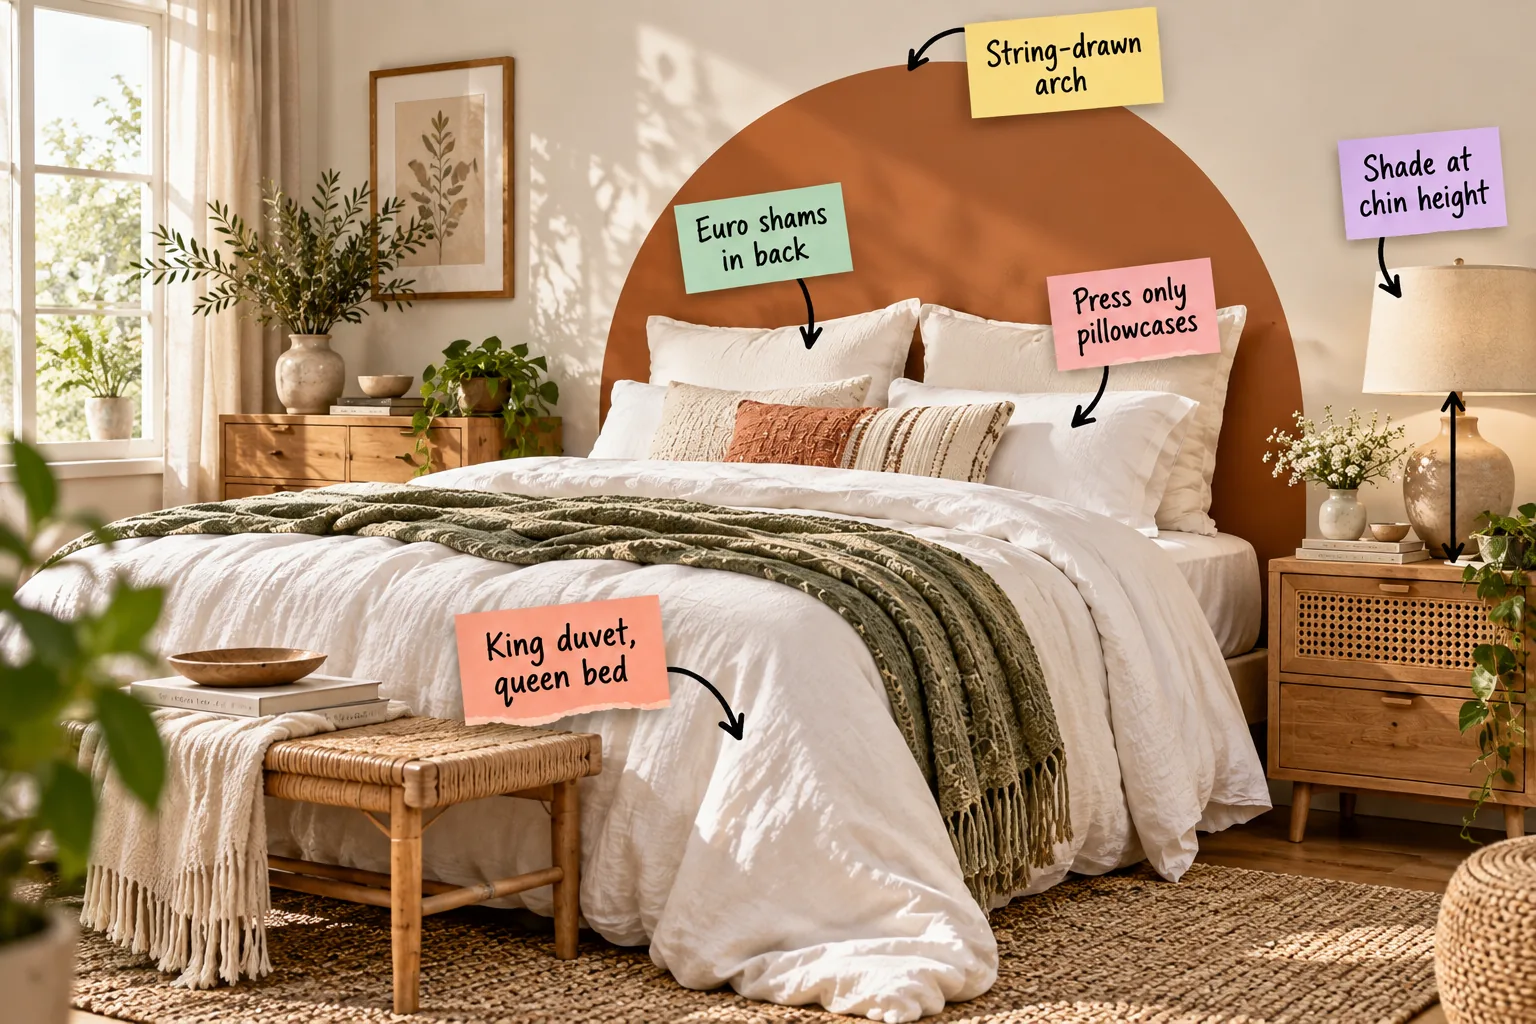
Transforming your bedroom into a serene sanctuary is entirely possible when you follow this printable two-page weekend schedule. I designed this Saturday-to-Sunday sequence to time your arch painting, linen swapping, and styling perfectly, giving you a designer-quality retreat by Sunday night.
The Complete Saturday-Sunday Schedule
Start by downloading the printable two-page weekend schedule to sequence your messy work for Saturday morning. In my own Denver home, separating the painting phase from the clean styling gave me the mental space to actually enjoy the process.

This timeline ensures your terracotta paint cures overnight while you handle the linen washing, leaving Sunday entirely reserved for crisp assembly.
Gathering the Weekend Supplies
Before starting the clock on Saturday morning, verify that all materials are staged in the room to avoid breaking your workflow.
Preparing the Room for Paint
Clear the headboard wall completely and push your mattress to the center of the room, covering it with a plastic drop cloth to catch any stray splatters.
- Remove all outlet covers on the focal wall.
- Apply painter’s tape along the baseboards.
- Lay a canvas drop cloth directly under the painting zone.
Patching Minor Wall Blemishes
Before you even think about primer, inspect the arch zone for old nail holes and fill them with a lightweight spackle, sanding the surface perfectly smooth once dry.
Priming the Arch Wall
If your bedroom walls are currently painted in a dark or glossy hue, apply one coat of high-adhesion primer before drafting your arch to ensure the terracotta color appears rich and true.
Selecting the Right Arch Dimensions
A successful painted arch must extend slightly beyond your mattress width, so a standard 60-inch queen bed requires a 64-inch arch, leaving a balanced two-inch margin on either side.
Selecting the Thumbtack Position
To position your thumbtack correctly, measure exactly halfway across your mattress width and place the tack 40 inches above the floor, which guarantees the arch peaks beautifully above your stacked pillows.
Drafting the String-Drawn Arch
Create a flawless headboard alternative using the string-drawn arch method by tying a string to a thumbtack at the center of your mattress width, securing a pencil at a 30-inch radius, and sweeping it across the wall.

This simple geometry trick guarantees a symmetrical focal point without requiring expensive stencils or complex measurements.
Cutting in the Curved Edge
Use a high-quality angled brush to slowly trace the pencil line of your arch before filling in the center with a roller, keeping a damp microfiber rag handy to immediately wipe away any tiny mistakes.
Choosing the Right Paint Finish
Always select a flat or matte finish for a painted headboard arch so it absorbs light and hides drywall imperfections. In my own home, I once used an eggshell finish on an accent wall, and the bedside lamps created a terribly distracting glare every evening.

| Paint Finish | Light Reflection | Best Bedroom Use |
|---|---|---|
| Matte / Flat | None (Absorbs light) | Focal walls, headboard arches, ceilings |
| Eggshell | Low (Soft sheen) | Standard bedroom walls, high-traffic areas |
| Satin / Semi-Gloss | High (Reflective) | Baseboards, doors, window trim |
Removing the Painter’s Tape
Always pull the painter’s tape off the baseboards while the terracotta edge is still slightly damp, pulling at a 45-degree angle to prevent the cured paint from peeling off in large strips.
Allowing Proper Cure Time
Leave the painted arch to dry undisturbed for at least twelve hours, because rushing to push the bed back while the paint is merely dry to the touch risks scuffing your pristine new curve.
Washing the New Linens
While the paint cures on Saturday afternoon, run your new linen sheets and duvet cover through a gentle wash cycle using cold water and a mild liquid detergent to protect the natural flax fibers.
Drying the Linen Naturally
Tumble dry your European flax linens on the lowest possible heat setting and remove them while they are still slightly damp to the touch, which prevents the fibers from becoming brittle and stiff.
The King Duvet on a Queen Bed
On Sunday morning, achieve that luxurious, floor-grazing drape by using a king duvet insert and cover on your queen mattress.
Sizing up provides an extra 16 inches of width, ensuring the bedding spills softly over the sides and completely hides the mattress foundation.
Securing the Duvet Corners
Prevent the heavy king insert from shifting inside the cover by utilizing the internal corner ties before you button the bottom closure.
- Turn the linen cover completely inside out.
- Tie all four internal corners tightly to the insert loops.
- Pull the whole assembly right-side out for a perfectly distributed layer.
Fluffing the Euro Inserts
Always buy feather or down-alternative inserts that are two inches larger than your Euro shams; stuffing a 28-inch insert into a 26-inch cover creates the firm, structured foundation needed for reading in bed.
Building the Euro Sham Foundation
Anchor the sleeping space by placing two large 26×26 inch Euro shams upright against the painted arch.

These oversized square pillows sit directly behind your standard sleeping pillows, providing crucial visual height and comfortable back support for reading.
Choosing the Sleeping Pillows
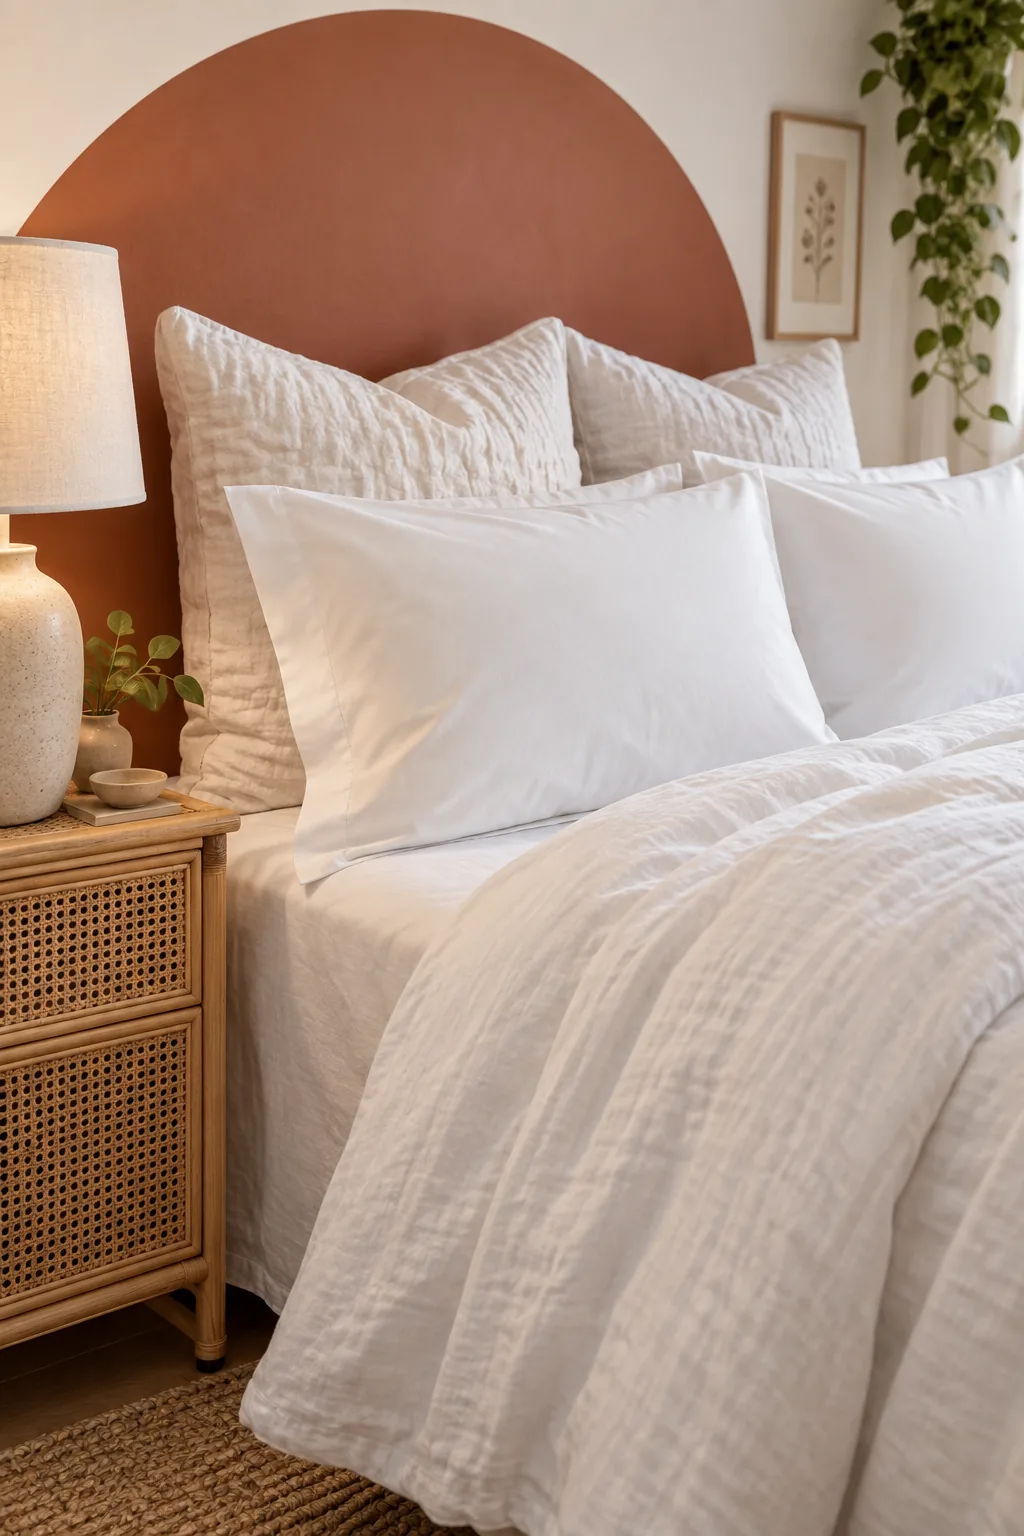
Stack two standard sleeping pillows flat in front of your upright Euro shams, choosing a medium-firm density that supports your neck during the night without looking deflated during the day.
Selecting the Linen Weight
For the most effortless drape, choose a mid-weight European flax linen that holds a rumpled texture without feeling stiff. In my own bedroom, switching to mid-weight linen completely eliminated that uncomfortable midnight temperature spike.
Tucking the Fitted Sheet
Pull the fitted linen sheet taut over your mattress corners, ensuring the elastic grips tightly under the foundation so the casual, unmade aesthetic above does not look sloppy or neglected.
The Strategic Ironing Shortcut
Save an hour on Sunday morning with a targeted styling trick that skips ironing the heavy duvet cover and fitted sheets entirely.
Instead, press only the front pillowcases to give the head of the bed a crisp, intentional polish that elevates the whole unmade look.
Arranging the Nightstand
Keep your bedside surface functional by limiting the decor to just your lamp, a small catch-all tray, and your current book, which prevents visual clutter from competing with the bold terracotta arch.
Managing the Nightstand Cords
Secure your lamp and phone charger cords to the back leg of your nightstand using small adhesive clips, maintaining the clean, serene atmosphere of your newly styled sanctuary.
Selecting the Bedside Bulb
Equip your bedside lamp with a warm 2700K LED bulb to create a cozy, relaxing glow that signals your brain it is time to wind down for sleep.
Setting the Bedside Lamp Height
Finish the nightstand styling by checking your lighting ergonomics; when you sit up in bed, the bottom rim of the lampshade should align exactly with your chin height to illuminate your book while shielding your eyes.
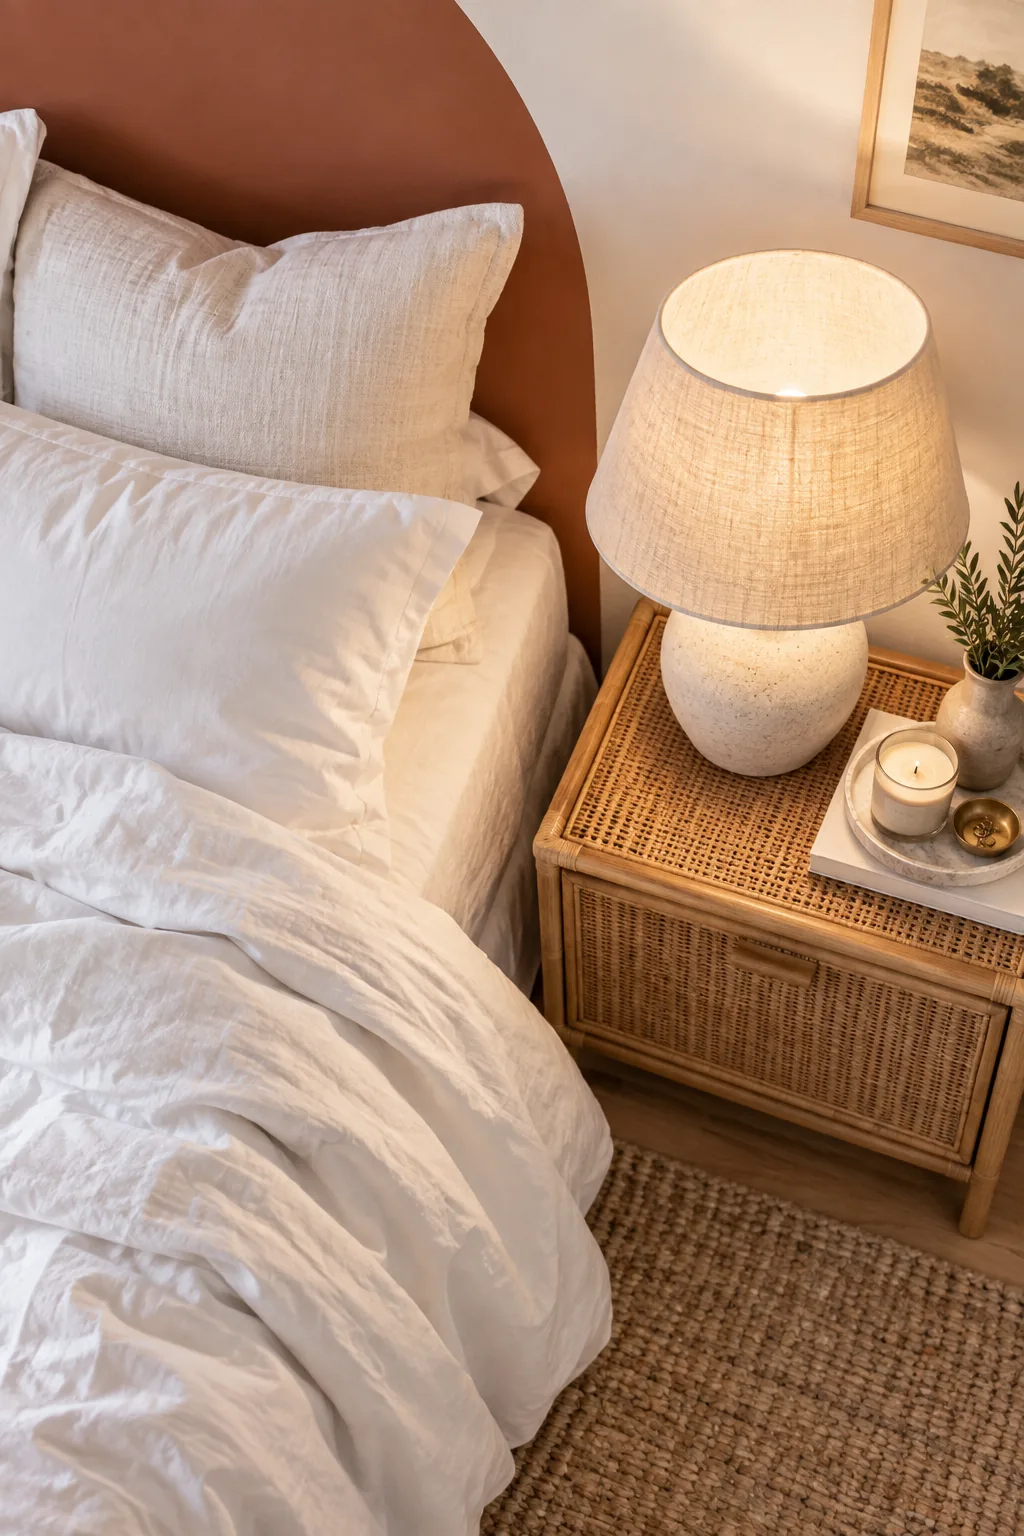
If your favorite lamp does not quite reach the correct ergonomic height on your current nightstand, you can easily adjust it without buying new furniture.
5 Ways to Style a Painted Arch Bedroom
Explore how changing the arch color and bedding materials can completely shift the room's atmosphere.
Moody Botanical: A moody botanical aesthetic relies on a deep charcoal arch to anchor rich, dark green velvet bedding, while a brass lamp adds a necessary touch of warmth.

Soft Pastel: This soft pastel retreat pairs a muted sage green headboard arch with breathable blush pink linen sheets, keeping the room airy with a light oak nightstand.

Modern Graphic: For a modern graphic edge, a bold mustard yellow wall contrasts sharply against crisp white percale bedding and a matte black plug-in wall sconce.

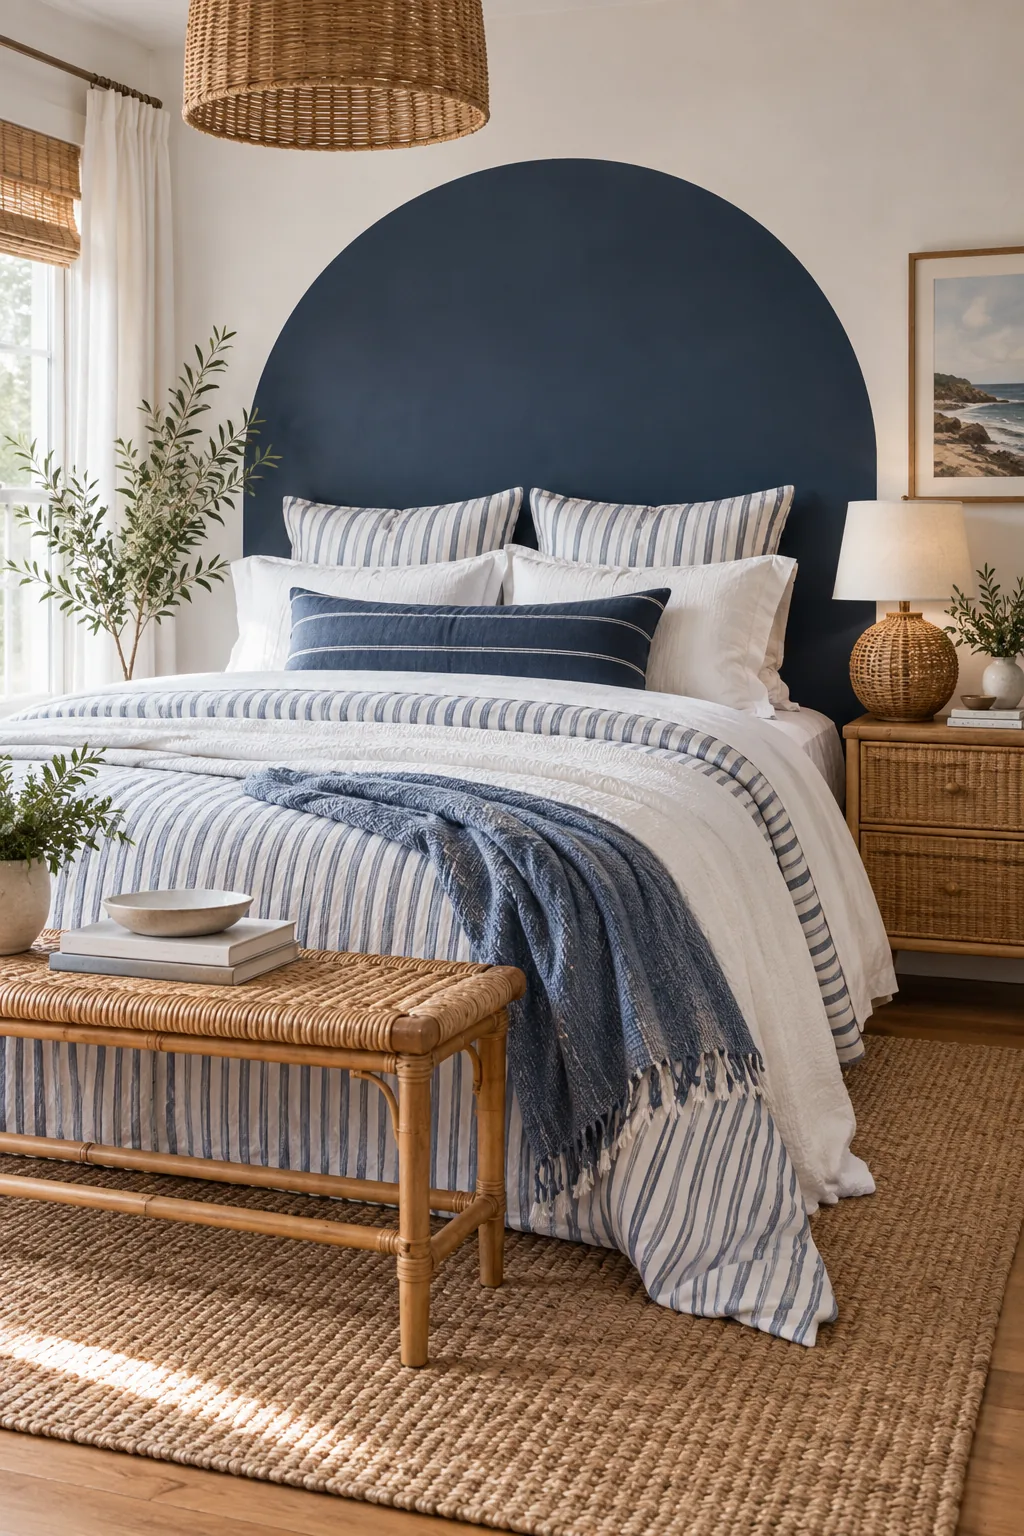
Coastal Retreat: A coastal retreat feel emerges when a deep navy blue arch grounds classic striped bedding, finished perfectly with a woven rattan bedside lamp for natural texture.
Earthy Minimalist: This earthy minimalist space uses a warm taupe painted arch to highlight rust orange throw blankets, completing the serene vibe with a handmade ceramic table lamp.