
5-Step Christmas Tree Styling Guide: The Designer Sequence
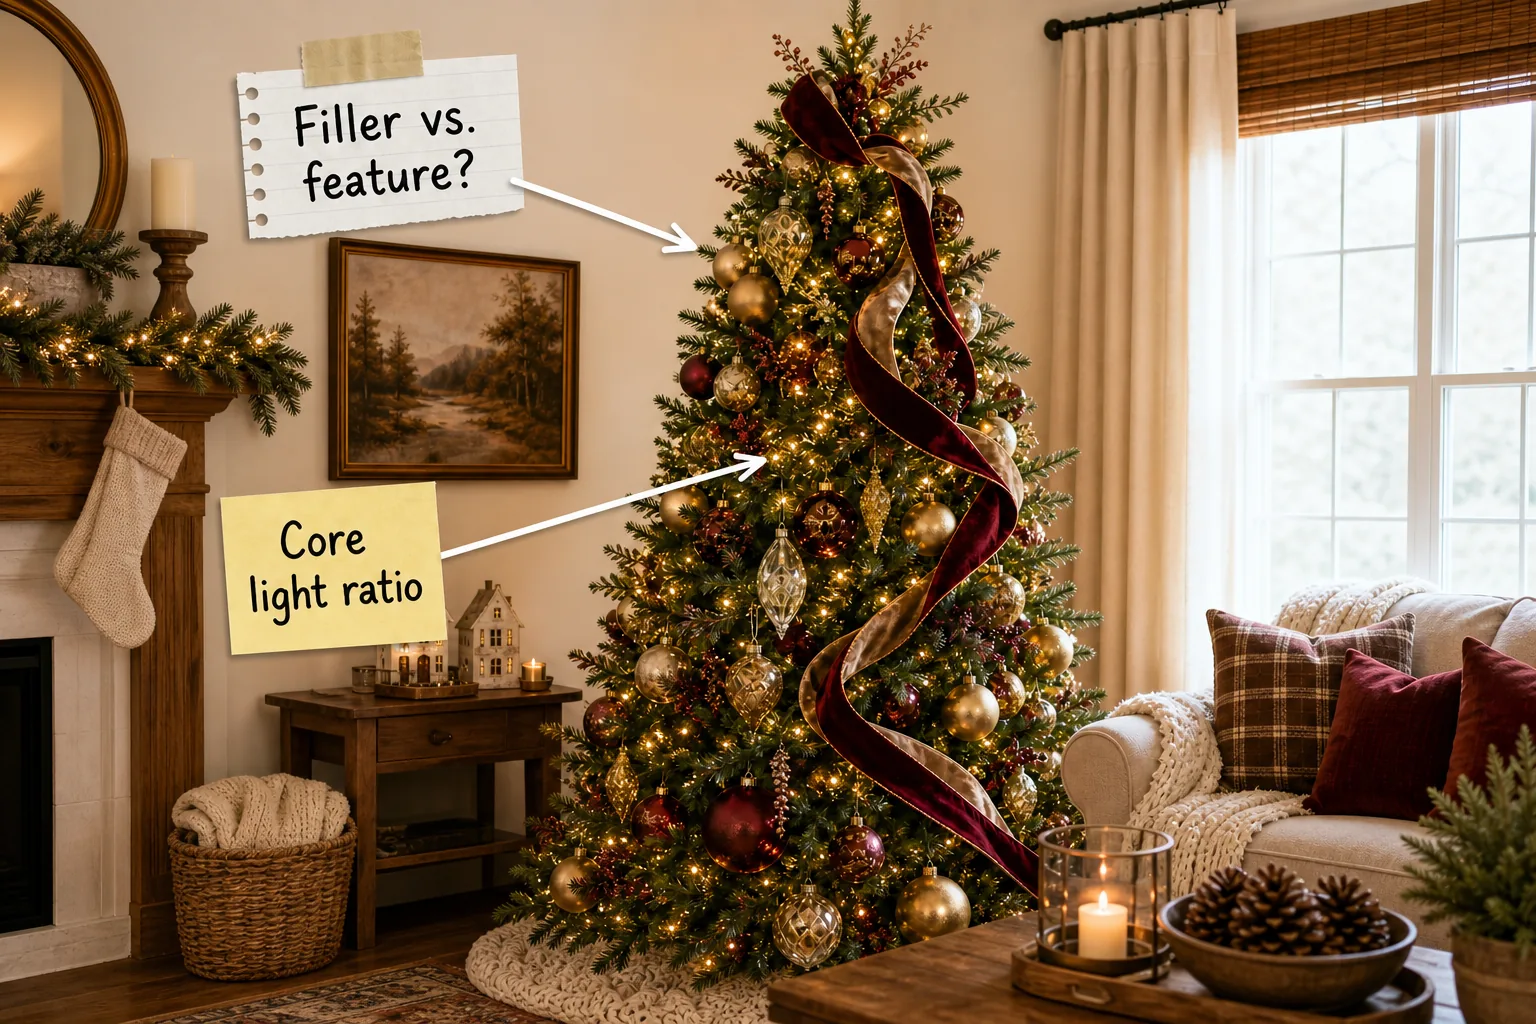
Master professional holiday decorating with our 5-step professional layering guide, delivering the exact sequence for placing lights, ribbon, and layered ornaments. You will be able to style your tree in the precise physical order designers use to build glowing depth and perfectly balanced proportions.
The Core Light Ratio
The foundation of any designer tree relies on a strict 100 string lights per foot of tree height to ensure adequate illumination. Applying the core lights directly against the central pole masks the artificial stem and establishes a brilliant internal foundation.

Zigzagging the remaining light strands out to the branch tips creates a deep, internal luminosity rather than a superficial surface wrap. This technique guarantees your inner ornaments will catch the glow and reflect it beautifully into the room.
Securing Your Lighting Foundation
Testing every strand before installation saves hours of frustrating troubleshooting later in the styling process. Pushing the wired connections deep against the artificial trunk keeps the hardware completely invisible while maintaining a seamless, magical aesthetic.
Establishing Ribbon Anchor Points
To attach cascading fabrics securely, pinch your velvet ribbon and wire it deep into the branches exactly 12 to 18 inches apart vertically. Wiring the fabric securely into the interior branches ensures the material maintains its structured, billowing shape throughout the entire holiday season.

Once your anchor spacing is perfectly planned, the secret to a seamless look lies entirely in the hardware you choose to hold those deep tucks in place. Hiding the attachment points ensures the fabric appears to float naturally among the pine needles.
Executing the Z-Pattern Sweep
To establish the correct geometry, drop the cascading ribbon roughly 2 feet vertically for every 1 foot it travels horizontally across the tree’s front face. This meticulously calculated sweep prevents the heavy fabric from looking like rigid, unnatural horizontal stripes that cut the tree in half.

This specific geometry forms a dynamic Z-pattern sweep that breaks up the rigid vertical lines of the branches and adds graceful, flowing movement. Maintaining this angle ensures the fabric naturally complements the downward slope of the foliage.
Balancing Ribbon Proportions
Stepping back every few feet allows you to verify that the diagonal cascade remains consistent across the entire front profile. Adjusting the tension at each anchor point ensures the fabric billows gently without pulling the delicate outer tips out of alignment.
Building the Visual Weight Base
Grounding the overall design requires placing your largest oversized ornaments—typically 4 to 6 inches in diameter—exclusively in the bottom third of the tree. Reserving your most substantial spheres for the lowest branches establishes a stable visual foundation that balances the delicate, tapering peak.

Concentrating these heavier visual elements near the floor establishes a stable foundation that effectively supports the delicate details layered above. Failing to ground the base with appropriately sized pieces often leaves the entire tree looking unbalanced and structurally precarious from across the room.
The Filler vs. Feature Strategy
Balancing your ornament collection requires maintaining a strict 3:1 ratio of filler baubles to feature ornaments to prevent overwhelming visual clutter. Standard, inexpensive spheres act as the quiet color foundation that allows your highly detailed specialty pieces to shine.

Categorizing your inventory before styling ensures you have enough basic spheres to build a solid backdrop before placing a single delicate glass piece. This preparation prevents you from running out of essential background colors halfway up the branches.
Selecting Cohesive Base Colors
Choosing two analogous colors for your filler ornaments establishes a rich, unified background that ties the entire room together. Sticking to a disciplined palette prevents the final design from looking chaotic when you introduce uniquely shaped focal pieces.
Layering the Filler Background
Push your standard matte and metallic spheres 6 to 8 inches back from the tips to build a solid, reflective color backdrop. Recessing these basic elements multiplies the depth of your string lights and effectively hides the artificial trunk.

Nestling these inexpensive baubles deeply within the lit branches creates a glowing, highly dimensional core that makes the artificial tree look remarkably full. This recessed foundational layer provides the essential dark contrast needed to make your outer decorations visually pop.
Enhancing Depth With Finishes
Alternating flat and reflective textures within that recessed layer creates sophisticated shadow and deep dimension without requiring expensive specialty ornaments. This intentional contrast catches the inner string lights differently, adding subtle movement to the background.
Showcasing Specialty Features
Reserve the sturdy outer branch tips exclusively for your intricate, delicate feature ornaments so they have ample physical room to dangle freely. Isolating these intricate designs on the perimeter allows them to catch the room’s ambient light and rotate freely without obstruction.

Hanging these special pieces on the very edge highlights their unique craftsmanship and distinct personality. Keeping them separated from the recessed filler baubles ensures their delicate shapes remain the clear focal points of your design.
The 5-Step Professional Layering Guide
Committing to this structured assembly order eliminates styling frustration and systematically builds depth rather than relying on random, chaotic placement. This proven method works flawlessly on any size or species of artificial tree.
- Core lights: Wrap from the trunk outward.
- Ribbon anchors: Wire deep diagonal tucks.
- Heavy base: Ground oversized ornaments below.
- Inner fillers: Recess basic baubles deeply.
- Outer features: Hang specialty glass on tips.
Executing this exact five-step layering sequence transforms a bare artificial tree into a stunning, professionally styled centerpiece.

Before you begin applying this sequence, ensure your canvas and materials are fully prepped, tested, and ready to go.