
The 3-Zone Backyard Layout Plan for a Perfect Outdoor Space
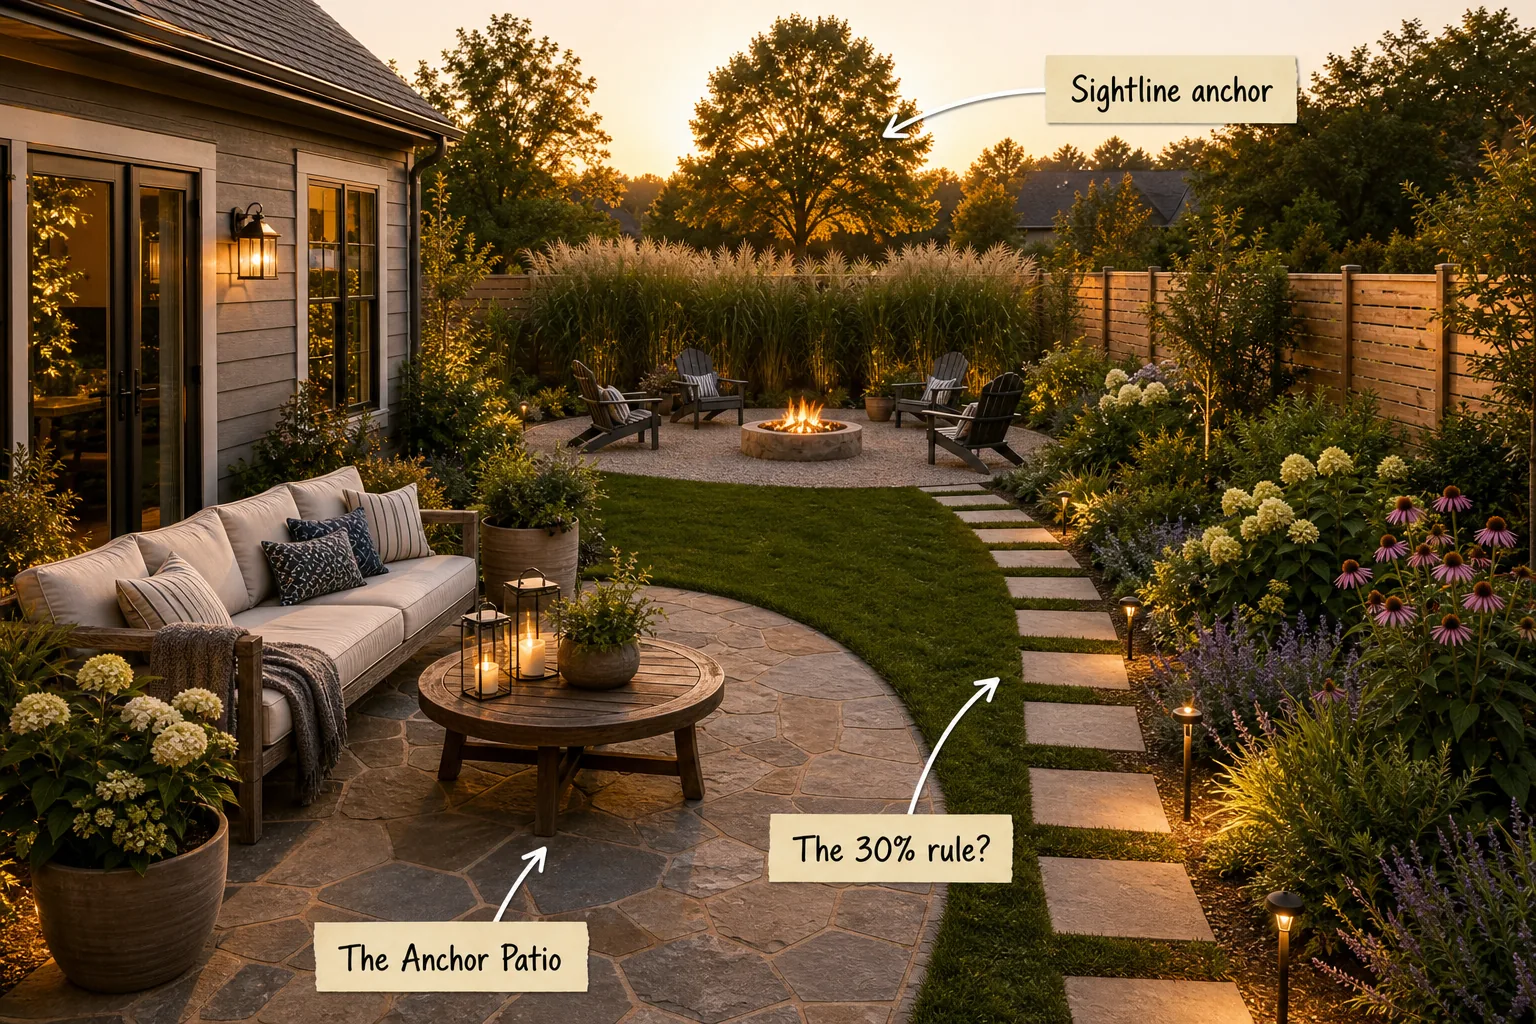
Map out your perfect outdoor space with this complete 3-zone backyard layout guide and hardscape ratio checklist. You will be able to designate distinct functional areas and apply exact spacing rules for paths, plants, and fire pits to create a truly balanced retreat.
The Anchor Patio
Establish your social zone immediately adjacent to the house to serve as the primary living space for family gatherings. Plan for a minimum 12-by-12 foot footprint to comfortably fit a standard outdoor sofa, chairs, and a central coffee table without feeling cramped.
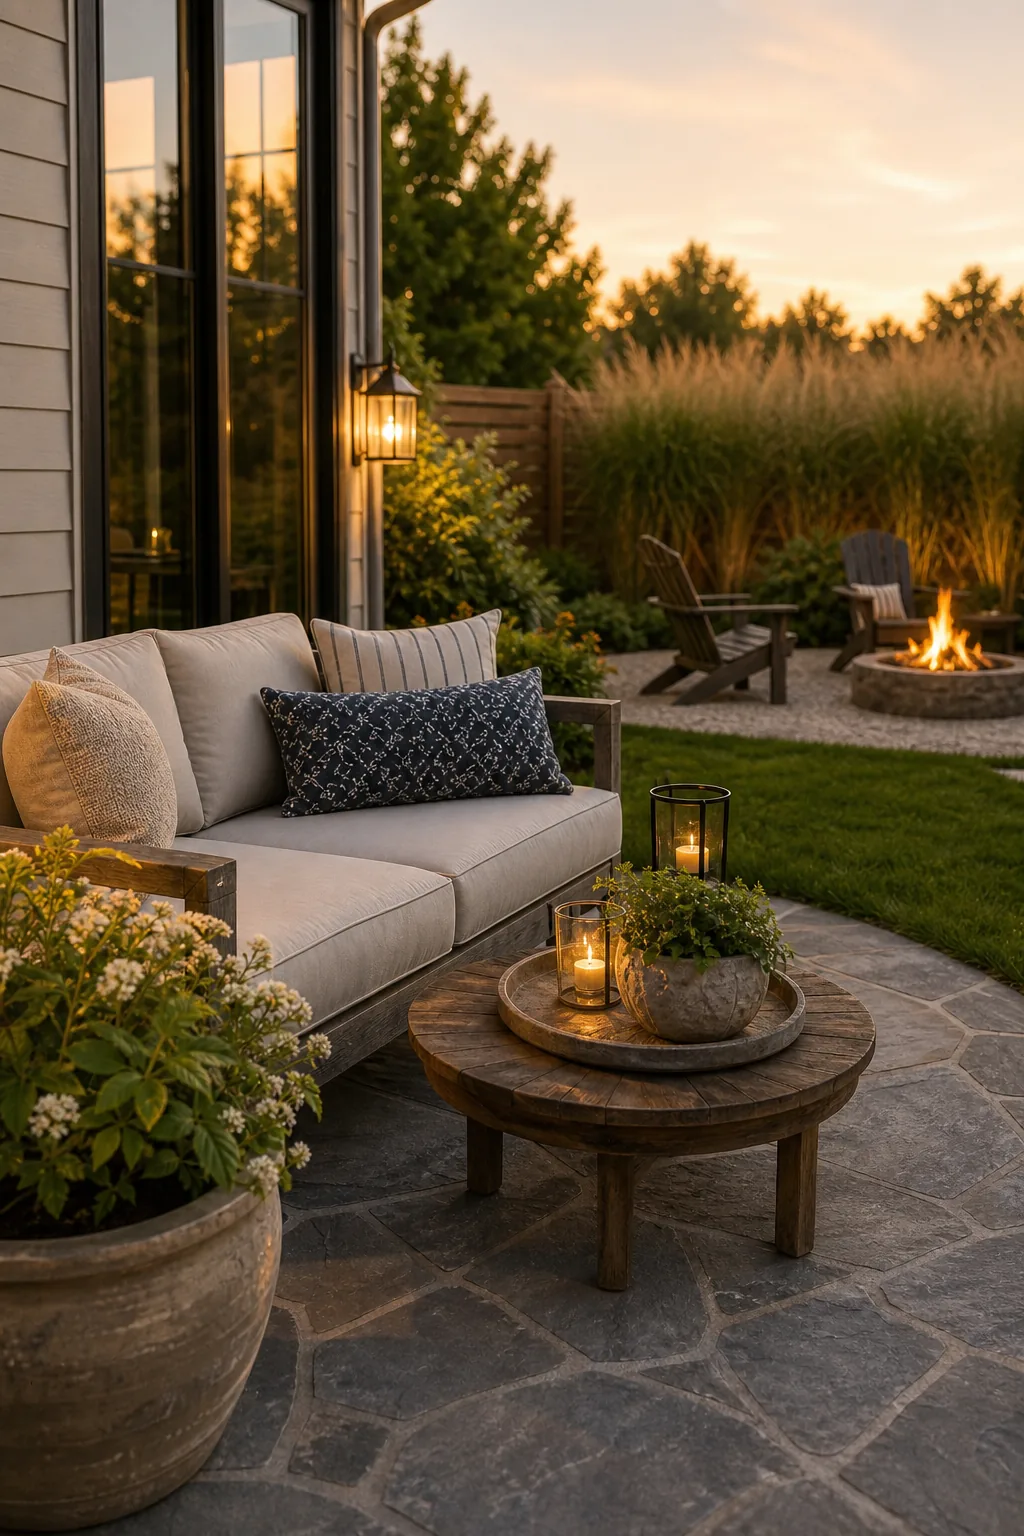
Leaving a continuous 3-foot circulation path around the outer perimeter of this anchor patio ensures guests can move freely. This generous border prevents the seating arrangement from feeling pushed against the edge of the hardscape and allows easy access to the lawn.
Furniture Scale and Spacing
Selecting the right furniture scale prevents your newly paved anchor patio from feeling overwhelmed or difficult to navigate. Maintain exactly 18 inches of knee clearance between the front edge of the seating and the coffee table for optimal reach and comfortable movement.
| Furniture Piece | Minimum Clearance | Ideal Placement |
|---|---|---|
| Outdoor Sofa | 36 inches behind | Facing the focal point |
| Lounge Chair | 24 inches beside | Angled toward center |
| Coffee Table | 18 inches around | Centered on sofa |
| Dining Table | 48 inches from edge | Near kitchen access |
Leaving adequate breathing room around these heavy pieces ensures the patio remains a relaxing environment rather than an obstacle course. Always measure your physical furniture frames against your spatial layout before finalizing the stone footprint to guarantee everything fits perfectly.
Traffic Flow Path
Connect your primary patio to the rest of the yard using a dedicated walkway that guides foot traffic safely through the grass. Space your individual stepping stones exactly 24 inches on center to perfectly match a natural human walking stride.
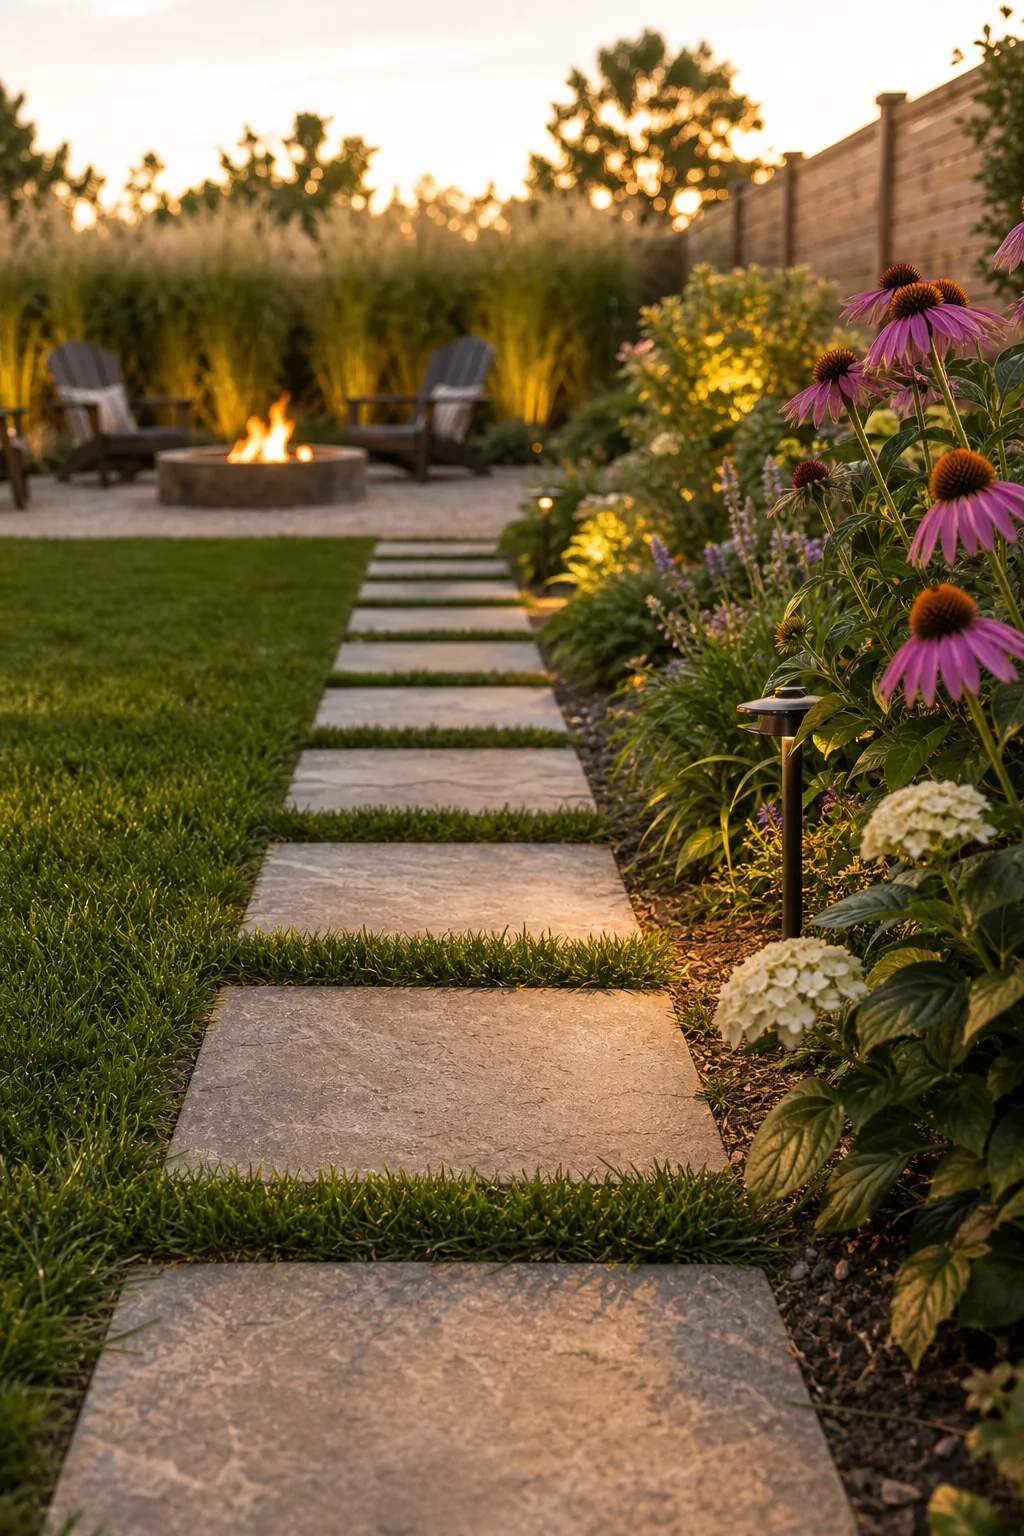
Keep the path at least 36 inches wide overall to allow easy passage for a single person navigating the space. This generous width comfortably accommodates someone carrying a heavy tray of drinks or a large bundle of firewood toward the destination zone.
Selecting Path Materials
The material you choose for your walkway dictates how quickly rainwater drains away from the primary living space during heavy storms. Set heavy flagstones into a 2-inch layer of leveling sand to prevent uneven settling and dangerous tripping hazards over time.
Surrounding those tightly packed stones with a loose border of decorative pea gravel creates a highly distinct, audible crunch underfoot. This subtle acoustic shift naturally encourages guests to slow their pace as they transition deeper into the surrounding garden areas.
The 60/30/10 Plant Rule
Create a lush, balanced garden bed by dividing your plant selection into three strict categories that guarantee visual interest. Dedicate 60 percent of the space to foundational evergreen shrubs to maintain crucial year-round structure even in the dead of winter.
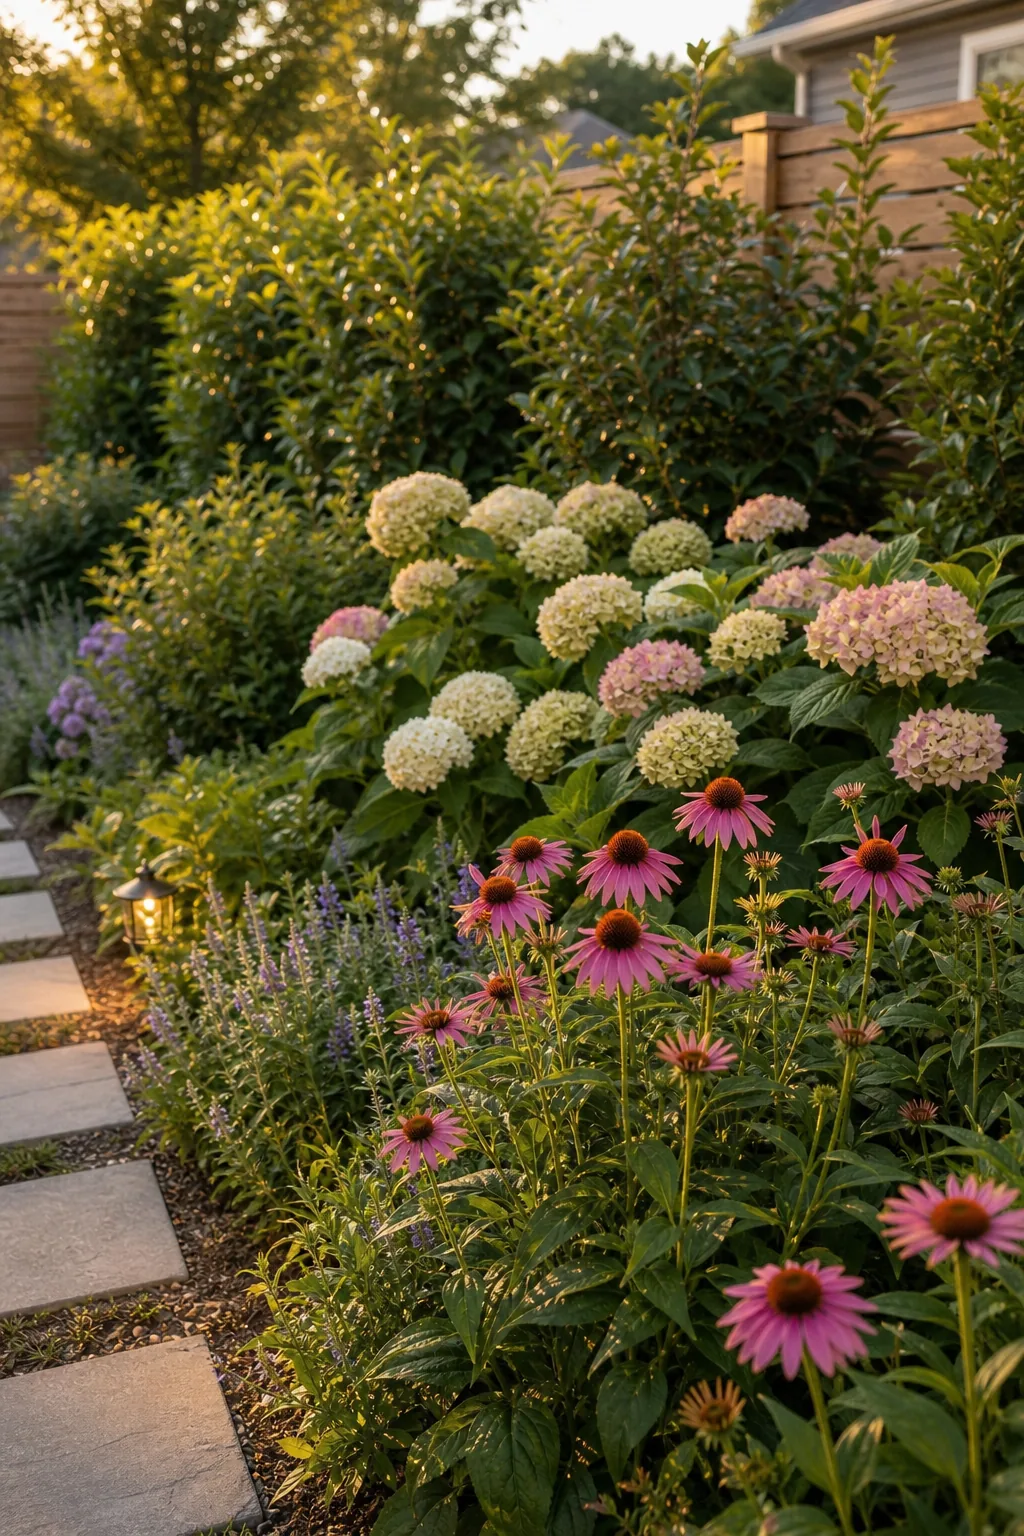
Fill the remaining garden space by allocating 30 percent to seasonal blooming perennials that provide vibrant pops of summer color. Reserve the final 10 percent for striking accent or specimen plants that demand immediate visual attention against the green backdrop.
Soil Preparation and Drainage
Before installing your carefully calculated plant ratios, ensure the garden bed can effectively manage heavy seasonal rainfall without drowning the roots. Dig a small test hole and fill it with water to verify it drains at a minimum rate of 2 inches per hour.
Amending heavy clay soils with expanded shale and rich organic matter prevents delicate perennial roots from suffocating underground. A well-draining foundation drastically reduces long-term maintenance requirements and actively protects your expensive landscaping investment from unpredictable weather extremes.
Fire Pit Clearance
Designate a safe destination area for your fire feature by establishing strict spatial boundaries that protect the surrounding landscape. Measure a strict 36-inch safety radius between the outer edge of the fire pit and the front legs of the seating.
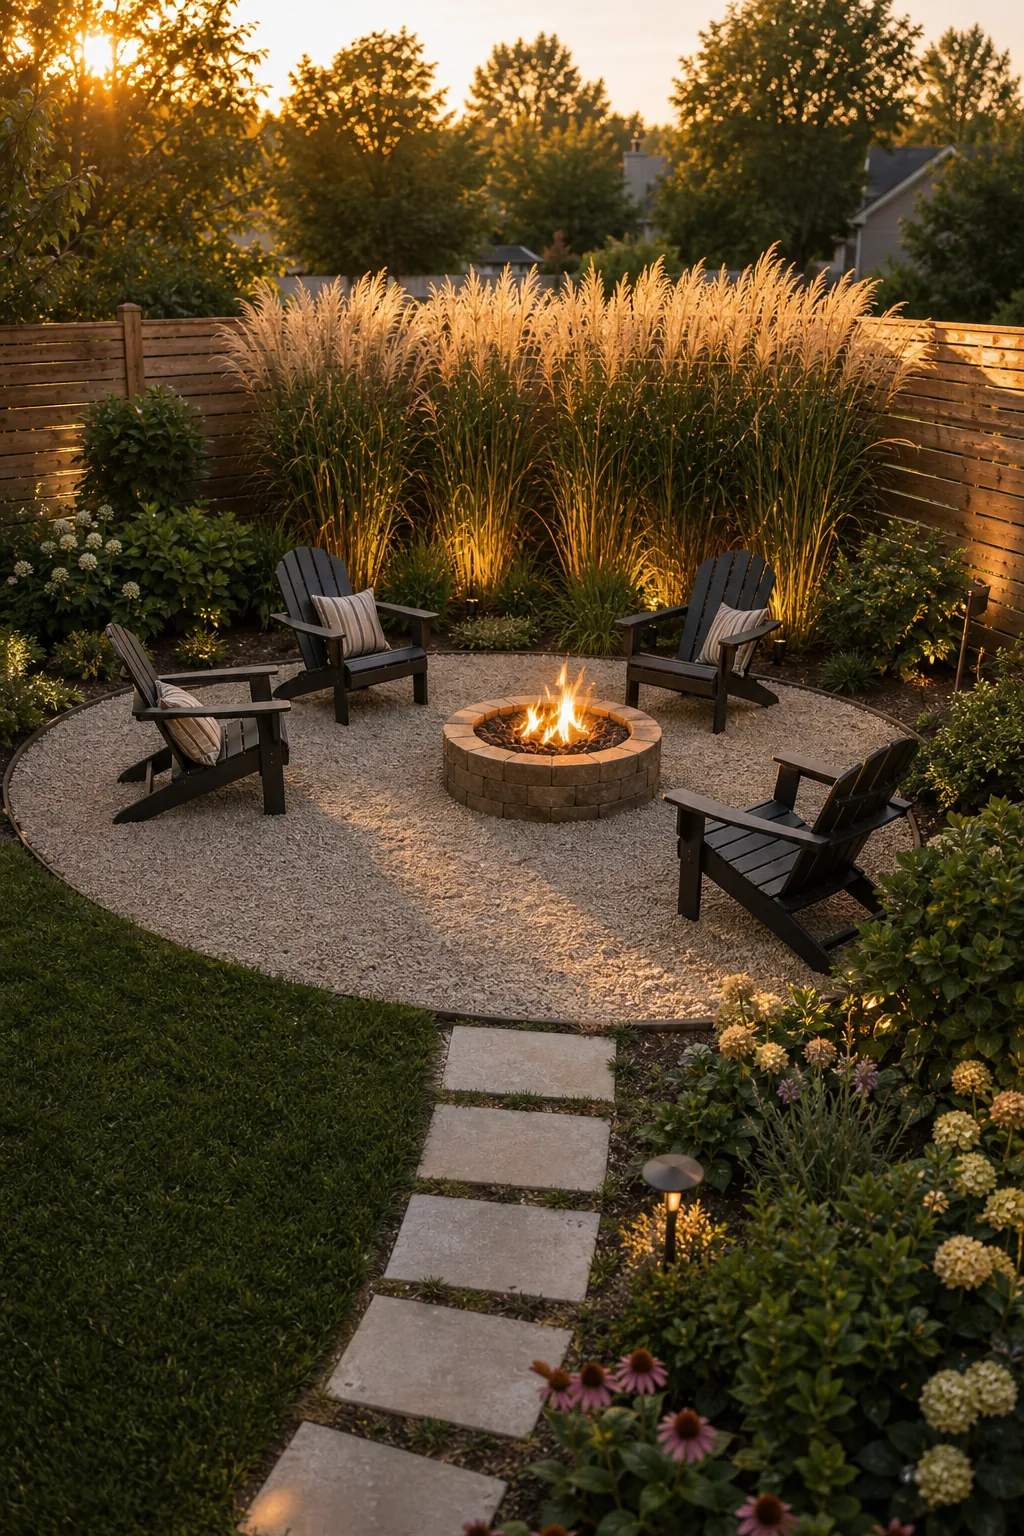
Ensure the entire fire setup sits at least 15 feet away from any structures, wooden fences, or low-hanging tree branches. Maintaining these generous clearances prevents a cozy evening gathering from quickly escalating into a dangerous neighborhood safety hazard.
Seating Comfort Dimensions
The precise angle and height of your destination seating directly impact how long guests will comfortably linger around the fire. Select classic Adirondack-style chairs with a seat height measuring exactly 14 to 16 inches off the ground for the best ergonomic support.
- Choose chairs with wide, flat armrests to provide a stable surface for resting heavy mugs or small appetizer plates.
- Ensure the seat backs sit at a gentle 105-degree angle to actively support a relaxed, reclining posture during long conversations.
- Space individual chairs at least 24 inches apart so guests can easily and safely maneuver around the hot fire ring.
Providing ample elbow room between each chair keeps the circle feeling intimate without ever becoming physically restrictive. Heavy, weather-resistant materials like high-density polywood ensure the furniture remains firmly in place even during strong seasonal storms.
The Privacy Screen
Soften hard property lines and establish a lush privacy layer to block unwanted sightlines using tall, dense native plantings. Plant ornamental grasses exactly 3 feet apart along the entire length of the wooden perimeter fence line.
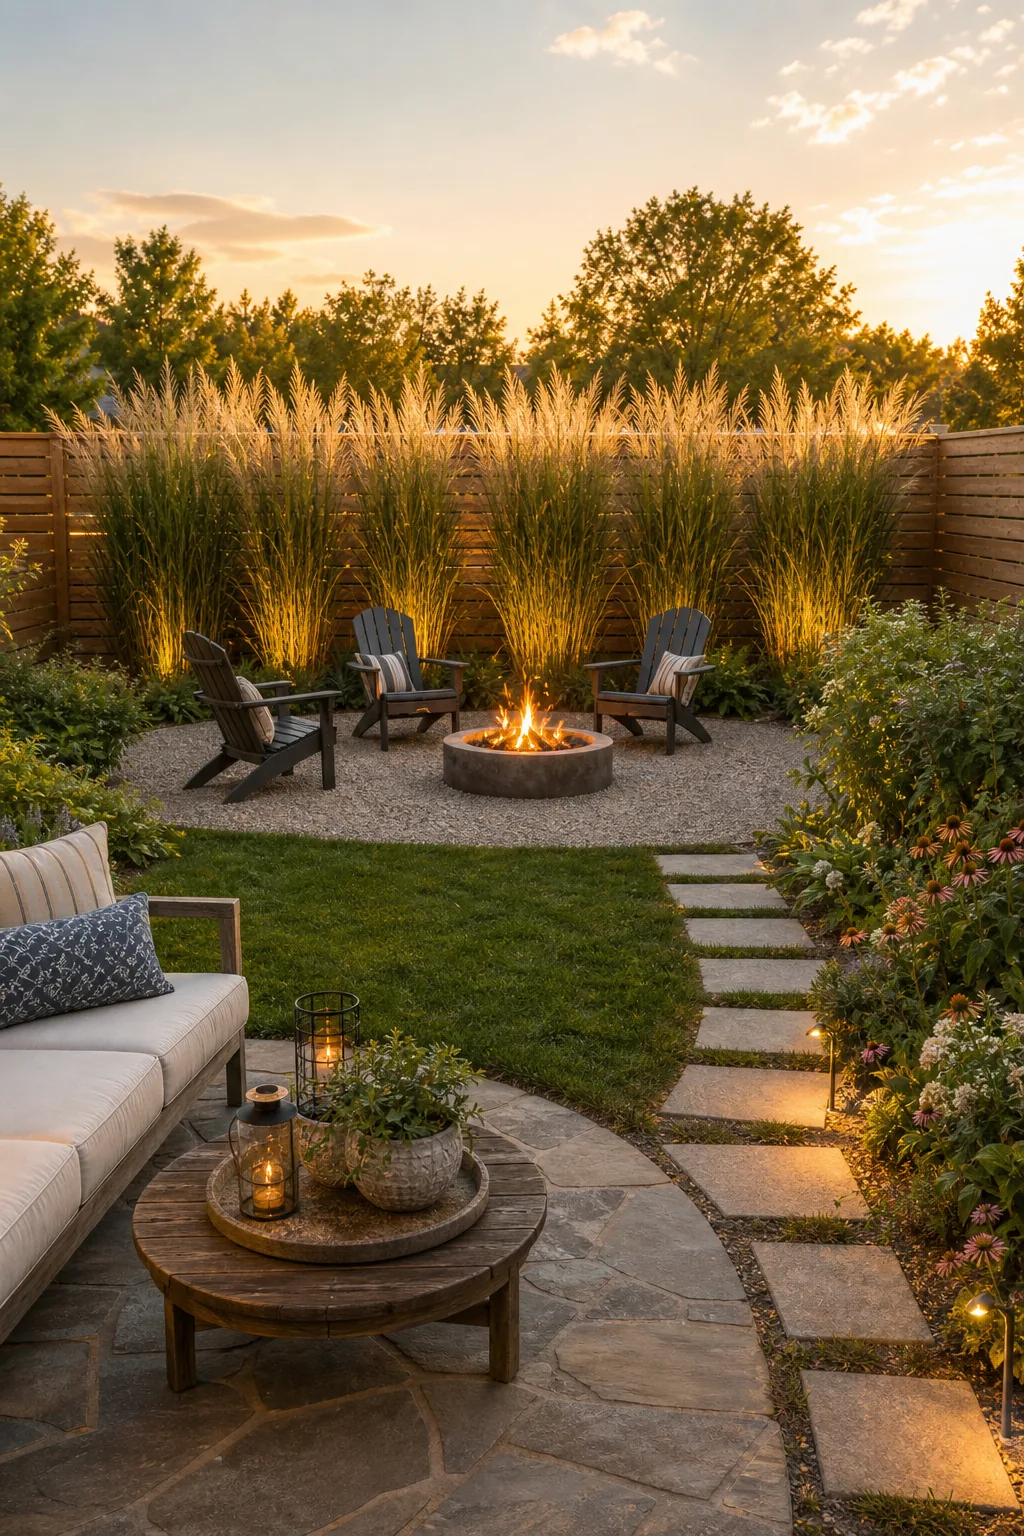
These incredibly fast-growing ornamental varieties will quickly fill in to create a continuous 5-to-6 foot high living wall by mid-summer. This natural barrier effectively shields your outdoor lounging zones from neighboring second-story windows while adding beautiful kinetic movement.
Wind Mitigation Strategy
Beyond simply blocking sightlines, a dense row of tall grasses acts as a highly effective, permeable windbreak for the entire yard. Positioning this living screen on the windward side of the property reduces harsh gusts by up to 50 percent, keeping the fire pit smoke manageable.
Defining the Three Zones
Structure the yard into three distinct areas: the active lounge zone, the transitional path zone, and the quiet destination zone. Establish a sightline anchor, like a striking focal point tree, at the far end of the yard to draw the eye outward.
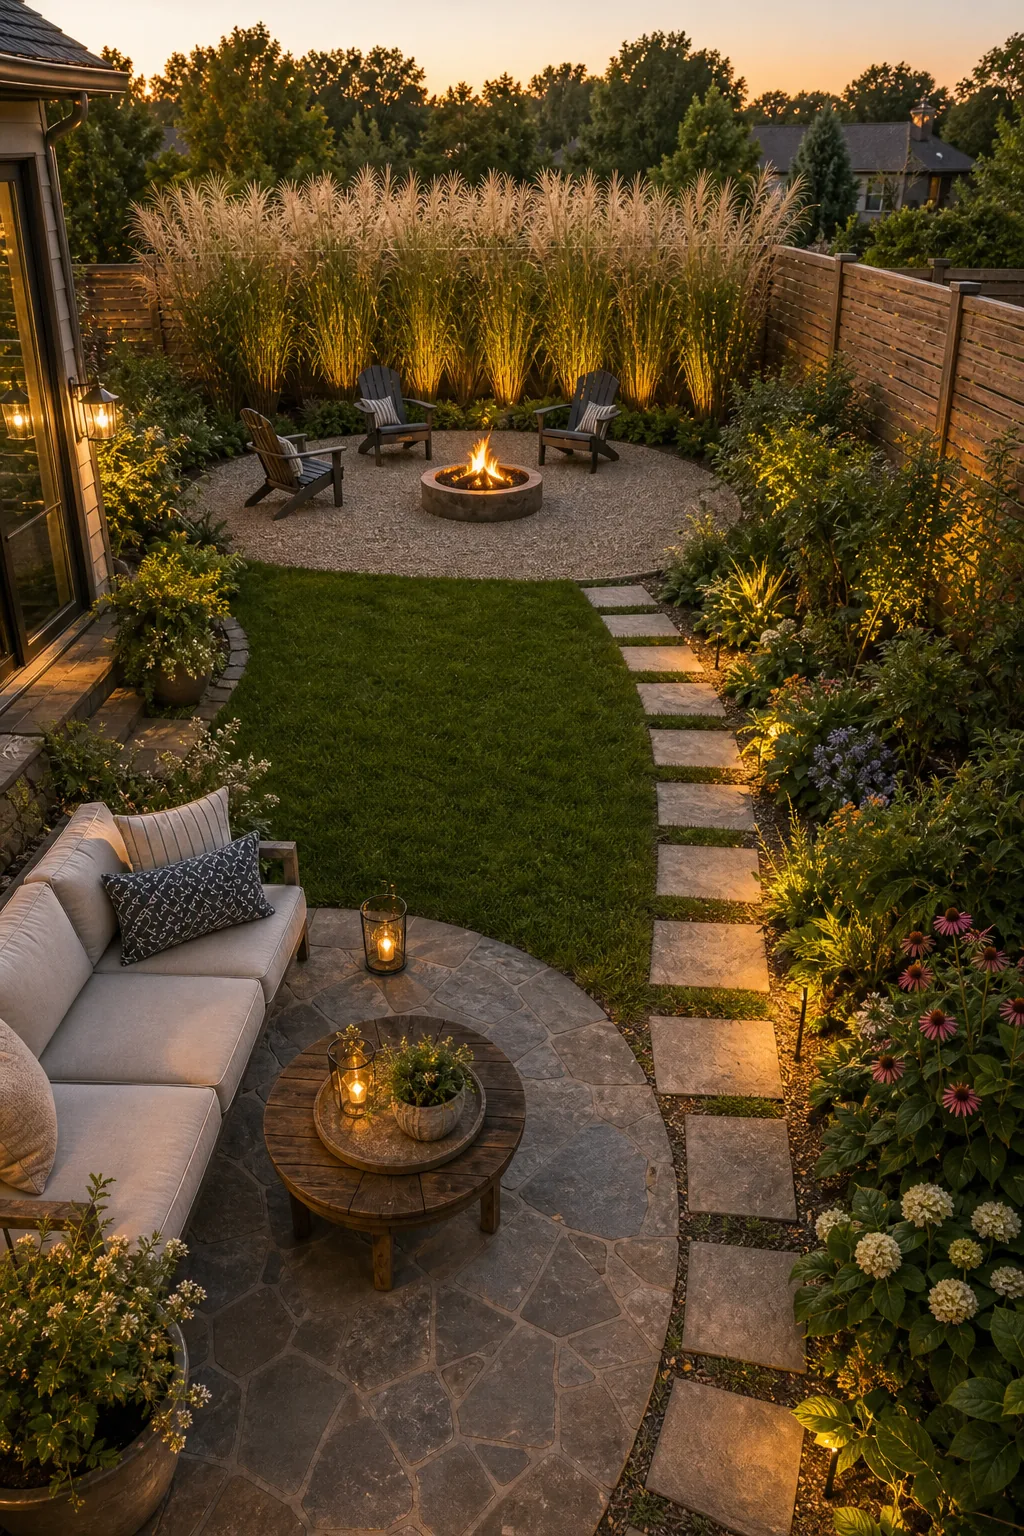
Use a deliberate change in ground materials rather than building physical walls to clearly signal these spatial boundaries. Moving smoothly from hard flagstone to soft turf to loose gravel creates an immediate psychological shift between the functional areas.
The Sightline Anchor Point
Planting a visually striking ornamental tree at the deepest edge of the property creates a permanent, year-round focal point. Select a hardy species that reaches a mature height of 15 to 20 feet so its canopy stands out prominently above the surrounding privacy screen.
Layering Landscape Lighting
Extend the usability of your three distinct zones deep into the evening with a layered lighting plan that prioritizes safety. Stagger low-voltage path lights 6 to 8 feet apart on alternating sides of the primary walkway.
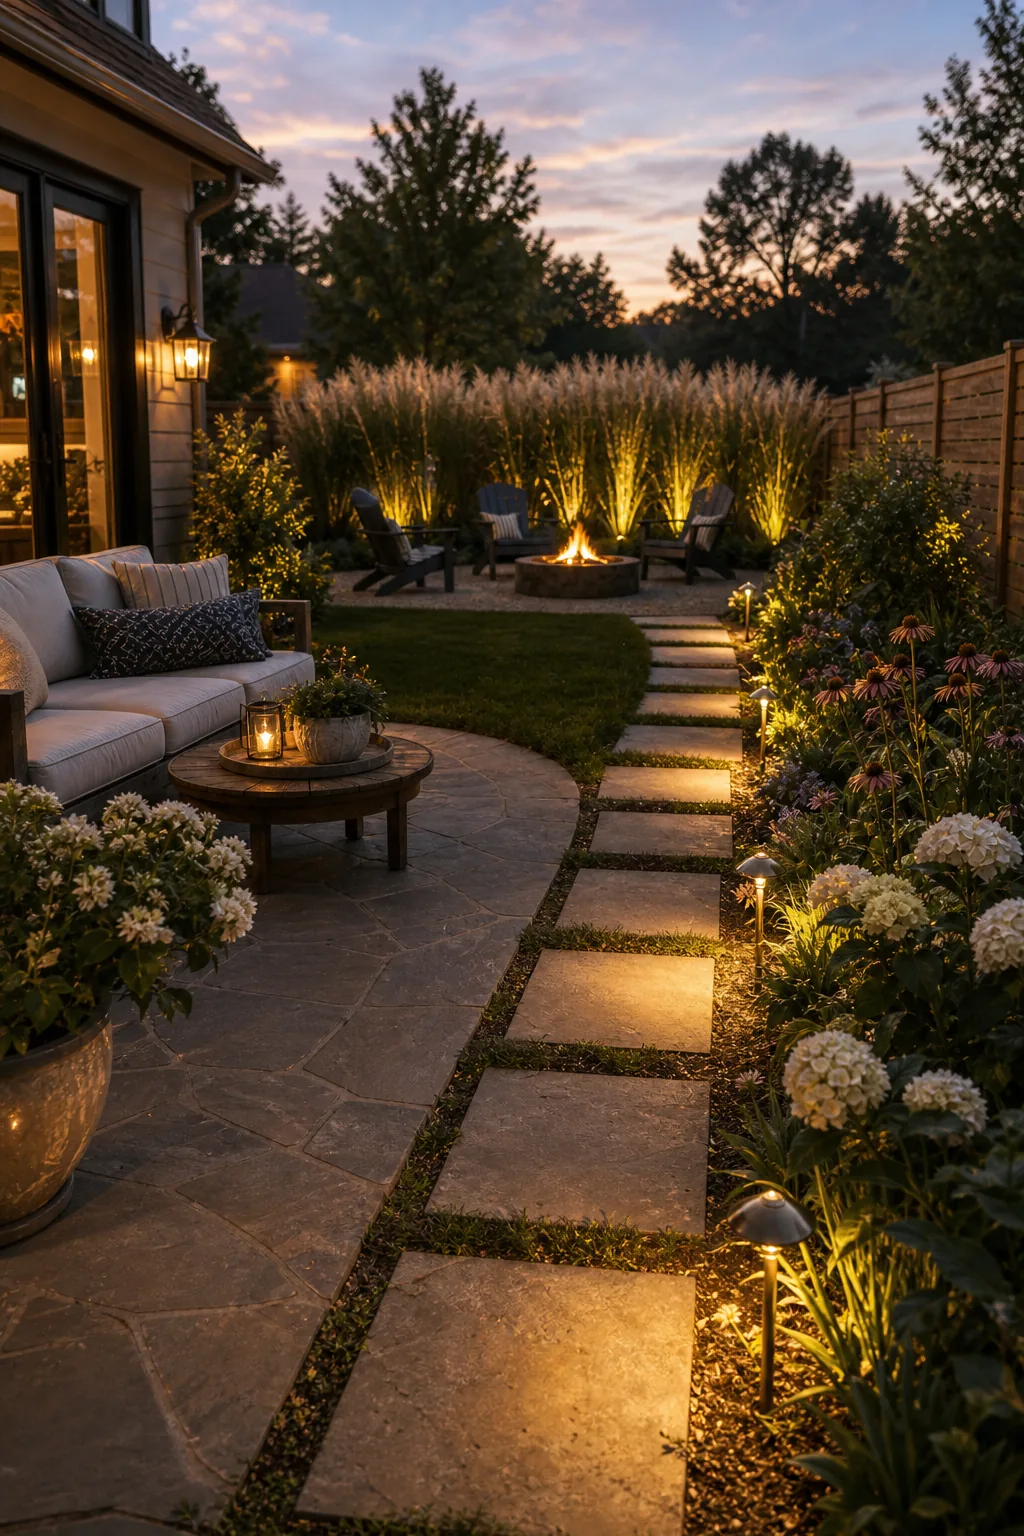
Place bright 300-lumen uplights exactly at the base of your privacy screen to cast a warm glow and highlight the texture of the tall grasses. This strategic layered approach eliminates harsh shadows and completely prevents an artificial runway effect.
Lighting Power and Timers
Connecting your entire landscape lighting system to a central smart transformer guarantees consistent evening illumination without daily manual effort. Calculate the total wattage of all your fixtures and choose a transformer sized at least 20 percent larger than that combined electrical draw.
The Full 3-Zone Layout Plan
Bring the entire layout together by perfectly balancing your paved entertaining areas with the surrounding lush greenery. Ensure the space feels like a natural garden retreat rather than a sterile concrete courtyard by strictly adhering to the 30% rule.
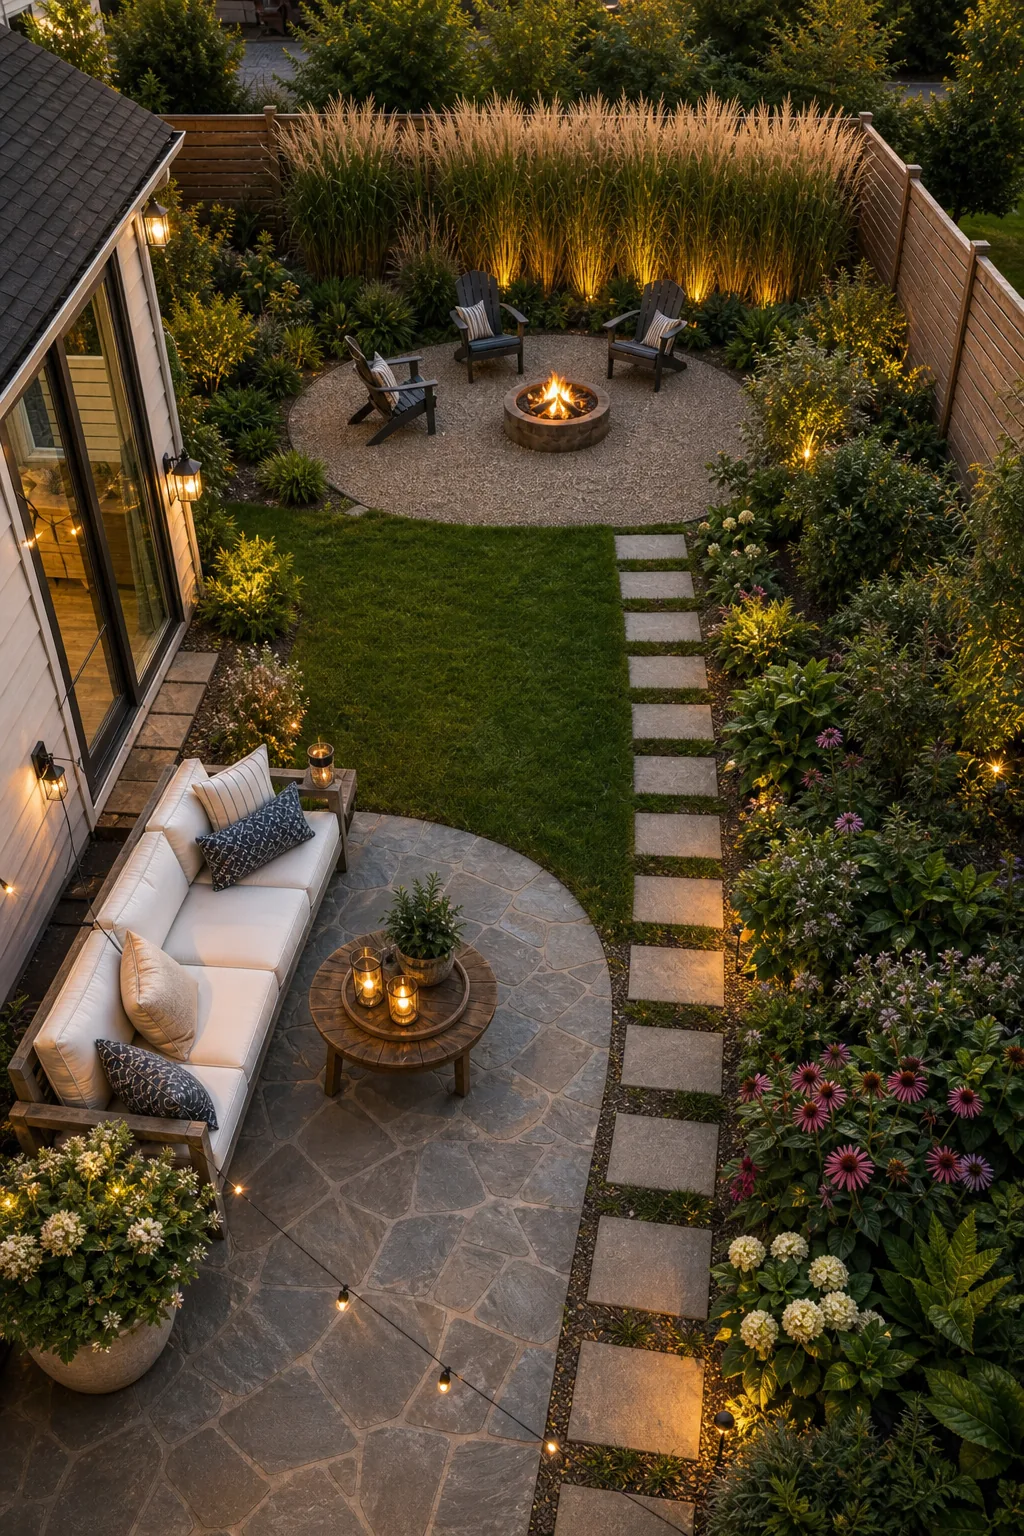
Before you finally break ground or order heavy pallets of materials, run your final site measurements through this essential hardscape ratio checklist to ensure a beautifully balanced outdoor space.