
Apothecary Cabinet Secondhand Makeover: Faux Marble Finish
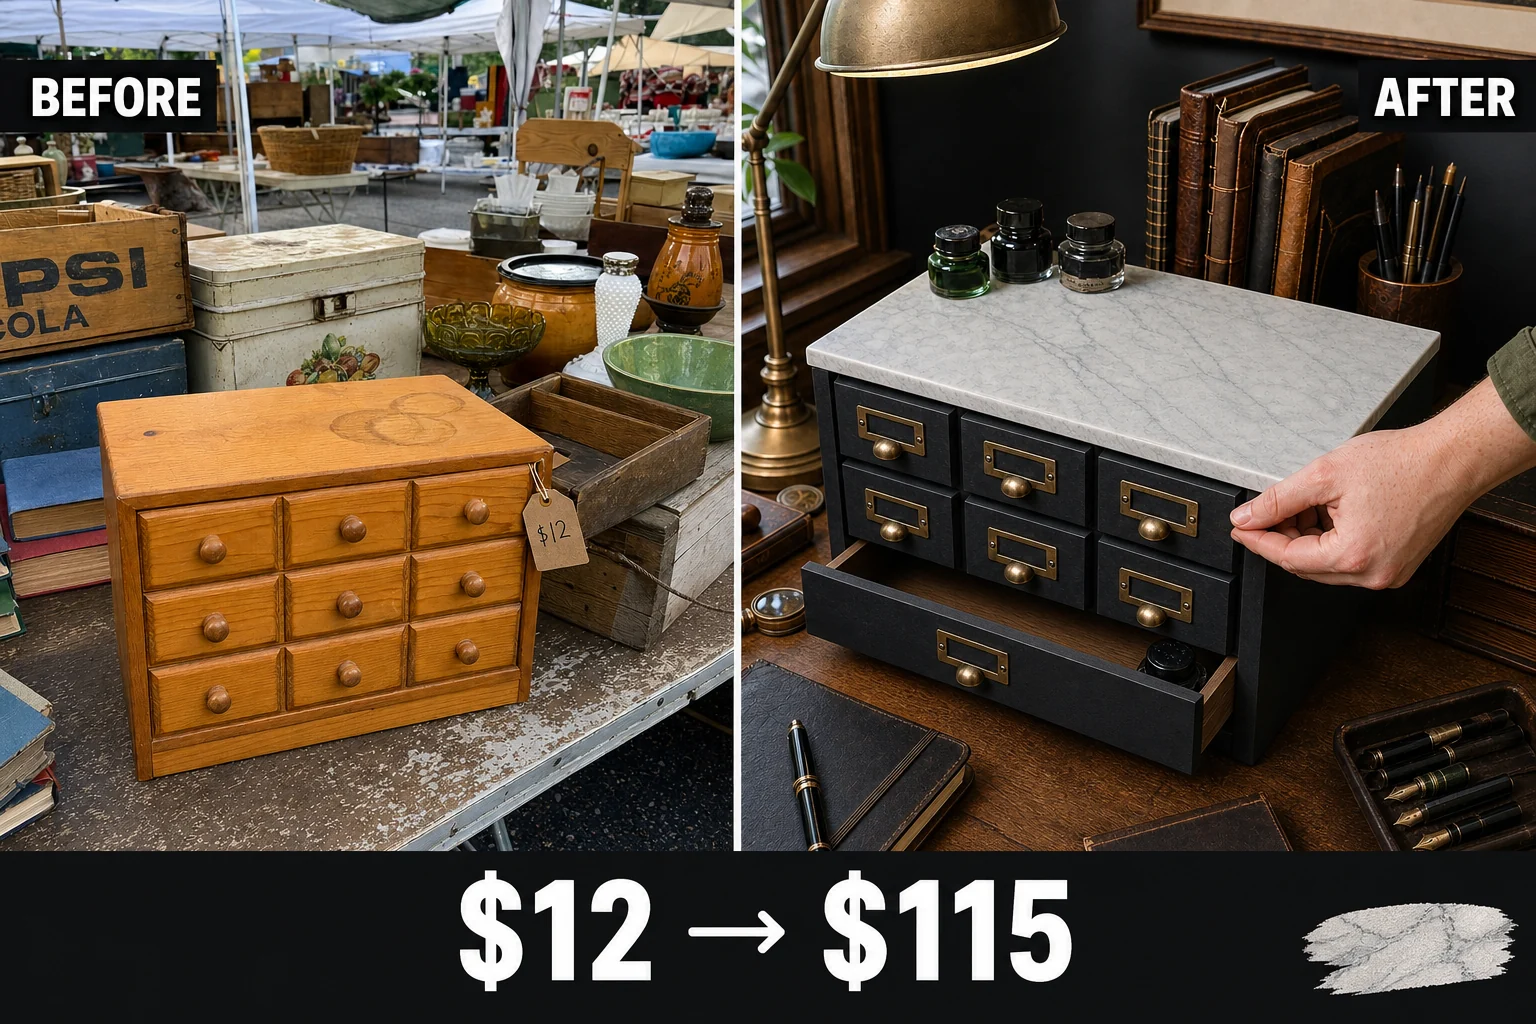
Spotted behind vintage crates at a weekend flea market, this dated pine desktop organizer had severe water rings. We updated it with a faux Carrara marble top, charcoal body, and brass label pulls for a sophisticated new look.
Assessing the Flea Market Find
Found tucked behind a stack of vintage crates at an outdoor weekend market, this desktop organizer featured mass-produced pine boards and thin plywood drawer bottoms. The top surface suffered from dark, raised water rings that penetrated the clear coat. These overlapping stains prevented a simple stain refresh, requiring an opaque surface treatment to hide the damage completely.
Materials checklist
Valuation and Resale Potential
The combination of a convincing faux Carrara marble top and authentic brass label pulls transforms a cheap craft-store organizer into a premium-looking vintage-style apothecary cabinet. This sophisticated update elevates the perceived retail value significantly, turning a twelve-dollar flea market find into a highly desirable piece of home office decor. The current resale value remains an editorial estimate based on similar restored pieces.
| Item | Cost |
|---|---|
| Flea market apothecary cabinet | $12 |
| Medium-grit sanding block | $4 |
| Charcoal chalk paint | $14 |
| White acrylic craft paint | $4 |
| Gray acrylic craft paint | $4 |
| Natural sea sponge | $5 |
| Fine liner brush | $3 |
| Antique brass label pulls | $18 |
| Total Materials | $52 |
| Total Investment | $64 |
| Estimated Resale Value | $115 |
| Value Gain | $51 |
Step 1: Remove Old Hardware
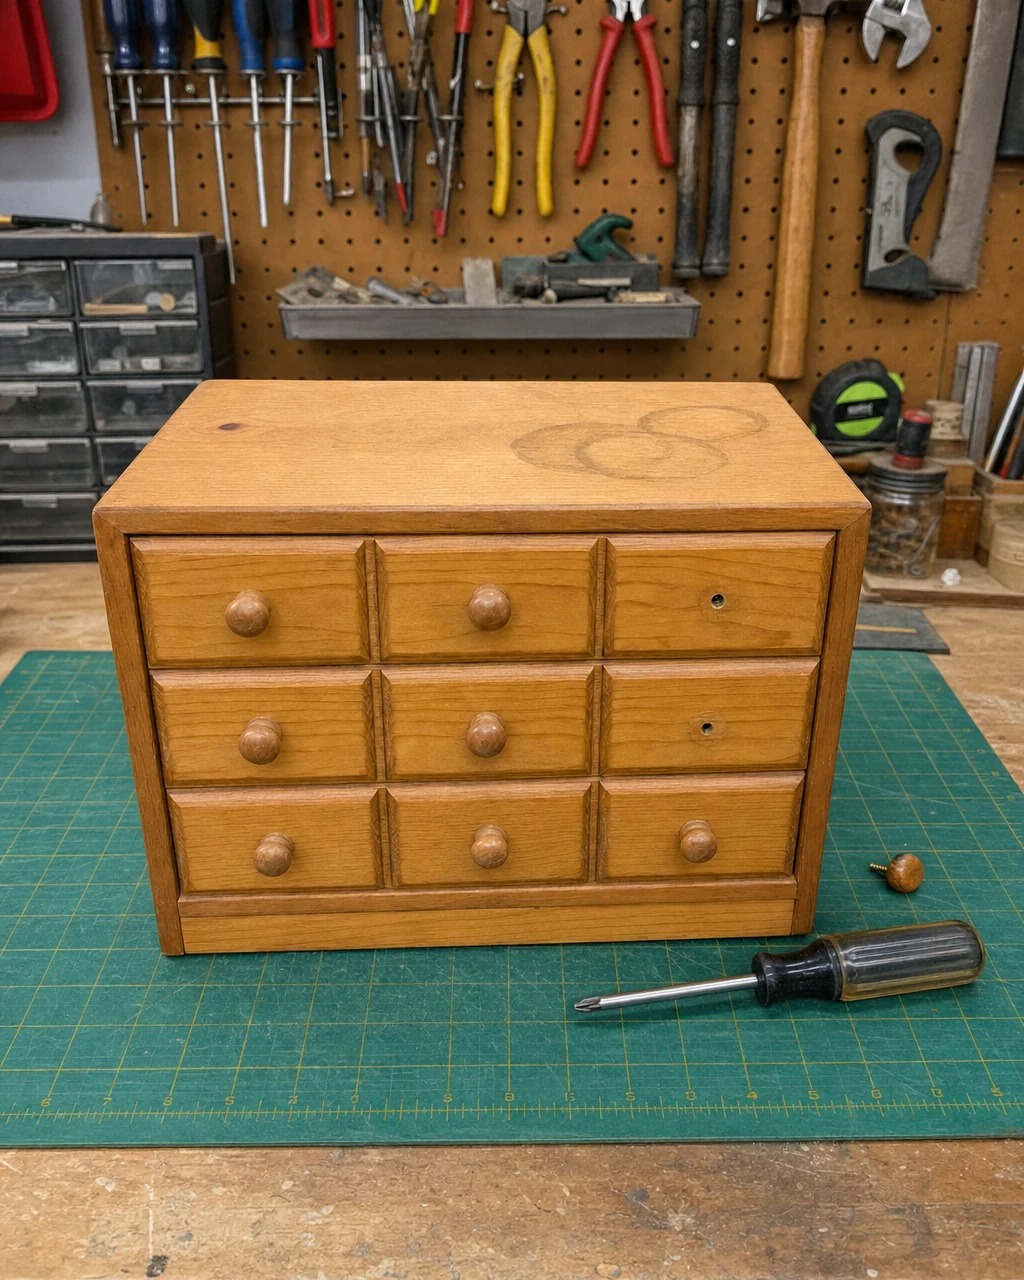
Evaluate the water damage on the top surface before starting the physical work. The cabinet sits on the workbench in its original honey pine finish, cluttered with chunky, oversized pine knobs. Use a manual Phillips screwdriver to remove all the glued and screwed wooden knobs. Ensure the cabinet is stable on the workbench while applying torque to stubborn screws.
Preparing for the Update
Removing the outdated wooden hardware declutters the rectangular silhouette. The cabinet is stripped of its original hardware, leaving empty screw holes on the drawer fronts. These existing holes provide perfect mounting points for the new antique brass label pulls, eliminating the need to drill fresh openings into the thin pine drawer faces.
Step 2: Sand Damaged Surfaces
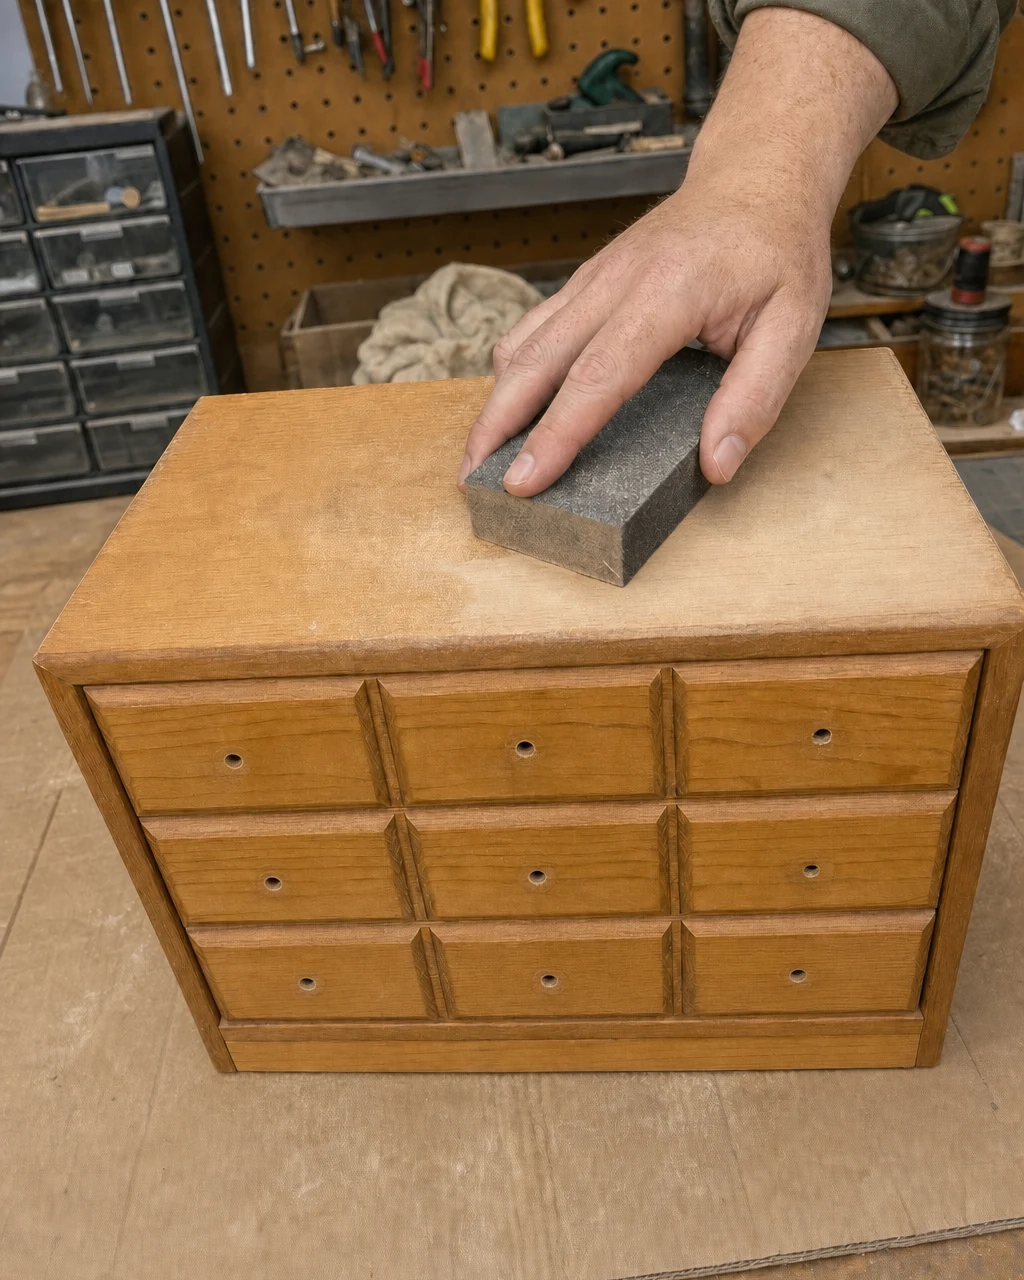
Rub a medium-grit sanding block vigorously over the dark water rings on the top surface until you reach dull bare wood, completely erasing the deep stains. Scuff-sand the glossy clear protective lacquer on the rest of the cabinet body to ensure the new paint will adhere properly. Always wear a dust mask and work in a well-ventilated garage to avoid inhaling clear-coat dust.
Smoothing the Finish
After thoroughly scuffing the shiny protective lacquer, wipe away all residual dust with a clean microfiber cloth. The top surface is now dull bare wood with the dark rings successfully removed. Creating this slightly rough texture is an essential step to prevent the dark charcoal chalk paint from peeling later.
Step 3: Paint Cabinet Body
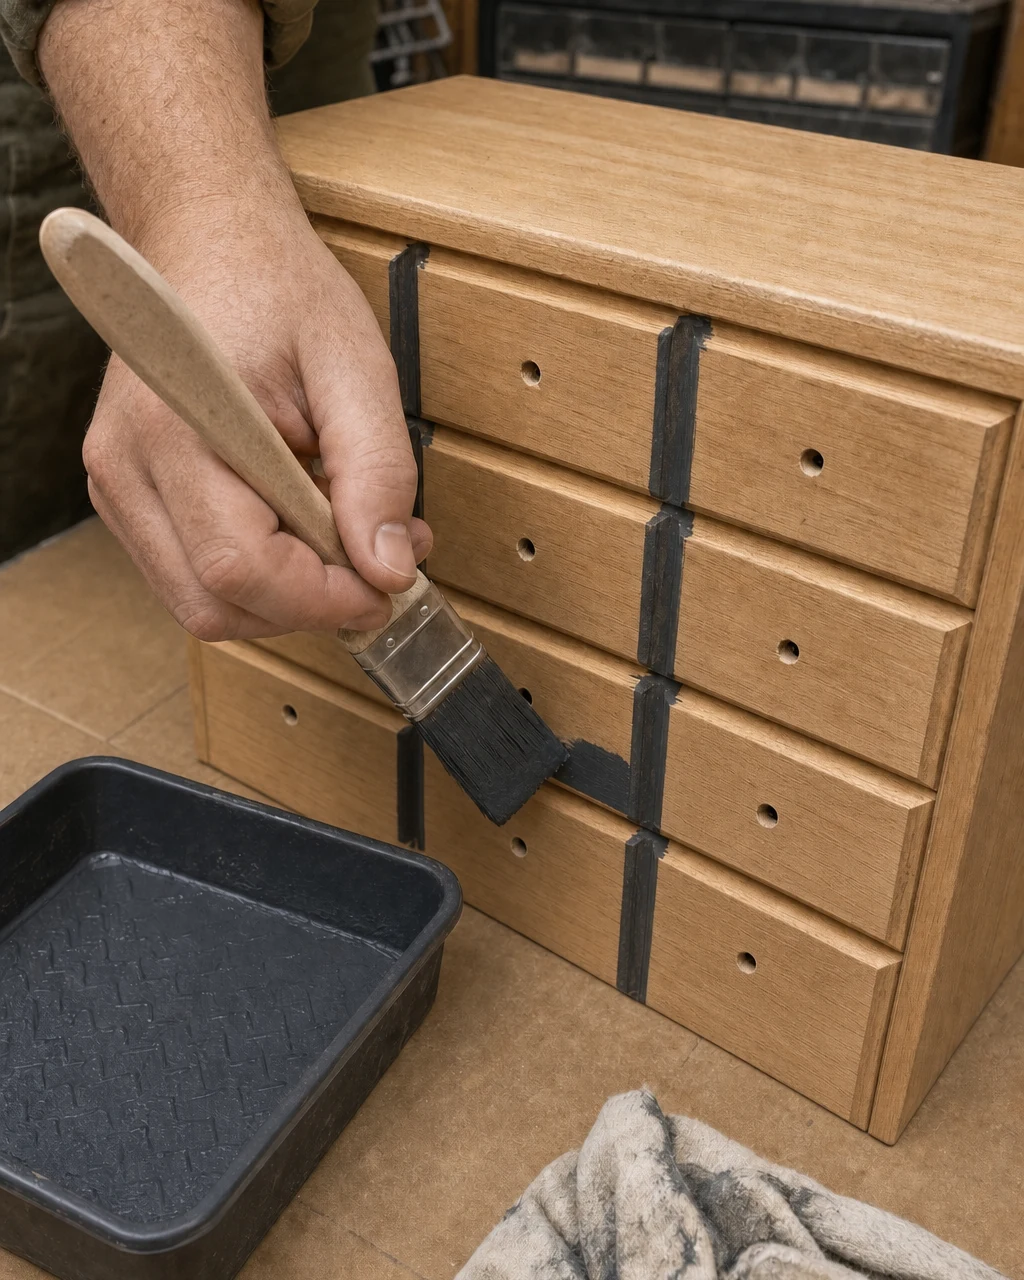
Brush a coat of dark charcoal chalk paint onto the routed vertical grooves of the pine faux-drawer fronts and the main cabinet frame. Apply a second coat for full, rich matte coverage, leaving the top surface bare for the marble treatment. Place a protective drop cloth over the workbench to catch any stray paint drips while working around the edges.
Applying the Base Color
Allow two hours of drying time between each coat of chalk paint. The cabinet body and drawers feature a rich, matte charcoal color that beautifully contrasts with the bare top. This deep shade completely masks the dated orange-pine finish and highlights the routed vertical grooves that create the faux nine-drawer illusion.
Step 4: Sponge Marble Base
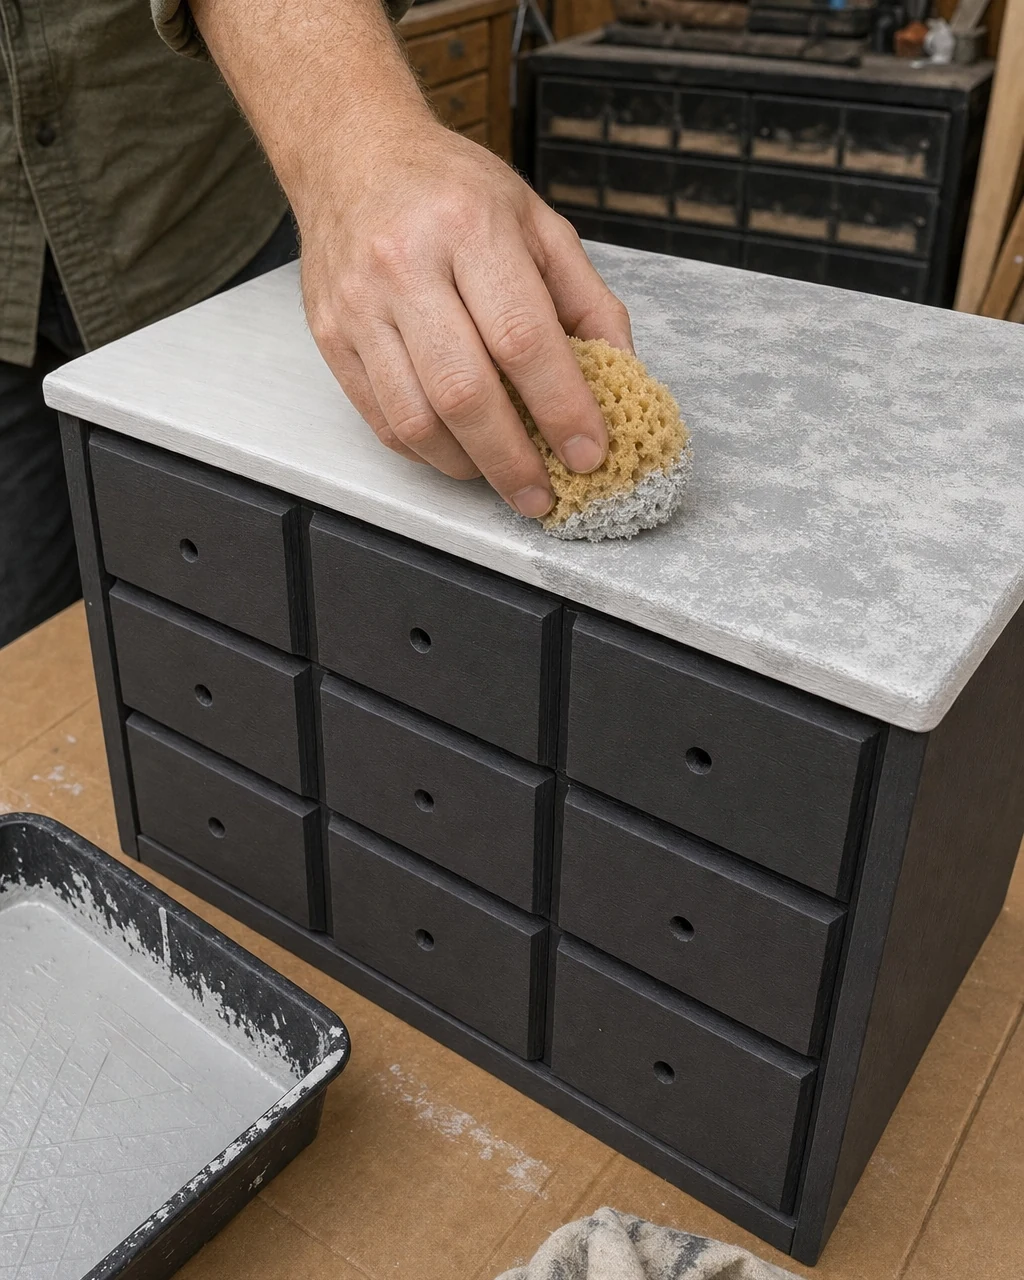
Brush a solid layer of white acrylic paint onto the bare top surface to serve as the basecoat. While the white paint is still wet, dab a natural sea sponge loaded with light gray paint randomly across the surface. Keep water and wet sponges safely away from any electrical tools on the workbench during this messy texturing process.
Building the Stone Texture
Working wet-on-wet allows the gray and white acrylics to blend seamlessly, creating a cloudy, mottled stone texture. The top surface now has a soft, cloudy gray-and-white mottled appearance that mimics the depth of real stone. Using a natural sea sponge is absolutely essential for this step, as synthetic sponges often leave repetitive, artificial patterns rather than organic mineral deposits.
Step 5: Paint Marble Veins
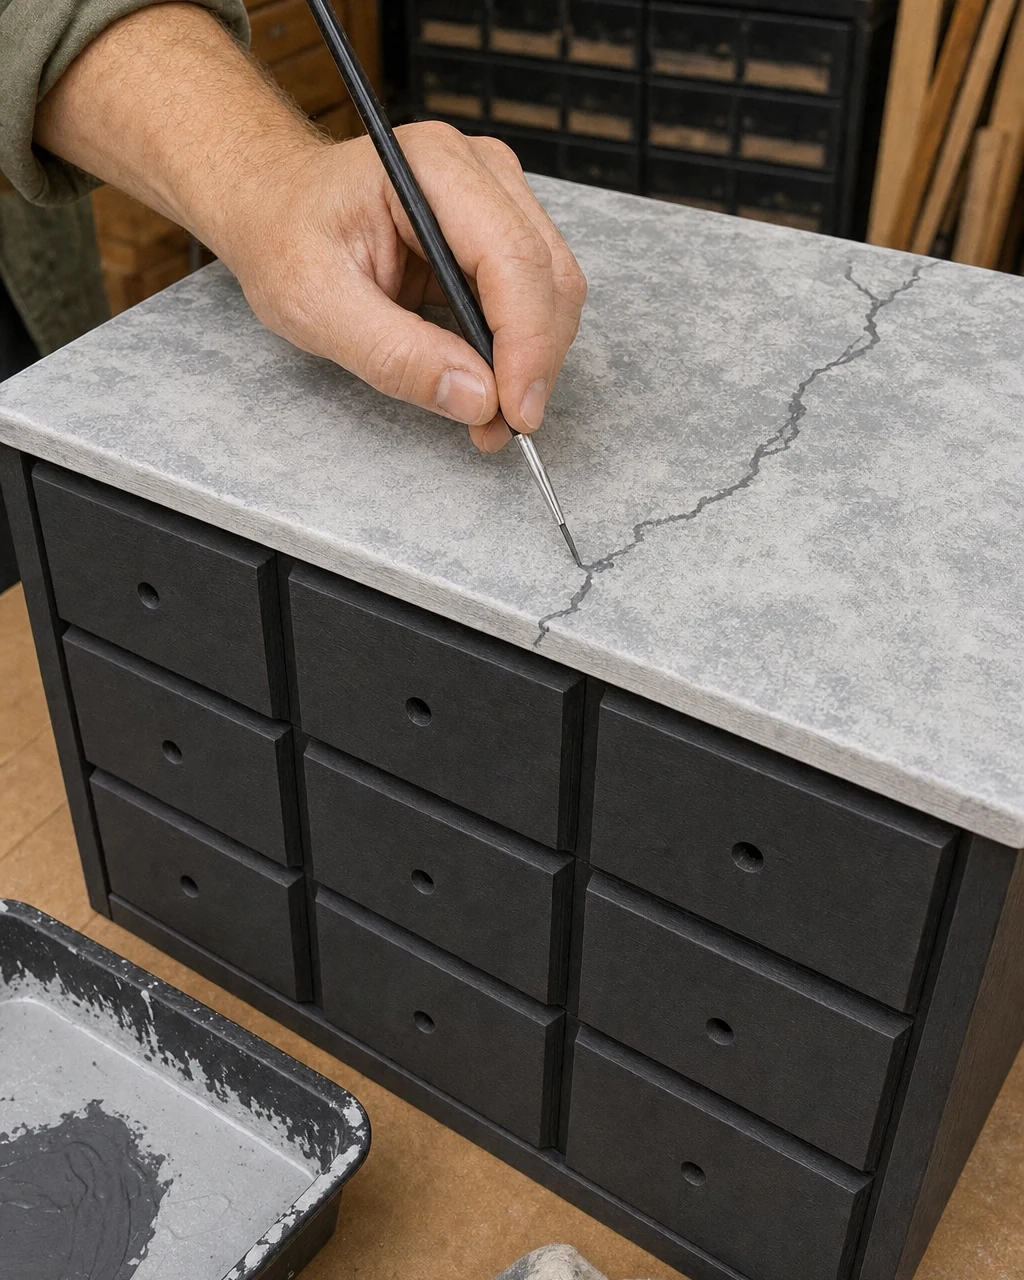
Dip a fine liner brush into dark gray paint and drag it in jagged, intersecting diagonal lines across the cloudy faux marble top. Soften the harsh edges immediately by lightly tapping them with a dry blending brush. Ensure you have adequate task lighting to accurately judge the contrast of the veining as you work across the surface.
Softening the Lines
Feathering the harsh lines mimics natural mineral deposits perfectly, blending the dark gray veins into the cloudy gray-and-white mottled base. Let the finished faux marble surface cure for at least two hours before handling the piece. The realistic dark gray veins now run organically across the top, providing a striking visual hook that elevates the entire apothecary cabinet.
Step 6: Install Brass Pulls
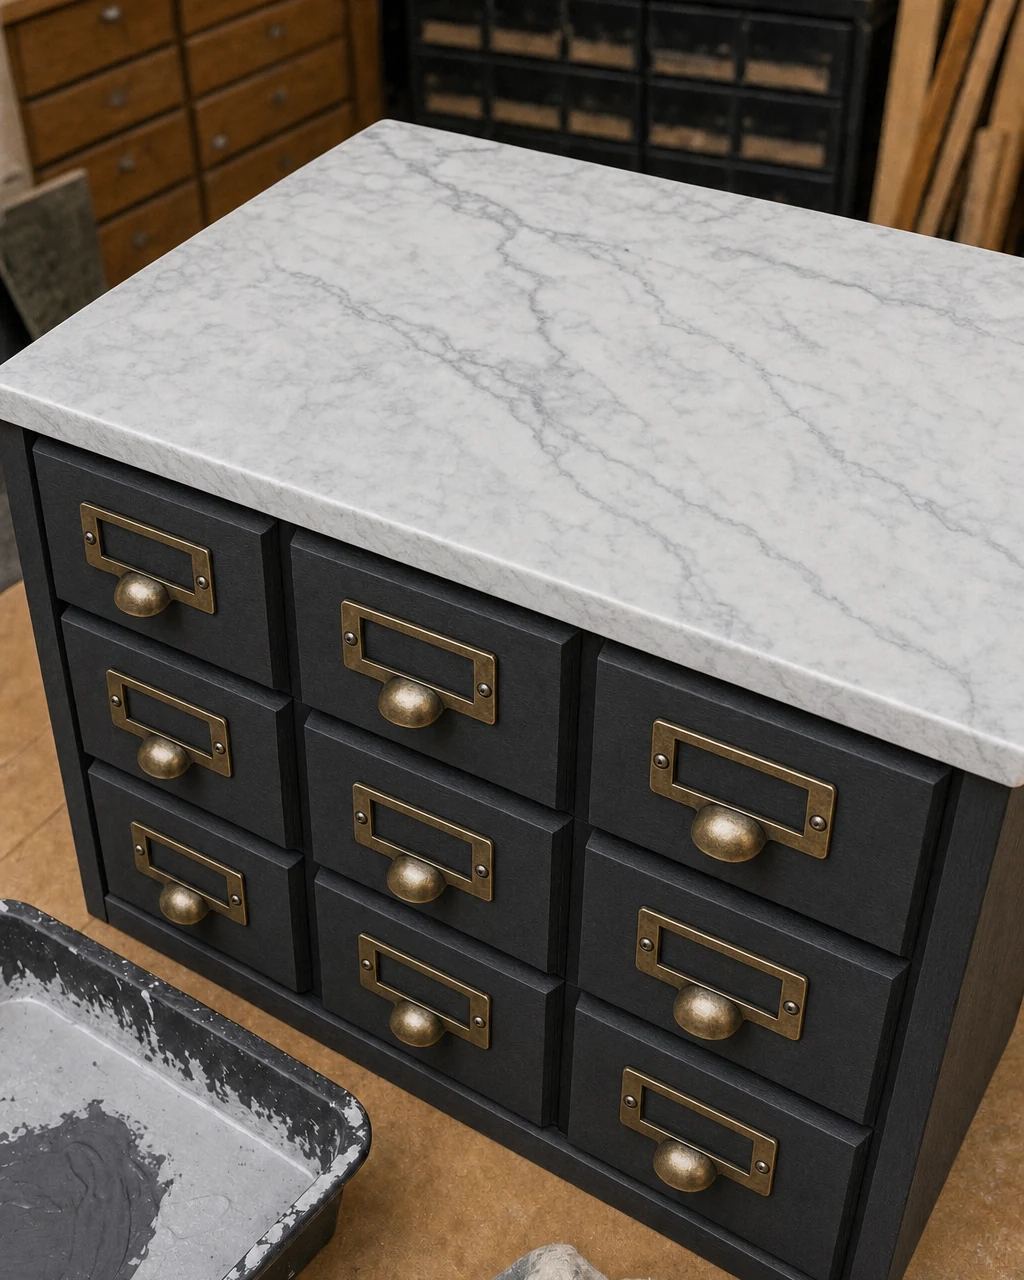
Position the new antique brass label pulls directly over the original knob holes on the dark charcoal faux-drawer fronts. Secure each pull using the provided small screws and a manual Phillips screwdriver. Drive the small screws in perfectly straight to avoid splitting the wood on the thin pine drawer fronts during installation.
Securing the Hardware
The cabinet now features elegant brass hardware contrasting beautifully against the dark charcoal paint. Replacing the wooden knobs with these antique brass label pulls instantly completes the authentic apothecary aesthetic. This simple hardware upgrade drastically alters the silhouette, turning a mass-produced desktop box into a sophisticated piece of functional storage that looks like a high-end vintage find.
Step 7: Style Desktop Organizer
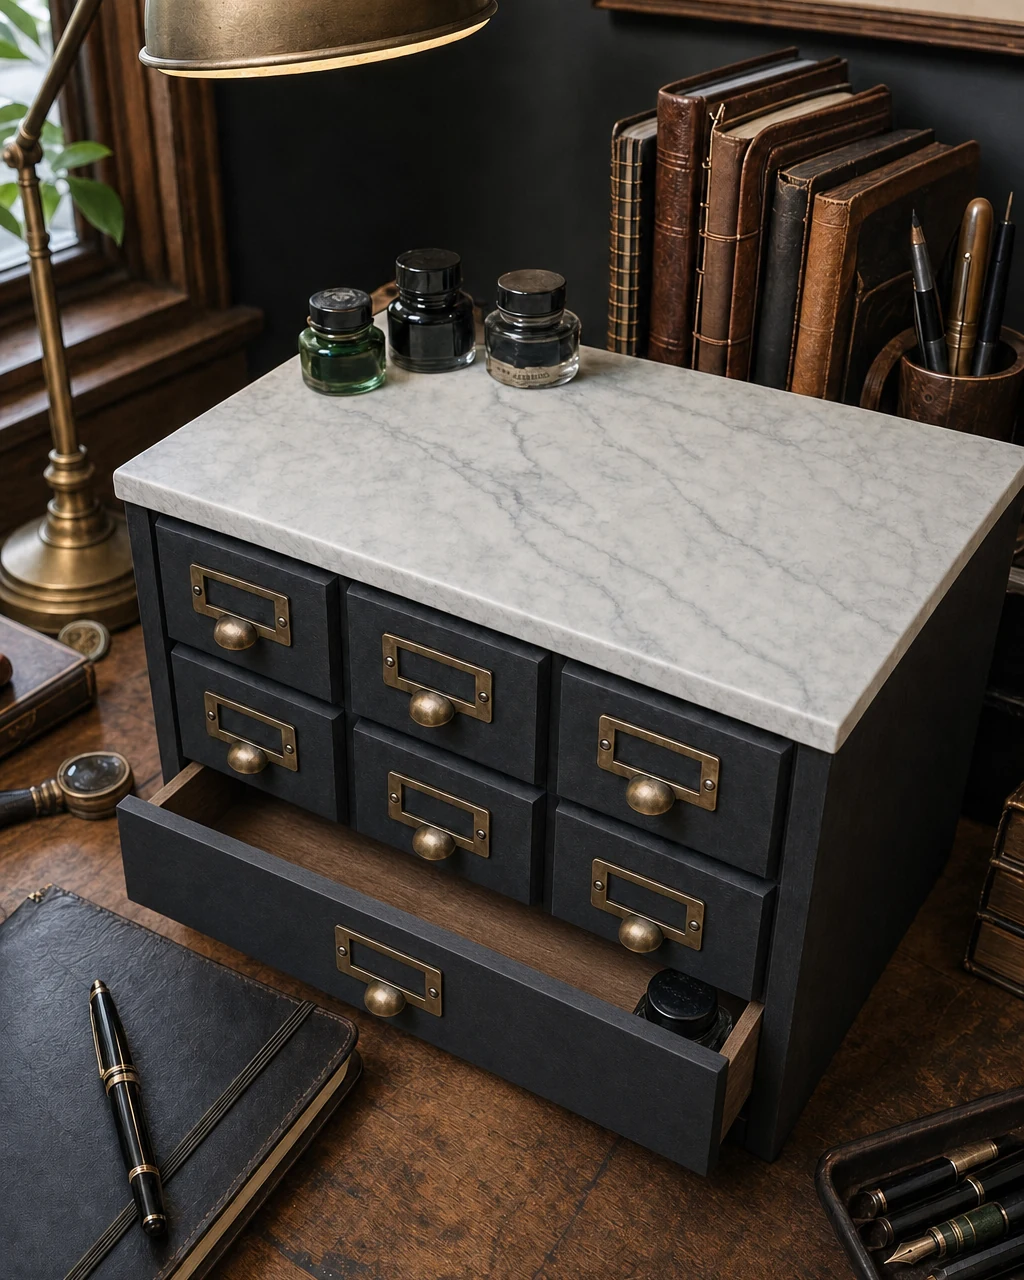
Move the finished apothecary cabinet to a moody home office desk setup, placing it under a warm brass desk lamp. Fill the drawers with paperclips, stamps, and pens for stylish and functional organization. Always lift the cabinet from the sturdy base rather than the top to protect the new finish from accidental scratches.
- Style the faux marble top with vintage glass ink bottles and leather-bound notebooks to enhance the sophisticated office aesthetic.
- Organize small desktop essentials inside the three wide drawers, utilizing the faux nine-drawer illusion to maintain a tidy exterior.
- Position the cabinet under warm ambient lighting to highlight the hand-painted marble veining and the antique brass hardware.