
Pine Blanket Box Upcycle with a Geometric Mosaic Tile Lid
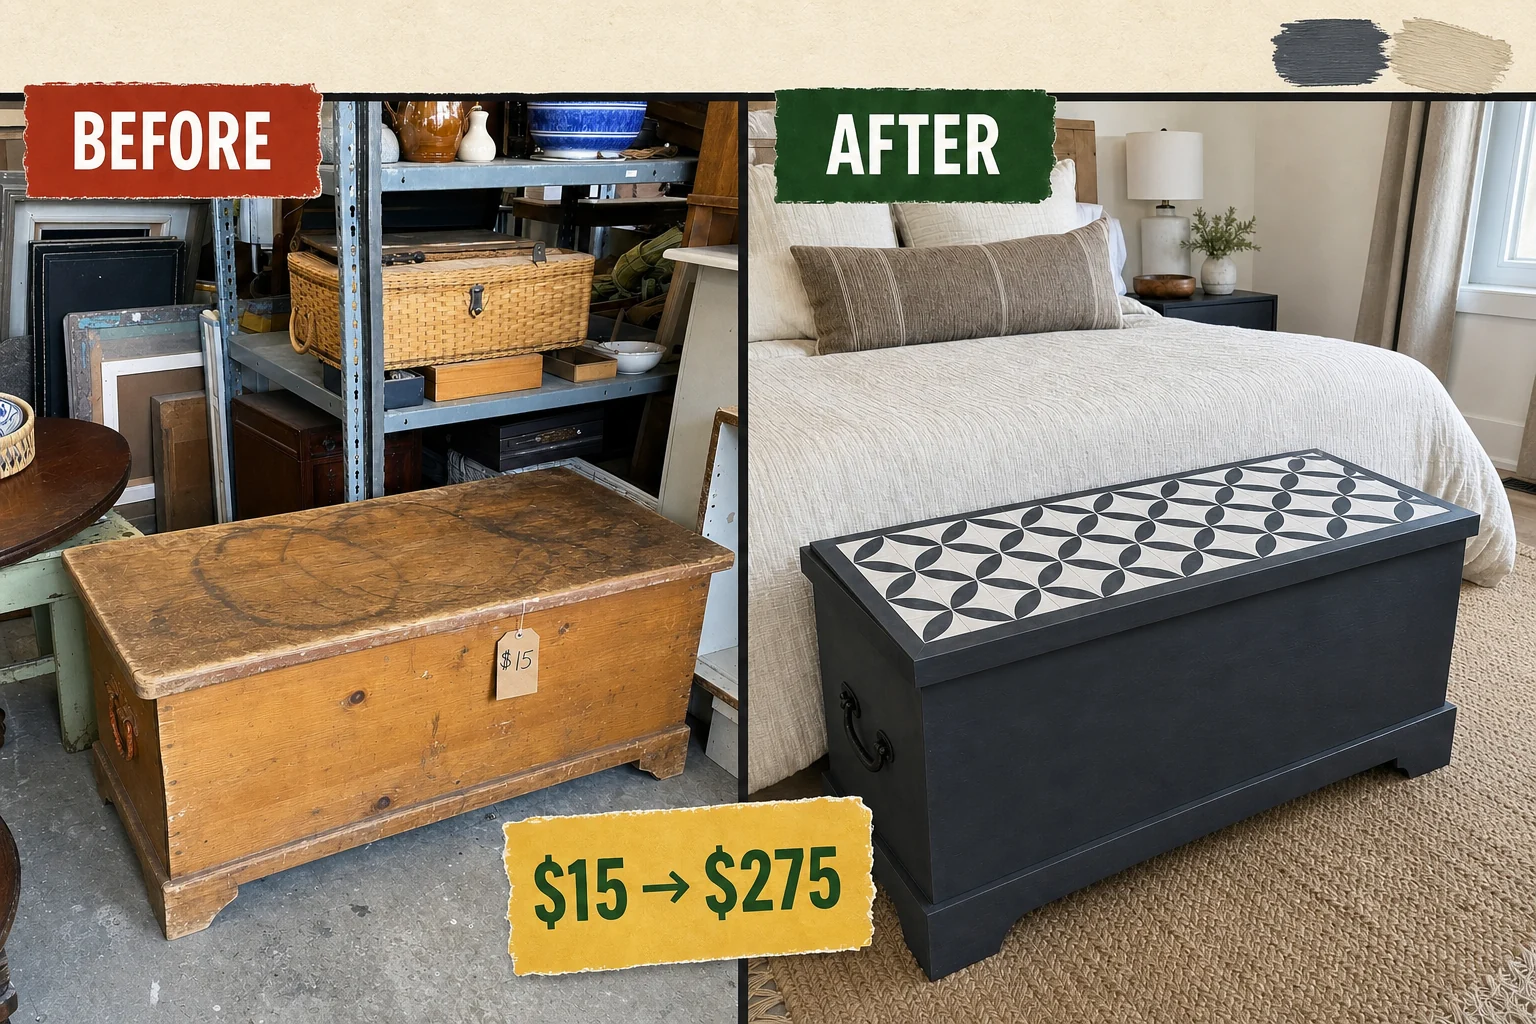
Tucked under discarded lamps at a thrift store, this 1950s pine blanket box had severe water damage. We transformed it by covering the ruined lid with geometric mosaic tile and modernizing the base with dark charcoal enamel.
Pre-Project Condition Audit
Severe water damage left overlapping dark rings across the entire top surface of the heavy pine lid. We needed a complete covering strategy since these deep stains are impossible to sand out. The worn body finish featured a scuffed, yellowed clear coat requiring scuff-sanding and an opaque enamel coating.
Hardware and Rust Issues
The heavy internal strap hinges remained structurally sound, but the exterior iron drop handles suffered from thick, flaking orange oxidation. This rust leaves stains on hands and fabrics, requiring a chemical conversion treatment before the hardware can be safely reused on the modernized storage bench.
Project Costs and Estimated Resale Value
The addition of a durable, hardwearing ceramic surface elevates this from a basic storage trunk to a functional, high-end bench seat. This transformation significantly increases its utility and market appeal, creating a strong editorial estimate for resale value compared to the initial thrift store investment.
| Item | Cost |
|---|---|
| Purchase price | $15 |
| Charcoal enamel | $18 |
| Rust converter gel | $9 |
| Ceramic mosaic tile | $35 |
| Tile mastic | $12 |
| Sanded grout | $14 |
| Materials total | $88 |
| Total investment | $103 |
| Estimated resale value | $275 |
| Value gain | $172 |
Required Materials and Supplies
Gathering the right supplies ensures a durable bond between the heavy ceramic and the wooden lid while properly sealing the painted base. Purchasing high-quality adhesives and rust treatments prevents future failures and keeps the restored iron hardware looking pristine for years to come.
Materials checklist
Step 1: Assess the Blanket Box for Tile
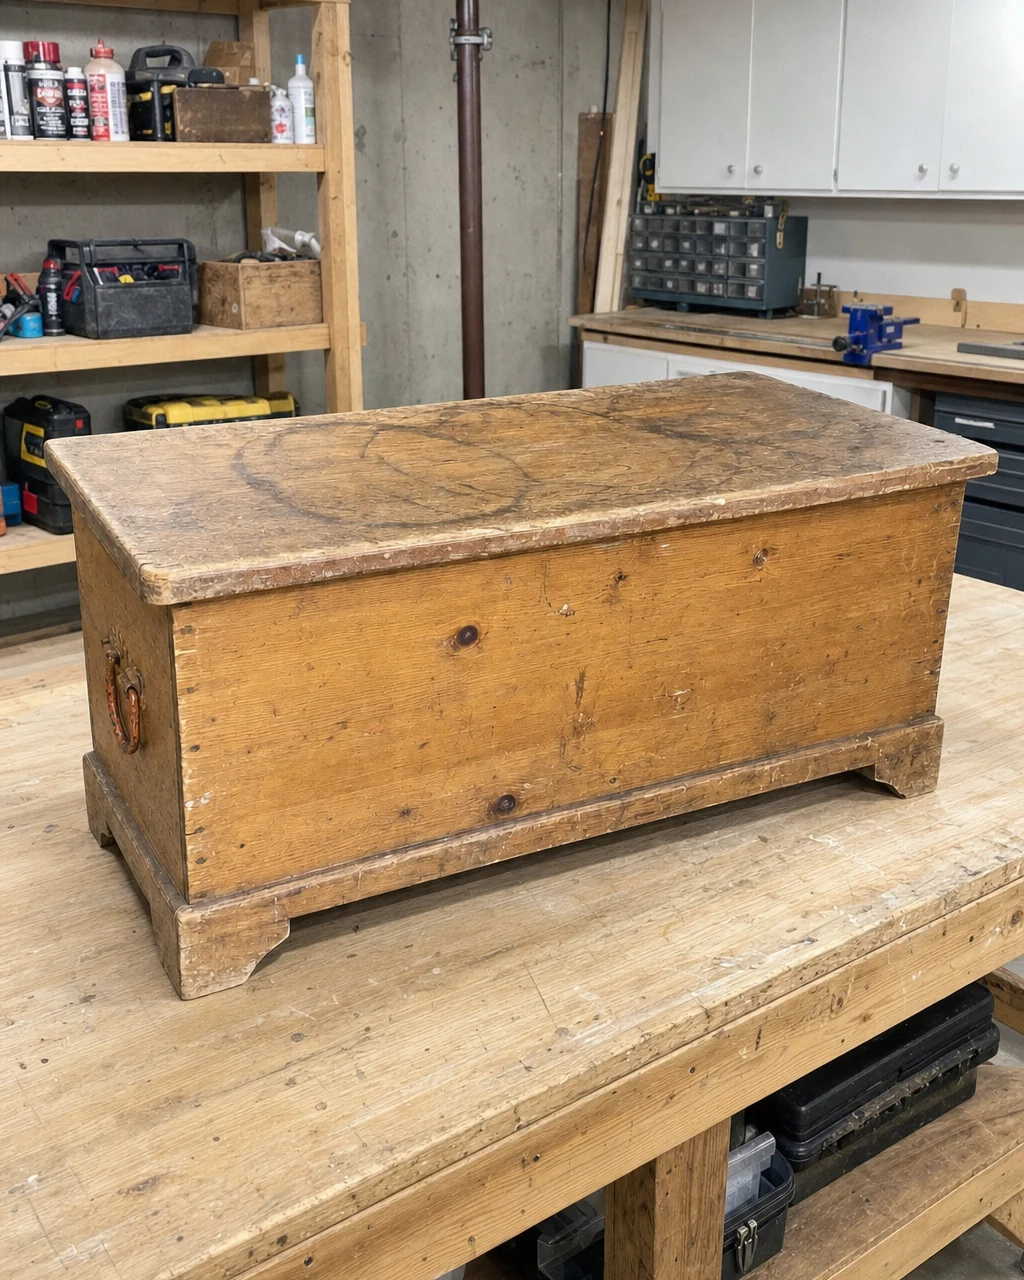
Evaluate the depth of the water damage on the heavy lid and prepare the piece for hardware removal using a screwdriver. Confirm the lid is flat enough to accept tile before proceeding with the rest of the transformation. Ensure the heavy lid is properly supported when open to prevent hyperextending.
Preparing for the Makeover
Staging the full blanket box on the workbench under bright garage lighting makes it easier to inspect the rusted iron side handles. The solid pine boards joined with butt joints provide a sturdy foundation, confirming the overall storage volume is well worth the effort required to restore this piece.
Step 2: Paint the Pine Base With Enamel
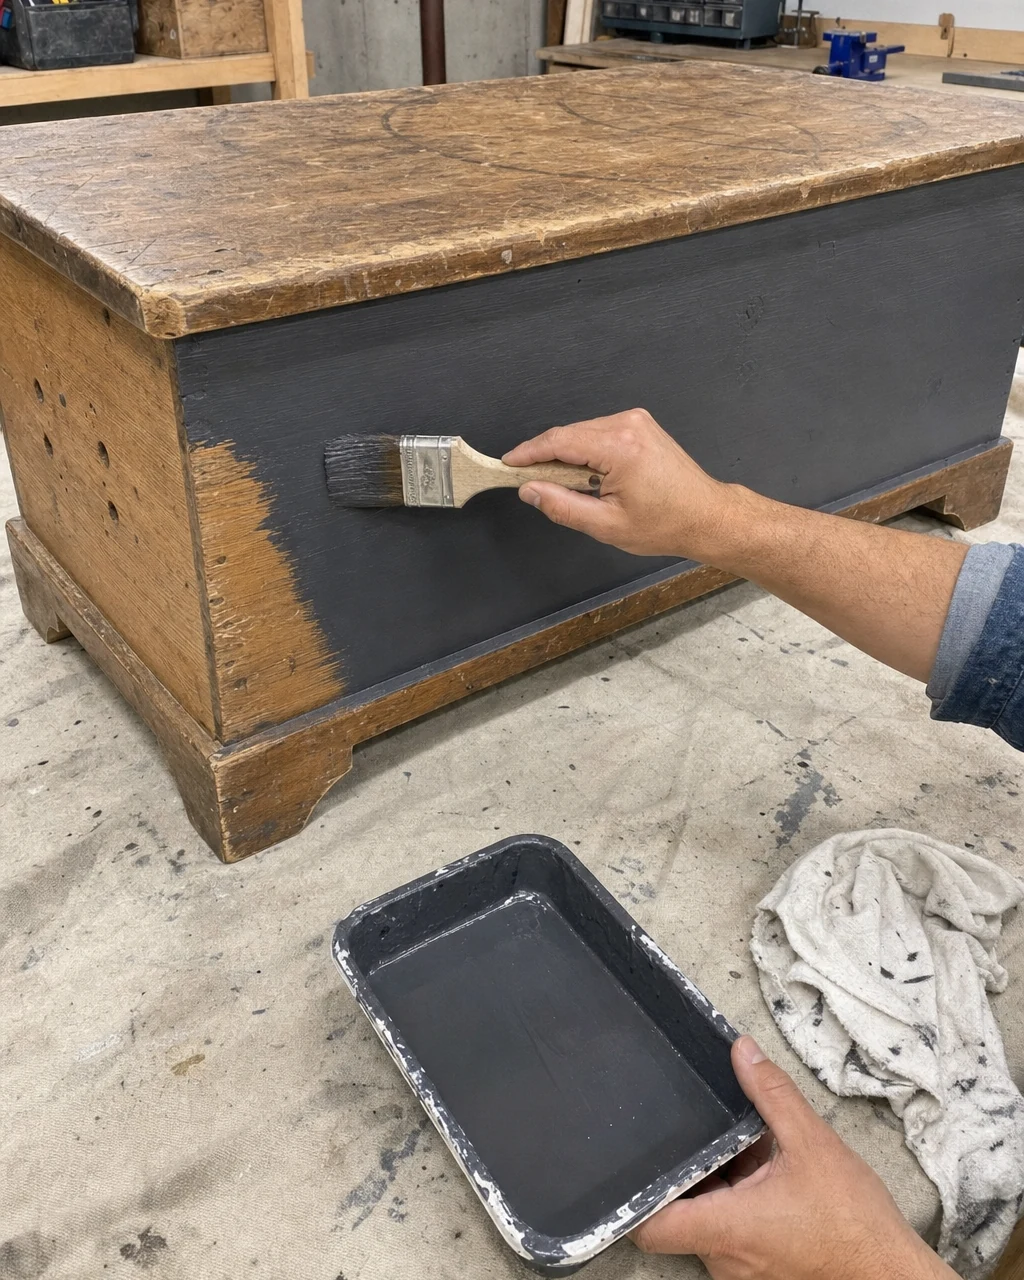
Scuff-sand the yellowed clear coat on the box body using a sanding block to prepare the surface for a fresh finish. Always work in a well-ventilated area when applying enamel paints to ensure proper drying and safety. Brushing rich charcoal enamel onto the sanded pine front panel modernizes the base.
Achieving an Opaque Finish
Apply a high-adhesion charcoal cabinet enamel with a paintbrush to coat the pine base in a smooth, opaque dark gray finish. This specific cabinet paint minimizes the need for a separate primer, allowing the deep charcoal color to contrast beautifully against the planned black-and-white geometric tiled top.
Step 3: Treat the Rusted Iron Hardware
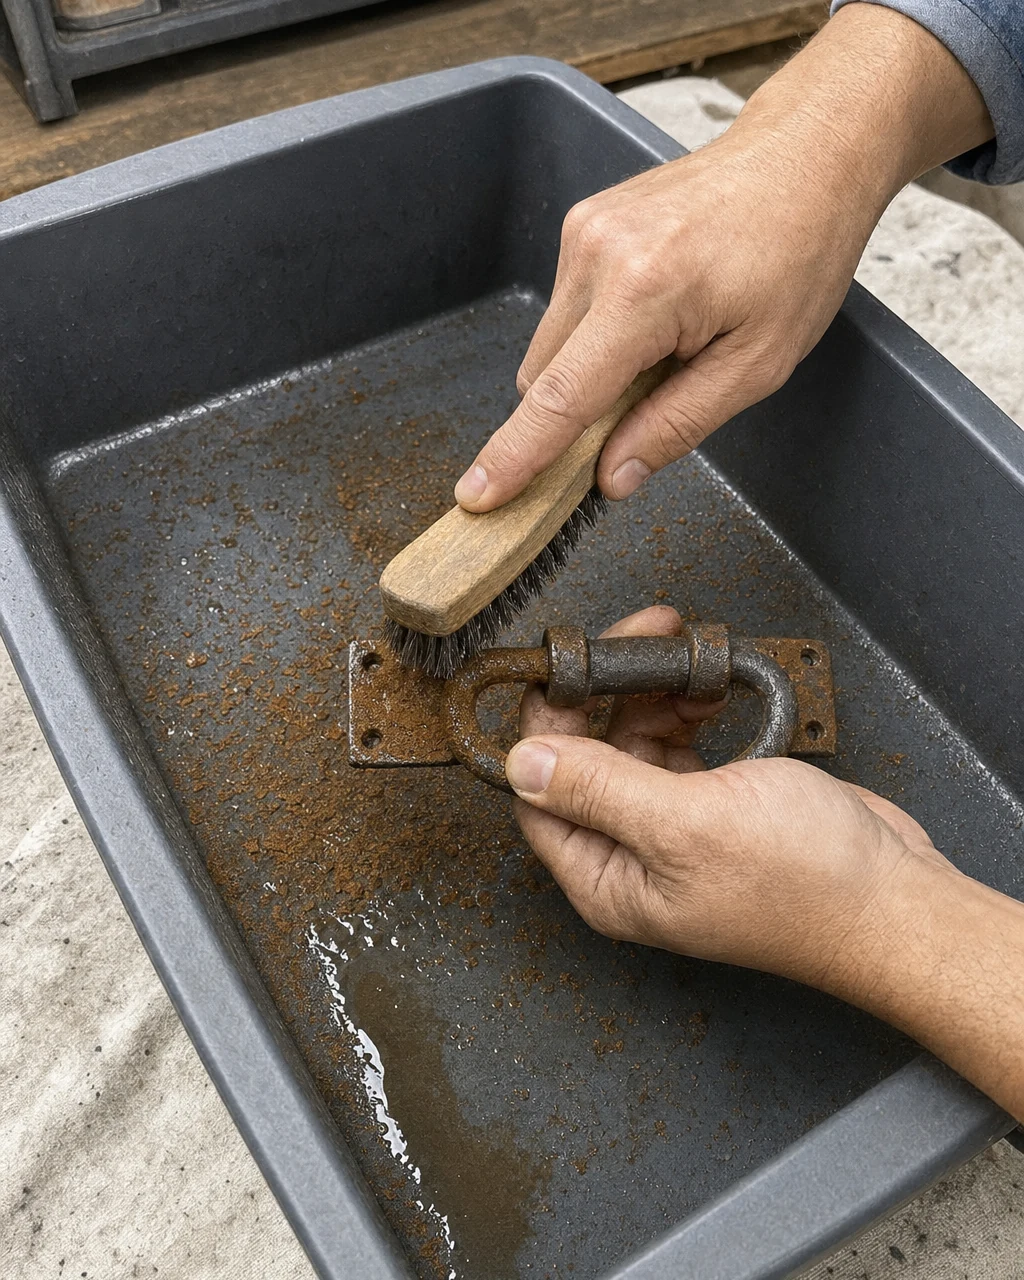
Soak the detached iron drop handles in a chemical rust converter gel inside a plastic utility basin. Wear chemical-resistant gloves and safety glasses when handling rust converter gel to protect your skin and eyes from the active ingredients. This thick gel formula clings well to the curved metal surfaces.
Restoring the Original Metal
Scrub away the loose oxidation with a stiff wire brush to strip the orange rust and restore the original darkened, pitted iron. This chemical process neutralizes deep oxidation without grinding away the original metal, leaving the handles completely stripped of orange rust and ready for reinstallation on the finished box.
Step 4: Set the Geometric Mosaic Tiles
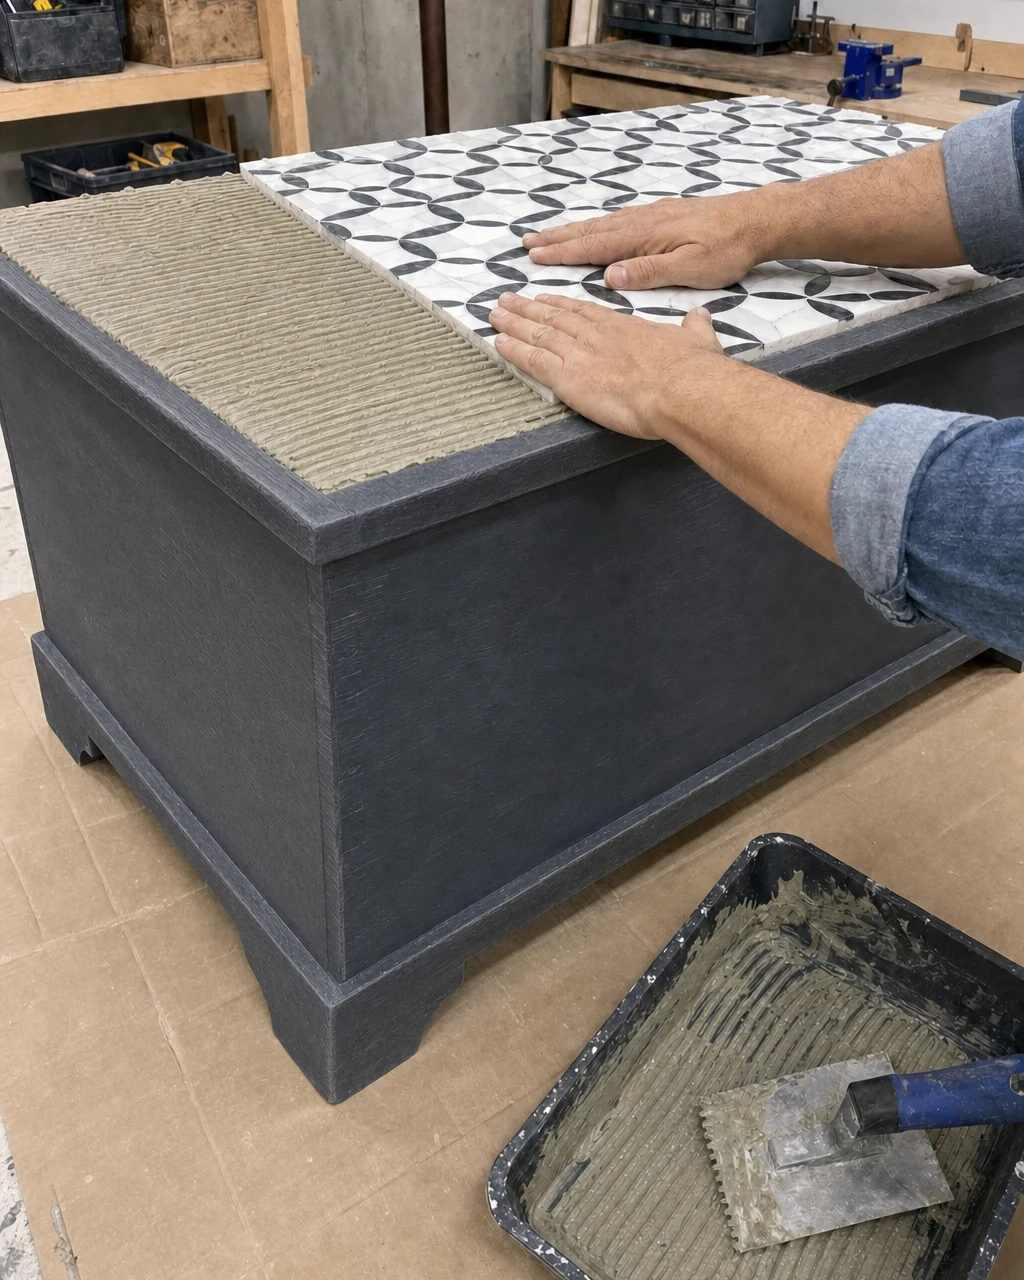
Trowel tile mastic directly over the water-damaged wood using a notched trowel to create an even adhesive bed. Ensure the mastic does not drip over the edges onto the newly painted base. This pre-mixed mastic is perfectly suited for adhering ceramic directly to flat wood substrates like our heavy lid.
Pressing the Sheets into Place
Press the geometric ceramic mosaic sheets firmly into place on the heavy lid and allow the adhesive to cure overnight. Using pre-meshed sheets keeps the complex geometric patterns perfectly aligned during installation. The lid is now fully covered in geometric tiles with empty joints waiting for the final finishing stage.
Step 5: Grout the Tiled Blanket Box Lid
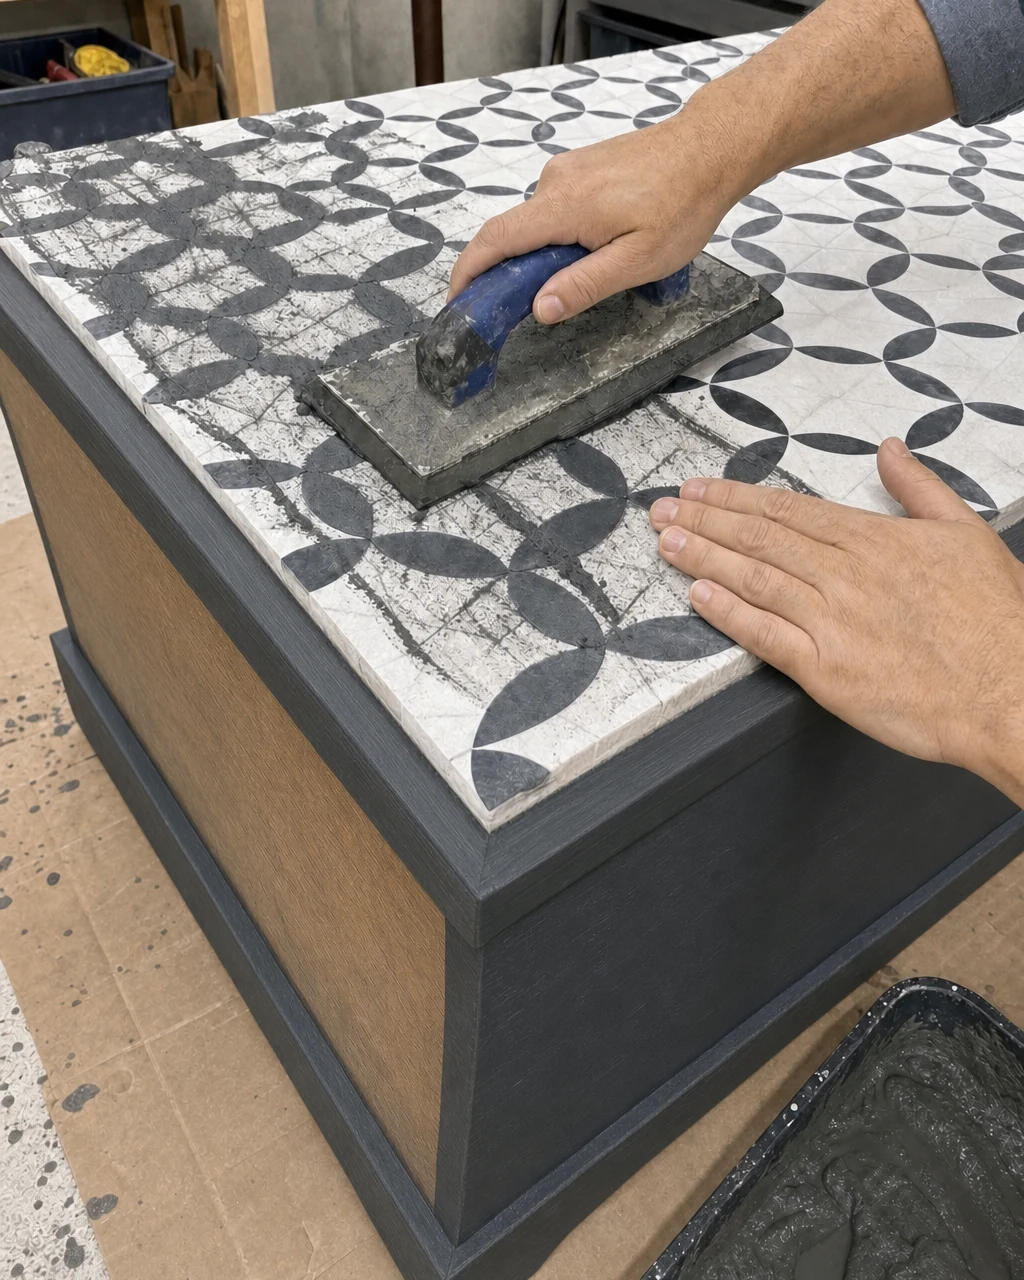
Force dark sanded grout into the empty tile joints using a rubber float, pulling it diagonally across the new tiles. Always wear a dust mask when mixing dry grout powder. This dark sanded grout hides future dust while beautifully highlighting the crisp white tiles within the geometric pattern.
Cleaning the Tile Surface
Wipe away the excess haze with a damp grout sponge to reveal a seamless surface with dark grout defining the geometric pattern. The heavy lid is now transformed into a seamless ceramic mosaic bench seat, completely hiding the overlapping dark black rings that previously ruined the top surface.
Step 6: Reassemble the Painted Blanket Box
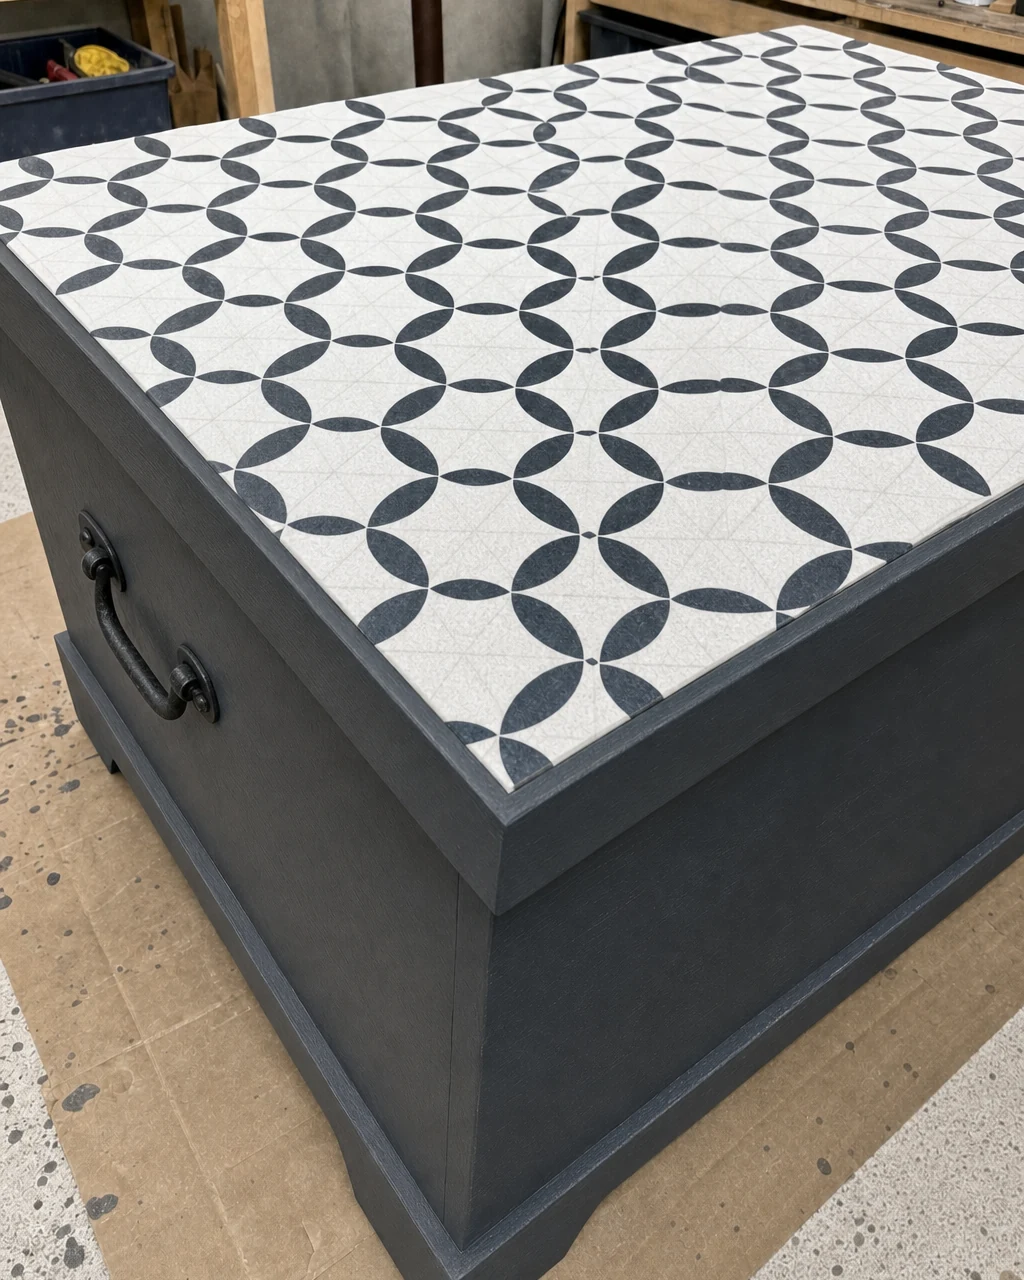
Reattach the restored iron drop handles to the sides of the painted base to complete the hardware installation. Drive the original flathead screws back into the restored iron handles using a screwdriver, securing them firmly to the finished charcoal box. Drive screws carefully to avoid scratching the newly painted enamel.
Final Workshop Inspection
The blanket box is fully assembled and complete on the workbench, showcasing the striking black-and-white geometric tiled top contrasting with the deep charcoal body. The added weight from the ceramic tiles requires checking the heavy internal strap hinges one last time to ensure absolute stability before moving the piece.
Step 7: Style the New Storage Bench
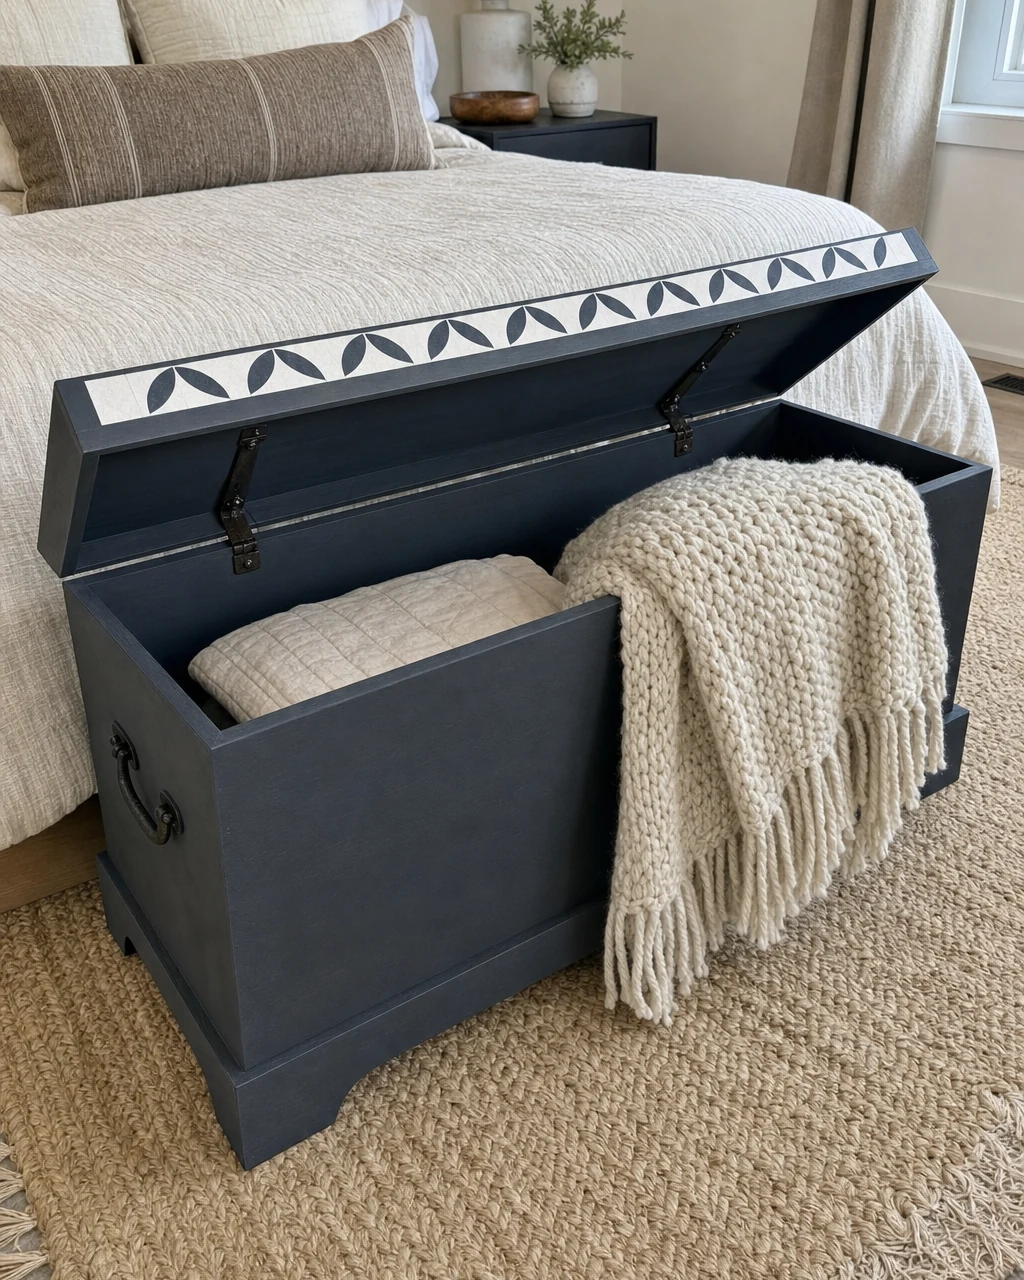
Move the heavy finished box into a bedroom setting to serve as a durable footboard bench and textile storage. Lift with two people, as the ceramic tile adds significant weight to the piece. Position the bench at the foot of a modern bed on a textured rug for maximum impact.
Enjoying the Upcycled Trunk
Drape a chunky knit throw out of the open tiled box to highlight how beautifully it functions as both seating and storage. The durable ceramic surfaces turn simple storage into functional everyday seating, proving that structurally sound solid wood pieces always justify a higher material investment.