
Pine Writing Desk Before and After: Sleek Two-Tone Makeover
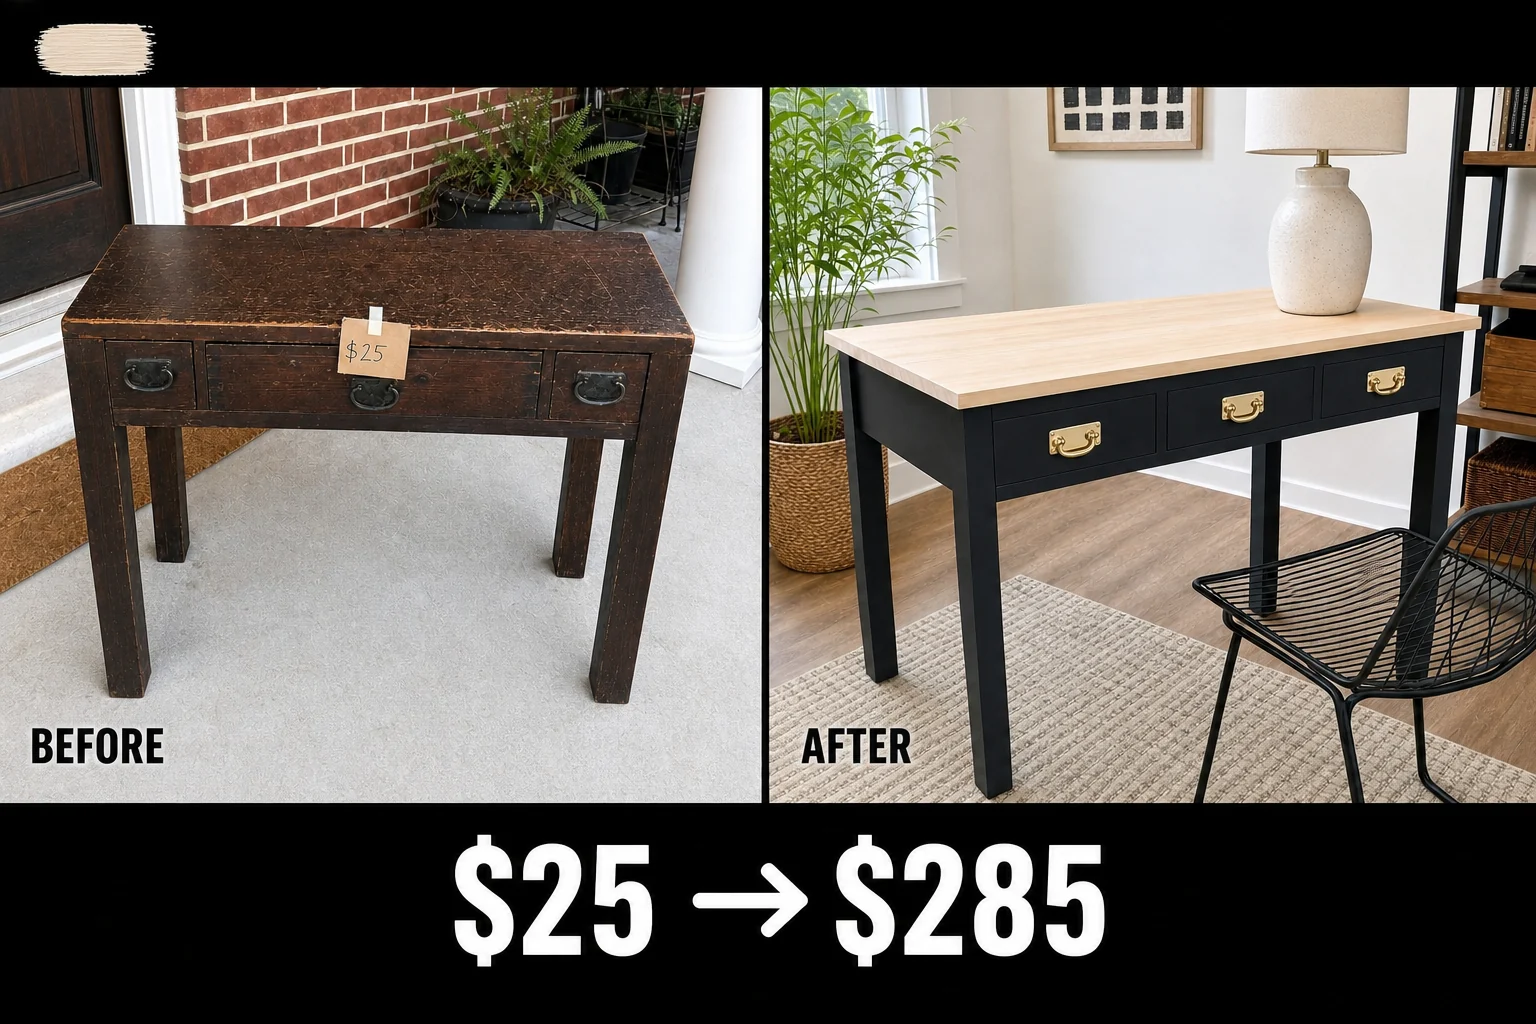
Spotted on a neighborhood app as a moving-out purge, this 1940s pine desk was a local listing pickup left on a covered porch. We transformed the scratched relic into a sleek two-tone workspace by bleaching the top and painting the base.
Assessing the Vintage Pine Desk
Deep scratches and uneven, alligatoring dark varnish across the main writing surface hid the natural wood grain and created an unusable, sticky workspace. The heavy brass drop-pulls were completely black with decades of oxidation, obscuring the high-quality original metalwork and making the piece look neglected.
- Dings, worn edges, and chipped finish along the legs and drawer fronts required filling and a solid opaque finish to look clean and intentional.
- The traditional square-leg profile and dovetail joinery provided a solid foundation for a modern update.
Why This Two-Tone Desk Gained Value
Solid wood construction and original heavy brass hardware command a premium when updated with a contemporary two-tone finish that fits modern home offices. By stripping the damaged top and painting the scuffed base, this $25 porch find transformed into a sleek workspace.
| Item | Cost |
|---|---|
| Purchase Price | $25 |
| Paint and Varnish Stripper | $12 |
| Two-Part Wood Bleach | $15 |
| Matte Enamel Paint | $20 |
| Metal Polish | $8 |
| Water-Based Polyurethane | $15 |
| Materials Total | $70 |
| Total Investment | $95 |
| Estimated Resale Value | $285 |
| Value Gain | $190 |
The estimated resale value is strictly an editorial estimate, not a completed sale, reflecting the premium commanded by modernized vintage construction.
Materials checklist
Step 1: Assess and Detach Hardware
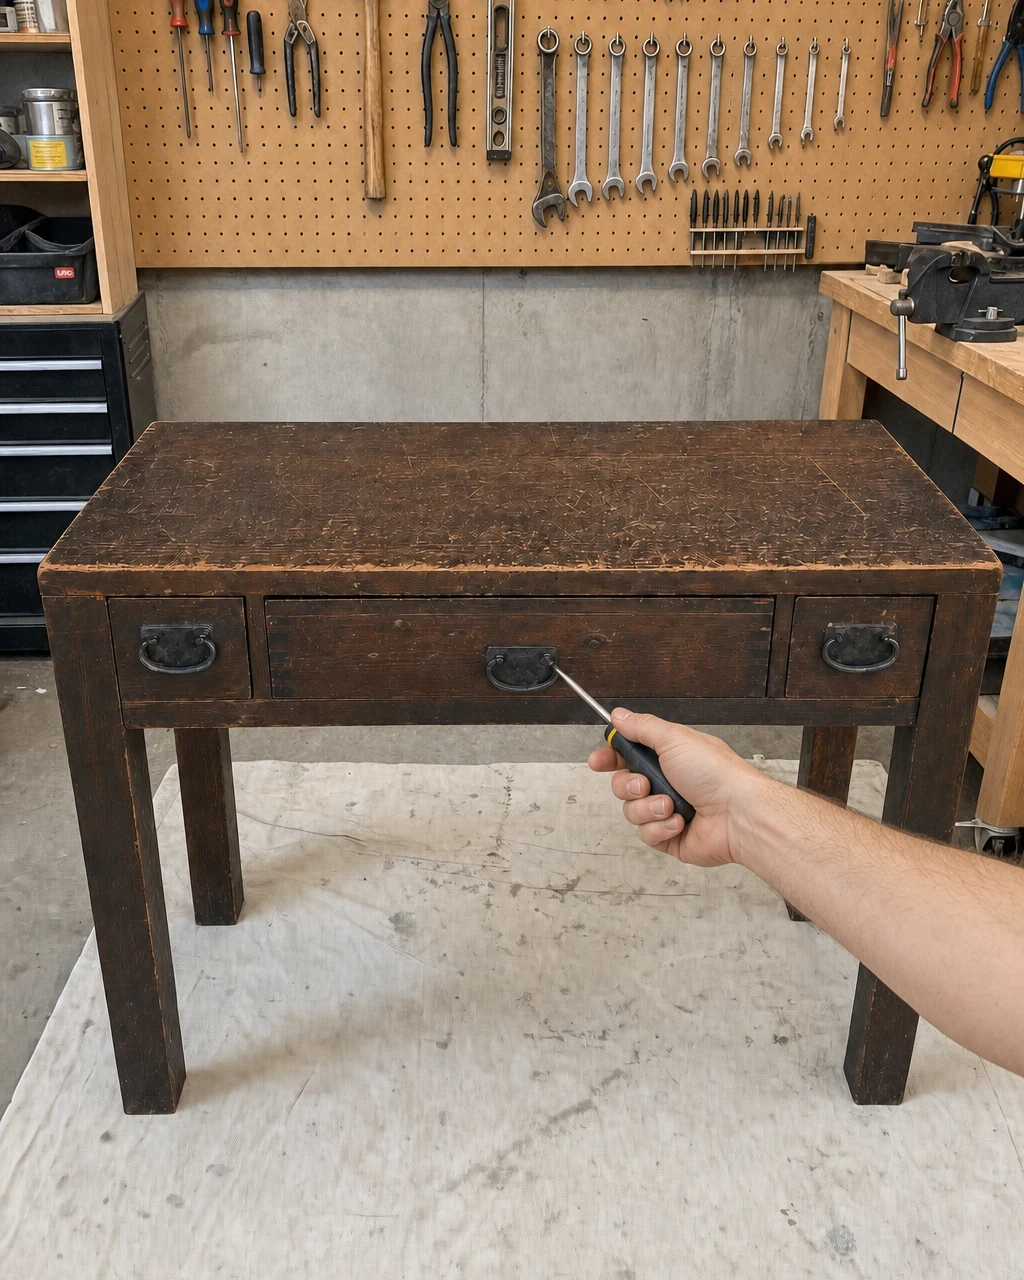
Evaluate the scratched varnish and unscrew the brass drop-pulls from the drawer fronts to prepare for stripping. Use a manual screwdriver to back the rusted screws out of the tarnished brass drop-pulls on the center and side drawers, leaving empty holes in the drawer fronts.
Hardware Safety
Keep track of original screws in a magnetic tray to avoid losing vintage threading. The heavy original hardware indicates better construction than modern flat-packs, making it crucial to preserve every original fastener for reassembly.
Step 2: Strip the Dark Varnish
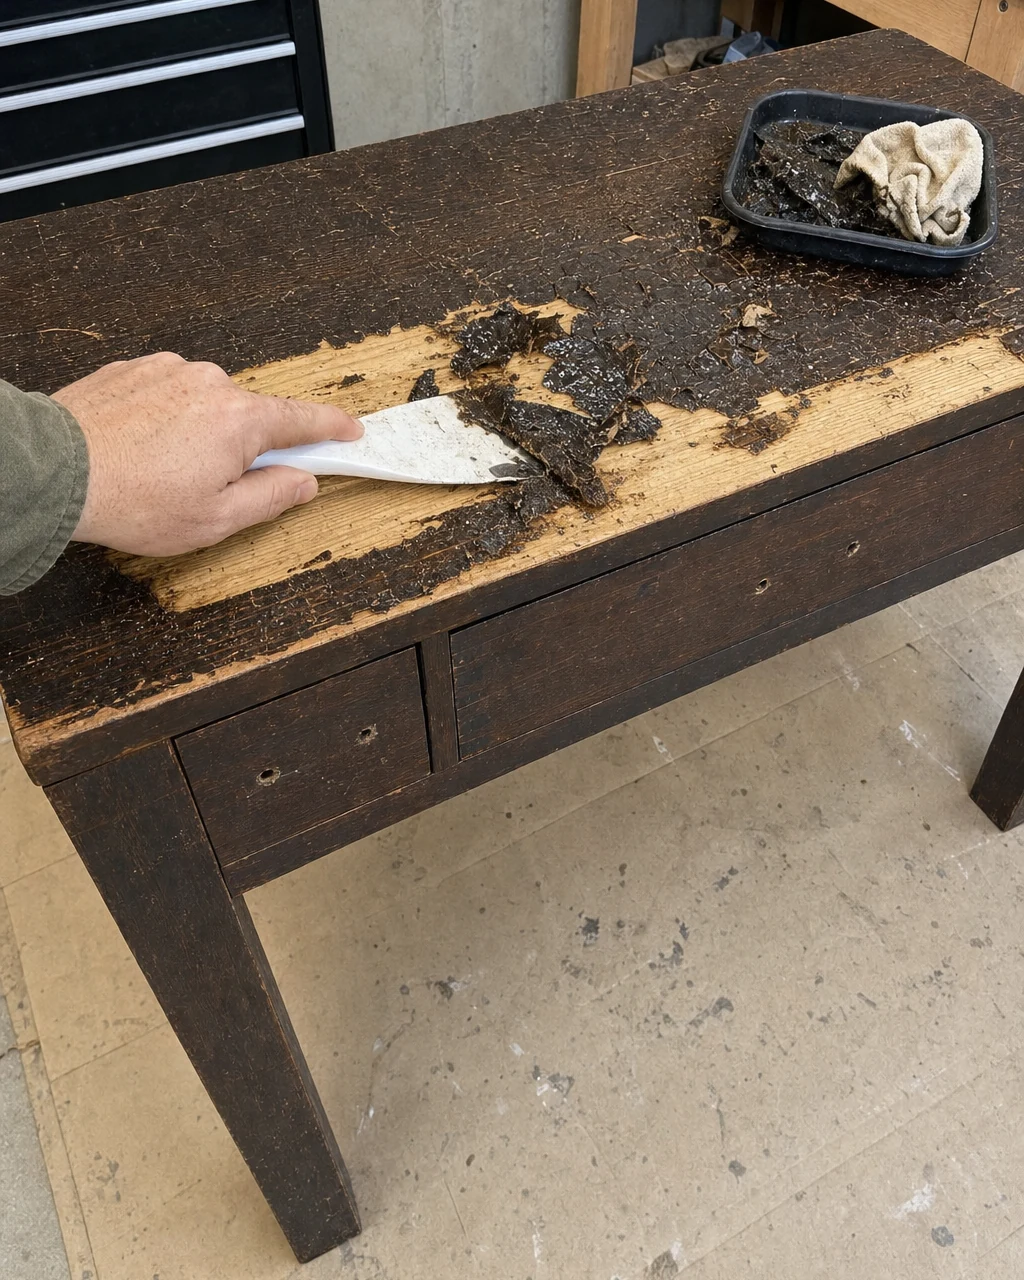
Apply chemical stripper to the top, allow it to sit for 30 minutes, and scrape away the dissolved finish. A plastic putty knife easily pushes through the bubbling dark varnish to reveal the light raw pine underneath, ensuring the top is completely stripped of its old finish.
Stripping Precautions
Wear chemical-resistant gloves and work in a well-ventilated area when using chemical strippers. These solvents dissolve old coatings without gouging soft pine, but they require careful handling and proper disposal of the scraped residue.
Step 3: Bleach the Pine Grain
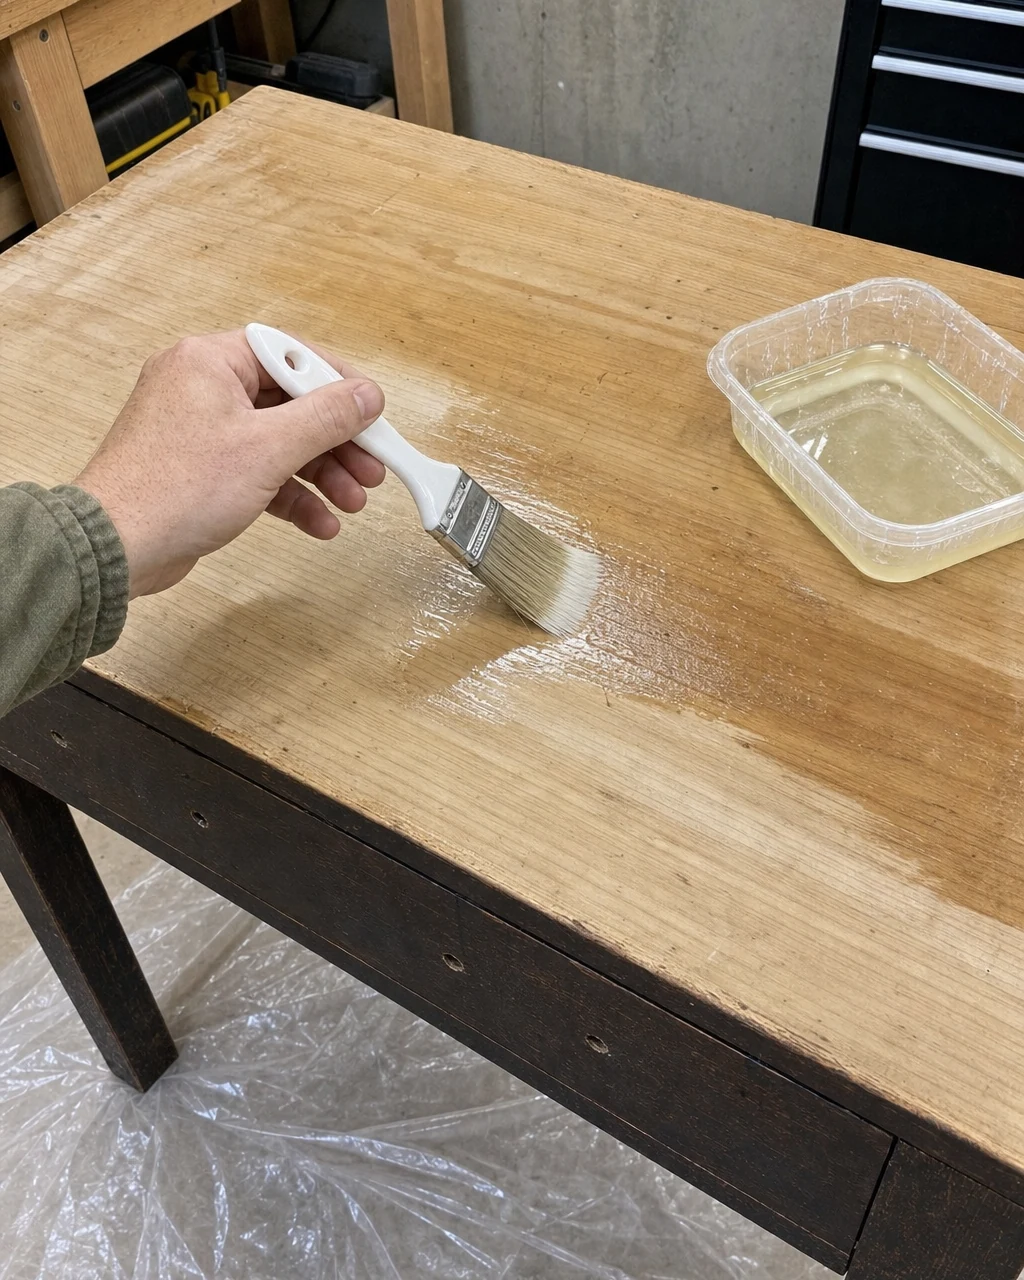
Sand the top smooth with an orbital sander. Brush on a two-part wood bleach to lighten the grain and neutralize the yellow and orange tones in the raw pine. Spread the clear wood bleach evenly across the raw pine surface using a synthetic brush, then leave it to dry overnight.
Handling Wood Bleach
Wear safety goggles and a respirator; wood bleach contains strong active chemicals. Bleaching neutralizes the yellow tones inherent to older pine, creating the stark contrast needed for a modern two-tone design and leaving the wood grain significantly lighter.
Step 4: Paint the Desk Base
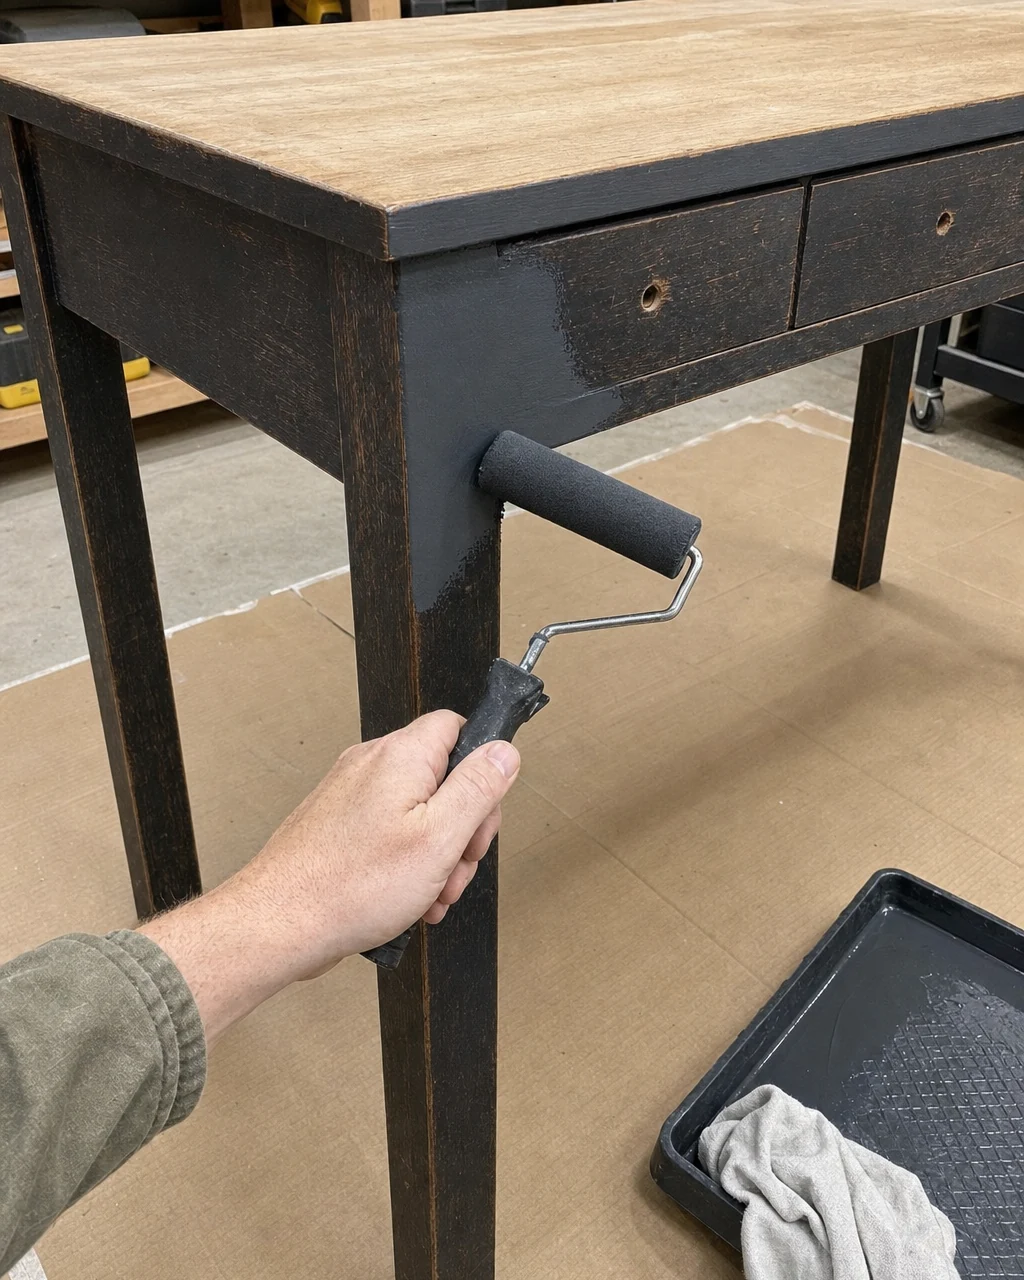
Scuff-sand the legs and drawer fronts, tape off the bleached top, and apply a matte charcoal enamel paint. A high-density foam roller smoothly coats the scuffed wooden side panels and legs in a durable, opaque dark finish.
Base Coating Strategy
Ensure the floor is protected with a drop cloth to catch any paint spatter. Charcoal enamel provides a durable shell against chair scuffs, hiding the previous dings and worn edges along the traditional square-leg profile.
Step 5: Restore the Brass Pulls
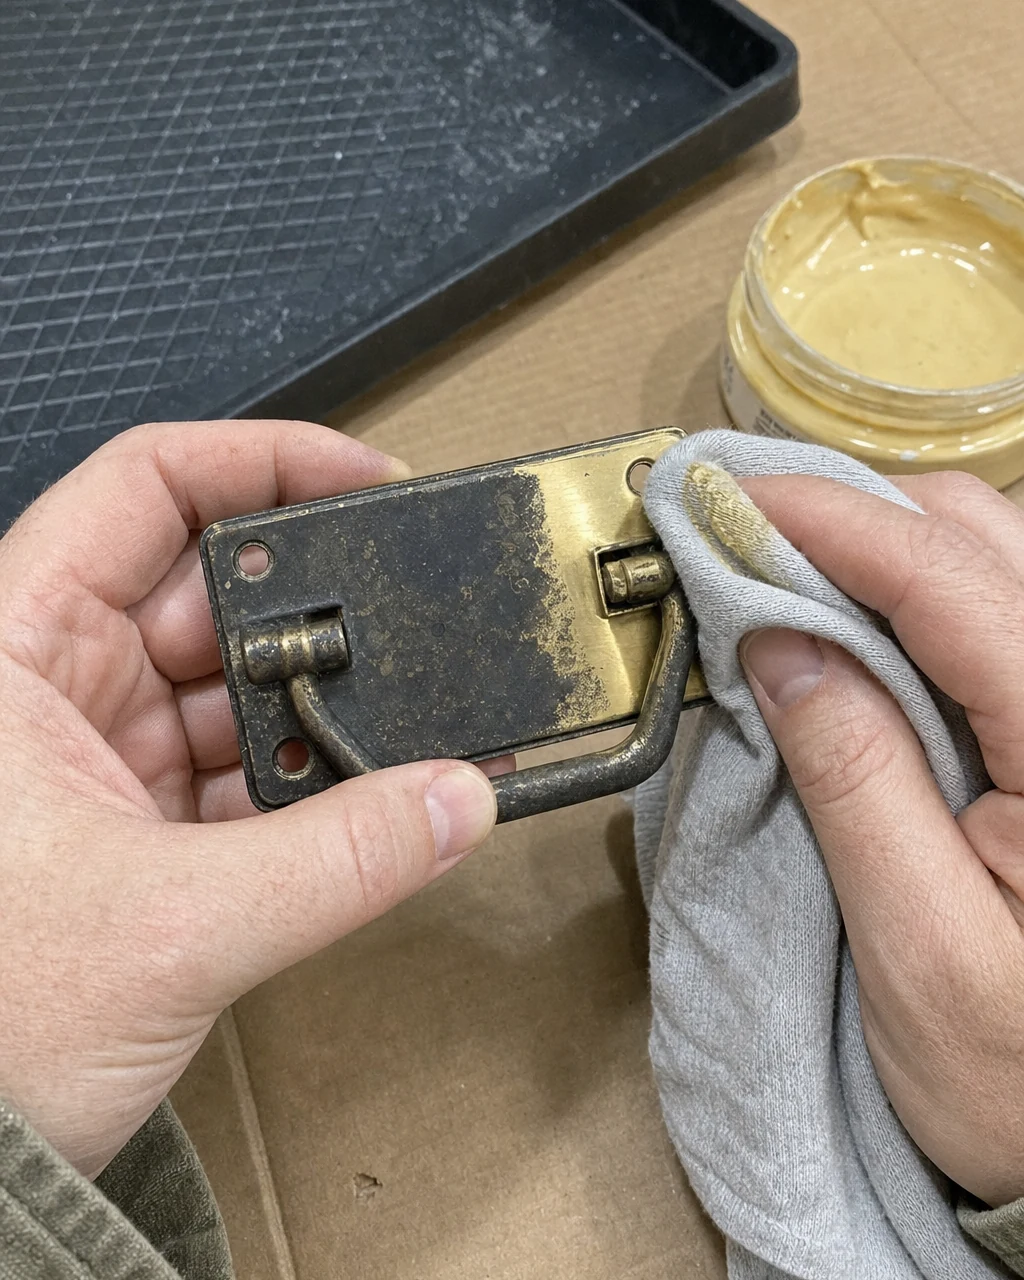
Polish the solid brass drop-pulls using a specialized brass cleaner and a soft cloth to remove decades of oxidation. Rubbing the polish into the tarnished metal quickly reveals bright, shiny original metalwork that pops against the dark paint.
Metal Polishing Care
Wash hands thoroughly after handling metal polish and oxidized brass. Solid brass handles easily survive decades of heavy oxidation, and restoring their original gleam highlights the high-quality original metalwork of this 1940s piece.
Step 6: Seal and Reassemble
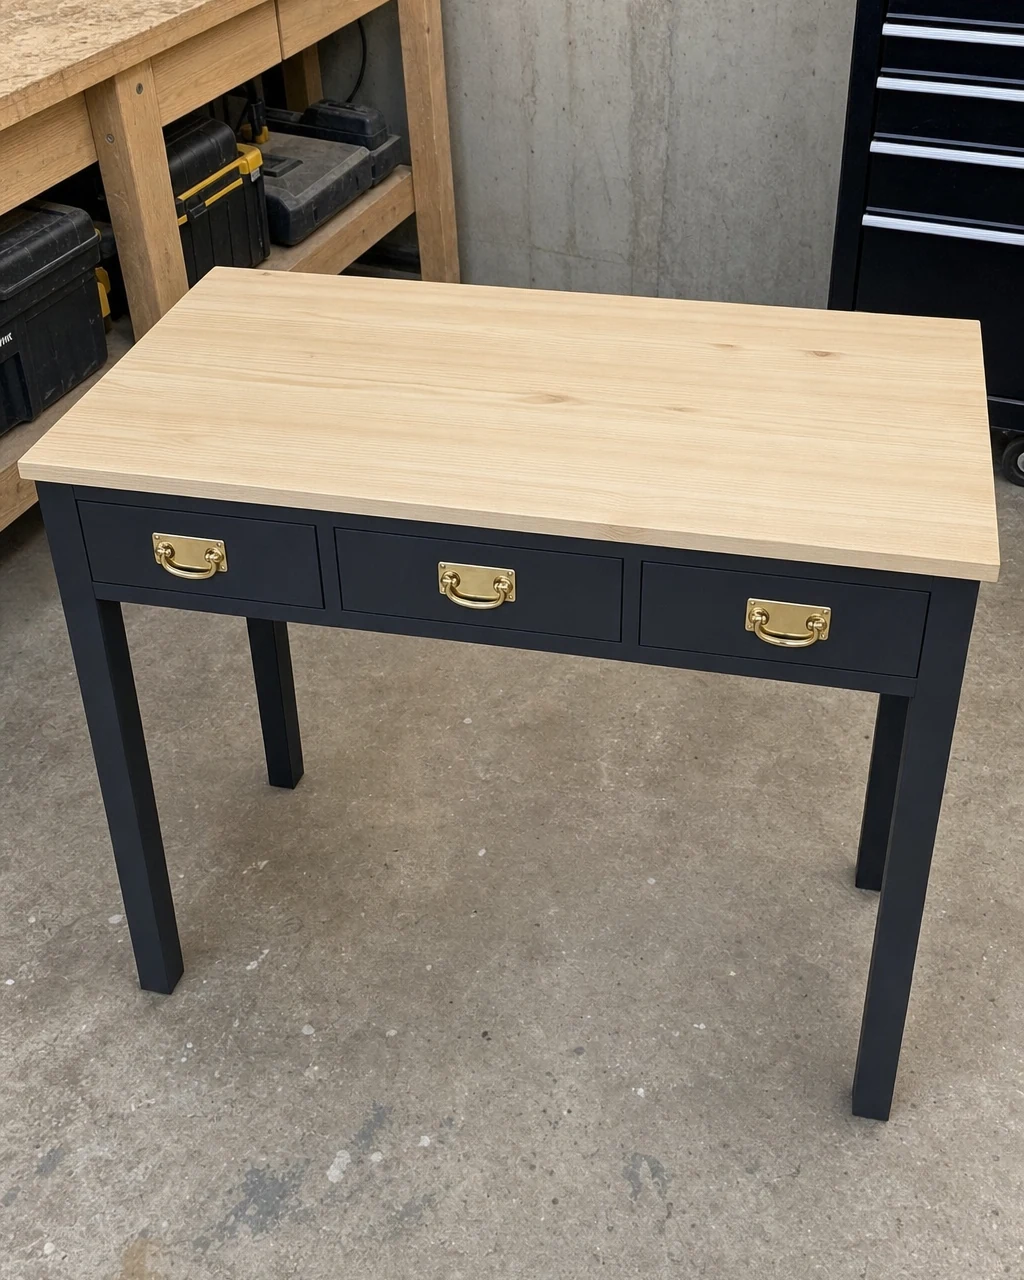
Apply a matte water-based topcoat to the pine using a bristle brush to seal and protect the bleached surface. Once the polyurethane is completely dry, screw the polished pulls back into the freshly painted charcoal drawer fronts.
Final Assembly Details
Allow the topcoat to cure fully before placing heavy objects on the desk. Matte topcoats protect the raw look without adding shine, ensuring the stark contrast between the blonde wood top and the dark matte base remains the focal point.
Step 7: Style the Modernized Desk
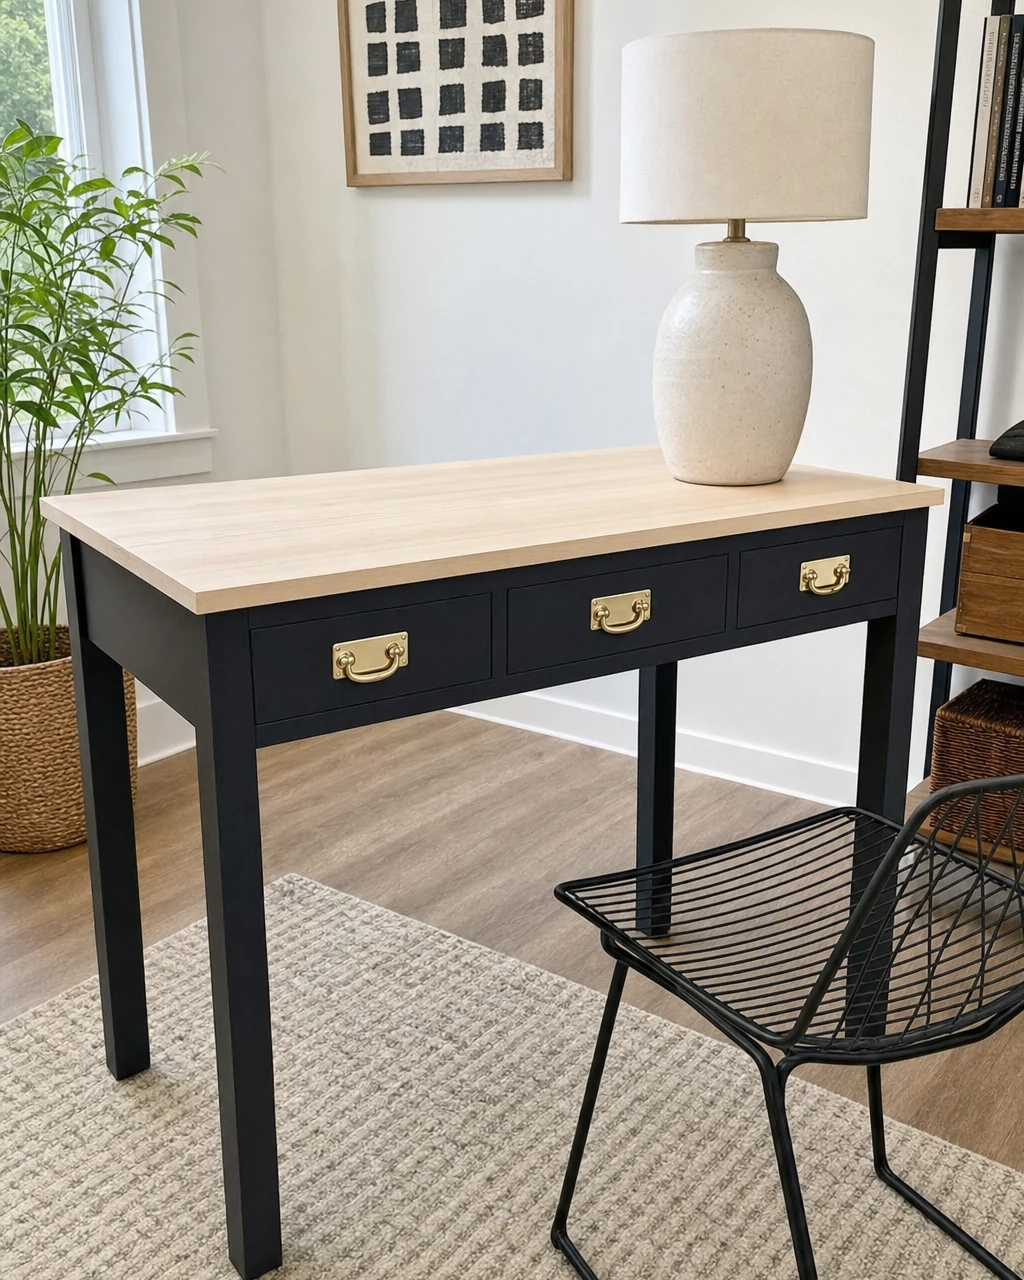
Move the desk into a home office, styling it with a modern chair, a sleek lamp, and minimal accessories. The finished piece looks high-end, bridging the gap between vintage construction and contemporary design for daily use.
Placement and Handling
Lift the solid pine desk from the base frame, not the overhanging top, when moving it. Two-tone finishes bridge the gap between vintage and contemporary, transforming a scratched relic into a sleek, matte contemporary workspace.