
Dining Chair DIY Makeover with a Custom Mosaic Tile Seat
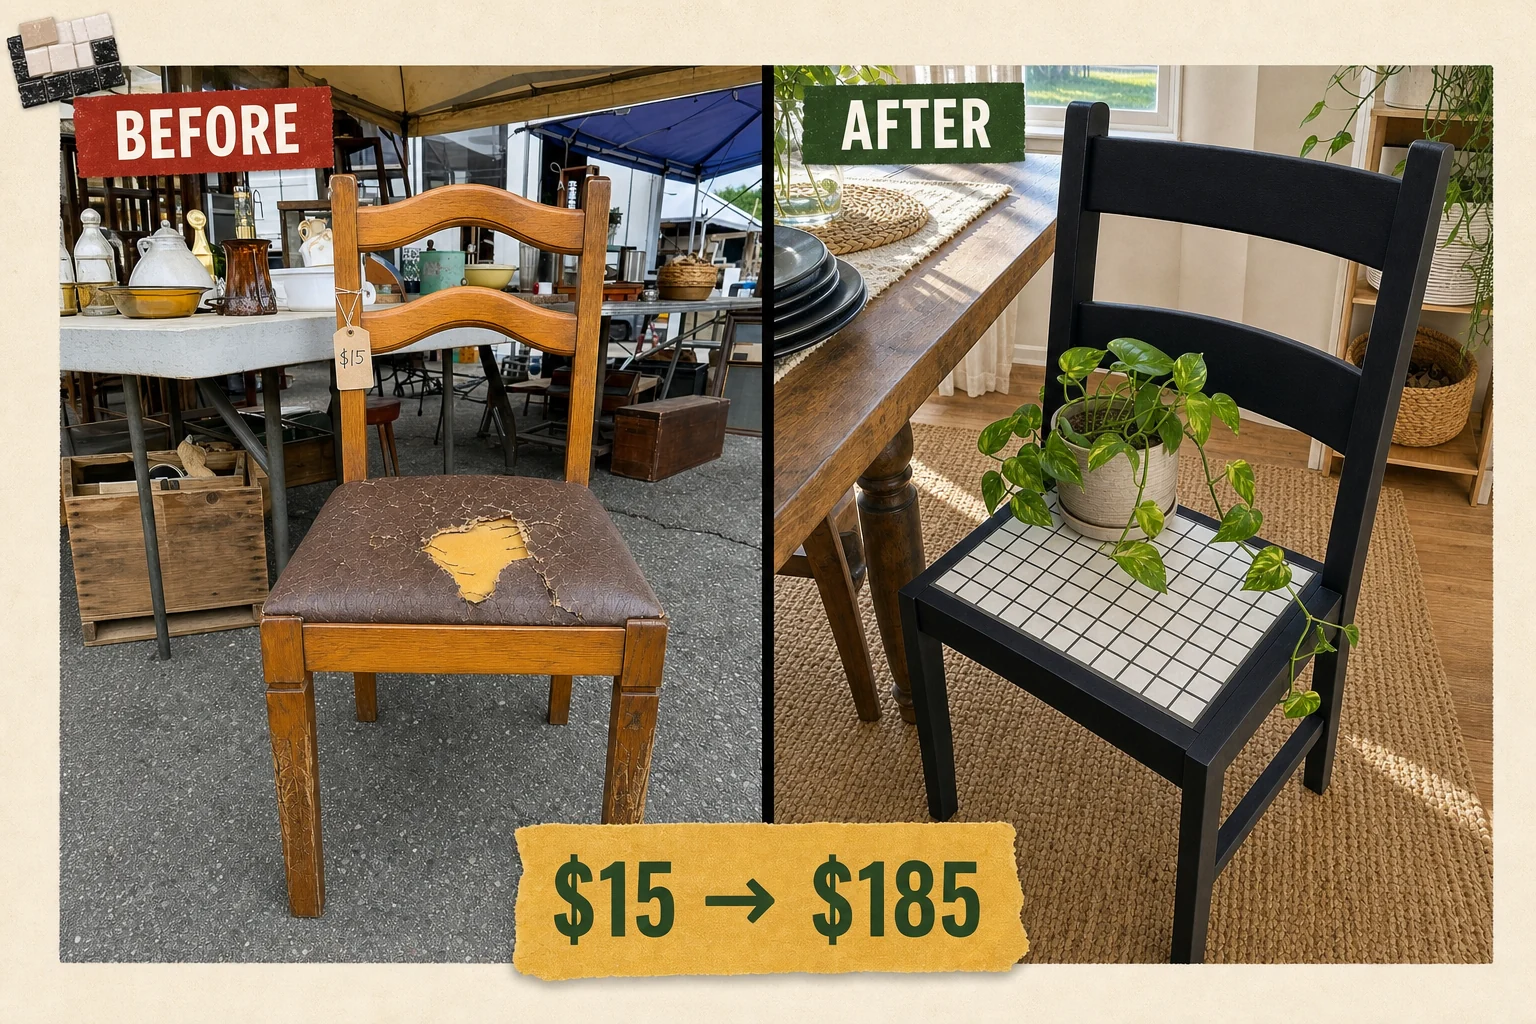
Tucked behind galvanized buckets at a flea market, this 1940s oak dining chair had great bones but a ruined vinyl seat. We transformed it by painting the frame matte black and building a custom geometric mosaic tile drop-in seat.
Assessing the Flea Market Find
An outdoor weekend flea-market stall under mismatched canvas canopies, surrounded by folding tables and wooden crates, yielded this sturdy 1940s wooden dining chair. While the classic upright silhouette featured beautiful curved backrest splats, the piece was abandoned due to significant structural and cosmetic damage.
- Brittle, cracked vinyl seat: Large splits in the material revealed deteriorating yellow foam underneath, rendering the chair unhygienic and uncomfortable to sit on.
- Deep gouges in the frame: Heavy impact scratches cut completely through the honey stain on the front legs, requiring structural filling and an opaque finish to conceal the damage.
Project Valuation and Resale Potential
The combination of a sturdy vintage oak frame and a custom, waterproof ceramic mosaic surface elevates this piece significantly. This transformation turns a basic dining chair into a highly durable, boutique-style accent piece, easily justifying the estimated resale value. Note that the resale value remains an editorial estimate rather than a completed sale.
| Item | Cost |
|---|---|
| Purchase Price | $15 |
| Epoxy Wood Filler | $8 |
| Matte Black Enamel | $18 |
| Plywood Panel | $12 |
| Ceramic Mosaic Tile | $14 |
| Premixed Thinset | $10 |
| Sanded Charcoal Grout | $12 |
| Heavy-Duty Screws | $4 |
| Total Investment | $93 |
| Estimated Resale Value | $185 |
| Value Gain | $92 |
Step 1: Remove the Ruined Seat
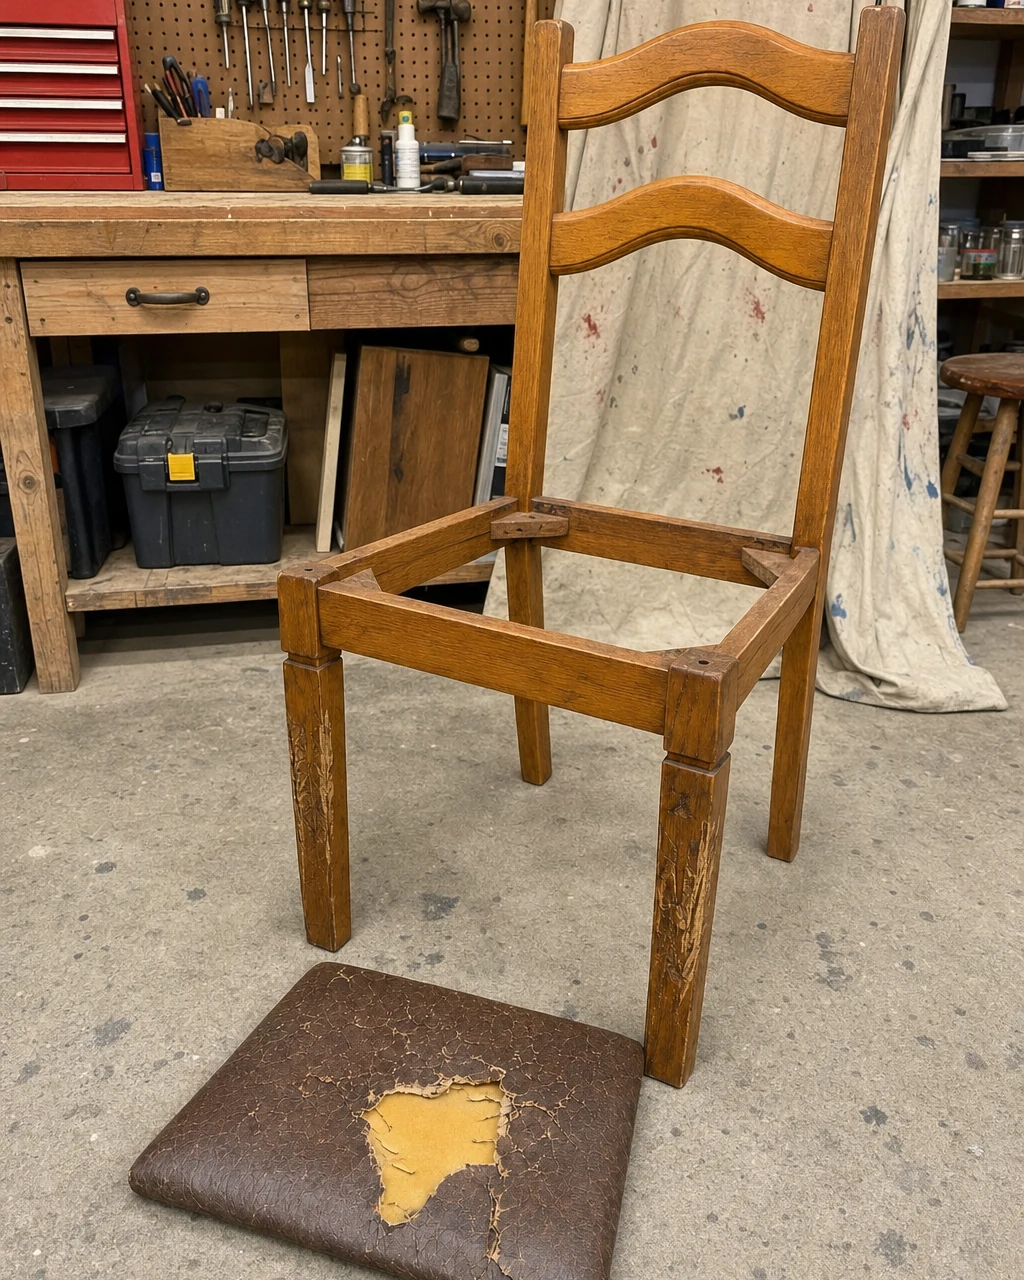
Inspect the sturdy 1940s oak frame for loose mortise and tenon joints before beginning this extensive transformation. The found chair sits in the workshop with its cracked vinyl seat intact, requiring careful handling. Always wear heavy work gloves when handling brittle, cracking vinyl to protect your hands from sharp edges.
Detaching the Drop-In Base
Use a manual screwdriver to carefully remove the four original corner-block screws from underneath the chair structure. Once unscrewed, lift the cracked vinyl seat directly out of the wooden frame. The original corner blocks make dropping out the damaged yellow-foam seat effortless, leaving the oak frame completely empty and separated.
Step 2: Fix Deep Wood Gouges
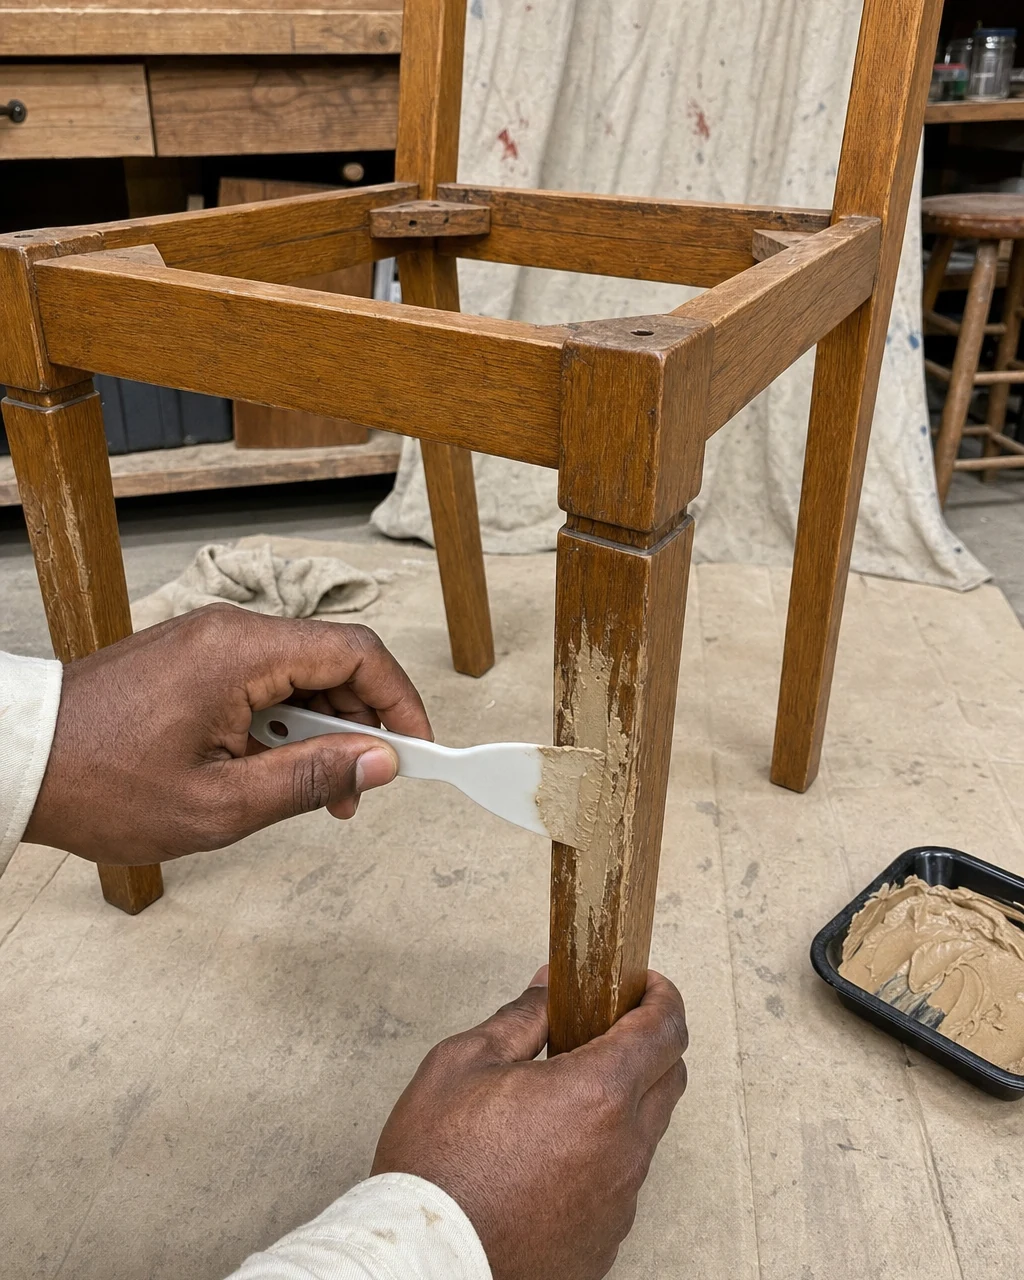
Spread two-part epoxy wood filler into the heavy impact scratches on the front legs using a plastic putty knife. This specialized filler cures harder than the original oak, providing a solid foundation for the new finish. Always wear a protective dust mask while sanding epoxy filler to avoid inhaling fine particulate matter.
Smoothing the Oak Frame
Allow the filler to cure completely for at least 30 minutes. Once hardened, sand the entire frame with a 120-grit sanding block to degloss the old honey stain and smooth the patched areas. The frame should look dull, perfectly flush, and patched with gray filler, ready for an opaque coating.
Step 3: Paint for a Modern Look
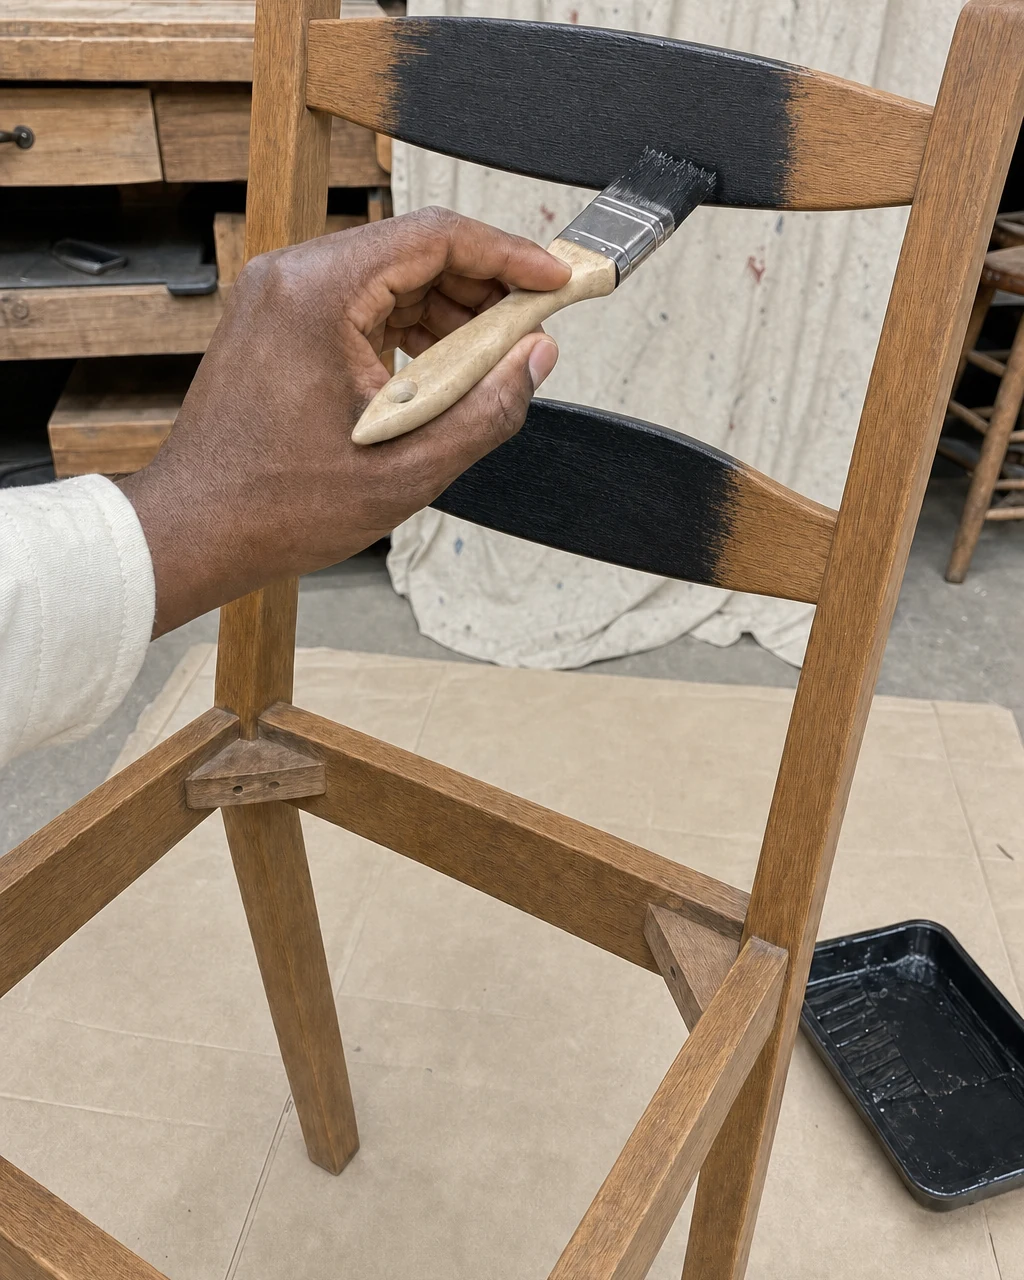
Wipe the sanded and patched frame completely clean of fine dust using a slightly damp microfiber rag. Lay down a protective canvas drop cloth and use a high-quality synthetic paintbrush to apply the first coat of matte black enamel paint to the curved wooden backrest splats and square front legs. Ensure proper cross-ventilation when applying enamel paint indoors.
Applying the Final Coat
Allow exactly four hours of drying time before brushing a second coat onto the sanded oak. This opaque enamel finish provides a highly durable shell against daily kicks while completely concealing the previous structural damage and gray patches. The chair frame is now completely coated in a sleek, opaque matte black finish.
Step 4: Create a Mosaic Seat
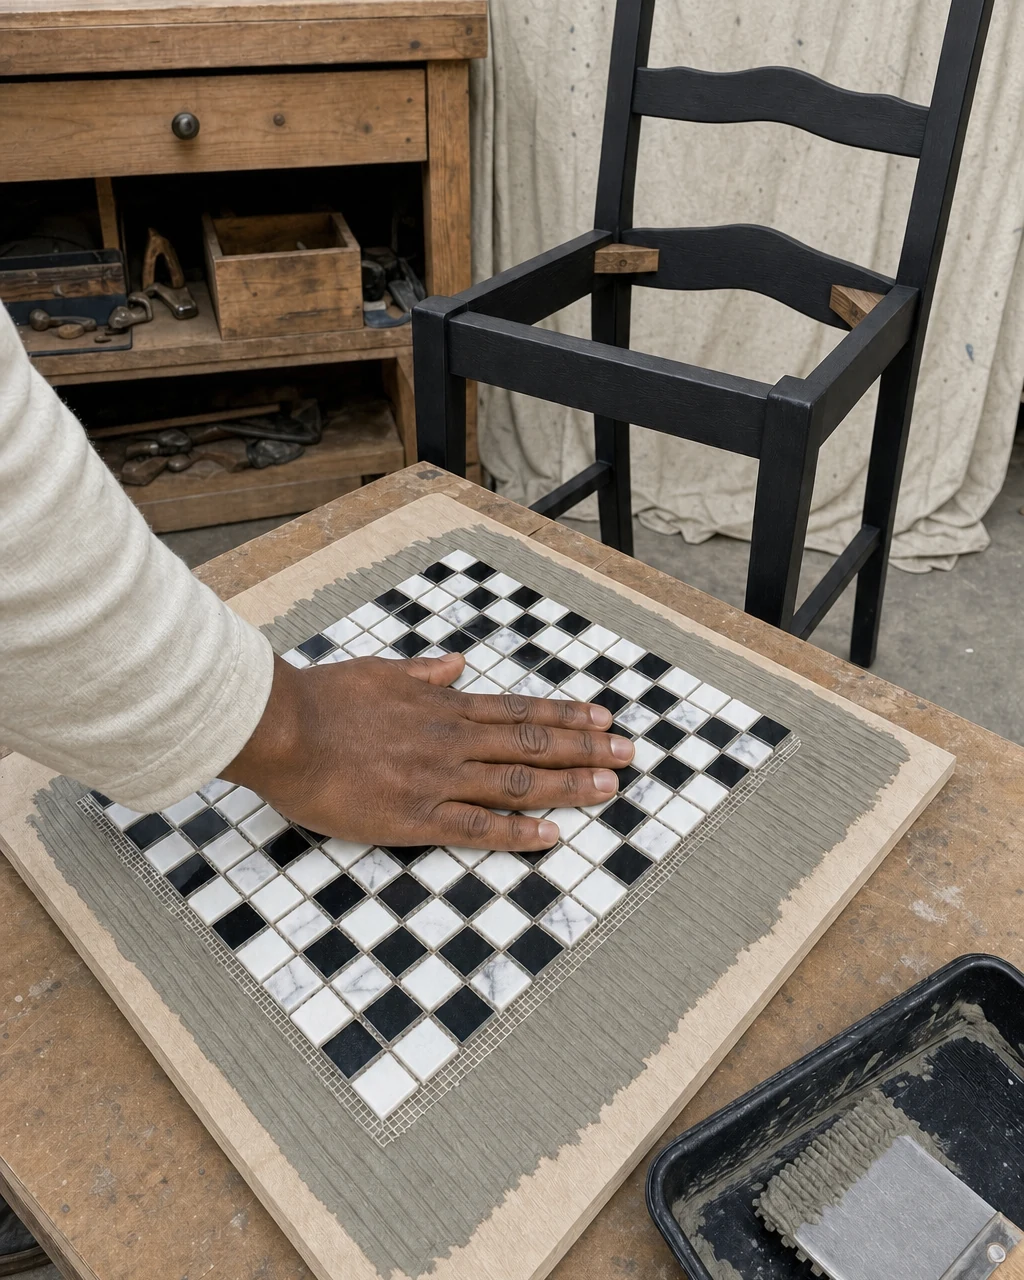
Use a power jigsaw to cut a sturdy 1/2-inch plywood board to the original drop-in seat dimensions. Trowel premixed thinset adhesive generously onto the new rigid base using a notched trowel. Always wear protective safety glasses when cutting plywood with a jigsaw to shield your eyes from flying wood chips.
Materials checklist
Setting the Ceramic Pattern
Press a mesh-backed sheet of black-and-white ceramic mosaic tiles firmly into the combed thinset adhesive. The convenient mesh backing keeps the intricate geometric pattern perfectly aligned while the adhesive cures. Ensure the tiles are firmly embedded in the adhesive on the plywood base before setting the piece aside.
Step 5: Grout the Tile Joints
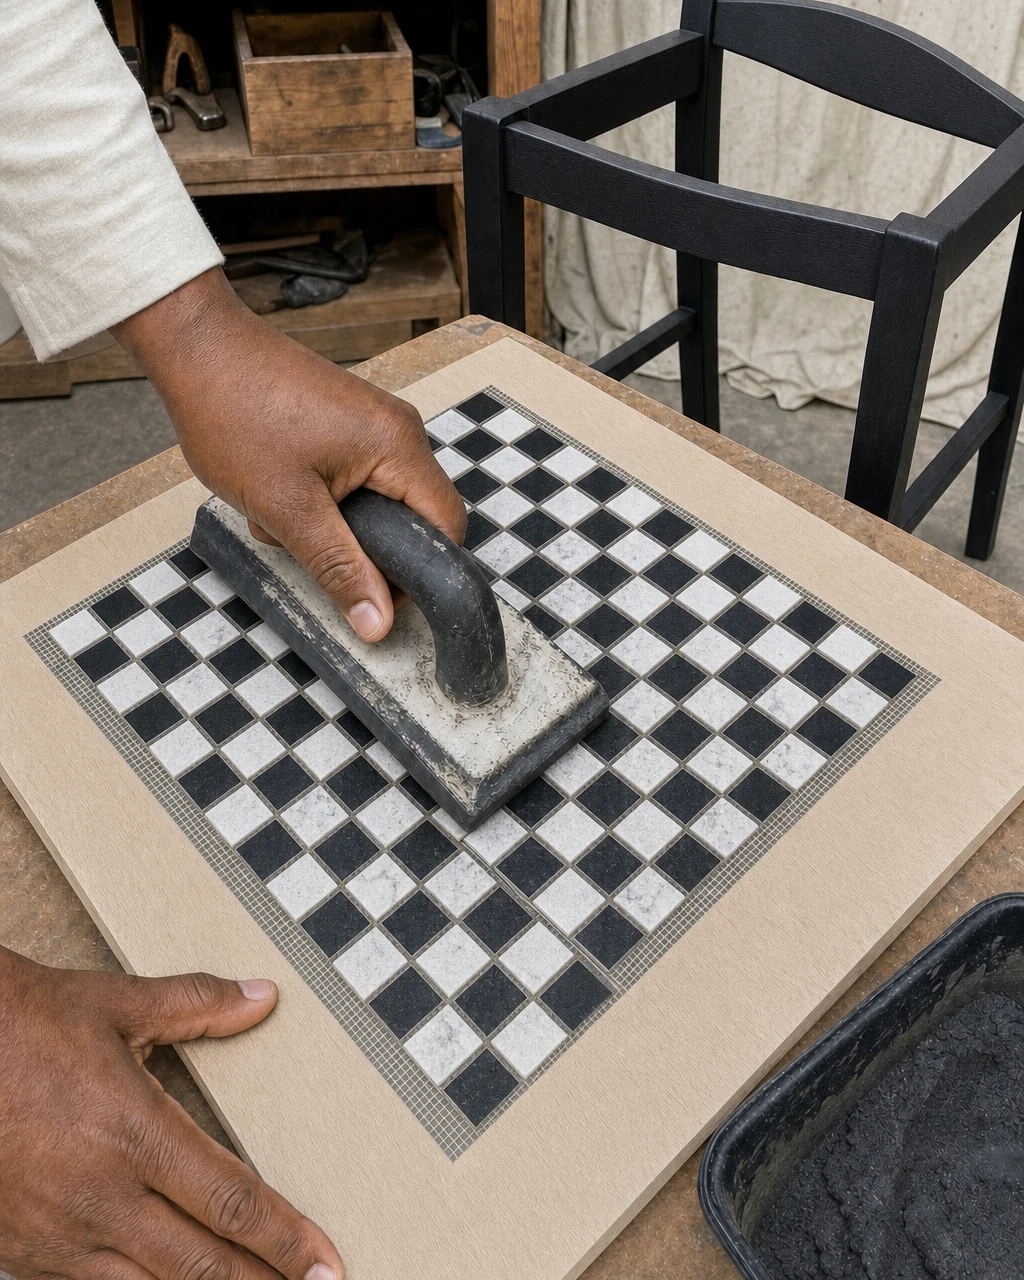
After the thinset has cured for 24 hours, locking the tiles to the plywood, prepare your grouting tools. Use a rubber grout float to sweep sanded charcoal grout diagonally across the ceramic tiles, pressing it deeply into the joints. Wear nitrile gloves to protect your skin from highly alkaline grout.
Revealing the Geometric Design
Wipe the tiled surface clean with a damp sponge to reveal the crisp black-and-white pattern. The dark grout unifies the design, fills the joints completely, and hides future stains effectively. Let the newly applied grout cure undisturbed for another 24 hours before handling the heavy seat.
Step 6: Secure the Heavy Seat
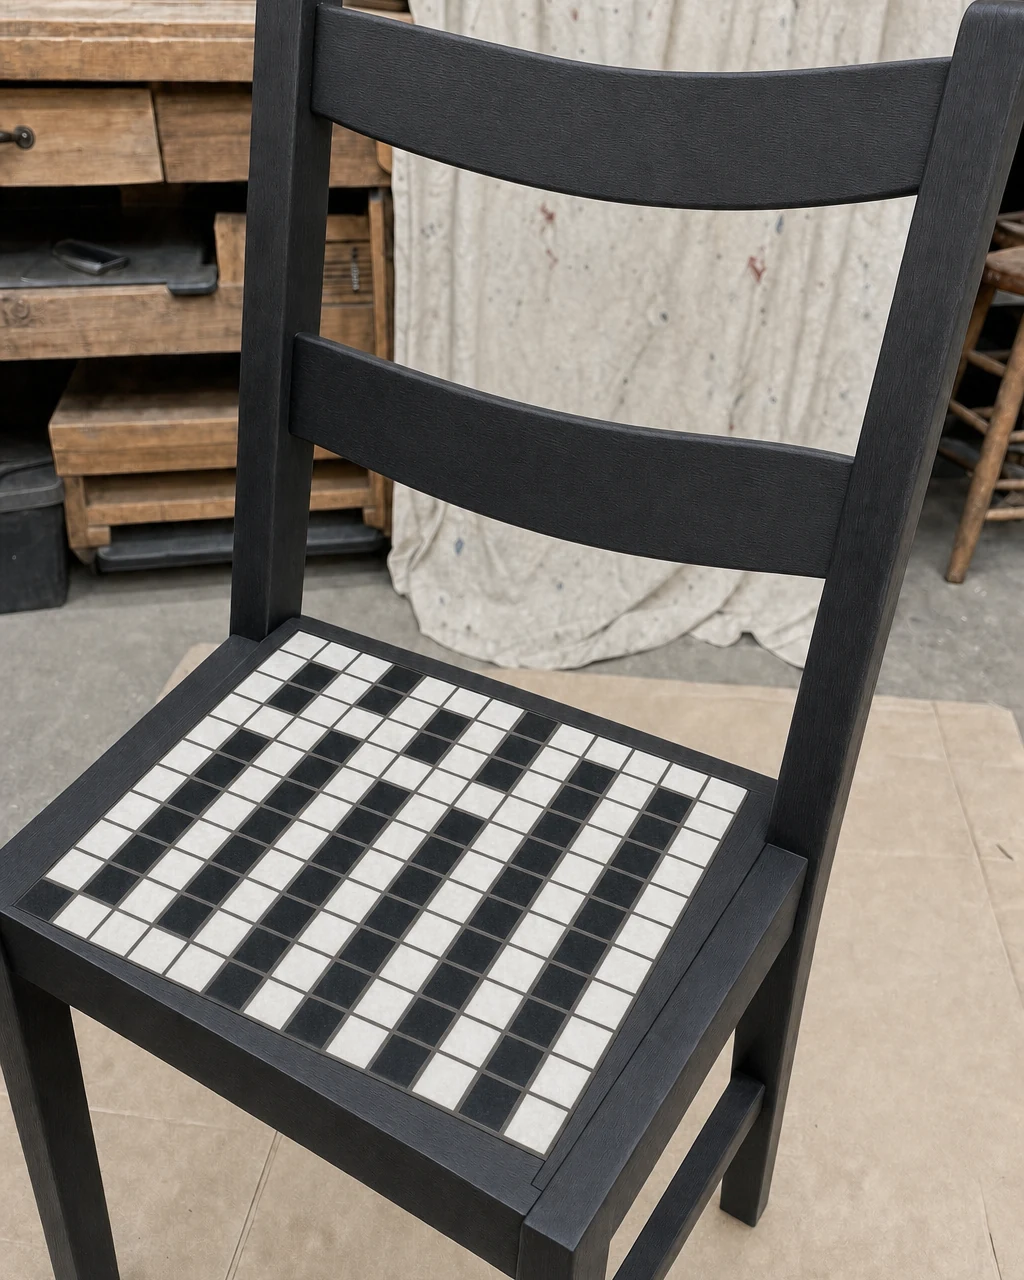
Carefully drop the fully cured, heavy mosaic seat into the dry painted frame. Ensure the newly tiled surface sits perfectly flush with the surrounding black wood for a professional finish. The painted frame should be completely dry and the grouted tile seat fully cured before attempting this final structural assembly.
Driving the Upgraded Fasteners
Secure the new custom seat from below using a power drill and heavy-duty wood screws. Drive the upgraded screws upward through the original structural corner blocks to safely support the extra weight of the ceramics. Always keep your fingers clear of the spinning drill bit when driving screws into the dense oak.
Step 7: Style Your New Accent
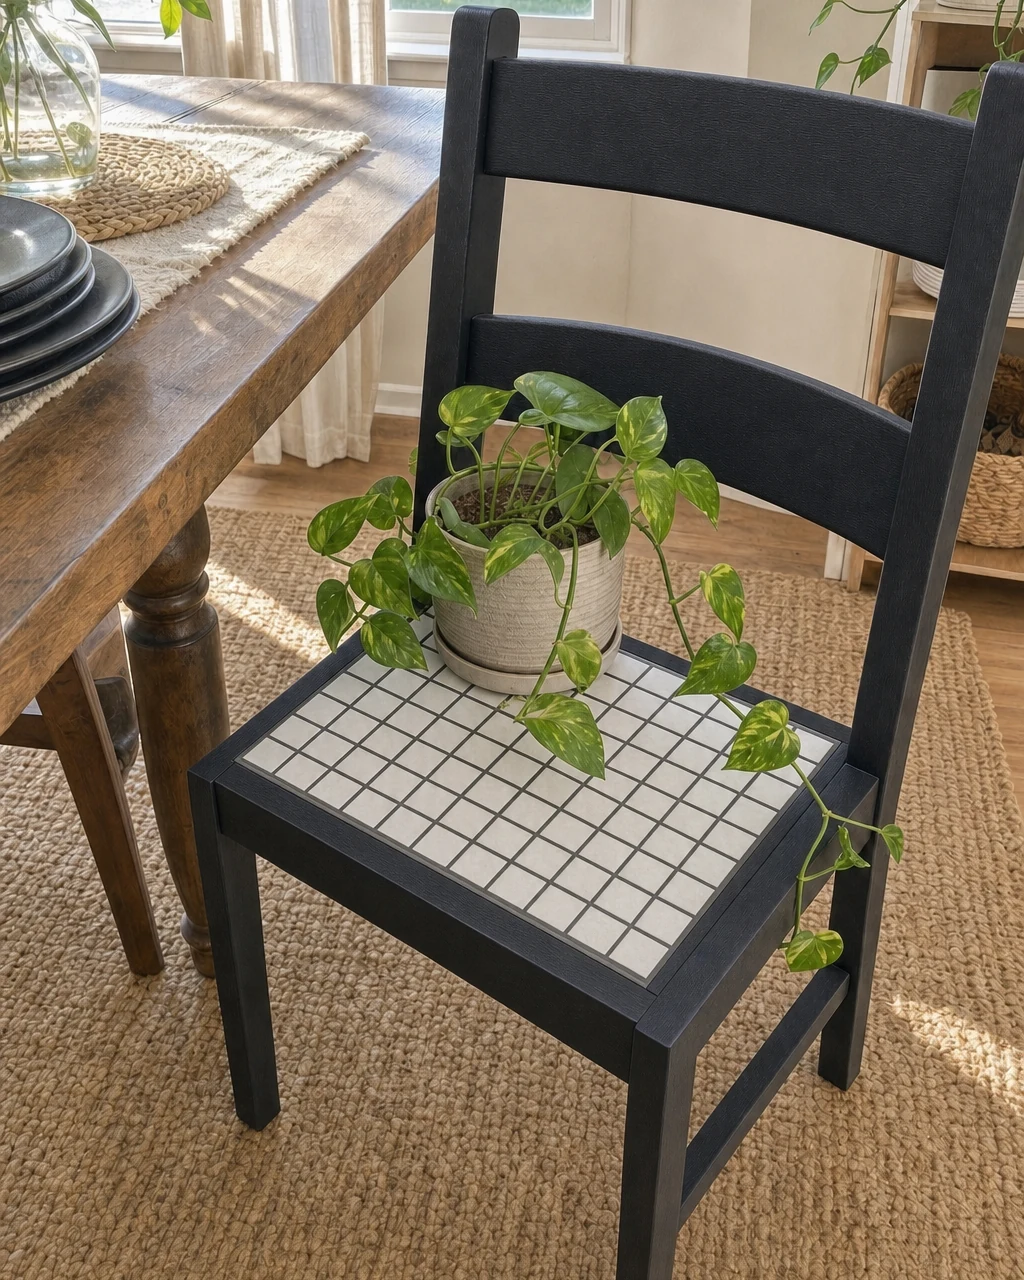
Move the finished chair into a bright, sunlit dining nook. The waterproof ceramic surface transforms this ordinary wooden seat into a versatile piece of functional architecture. When relocating the piece, always lift the finished chair from the sturdy wooden frame, never from the fragile tile edge.