
Large Woven Basket DIY Makeover with a Two-Tone Dip Dye
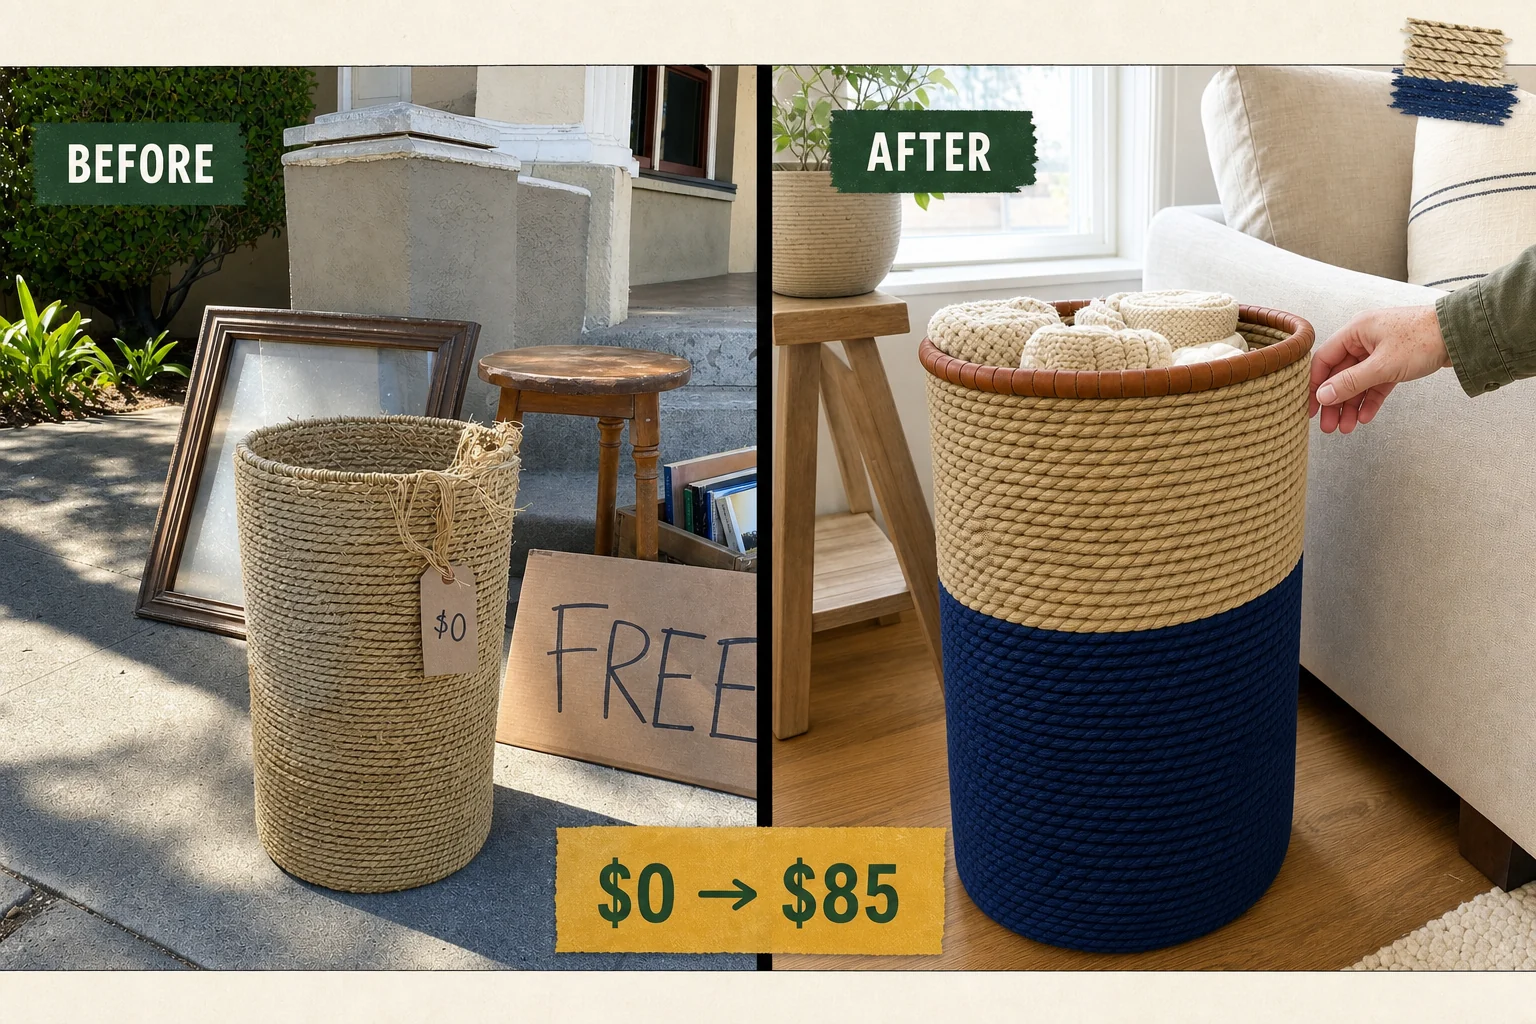
I rescued this faded 90s floor basket from a curbside free pile to save it from the trash. This DIY makeover transforms the brittle, unraveling cylinder into a modern storage piece featuring a crisp two-tone dip dye and a chunky leather-wrapped rim.
Assessing the Basket Damage
Finding this tall, straight-sided cylinder sitting on a concrete pavement beside a handwritten FREE sign presented a great opportunity. The piece suffered from brittle, sun-bleached fibers, leaving a pale, dry texture that cracked slightly under pressure. This extreme dryness weakens the basket walls and prevents even dye absorption, requiring immediate hydration before any structural work begins.
- The sun-bleached seagrass requires gentle handling and moisture to restore flexibility and prevent further damage.
- The frayed top rim features unraveling binding threads and loose coils at the upper edge, necessitating a complete rebinding.
Step 1: Evaluate the Basket Condition
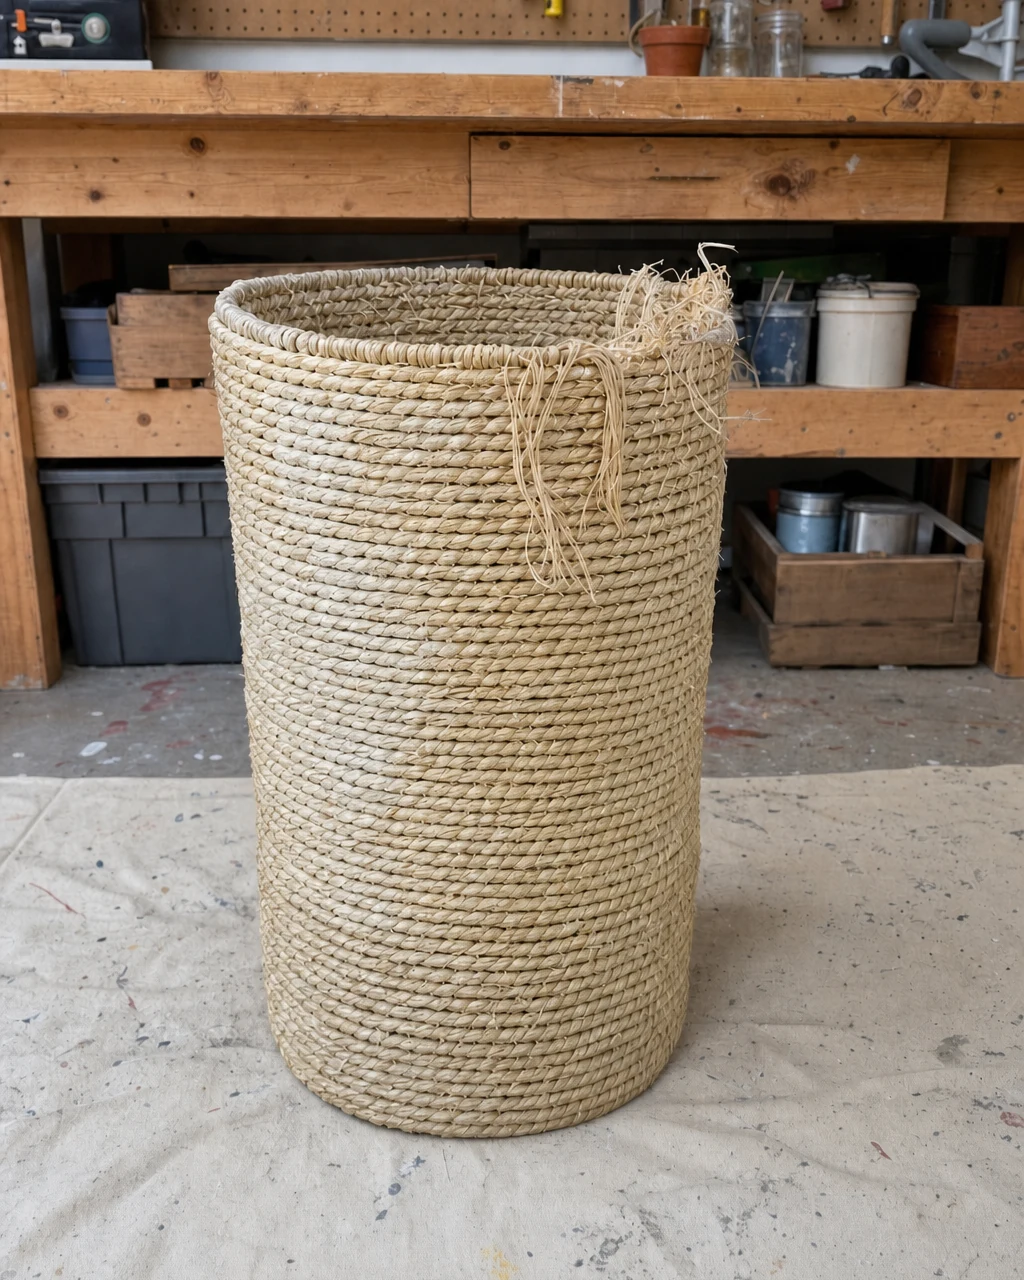
Resting the sun-bleached basket on a canvas drop cloth makes it easier to evaluate the frayed rim and brittle fibers. Inspect the unraveling rim to determine the necessary repairs, and use a brush to gently clear away any loose dust or debris from the surface. Handle brittle seagrass gently to avoid snapping the main structural coils.
Materials checklist
Once the surface is clean, mark the intended dye line placement on the full basket to guide the upcoming color block treatment. The basket is now properly staged for repair with the damaged rim clearly visible.
Step 2: Trim the Loose Fibers
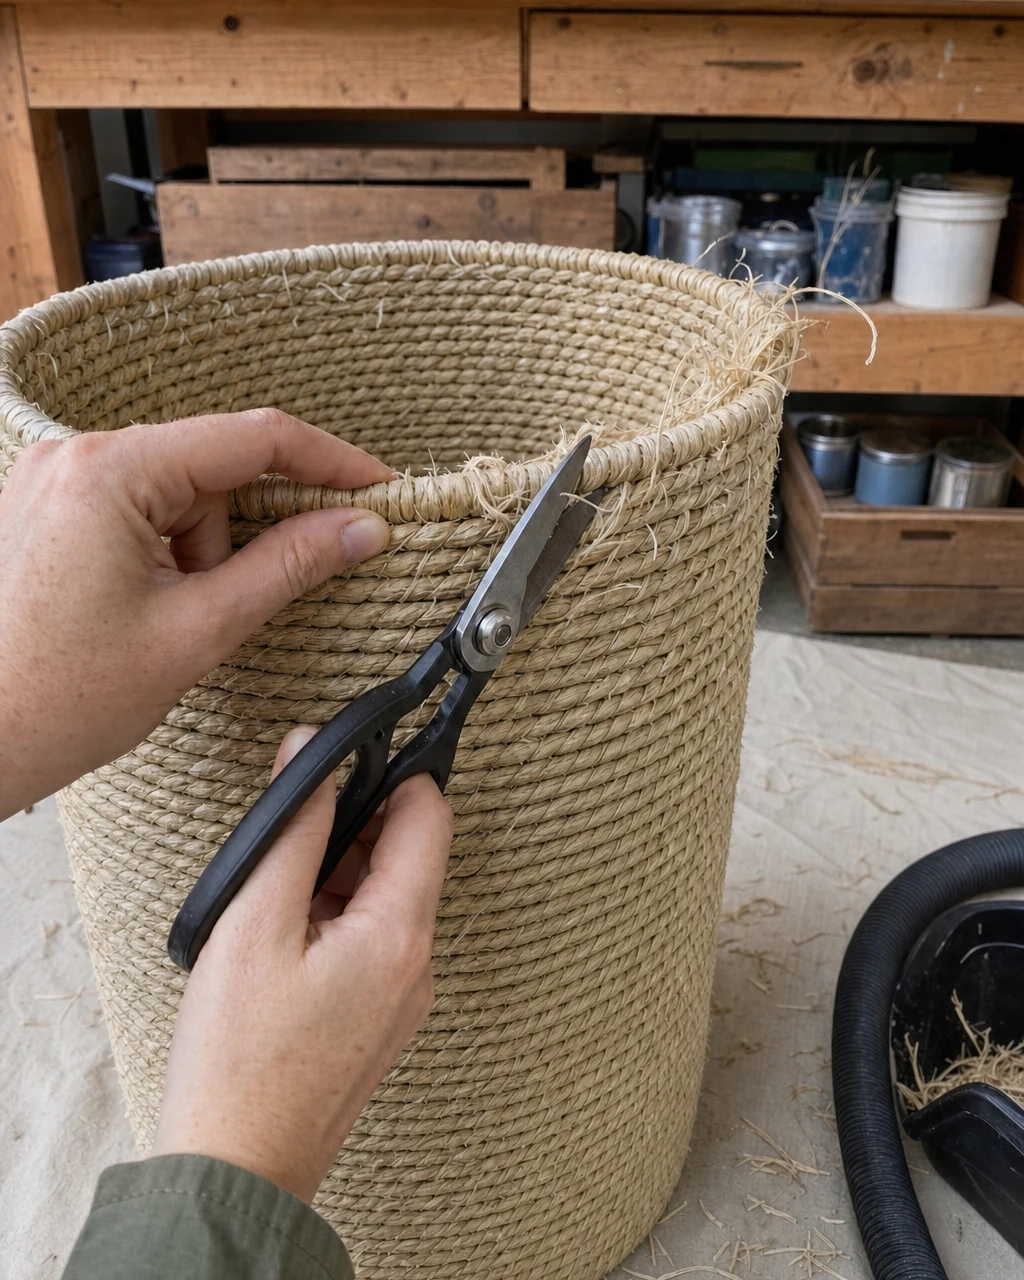
Snip away the broken seagrass strands from the top coil using heavy-duty craft snips. Removing these broken pieces ensures the top edge is clean and free of protruding debris before you begin the rebinding process. Always wear safety glasses when snipping dry fibers to protect eyes from flying debris.
Mist the basket lightly with water using a spray bottle to hydrate the brittle fibers. This essential moisture restores flexibility to the dry seagrass, preparing it for the tension of the new binding. The top edge is now clean and ready for structural reinforcement.
Step 3: Bind the Rim With Leather
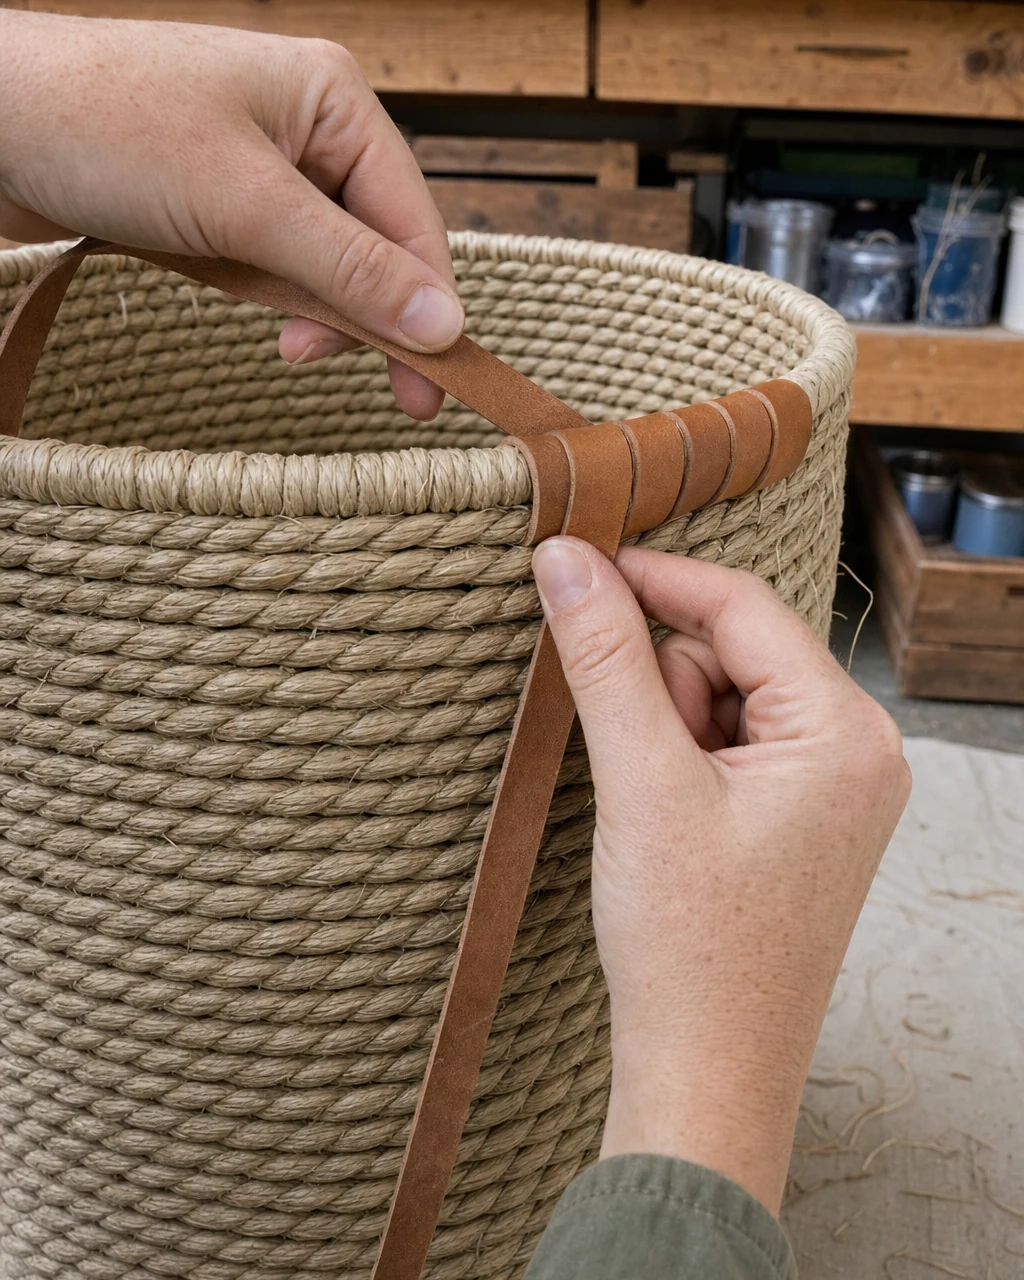
Wrap flat leather lacing tightly around the top two coils to bind the loose seagrass together. The thick leather provides a durable grip that outlasts natural twine while adding a contrasting texture. Pull the leather cord firmly but steadily to avoid snapping the lacing during installation.
| Item | Cost |
|---|---|
| Purchase price | $0 |
| Liquid synthetic dye | $8 |
| Flat leather cord | $12 |
| Total investment | $20 |
| Estimated resale value | $85 |
| Value gain | $65 |
Use scissors to trim the leather cord, then knot it securely on the inside of the basket to stabilize the rim. This tightly secured edge prevents any future structural unraveling, leaving the top edge neatly finished with a contrasting leather wrap.
Step 4: Prepare the Hot Dye Bath
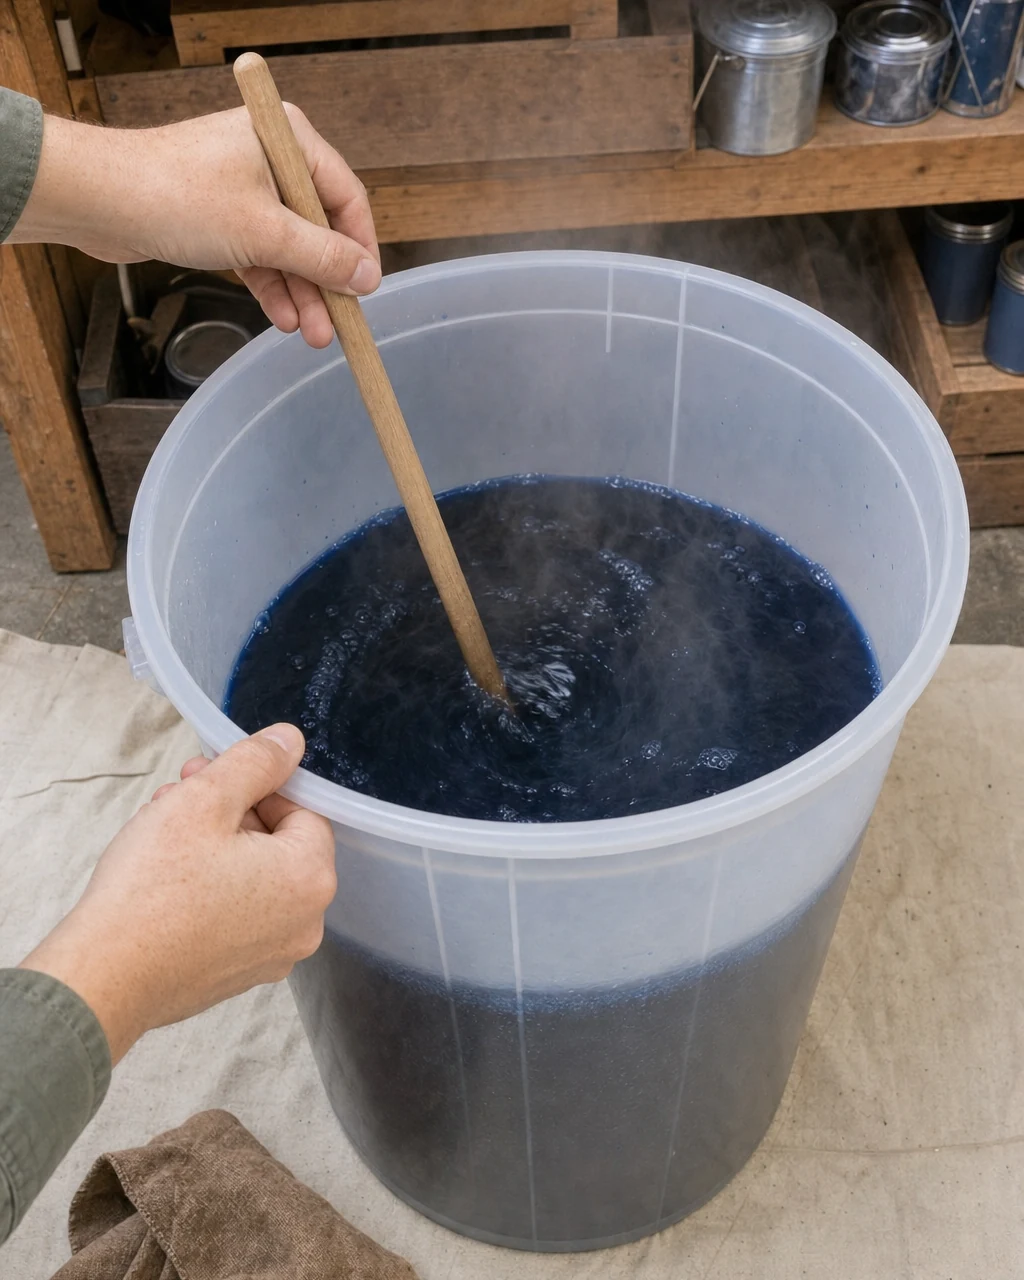
Set up your workspace by placing a drop cloth on the floor to protect the surface. Fill a large plastic storage tub with steaming hot water, ensuring there is enough depth to submerge the bottom half of the basket. Wear thick rubber gloves and work in a well-ventilated area when handling hot dye to ensure safety.
Mixing the Synthetic Formula
Stir in the dark blue liquid synthetic dye using a stirring stick until it is fully dissolved. Synthetic dye bonds much better with aged plant fibers than standard all-purpose formulas, creating a deep, opaque blue bath ready for the basket. The large tub is now filled with dark blue liquid, properly mixed for maximum absorption.
Step 5: Dip Dye the Basket Base
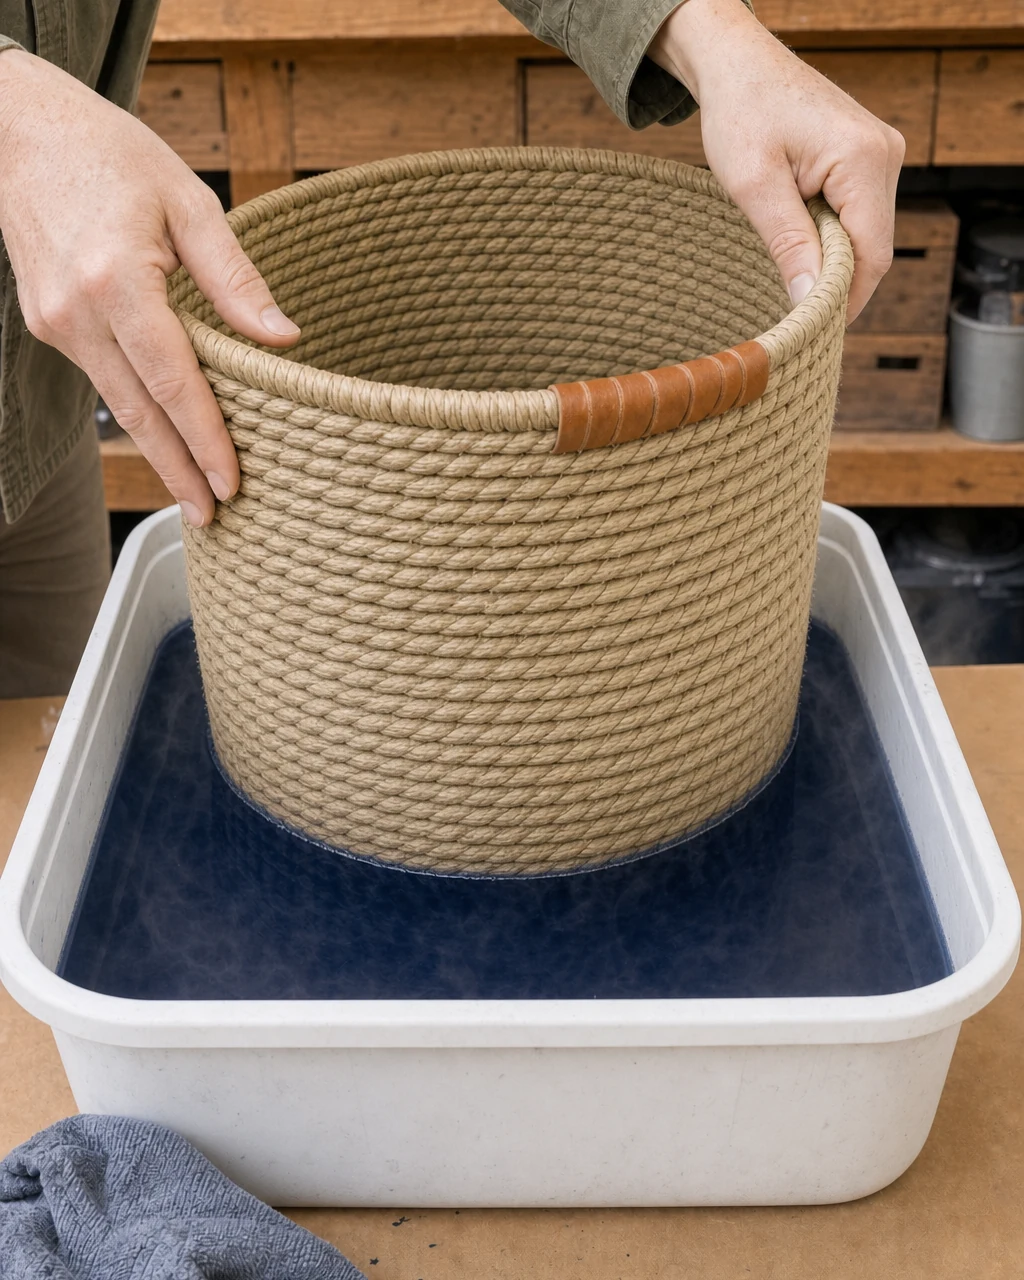
Lower the bottom half of the seagrass basket straight down into the dark blue dye bath. Submerging the piece quickly and steadily creates a sharp color line without muddy bleeding up the fibers. Protect the surrounding floor with a waterproof drop cloth to catch inevitable drips during the process.
Hold the basket steady in the hot dye for ten minutes to ensure maximum color saturation. Once the bottom half is saturated with dark blue dye, lift it out carefully and set it aside to dry overnight. The bottom half of the basket is now saturated with vibrant dark blue dye.
Step 6: Review the Finished Piece
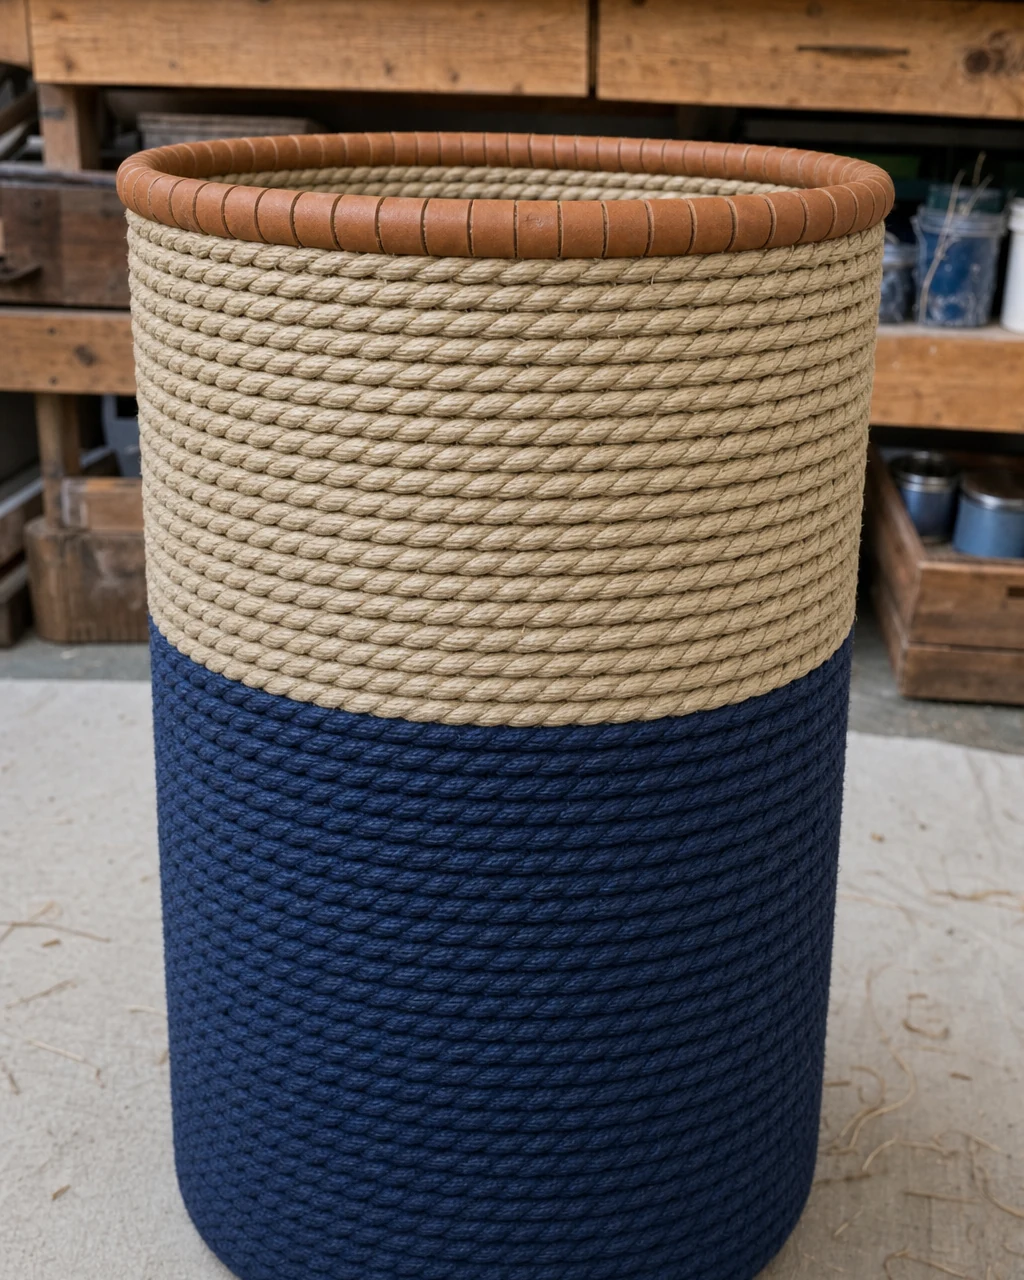
Inspect the fully dried basket on the workbench to ensure the synthetic dye has set evenly across the seagrass. Use a brush to gently sweep away any residual dried dye dust from the surface. Ensure the basket is completely dry before placing it on any porous household surface to prevent accidental staining.
Checking the Structural Details
Verify that the new leather binding remains tight and secure around the top rim. The completed two-tone finish successfully elevates a basic vessel into a structured, modern piece of home decor. The crisp dyed line and new leather rim are clearly visible as the basket sits proudly in the workshop.
Step 7: Style the Basket for Storage
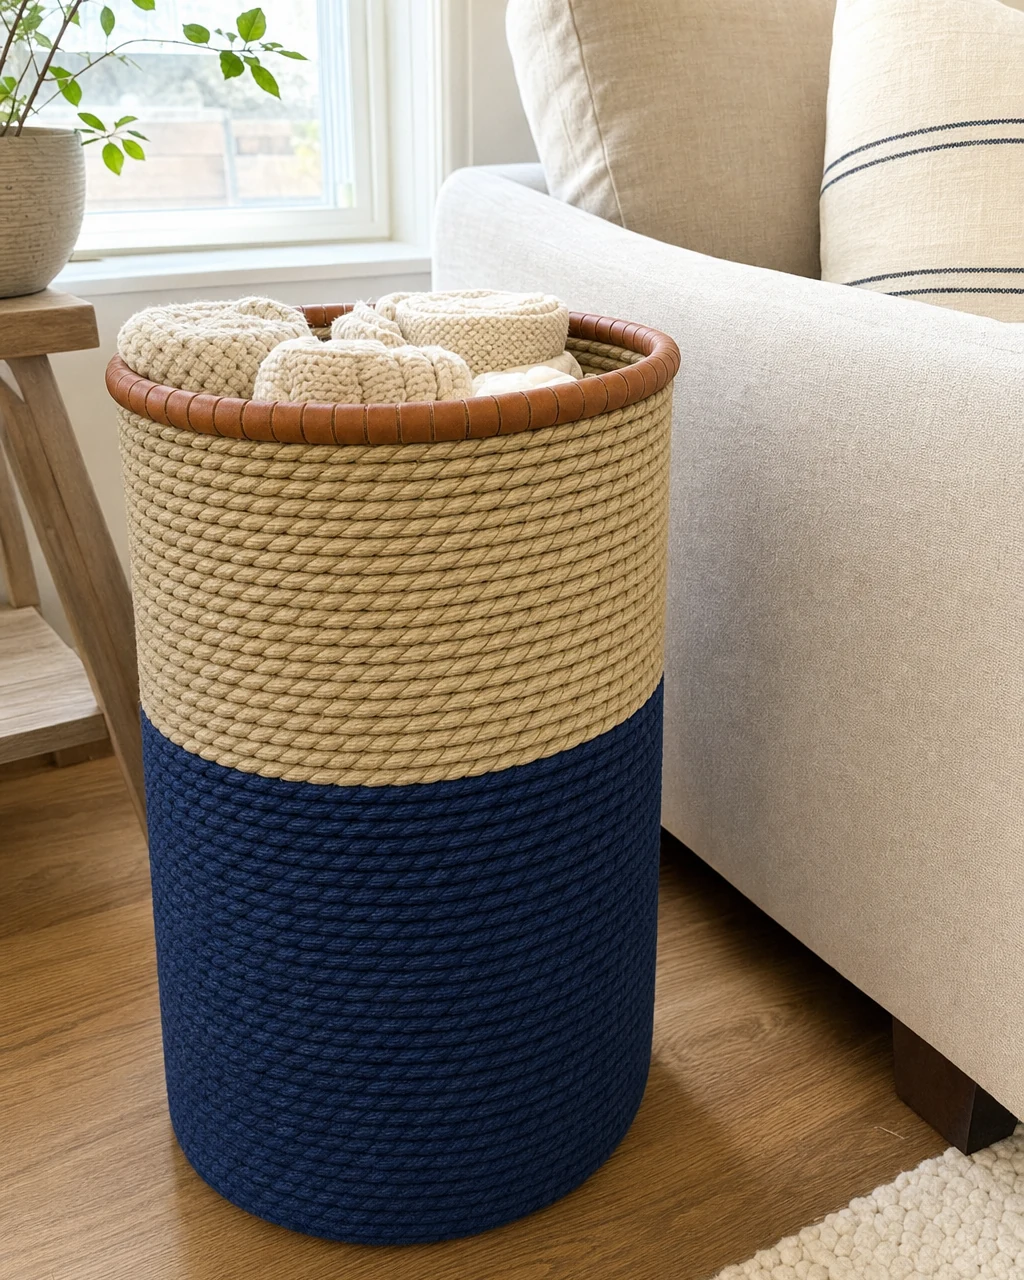
Position the finished two-tone basket next to a linen sofa in a bright, modern living room. The crisp dip-dyed base contrasts beautifully with the chunky leather-wrapped rim, highlighting its new modern look. Keep dyed items out of direct, intense sunlight to prevent the new color from fading over time.
Functional Living Room Decor
This oversized piece now functions as stylish living room storage, easily accommodating three heavy winter layers. The natural seagrass perfectly complements warm oak flooring and soft natural window light.
Valuation and Resale Potential
Large, structurally sound floor baskets retail at a premium in home decor boutiques. The custom leather binding and modern color-block dye treatment elevate this free find to boutique decor standards, justifying a strong estimated resale value.