
Front Yard Dry Creek Landscaping: Step-by-Step Build Guide
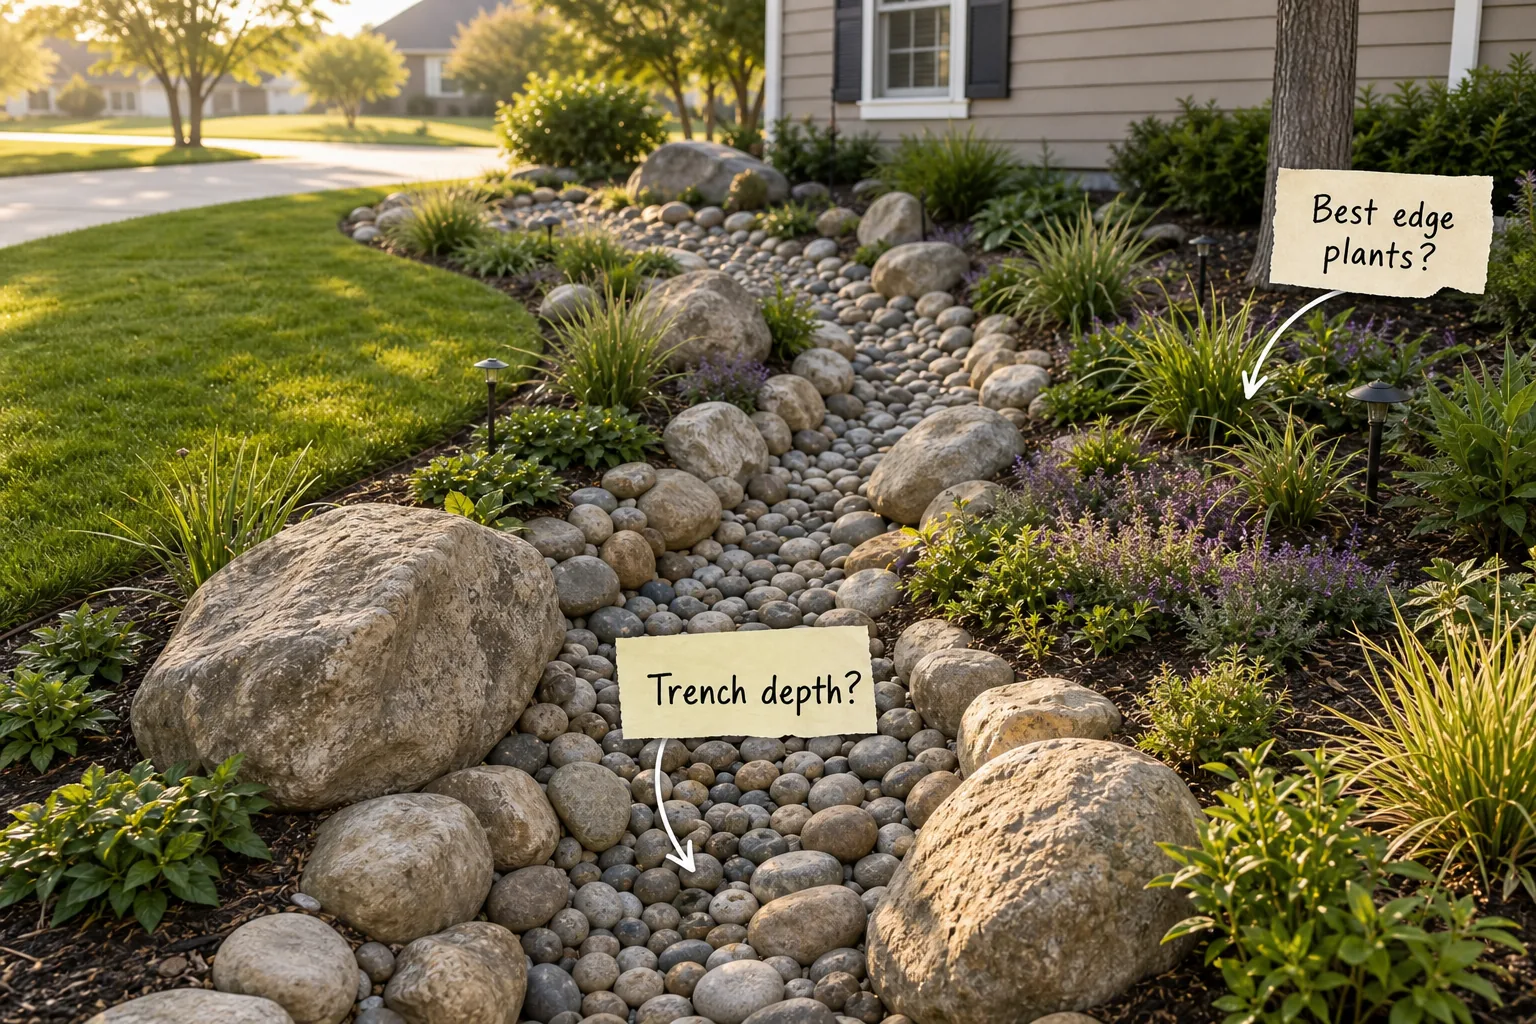
You will be able to dig the correct trench depth, position anchor boulders, and layer river rock to build a professional-looking dry creek bed. This complete step-by-step build guide delivers exactly how to arrange your stones and plants for a natural drainage feature.
Mapping the Creek’s Natural Curve
Use a flexible garden hose or bright spray paint to lay out a meandering path across the front yard before breaking any ground. You should vary the width between 3 and 6 feet, making the channel wider at the bends and narrower in the straightaways.
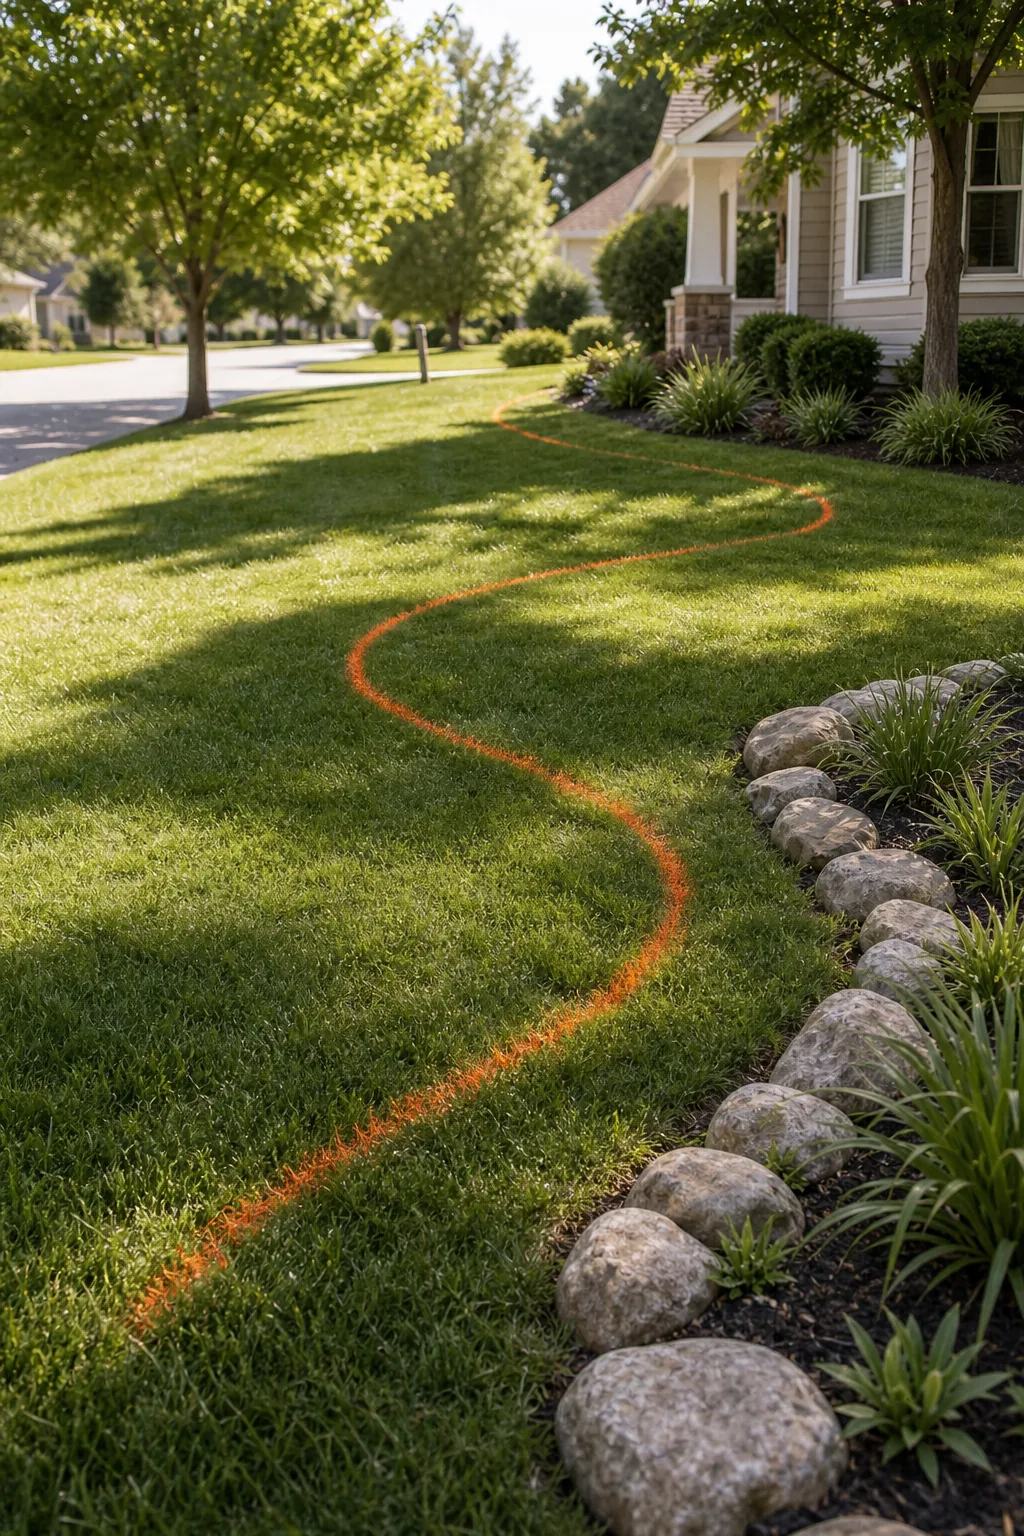
Before you pick up a heavy shovel, take a moment to double-check your painted layout from the street to ensure it mimics how real water behaves. The way you map these initial borders will dictate the success of the entire drainage project.
Evaluating the Yard’s Existing Slope
A highly successful dry creek bed requires a consistent downward gradient to safely move heavy rain away from your foundation. You must identify the highest elevation point and plan the route toward an appropriate municipal drainage zone.
- Drive a wooden stake at the start of your planned creek path.
- Place a second stake at the intended termination point near the street.
- Run a tight string level between the stakes to calculate the elevation drop.
- Ensure a minimum fall of one inch per ten feet for safe drainage.
Measuring this gradient prevents stagnant water from pooling in the center of your newly built feature. A properly sloped channel ensures that torrential downpours will drain completely dry within a few hours.
The Step-by-Step Build Guide & Trench Depths
The secret to a highly functional drainage feature lies in digging the correct trench depth profile from start to finish. The center of the trench should be dug exactly 12 to 18 inches deep to safely handle heavy rain volumes.
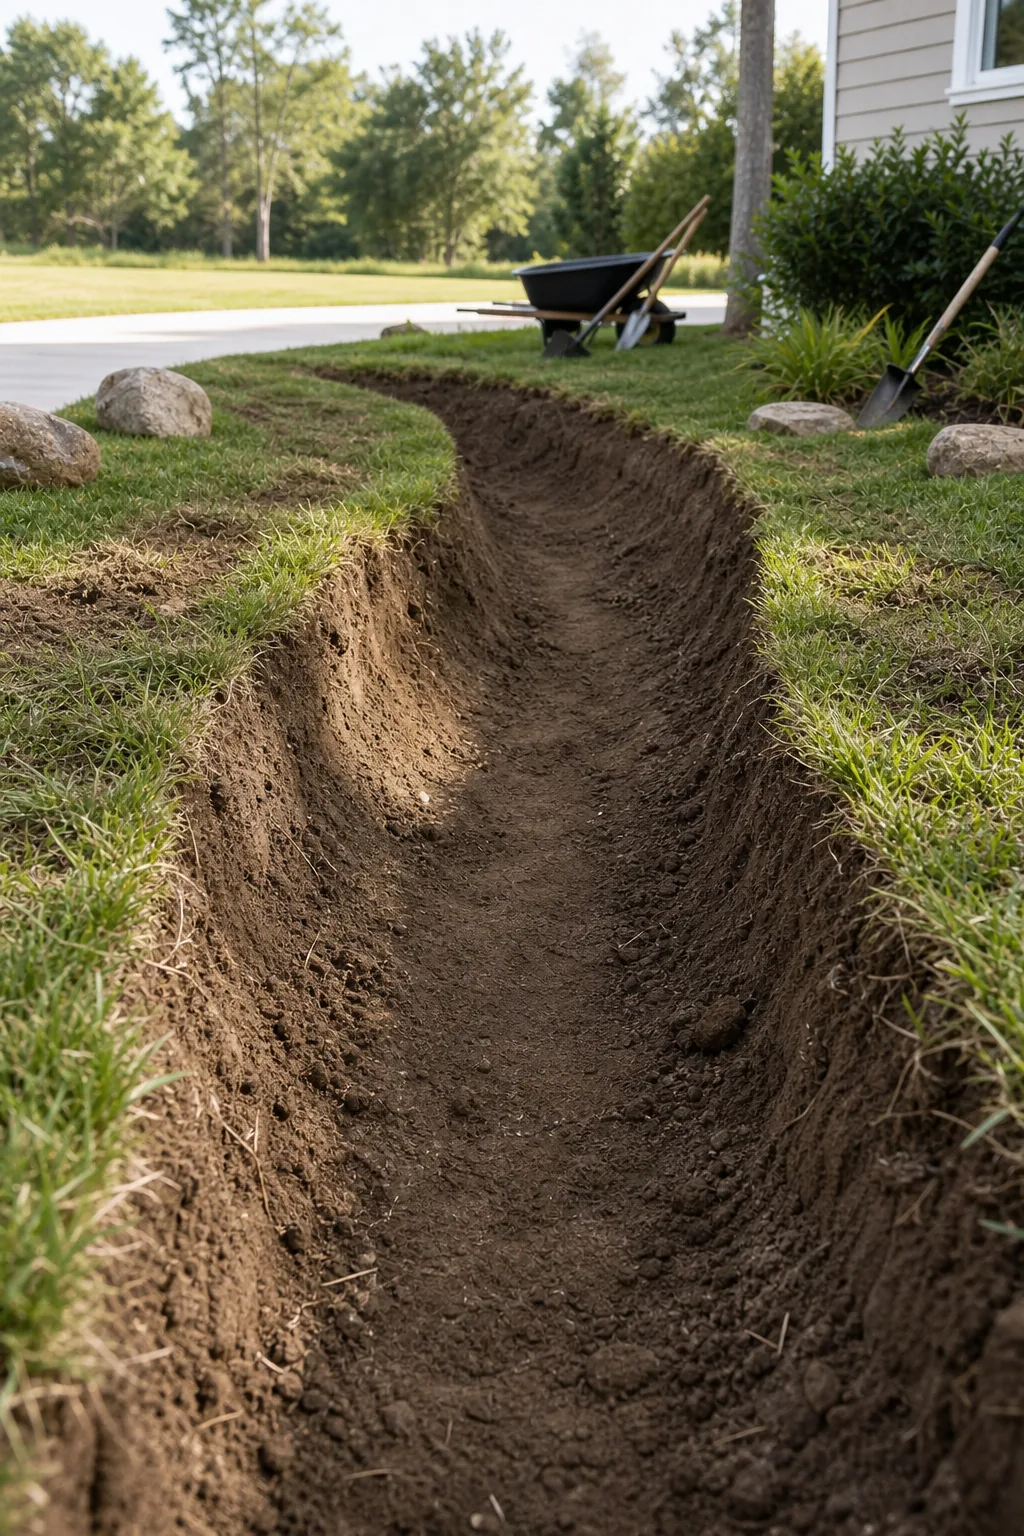
Creating this specific U-shaped dirt profile ensures that the rushing storm water stays completely contained within the rock bed rather than spilling out onto the adjacent grass. Following these exact depth measurements guarantees that your landscape feature performs as beautifully as it looks.
| Trench Zone | Required Depth | Primary Function |
|---|---|---|
| Center Channel | 12 to 18 inches | Carries maximum water volume during heavy storms |
| Outer Edges | 6 to 8 inches | Contains minor overflow and anchors bordering plants |
| Spillway Banks | 8 to 12 inches | Supports the massive weight of medium landscape stones |
Handling Excavated Soil and Sod
Digging a trench that is several feet wide and over a foot deep generates a massive amount of loose dirt. You can use the excavated topsoil to build up raised planting beds elsewhere, or rent a small commercial dumpster for immediate off-site soil disposal.
Securing the Landscape Fabric Base
You must line the entire dirt trench with heavy-duty, non-woven landscape fabric to prevent aggressive perennial weeds from taking root in the rocks. Pin the black fabric tightly against the dug soil contours using specialized metal staples driven directly into the earth every 12 to 18 inches.
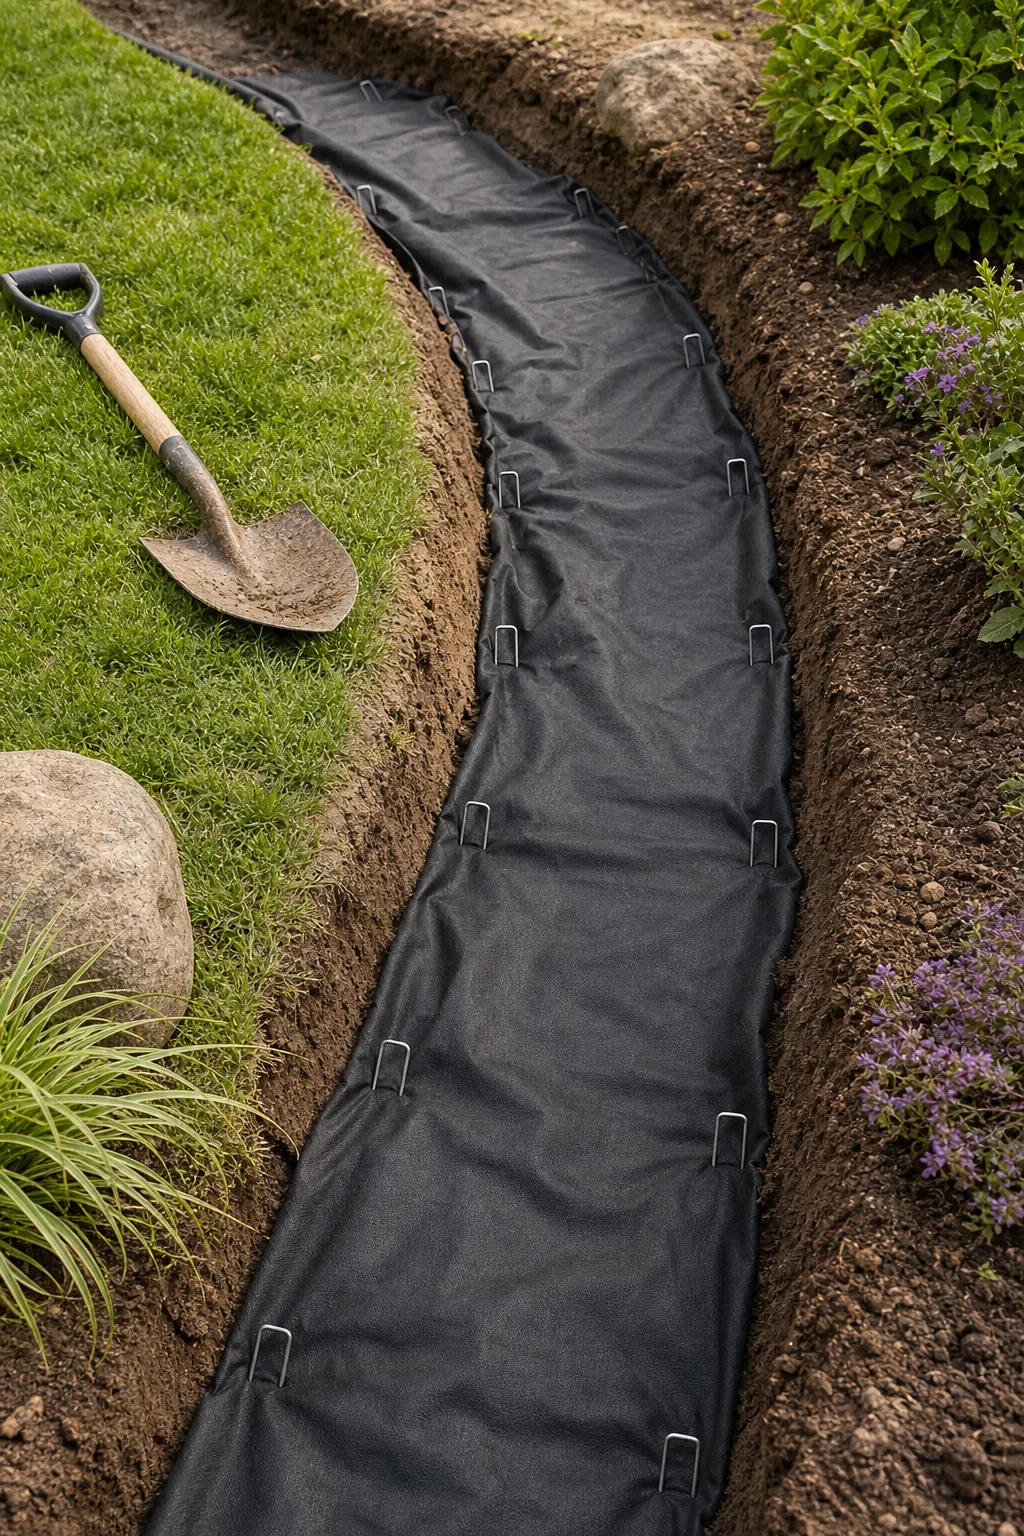
This crucial barrier keeps the underlying muddy soil from slowly swallowing your expensive decorative stones over time. Taking the time to secure this layer properly prevents the fabric from floating upward during the first major rainstorm.
Choosing the Right Fabric Pins
Standard plastic garden pegs will immediately snap when forced into compacted clay or rocky front yard soil during installation. You should always use six-inch galvanized steel landscape staples to permanently lock the protective fabric against the steep trench walls without bending or rusting.
Positioning the Large Anchor Boulders
Place your massive anchor boulders on the outside of the curves where rushing water would naturally hit the hardest during a flood. You must follow the strict landscaping rule of burying these stones by one-third of their height so they appear organically embedded.
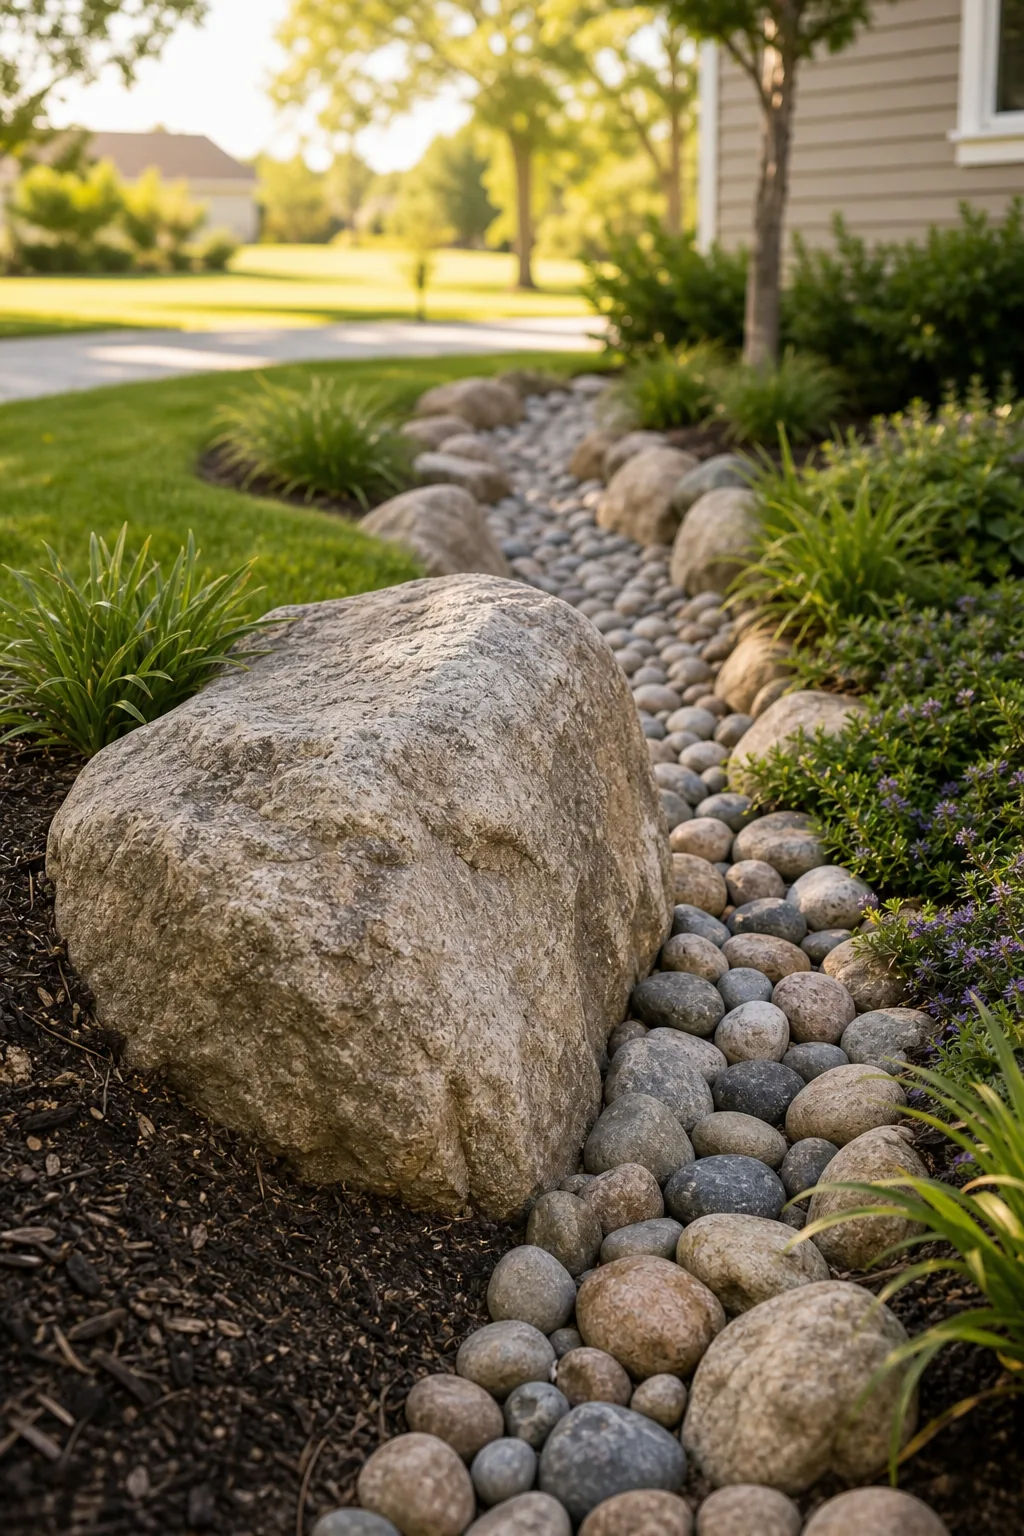
The specific way you group your largest stones dictates the entire aesthetic of the creek bed and establishes the primary visual boundaries. Always maneuver these heavy boulders into their final positions before adding any of the smaller surrounding rocks.
Grouping Stones for a Natural Look
Never drop a massive rock completely alone on the flat ground, as it will look entirely artificial and out of place. You should group your heavy anchor stones in odd numbers like one, three, or five for a highly authentic, unengineered appearance.
Arranging the Medium Spillway Stones
You will use 4- to 8-inch cobbles as spillway stones to bridge the awkward visual gap between the massive anchors and the tiny channel rocks. These medium stones add necessary texture and prevent the final design from looking like a simple gravel walking path.
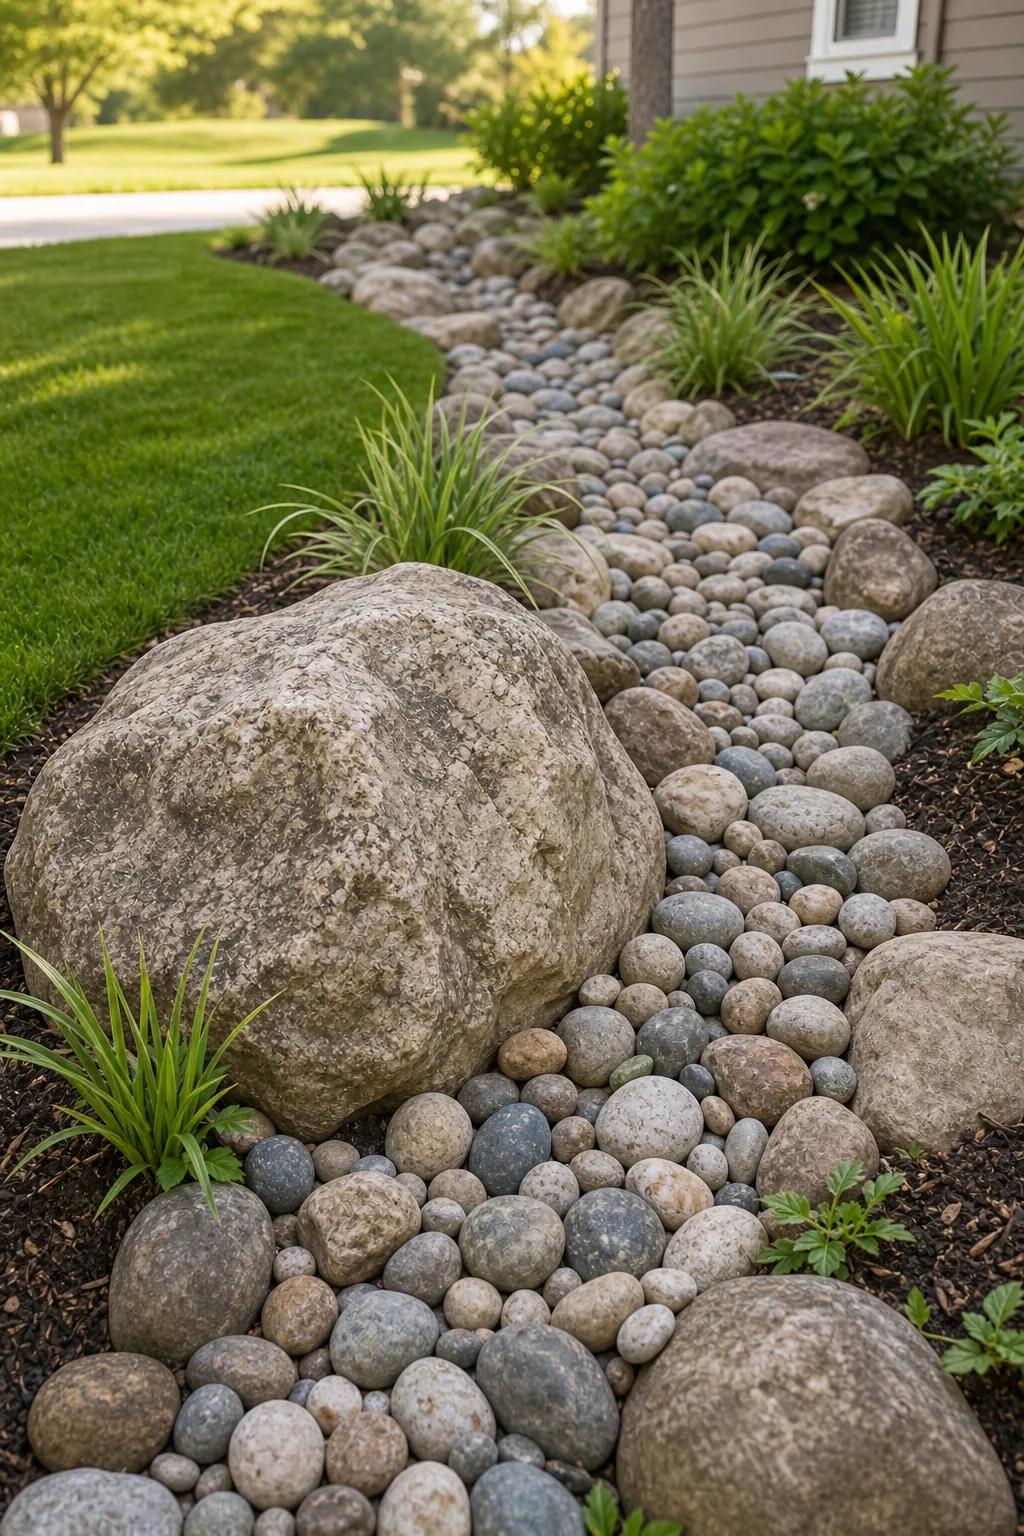
Tuck these spillway rocks tightly around the base of the large boulders to lock them permanently into the landscape and hide the buried edges. Taking the time to fit these pieces together creates a structurally sound barrier against erosion.
Locking the Anchor Boulders in Place
Rushing storm water carries immense physical force that can gradually shift poorly placed landscape features over several harsh seasons. Wedging angular spillway stones tightly beneath the rounded edges of your anchor boulders creates a structural interlocking web that completely resists downward erosion.
Pouring the Smooth Flow Channel
Fill the lowest center path with 1- to 3-inch smooth river rock to create the primary flow channel for the water. You must lay this smooth stone layer at least 3 to 4 inches thick to completely hide the black landscape fabric below.
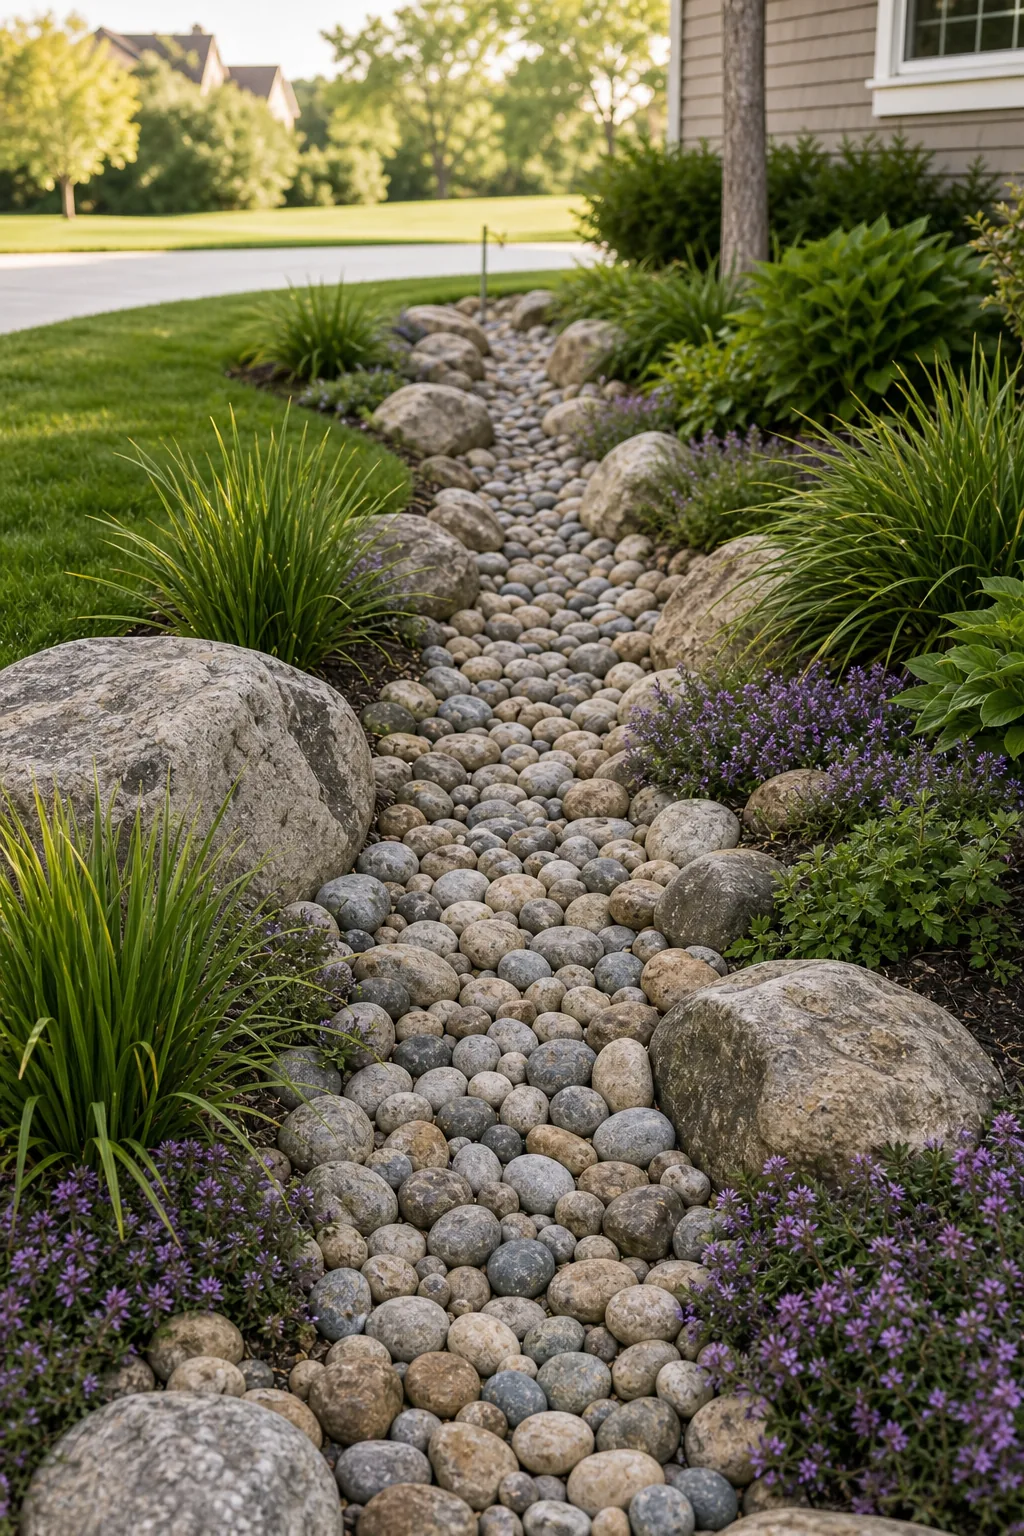
This specialized central zone allows heavy rain to glide effortlessly across the surface without catching on jagged edges or causing unwanted splashing. Spreading the rock evenly ensures a solid, stable base that will not wash away during a torrential spring downpour.
Calculating the Required River Rock
Purchasing the correct volume of river rock upfront prevents frustrating mid-project delays and mismatched stone batches from different quarry deliveries. You should multiply your trench length by the average width, then divide by 80 to determine the necessary cubic yards for a four-inch depth.
Selecting the Best Edge Plants
Choosing the best edge plants involves finding drought-tolerant ornamental grasses and creeping groundcovers that soften the harsh rocky banks. These highly resilient varieties thrive in the intense radiant heat generated by the sun-baked stones during the peak of summer.
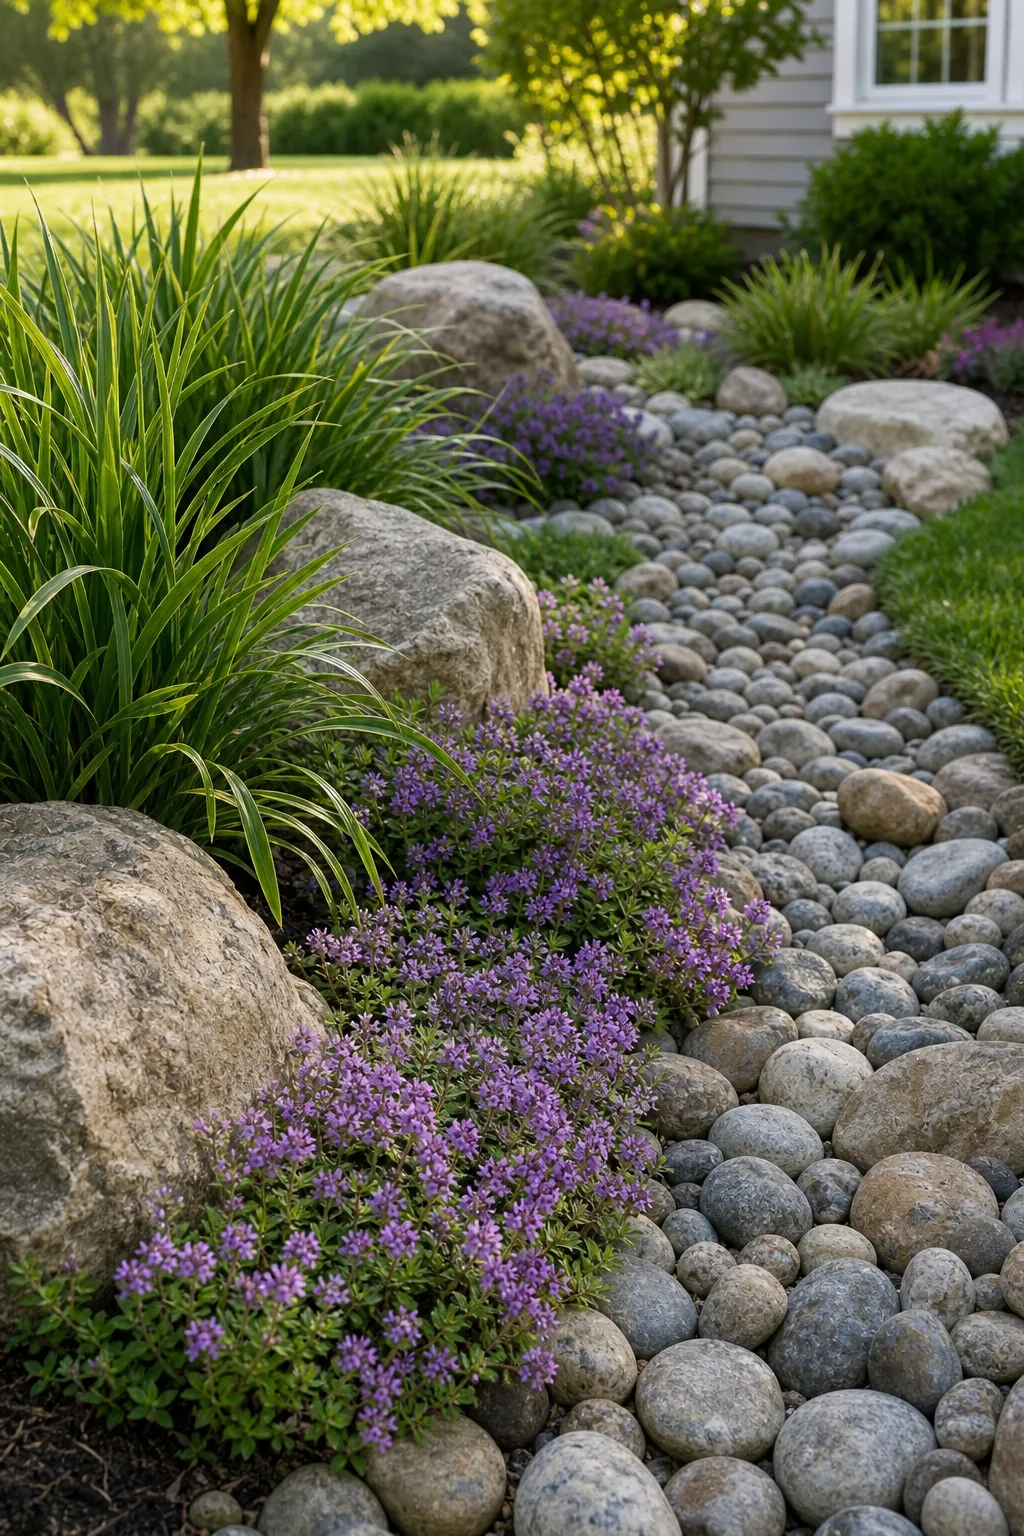
Plant these lush ornamentals just outside the fabric edge so their delicate roots can access rich soil without sitting in the active drainage zone. Keeping the root balls away from the primary water channel prevents devastating root rot during unusually wet seasons.
Establishing Drought-Tolerant Root Zones
While the center creek bed handles occasional floods, the surrounding elevated banks will remain completely dry during normal sunny weather. You must amend the border soil with rich organic compost to help your new ornamental grasses establish deep, heat-resistant root systems quickly.
Blending the Creek into the Lawn
Finish the outer landscape edges with a thick layer of dark hardwood mulch to seamlessly transition from the spillway stones to the surrounding green grass. This final protective layer perfectly hides any remaining visible fabric edges and gives the feature a polished look.
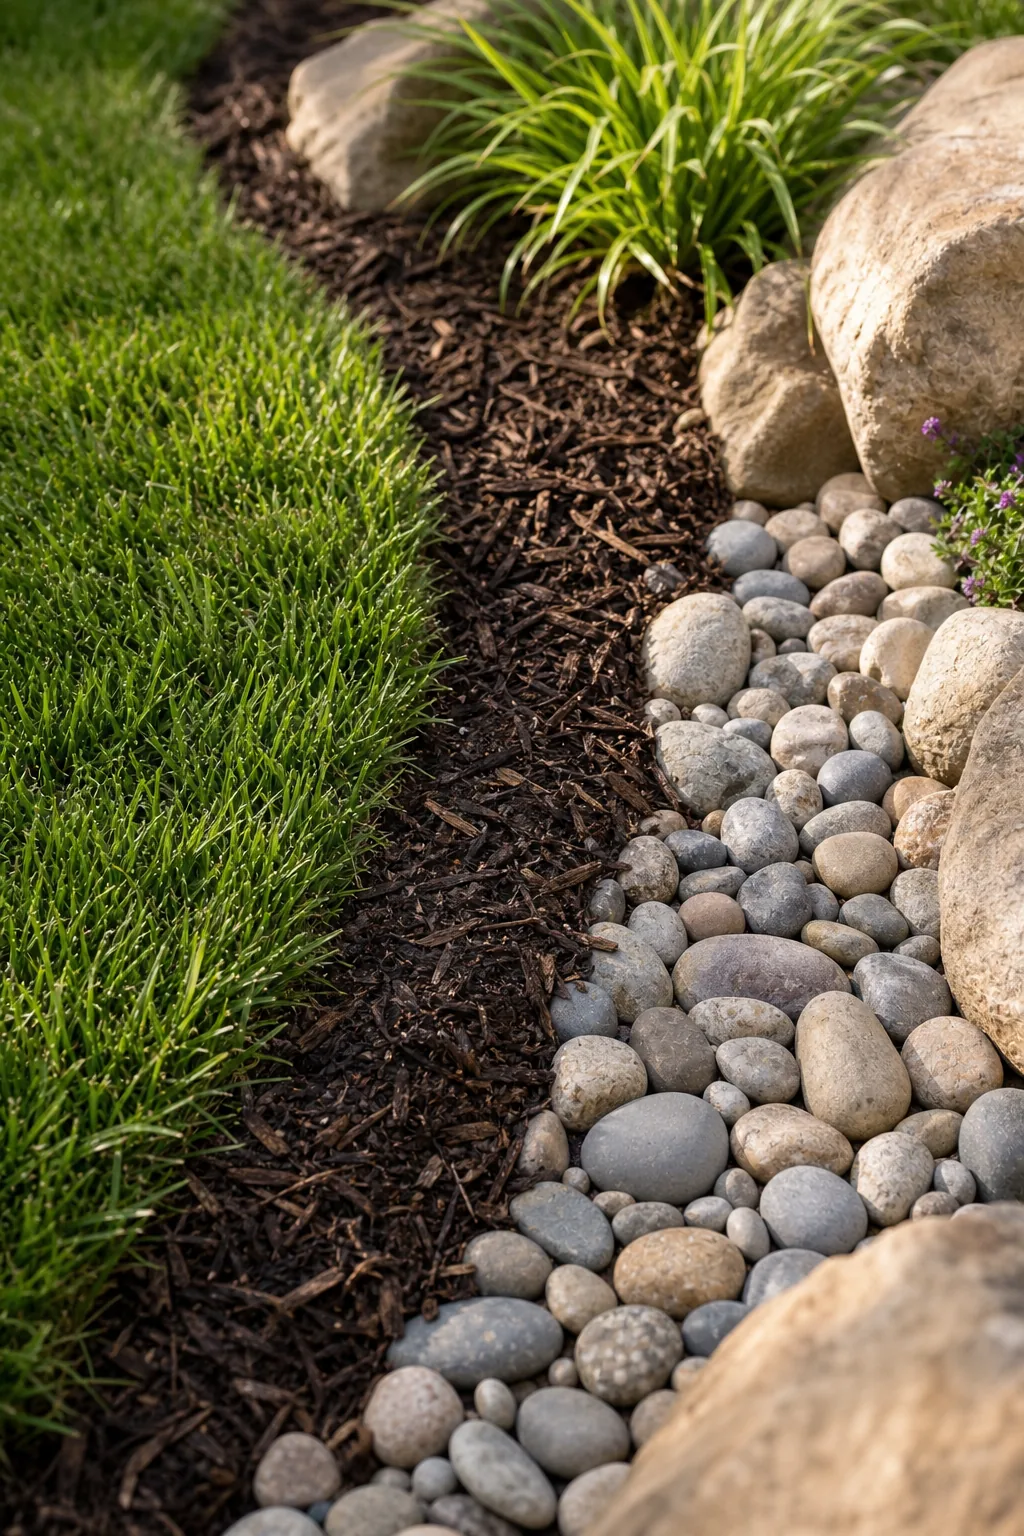
This high-contrast organic border makes the bright, smooth river stones pop visually from the street. Maintaining this distinct border prevents aggressive lawn grass from slowly creeping back into your beautiful new rock bed over the coming years.