
The Christmas Door Decor Styling Cheat Sheet & 2/3 Rule
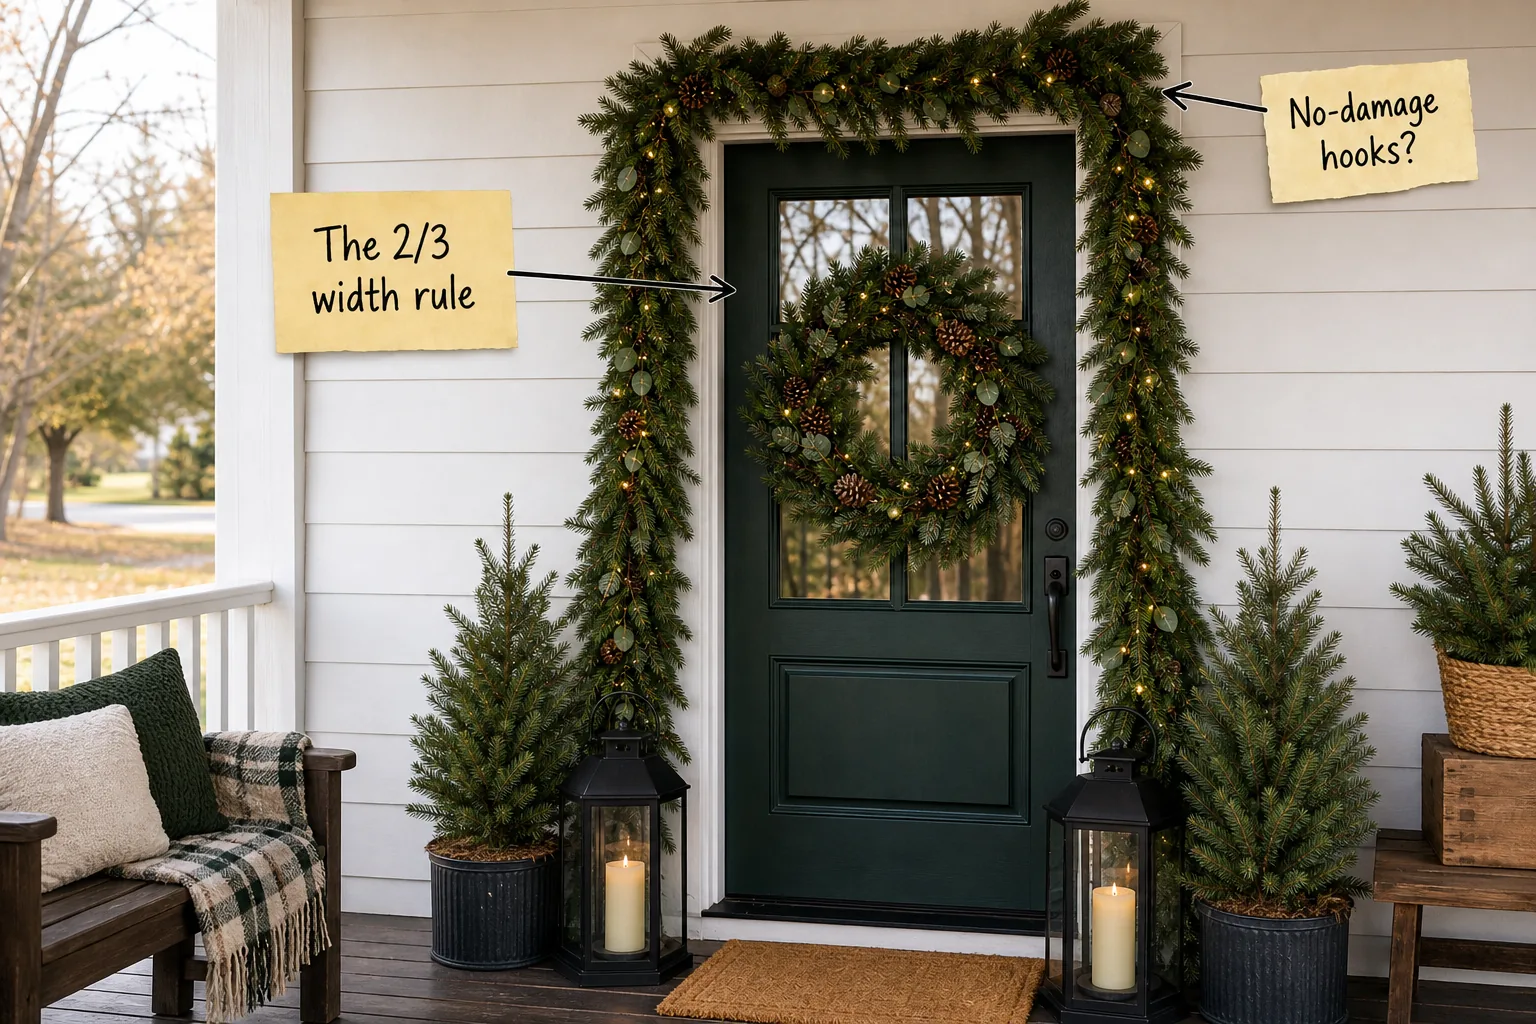
Master the 2/3 width rule and build a welcoming, damage-free holiday entrance with our comprehensive styling checklist. By following this guide, you will measure, hang, and perfectly proportion a warmly lit doorway using the promised Doorway Styling Cheat Sheet.
Securing the Garland with No-Damage Hooks
Mounting heavy evergreen garland without drilling into the door frame requires outdoor-rated adhesive hooks rated for at least 5 pounds of holding power. Place these heavy-duty plastic anchors exactly every 12 to 18 inches along the top and sides of your exterior trim.
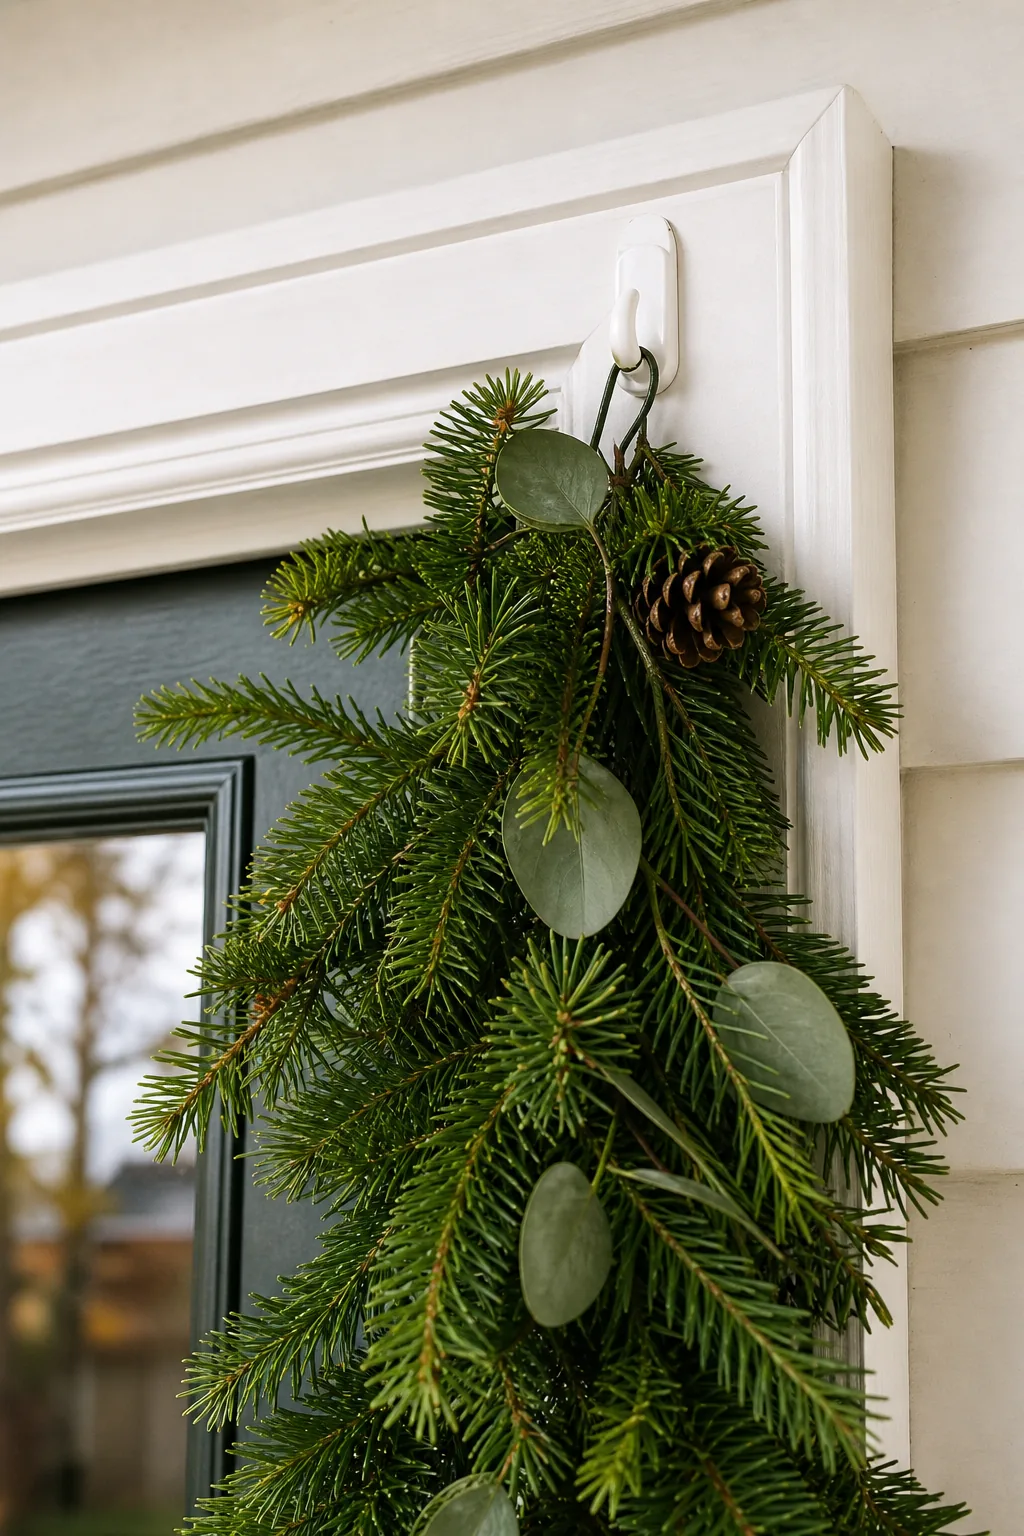
Before pressing the adhesive strips into place, firmly wipe the door frame with rubbing alcohol to ensure a weather-resistant bond. Wait a full hour before resting the garland’s central vine onto the hooks to prevent the heavy greenery from sagging under its own weight.
Preparing the Trim for Adhesive Bonds
Proper surface preparation guarantees your temporary hooks will survive freezing overnight temperatures and heavy winter moisture. Applying the hooks when the outdoor temperature sits above 50 degrees Fahrenheit ensures the adhesive cures properly against the wood, creating an unbreakable temporary seal.
Concealing the Battery Packs
Hiding waterproof battery boxes within pre-lit garland keeps the doorway display looking natural and professionally styled. Tuck the rectangular power units deep into the densest clusters of faux pine, positioning them completely behind the thickest forward-facing branches to maintain a seamless green appearance.
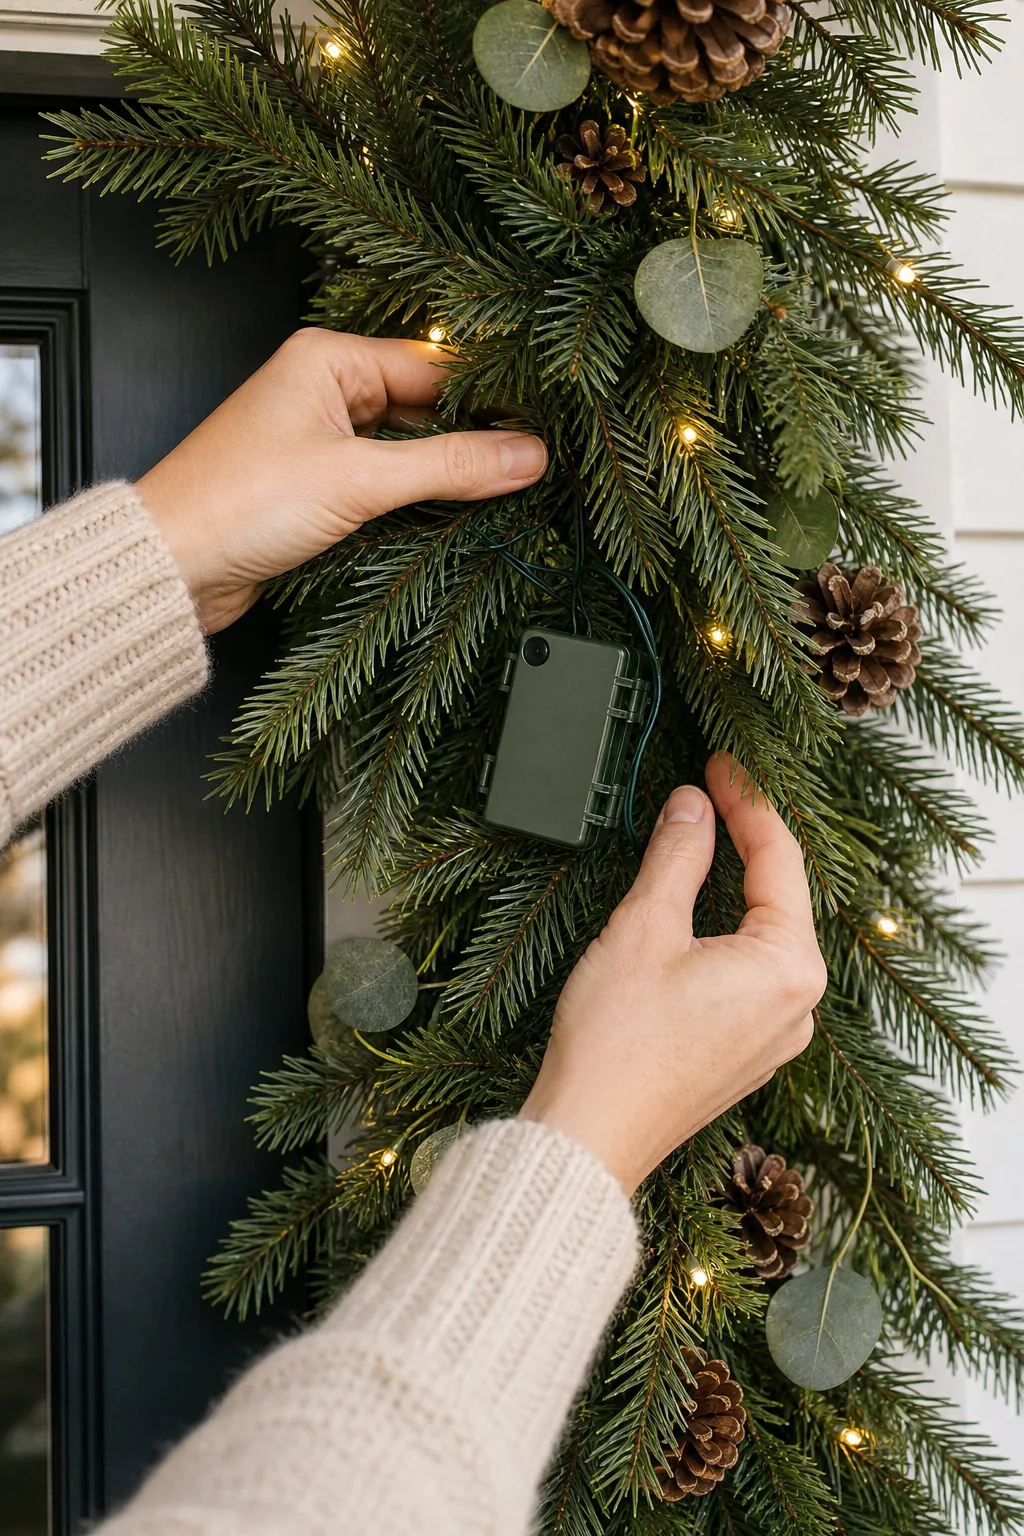
Wrap a short length of 22-gauge green floral wire tightly around both the battery case and the garland’s main central vine. Twisting the wire securely ensures the heavy power source will not slip down or become visible during harsh winter winds.
Waterproofing Your Power Connections
Protecting your electronic components from melting snow extends the lifespan of your expensive pre-lit greenery. Orienting the battery box so the opening latch faces downward prevents melting ice from seeping directly into the compartment, keeping the alkaline power source completely dry all season.
Sizing Your Wreath: The 2/3 Width Rule
Defining perfect door proportions relies entirely on the 2/3 width rule, which prevents the wreath from looking miniature or overwhelming the entrance. Measure the width of the physical door itself, completely excluding the outer frame, and calculate exactly 66 percent of that measurement.
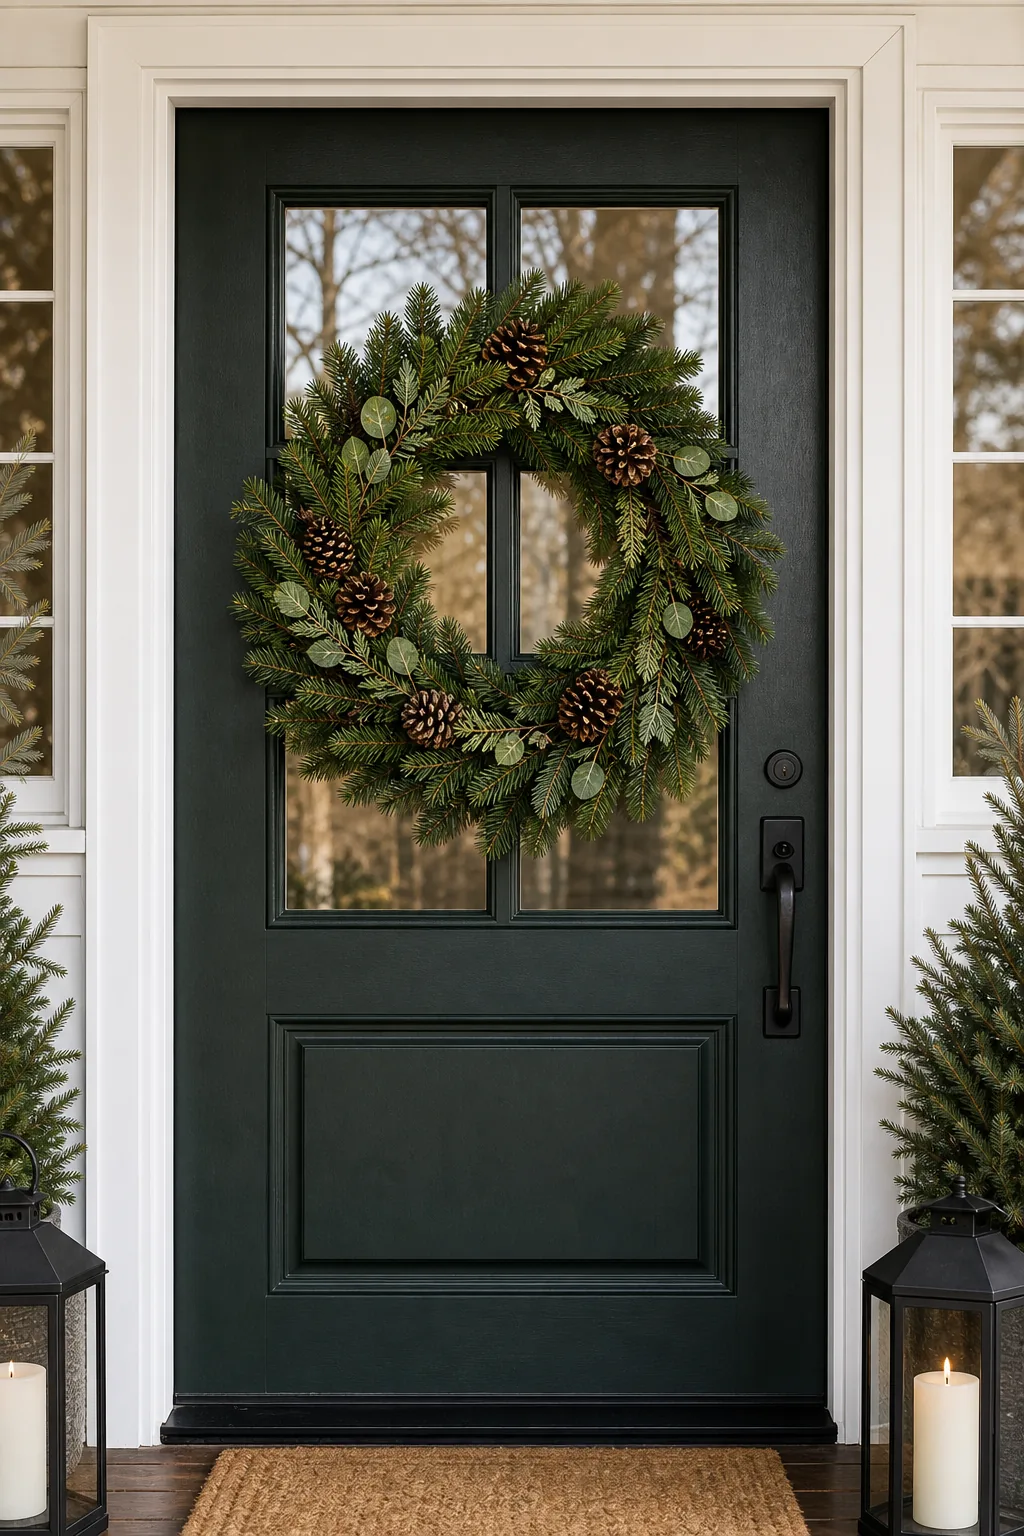
Applying this exact ratio to modern home builds takes the guesswork out of your seasonal holiday shopping. Sizing your greenery mathematically ensures the final arrangement feels intentionally designed rather than randomly assembled from generic clearance bins.
Selecting the Right Wreath Profile
Choosing a wreath with the correct depth profile ensures the greenery will not get crushed against the glass storm door. Measure the exact clearance between your primary exterior door and the outer glass pane before purchasing any thick artificial foliage.
| Clearance Space | Recommended Wreath Depth | Best Foliage Type |
|---|---|---|
| Under 3 inches | 2 inches maximum | Flat cedar or boxwood |
| 3 to 5 inches | 3.5 inches maximum | Mixed pine with flat accents |
| Over 5 inches | 5 inches maximum | Flocked fir or heavy spruce |
Selecting a flatter profile for tight spaces prevents the needles from pressing unpleasantly against the glass, which ruins the elegant silhouette. A slim boxwood design provides beautiful texture while easily accommodating the narrow gaps behind older storm door frames.
Wiring in Foraged Pine Cones
Elevate a basic artificial wreath by adding natural texture through carefully placed, genuine foraged pine cones. Wrap a piece of floral wire tightly around the bottom scales of each cone, leaving two long, flexible wire tails for secure mounting.
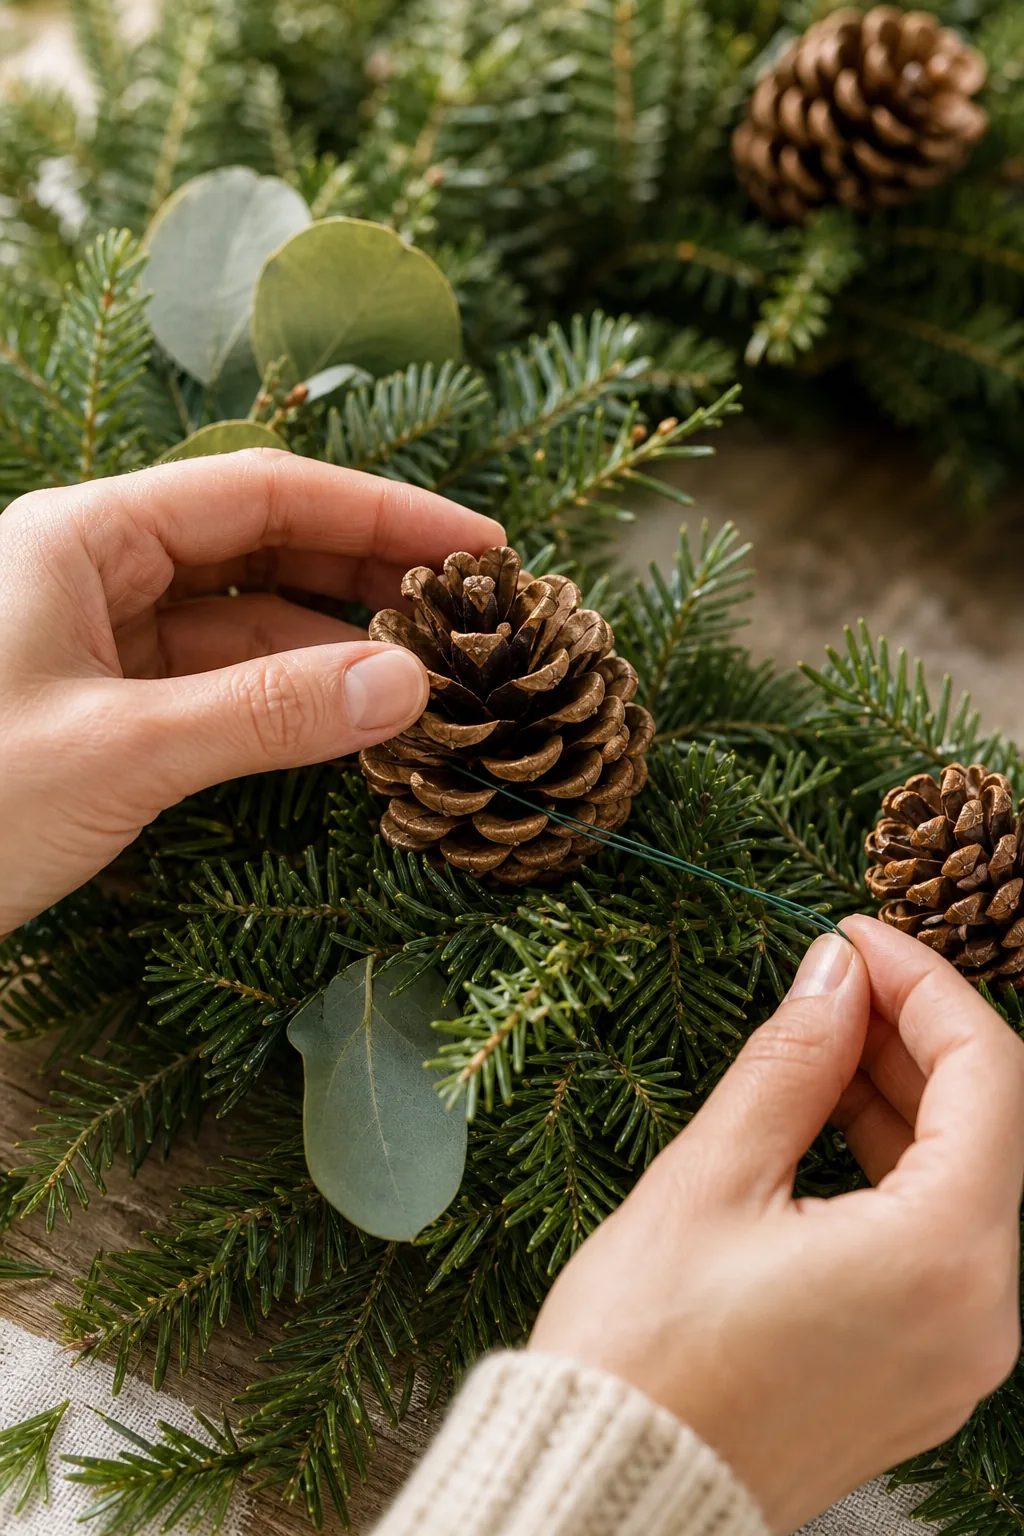
Push those wire tails entirely through the faux greenery and twist them firmly around the wreath’s inner metal frame to prevent drooping. Distribute these natural accents in an asymmetrical zigzag pattern to mimic organic branch growth perfectly.
Foraging and Baking Natural Elements
Gathering your own organic materials provides beautiful, free accents, but raw pine cones often harbor sticky sap and hidden winter insects. Baking the collected cones dries the sticky resin into a glossy glaze while eliminating any unwanted outdoor pests completely.
- Line a rimmed metal baking sheet with a disposable layer of aluminum foil.
- Arrange the gathered pine cones in a single, uncrowded layer.
- Bake the cones at 200 degrees Fahrenheit for exactly forty-five minutes.
- Let the pieces cool completely before wrapping them with floral wire.
Monitoring the oven closely prevents the dry wooden scales from scorching or catching fire during the low-heat curing process. Once completely cooled, the hardened resin gives each cone a professional, store-bought shine that withstands freezing outdoor temperatures.
Grounding the Base with Symmetrical Anchors
Adding visual weight at the bottom of the doorway is essential to balance the heavy, sweeping garland mounted above. Place matching black metal lanterns and mini potted spruce trees on both sides of the entrance to create formal symmetrical anchors.
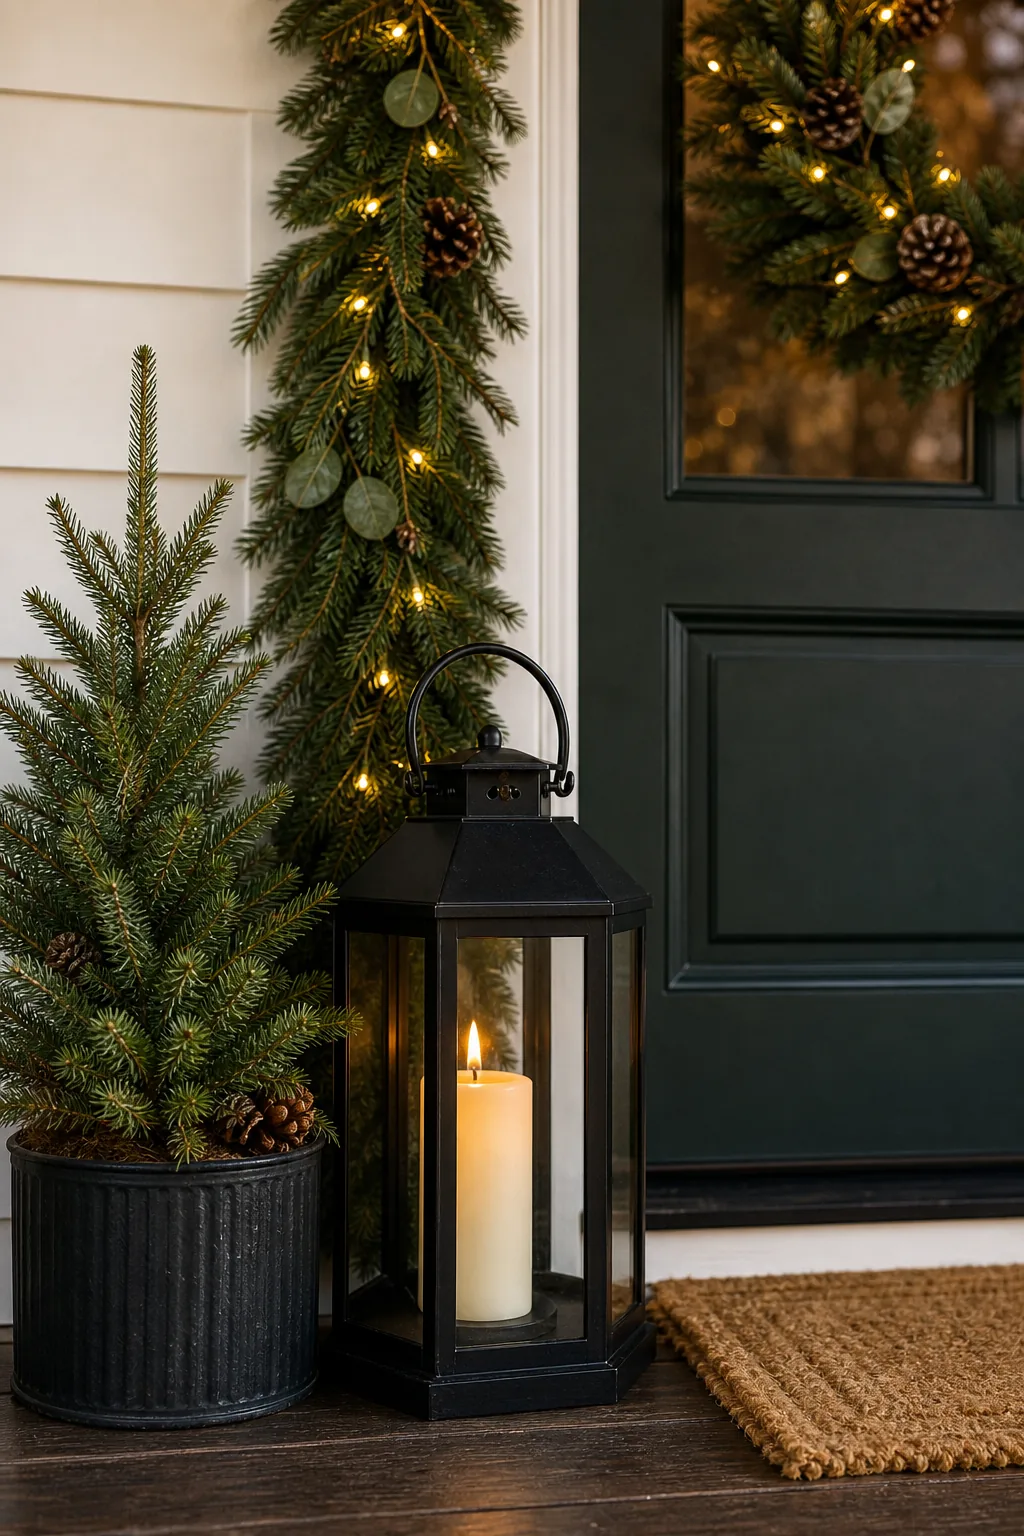
These heavy base elements draw the eye downward, giving the entire holiday display a grounded, architectural foundation. Staggering the heights of the lanterns and the planters adds necessary dimension without ruining the traditional, balanced symmetry of the porch.
Selecting Weatherproof Lantern Materials
Choosing the correct metal finishes for your floor lanterns prevents rapid rusting when exposed to continuous snow and road salt. Powder-coated steel or solid brass fixtures withstand harsh winter moisture significantly better than cheap painted iron alternatives.
Elevating the lantern bases slightly off the freezing concrete porch prevents ice from freezing the metal doors shut. Setting the fixtures on small rubber leveling pads ensures the battery-operated candles remain easily accessible for quick replacements.
Balancing the Warm White Lighting
Consistent lighting temperatures across the entire display prevent harsh visual contrasts between the battery-operated and plug-in elements. Ensure the garland micro-LEDs, wreath lights, and lantern candles all share a brilliant warm white glow.
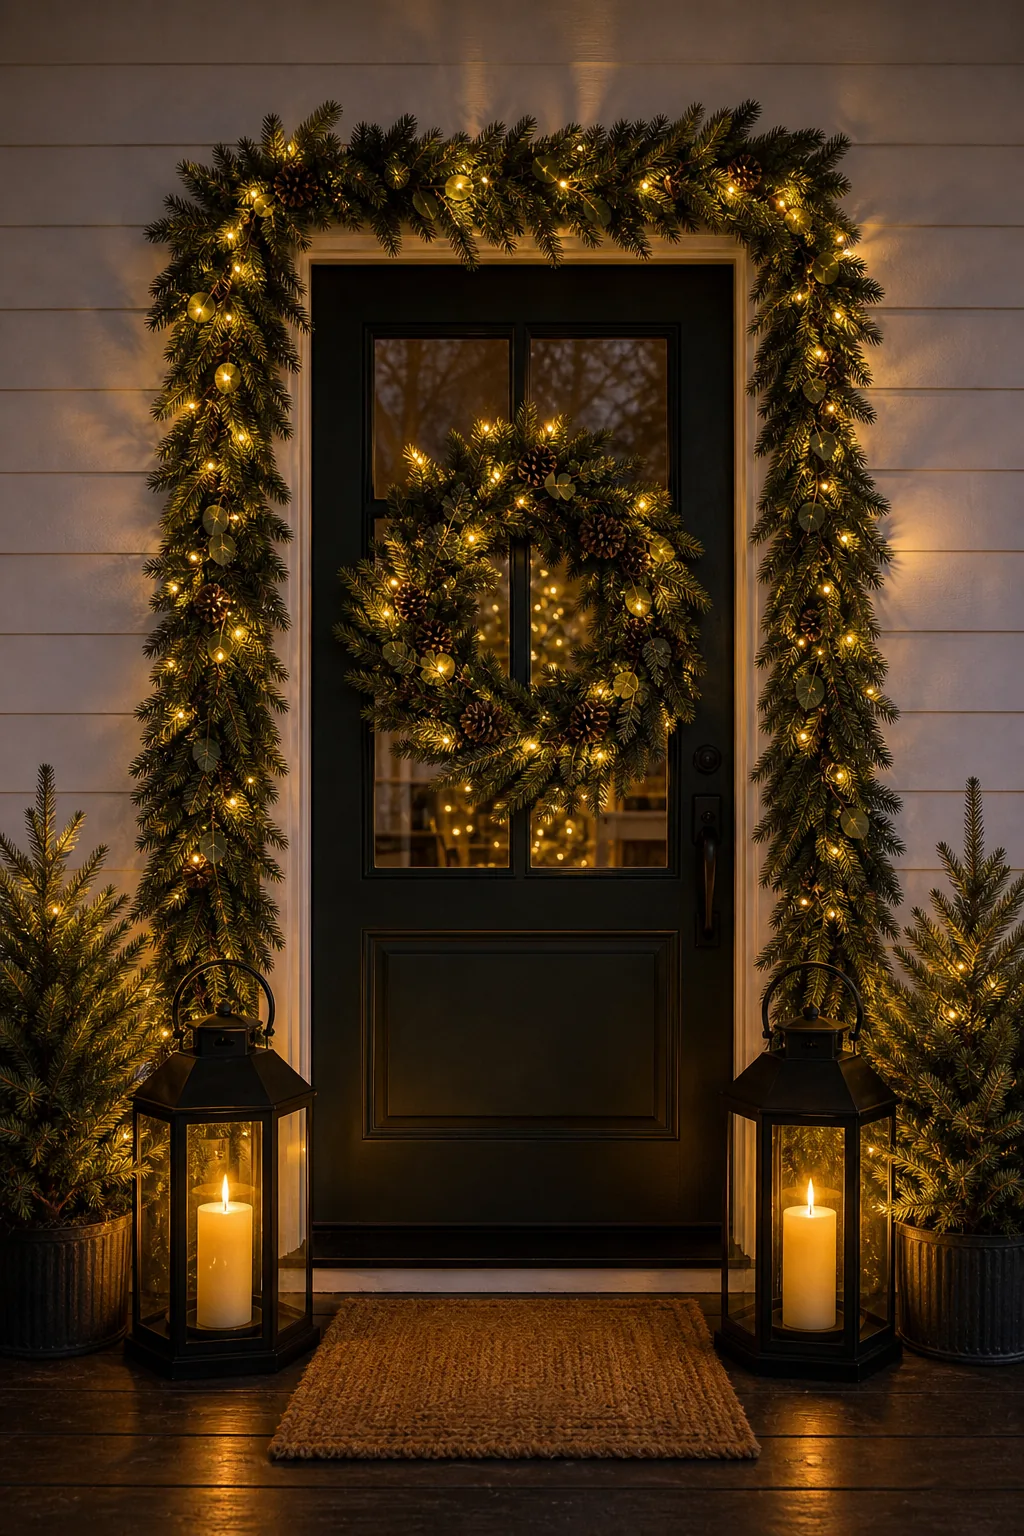
Aiming for a specific color temperature of roughly 2700K keeps the doorway looking cozy and inviting rather than stark or clinical. Mixing cool white LEDs with warm incandescent bulbs instantly breaks the cohesive, professional illusion.
Programming Automated Lighting Timers
Synchronizing every light source to activate simultaneously creates a magical, instant reveal when the sun sets. Utilizing waterproof outdoor smart plugs allows you to control the heavy garland strands directly from your smartphone, linking them with the lanterns’ dusk-to-dawn sensor mode.
Layering a Textured Welcome Mat
Complete the physical styling with a heavy-duty, natural coir welcome mat that adds essential warmth to the concrete porch flooring. A thick, textured rug visually connects the two sides of the display while providing a practical surface for snowy boots.
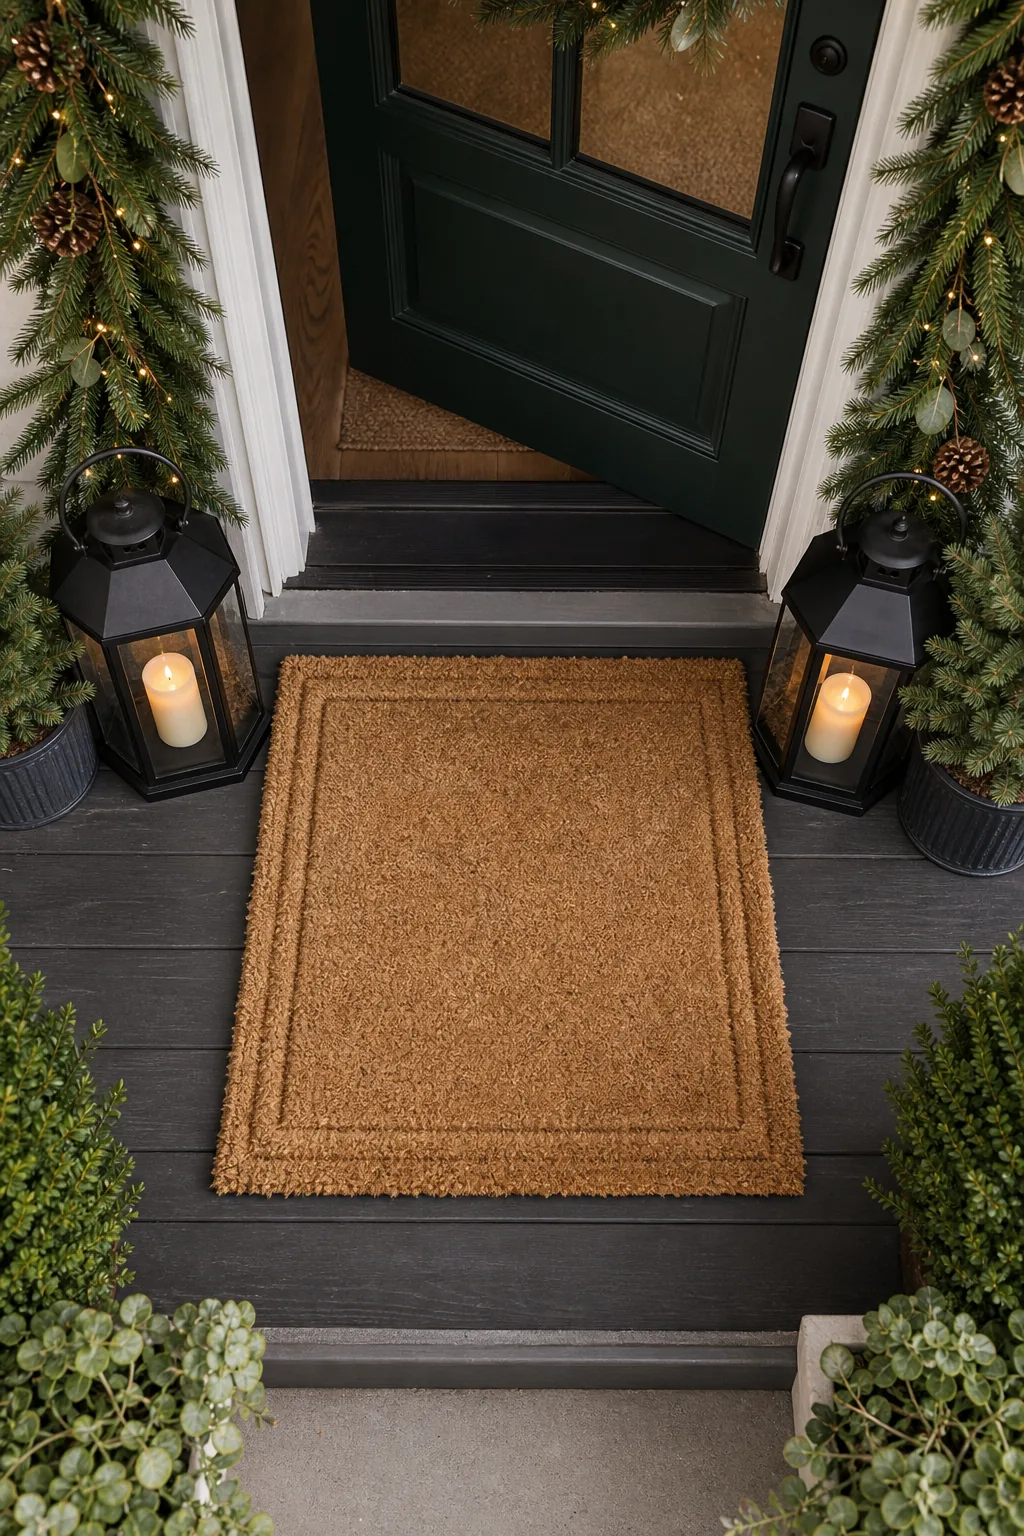
Position the mat perfectly centered between the symmetrical anchors, leaving about 2 to 3 inches of clearance on either side of the lanterns. This deliberate spacing prevents the entrance from feeling cluttered while maintaining the structured, formal layout.
Maintaining Coir Mats in Snow
Protecting natural coir fibers from continuous moisture prevents the thick doormat from rotting or freezing into a solid block of ice. Shaking the mat vigorously over the railing twice a week removes abrasive salt crystals and packed snow before they destroy the bristles.
The Complete Doorway Styling Cheat Sheet
Executing this complete system transforms a bare porch into a cohesive, professionally designed holiday entrance. Reviewing the finished doorway styling as an integrated unit reveals how the proportions, lighting, and natural textures work together.
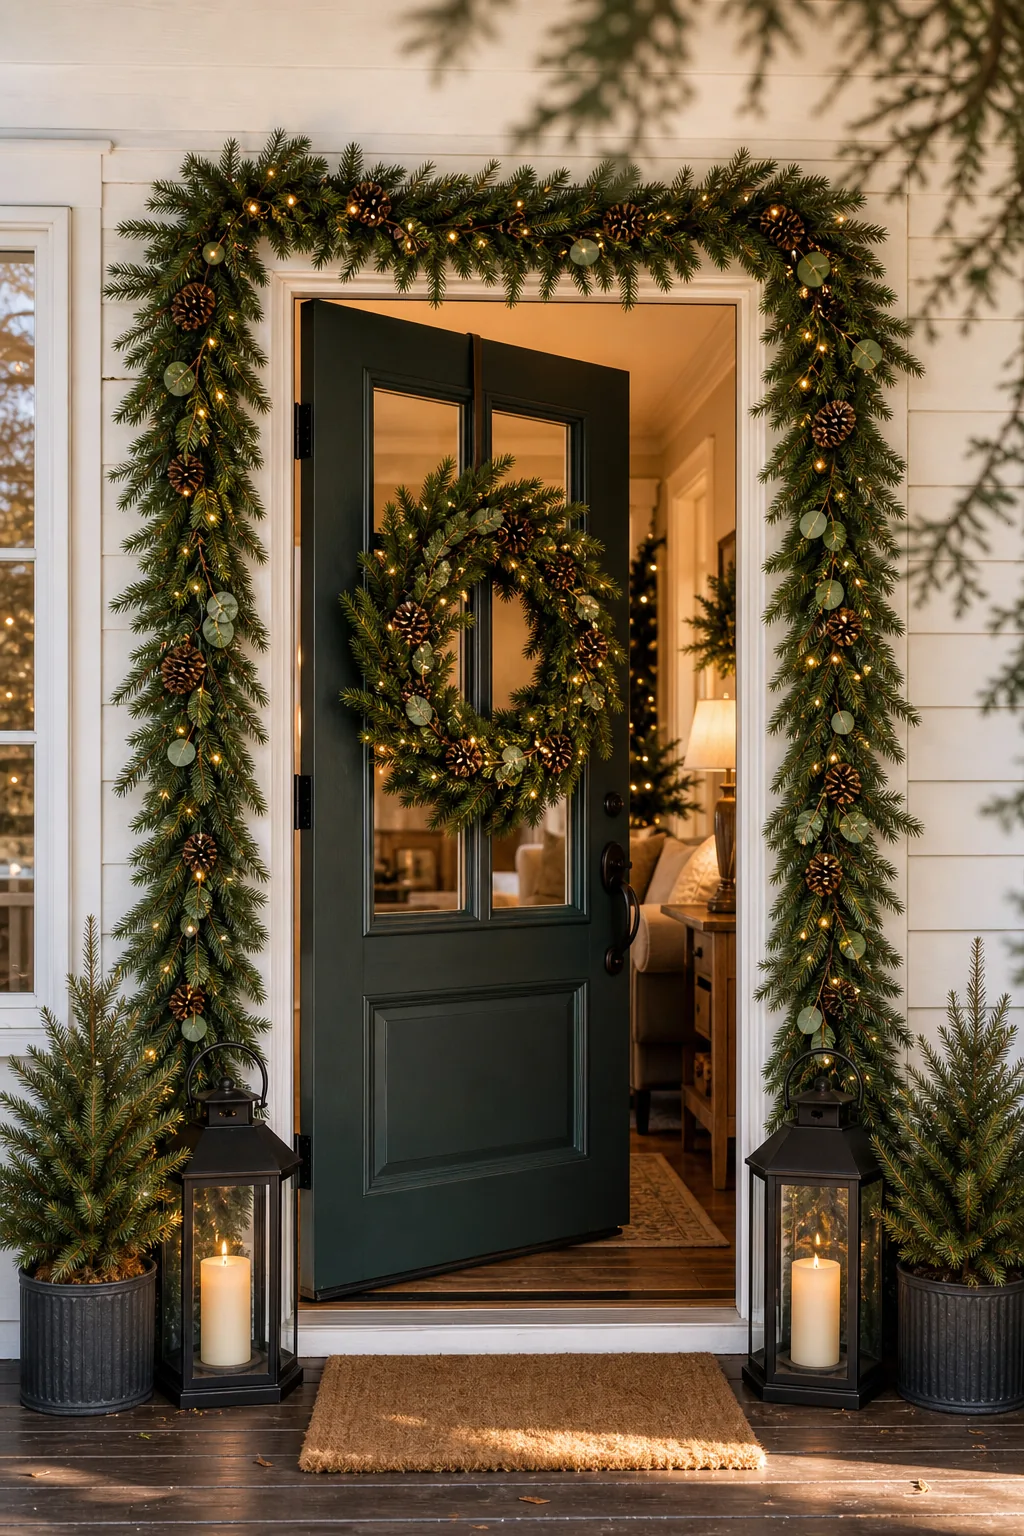
Review these final steps before you begin to ensure a smooth, professional-looking installation that lasts the entire winter season.