
Anatomy of a Perfect Outdoor Shower (DIY Build Plan)
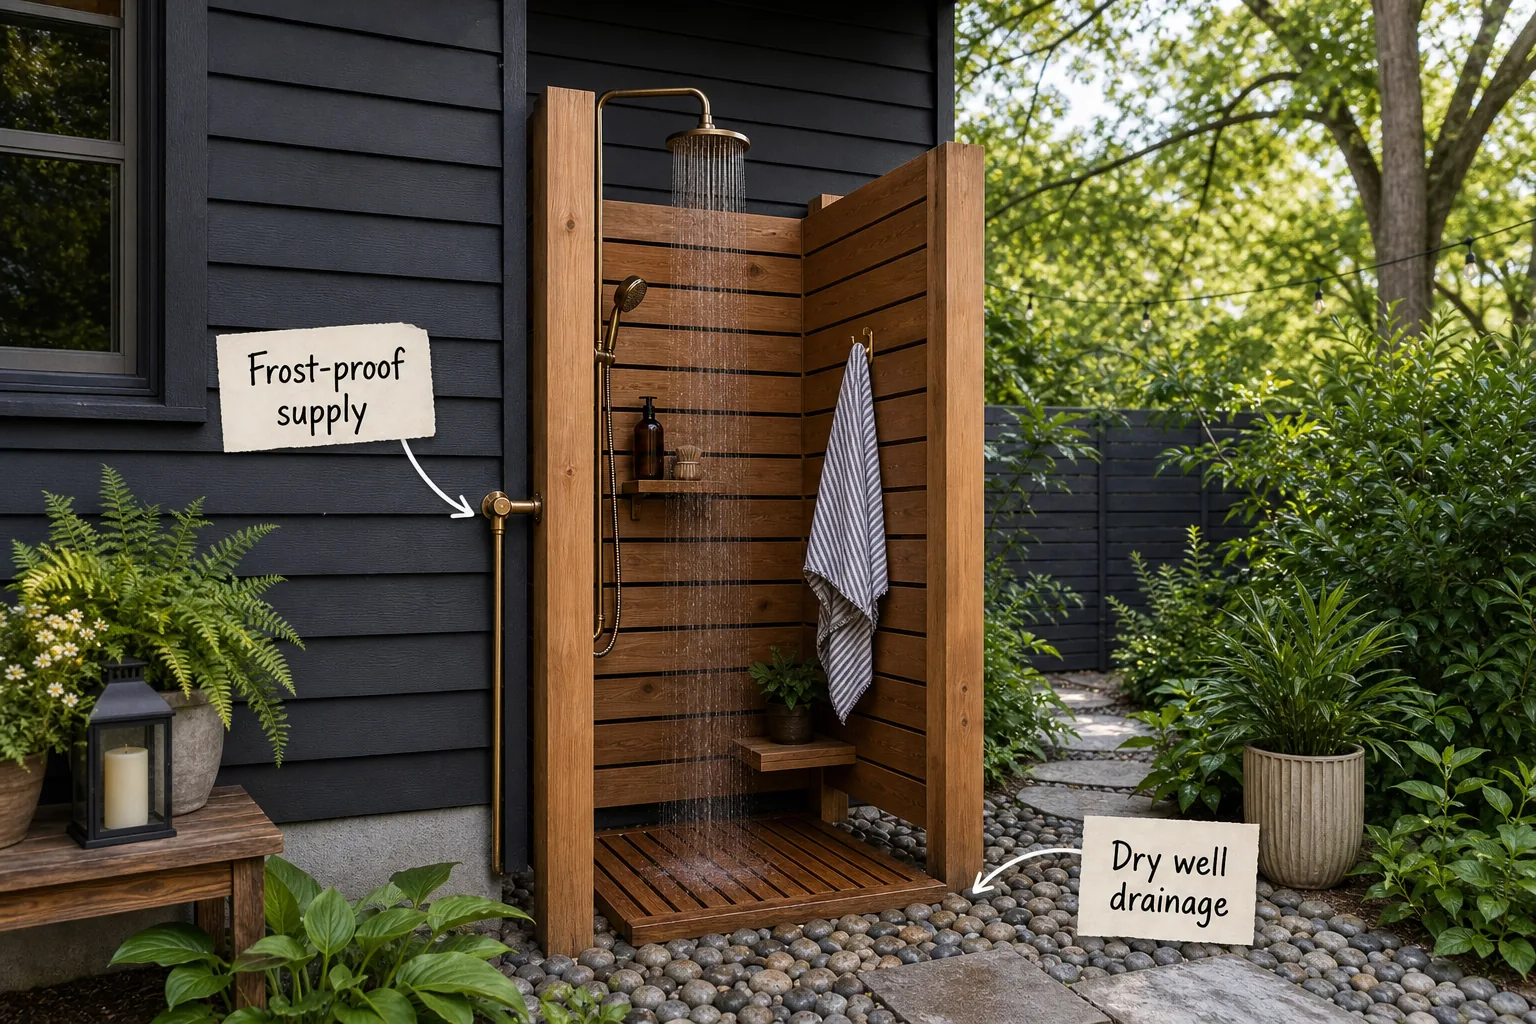
Ready to build your own backyard oasis? This guide delivers the complete DIY build, plumbing, and drainage plan so you can confidently source materials and construct a frost-proof cedar enclosure.
Planning the Dry Well Drainage
Start the build by excavating a drainage pit directly beneath the shower footprint to manage daily water runoff. Dig the pit 18 to 24 inches deep, depending on your local soil percolation rates, and prepare to fill it completely with washed river rock.
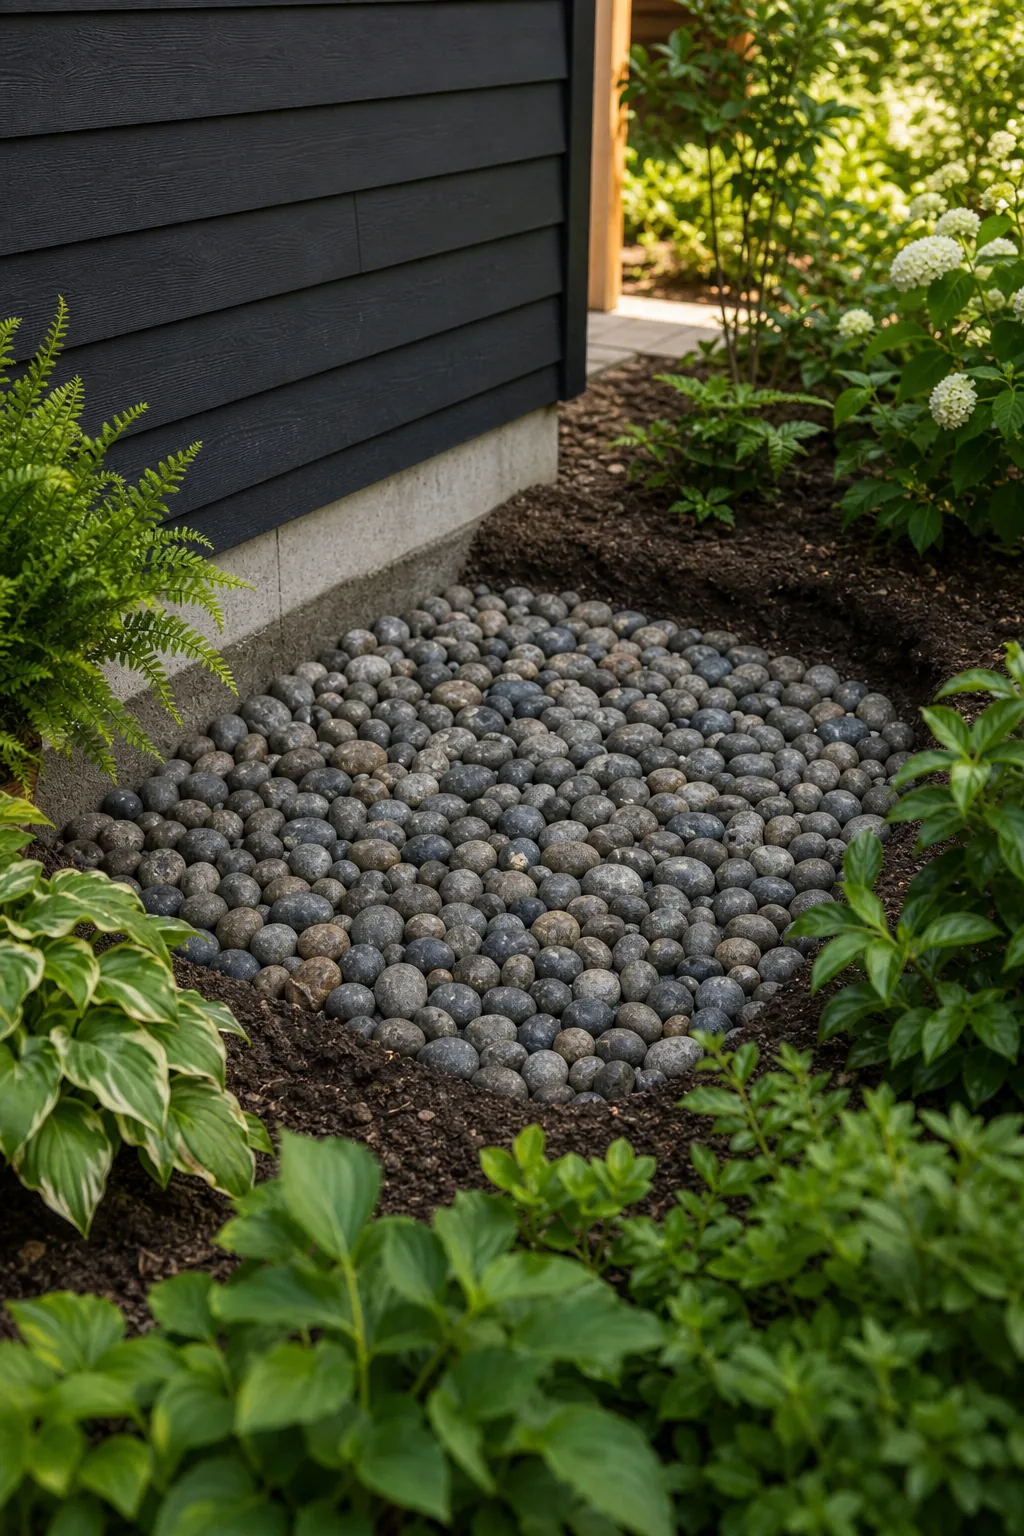
To keep your dry well drainage system working perfectly for years, you must physically separate the surrounding soil from the clean stone base. Without a proper barrier, heavy rains will wash mud into the pit, filling the crucial air voids between the river rocks.
Sizing the Excavation Footprint
Match your pit dimensions to the intended size of your wooden floor platform to ensure every drop of water is captured. Standard square platforms require a slightly larger excavation footprint to accommodate the heavy structural corner posts sitting just outside the wet zone.
| Floor Size | Pit Size | Rock Volume | Post Spacing |
|---|---|---|---|
| 36″ x 36″ | 48″ x 48″ | 0.5 cubic yards | 40″ on center |
| 48″ x 48″ | 60″ x 60″ | 0.8 cubic yards | 52″ on center |
| 60″ x 60″ | 72″ x 72″ | 1.2 cubic yards | 64″ on center |
Keep the surrounding ground sloped away from the pit edges so heavy rain storms do not overwhelm the river rock percolation bed.
Setting the Slatted Floor Base
Construct a removable wooden platform to keep bare feet clean and elevated above the damp drainage stones. Cut 1×4 cedar boards and leave exactly a 1/4-inch gap between each slat to guarantee rapid water runoff and prevent slippery pooling.
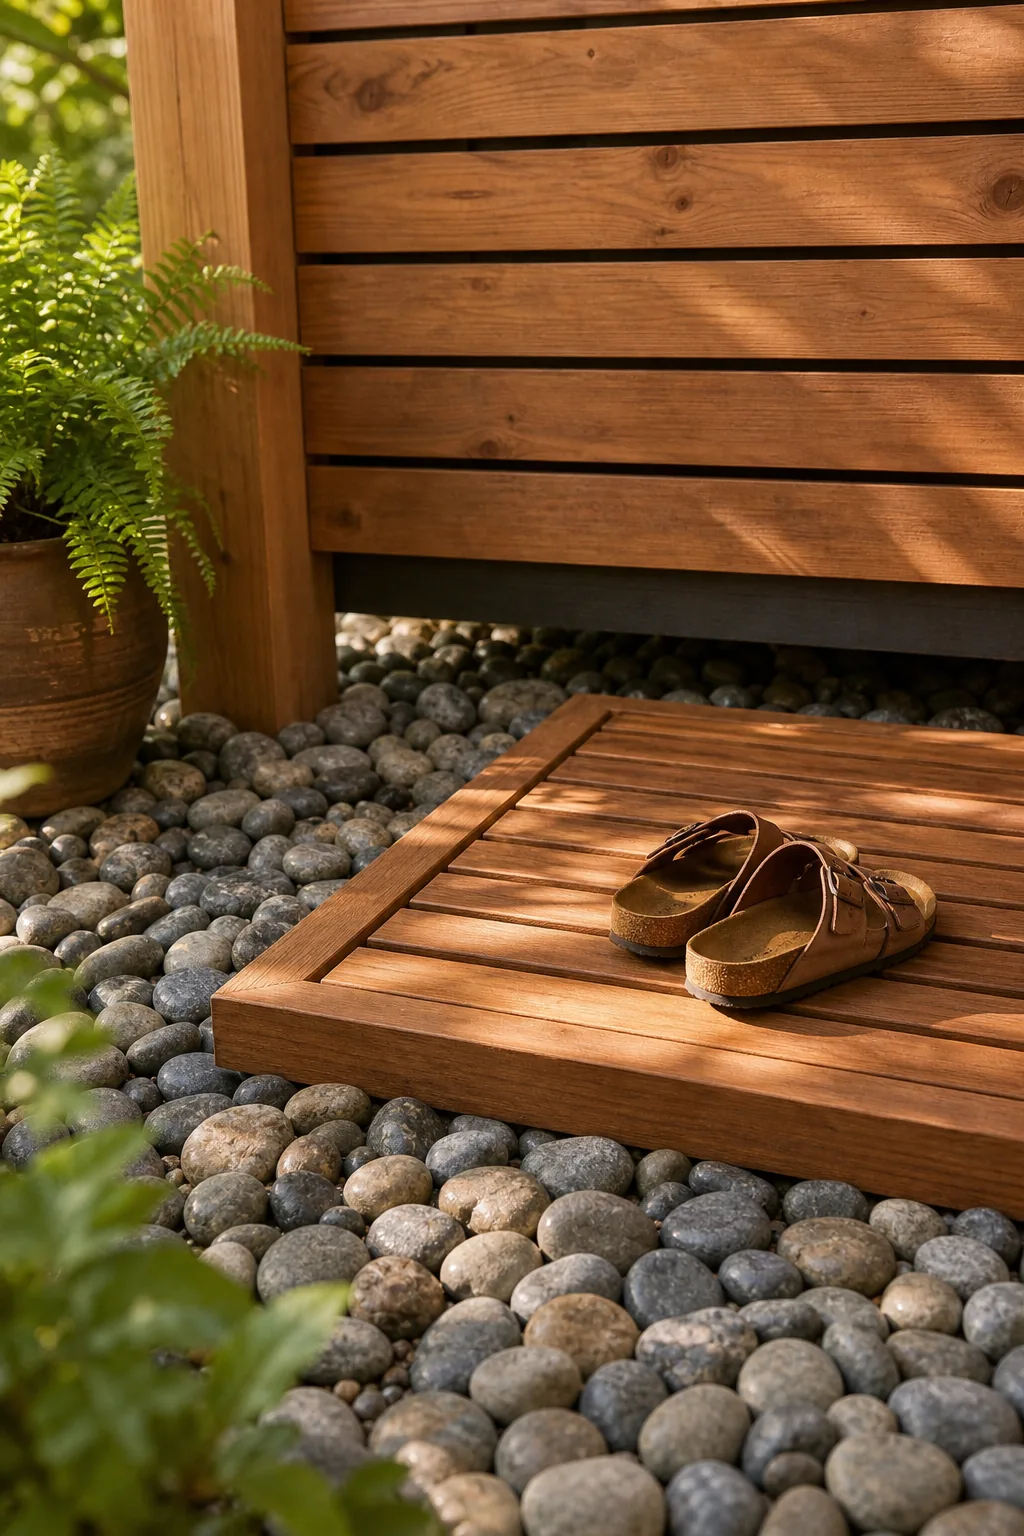
Rest the finished slatted floor directly on the smooth river stones, checking it with a spirit level to ensure a comfortable, perfectly flat standing surface. A stable floor prevents accidental slips while keeping your feet elevated above the slow-draining soapy water.
Leveling the Foundation Stones
Before placing the floor base, spend time grading the top layer of washed river rock perfectly flat across the entire excavated shower footprint. A highly uneven stone bed will cause the wooden platform to rock dangerously underfoot during use, stressing the delicate cedar joints.
Creating Splash Zone Clearance
Protect the wooden enclosure from constant ground moisture by floating the privacy walls entirely above the stone drainage bed. You must maintain a strict 6 to 8-inch air gap between the bottom wall slat and the river rocks.
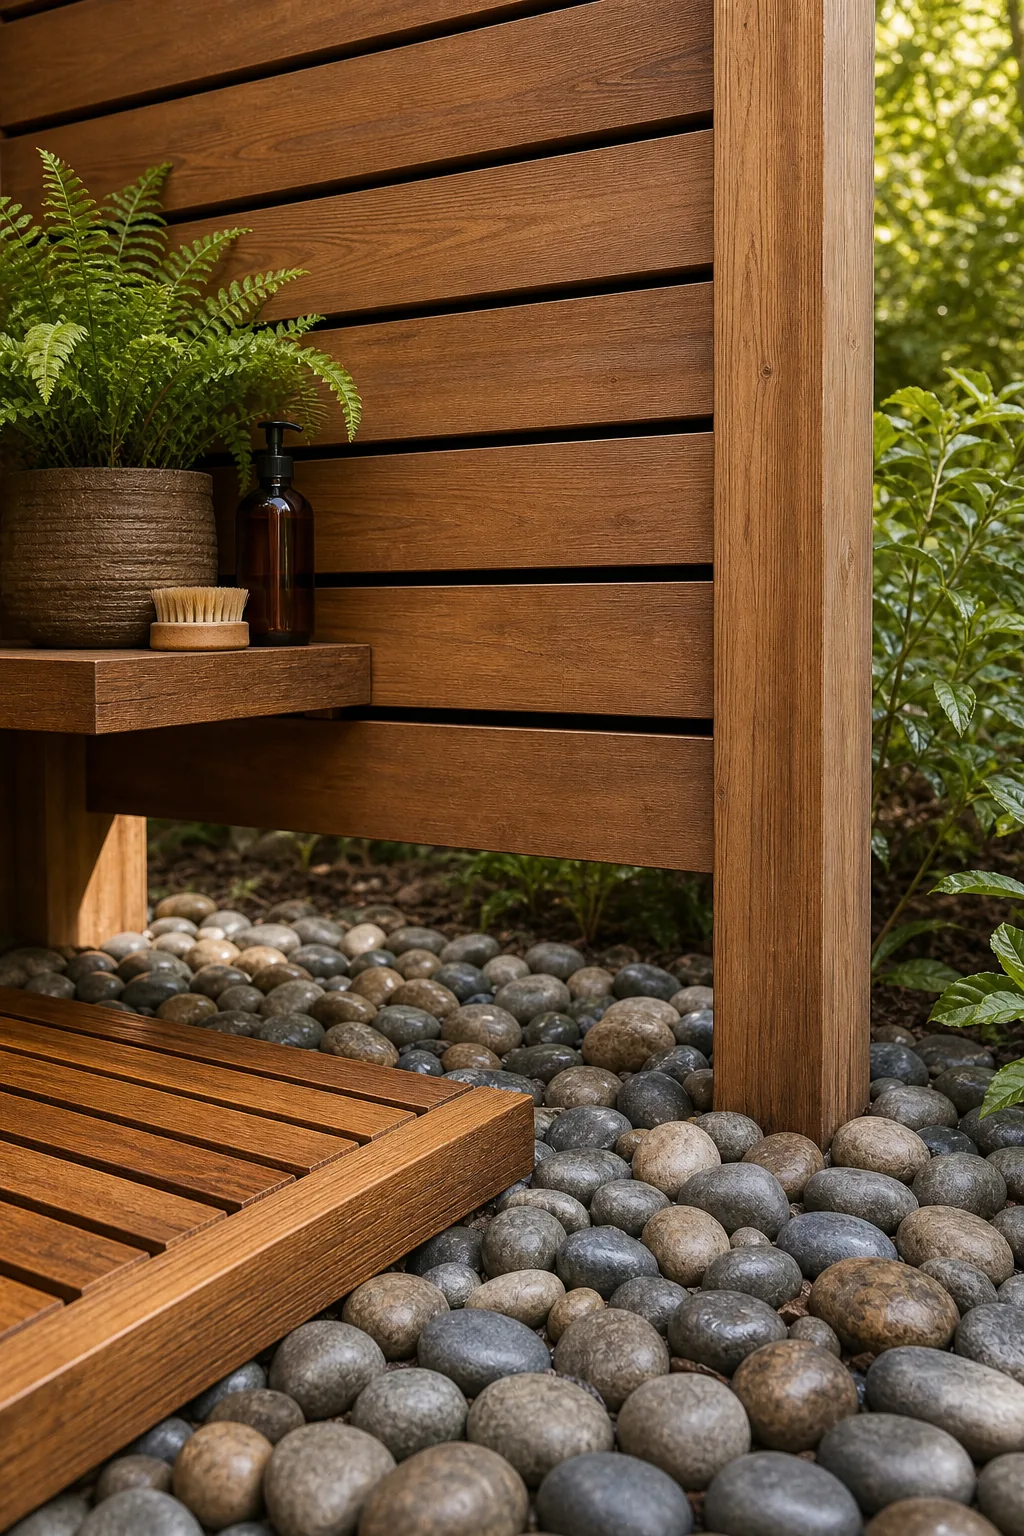
This essential splash zone clearance allows continuous cross-breeze ventilation to dry the lower boards quickly after every use, completely preventing the cedar wood from wicking standing water. Proper airflow at the base is the single most effective way to stop premature rot.
Securing the Structural Posts
Anchor the privacy enclosure using heavy 4×4 pressure-treated posts set securely in concrete footings positioned just outside the dry well perimeter. Dig these structural post holes below your local frost line to prevent violent winter ground heaving from destroying the precise cedar wall alignments.
Framing with Rot-Resistant Cedar
Build the privacy enclosure using naturally weather-resistant lumber that can easily withstand daily soaking and intense UV exposure. Rot-resistant cedar is the ideal choice; use 1×6 horizontal boards secured tightly to your anchored corner posts.
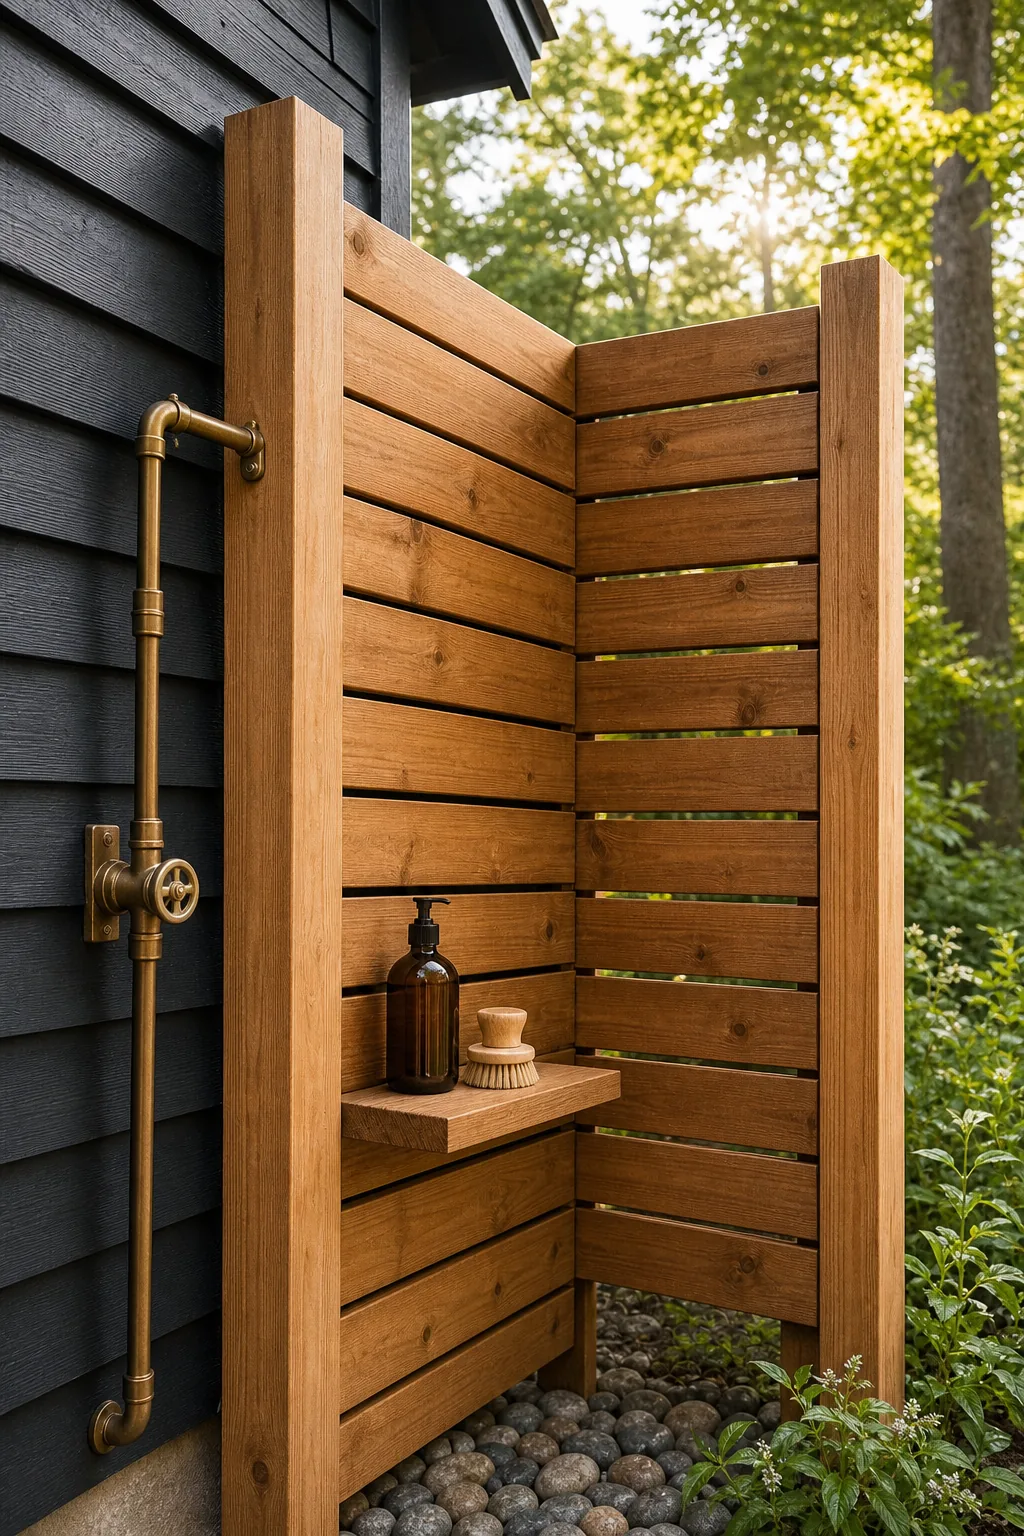
Always pre-drill the ends of your horizontal cedar boards before driving the stainless screws to prevent the dry wood from splitting near the vulnerable edges. Taking this extra step ensures the wall panels remain structurally sound and visually flawless for decades.
Fastening for Long-Term Stability
Standard coated deck screws will eventually corrode when exposed to daily shower moisture, leaving ugly black rust streaks running down your beautiful cedar walls. You must assemble the entire enclosure using premium marine-grade hardware to maintain a pristine modern aesthetic.
- Wall slats: Use 2-inch #10 stainless steel deck screws with trim heads to secure the 1×6 cedar boards without splitting the wood.
- Corner posts: Secure the 4×4 structural posts to their concrete footings using heavy-duty galvanized post bases and 3-inch structural lag screws.
- Plumbing mounts: Fasten the heavy brass shower fixtures directly to the wood framing using solid brass screws to prevent galvanic corrosion over time.
Check the structural rigidity of the wall panels after installing the hardware, adding a vertical center batten if the 1×6 boards span more than four feet.
Calculating the Privacy Sightline
Determine the optimal wall height by evaluating the sightlines from surrounding properties, elevated decks, and neighboring second-story windows. A standard enclosure height of 72 to 78 inches provides comfortable full-body coverage for most users.
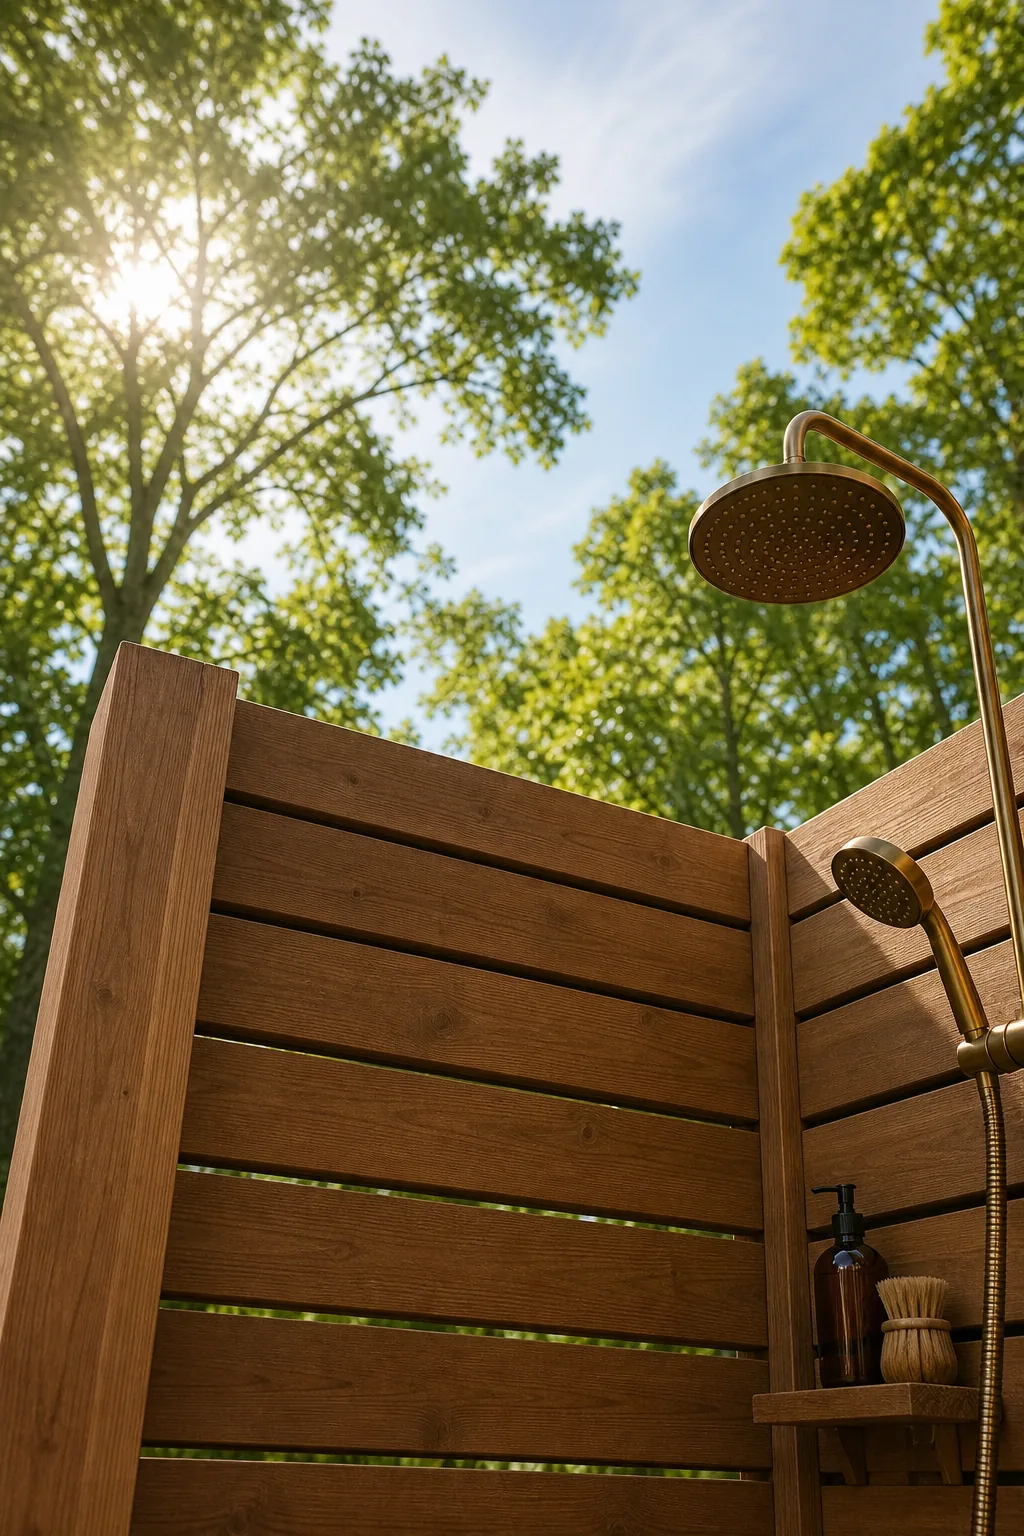
Have a partner stand inside the framed area while you check the privacy sightline? from various yard angles before permanently attaching the top row of cedar boards. Testing these specific sightlines ensures you block unwanted views without making the enclosure feel like a dark, claustrophobic box.
Designing the Entryway Flow
Instead of installing a complicated swinging door that requires heavy stainless hinges and a latch, consider framing a simple overlapping privacy baffle. Offsetting a short entry wall by two feet blocks all direct sightlines while allowing incredibly easy, hands-free access to the shower interior.
Routing the Frost-Proof Supply
Prevent disastrous winter pipe bursts by installing a frost-proof sillcock or routing the supply lines directly through the house exterior. The critical success factor is ensuring the actual water shut-off valve sits safely inside the home’s heated thermal envelope.
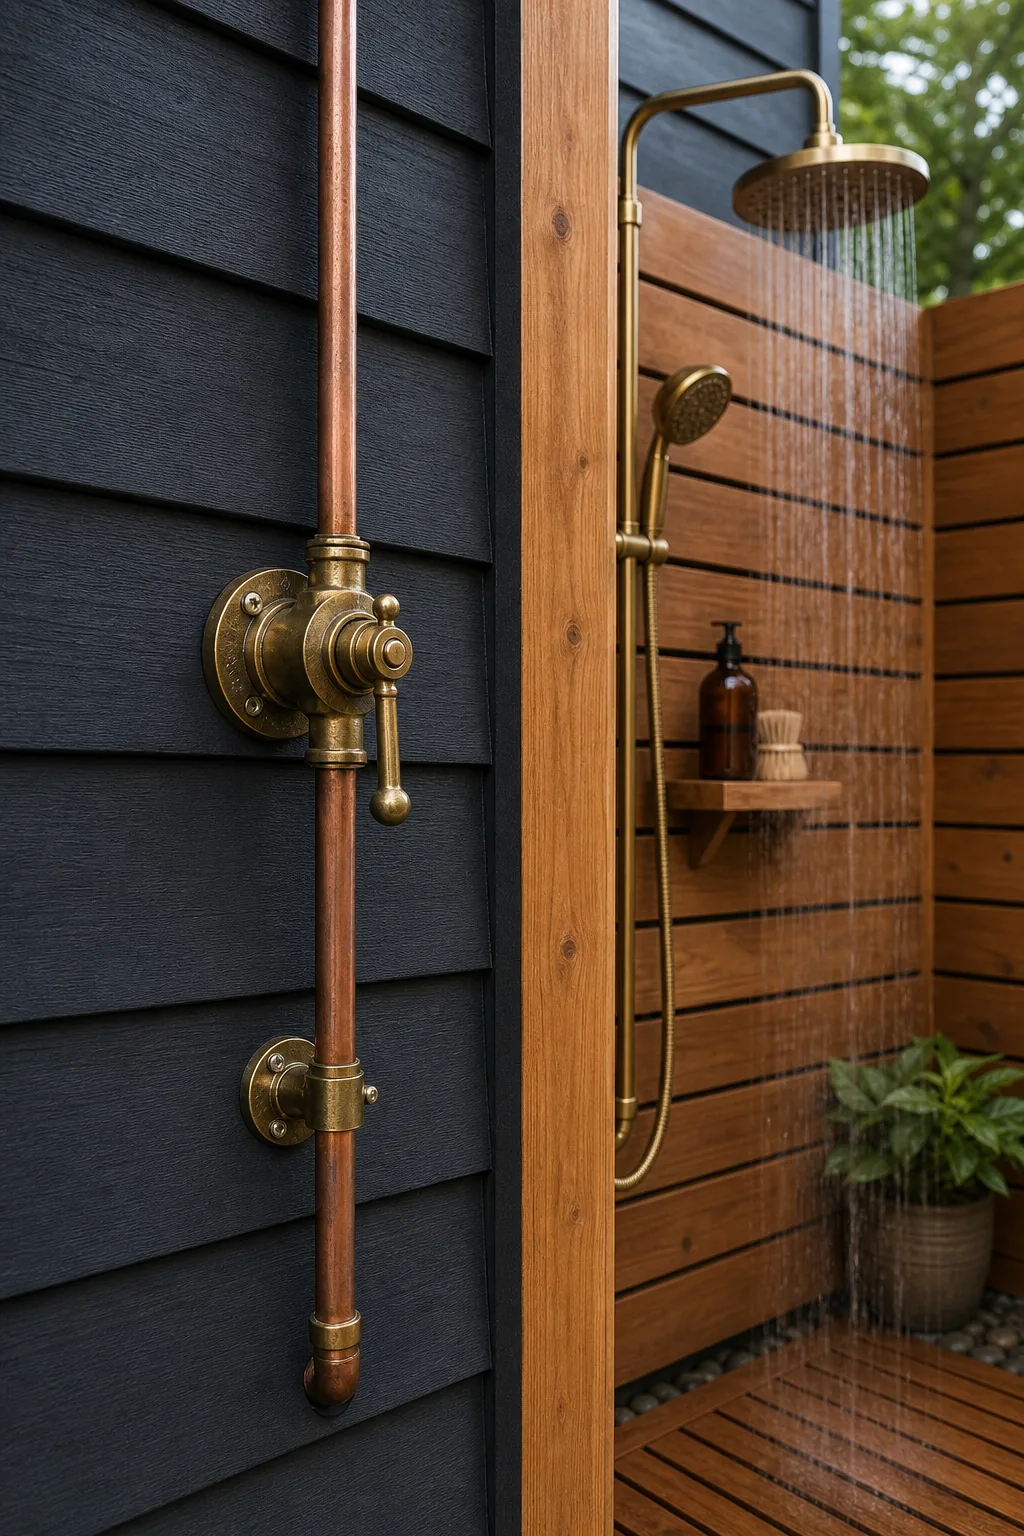
This frost-proof supply configuration allows you to completely drain the exposed exterior pipes before freezing winter temperatures hit, protecting your entire home plumbing system. By keeping the main shut-off safely indoors, you eliminate the risk of catastrophic cracked pipes hidden behind your exterior siding.
Tapping into Existing Water Lines
Run new flexible PEX supply lines from your basement utility room to the exact exit point on the exterior siding. Install dedicated quarter-turn isolation valves on both the hot and cold lines inside the house so you can easily isolate the outdoor shower for winterization.
Mounting the Exposed Plumbing
Secure the exposed brass or copper shower fixtures directly to the rigid cedar wall framing for a striking rustic-modern aesthetic. Mount the main rainfall showerhead at a comfortable height of 80 to 84 inches measured from the slatted floor base.
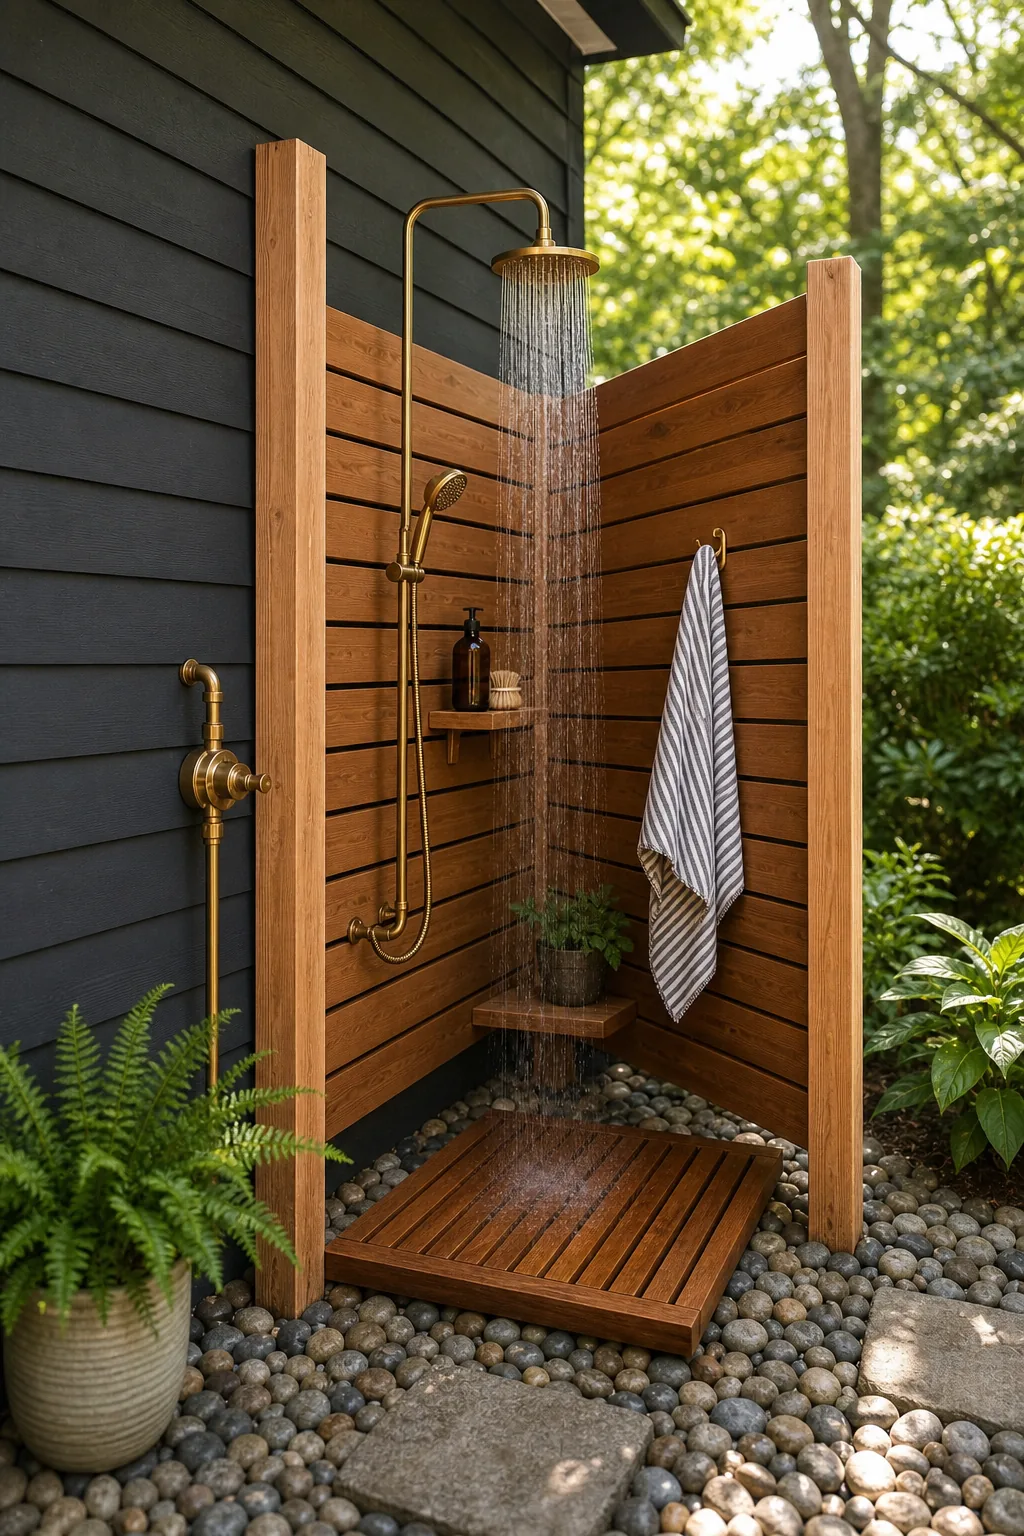
Position the secondary mixing valve at a comfortable waist height, roughly 42 inches from the slatted floor, so it remains easily reachable for both children and adults. Incorporating a separate hand wand makes rinsing sandy feet or washing the family dog incredibly convenient.
Sealing the Exterior Penetrations
Waterproofing the exact spots where the hot and cold supply pipes exit your home’s exterior siding is crucial to prevent hidden structural wall rot. Inject premium exterior-grade silicone caulk deep into the drilled holes before sliding the decorative brass escutcheon plates tightly against the house.
The Complete DIY Build and Plumbing Plan
This comprehensive DIY plan combines every critical step into one actionable sequence so you can confidently break ground. Following these specific phases guarantees your outdoor shower will remain structurally sound and completely frost-proof for decades.
- Excavate: Dig the 18 to 24-inch dry well pit and fill it with washed river rock.
- Set posts: Sink the 4×4 pressure-treated corner posts into concrete footings outside the pit.
- Frame walls: Attach the 1×6 cedar boards, maintaining the bottom splash zone clearance.
- Route plumbing: Run supply lines through the wall, keeping the main shut-off valve indoors.
- Mount fixtures: Secure the brass showerhead at 80 inches high and attach the rinsing wand.
Bring all these material layers, drainage calculations, and plumbing routes together to construct the final backyard enclosure. Once the walls are assembled and the fixtures are pressure-tested, you can style the space with heavy brass towel hooks and a teak bench.
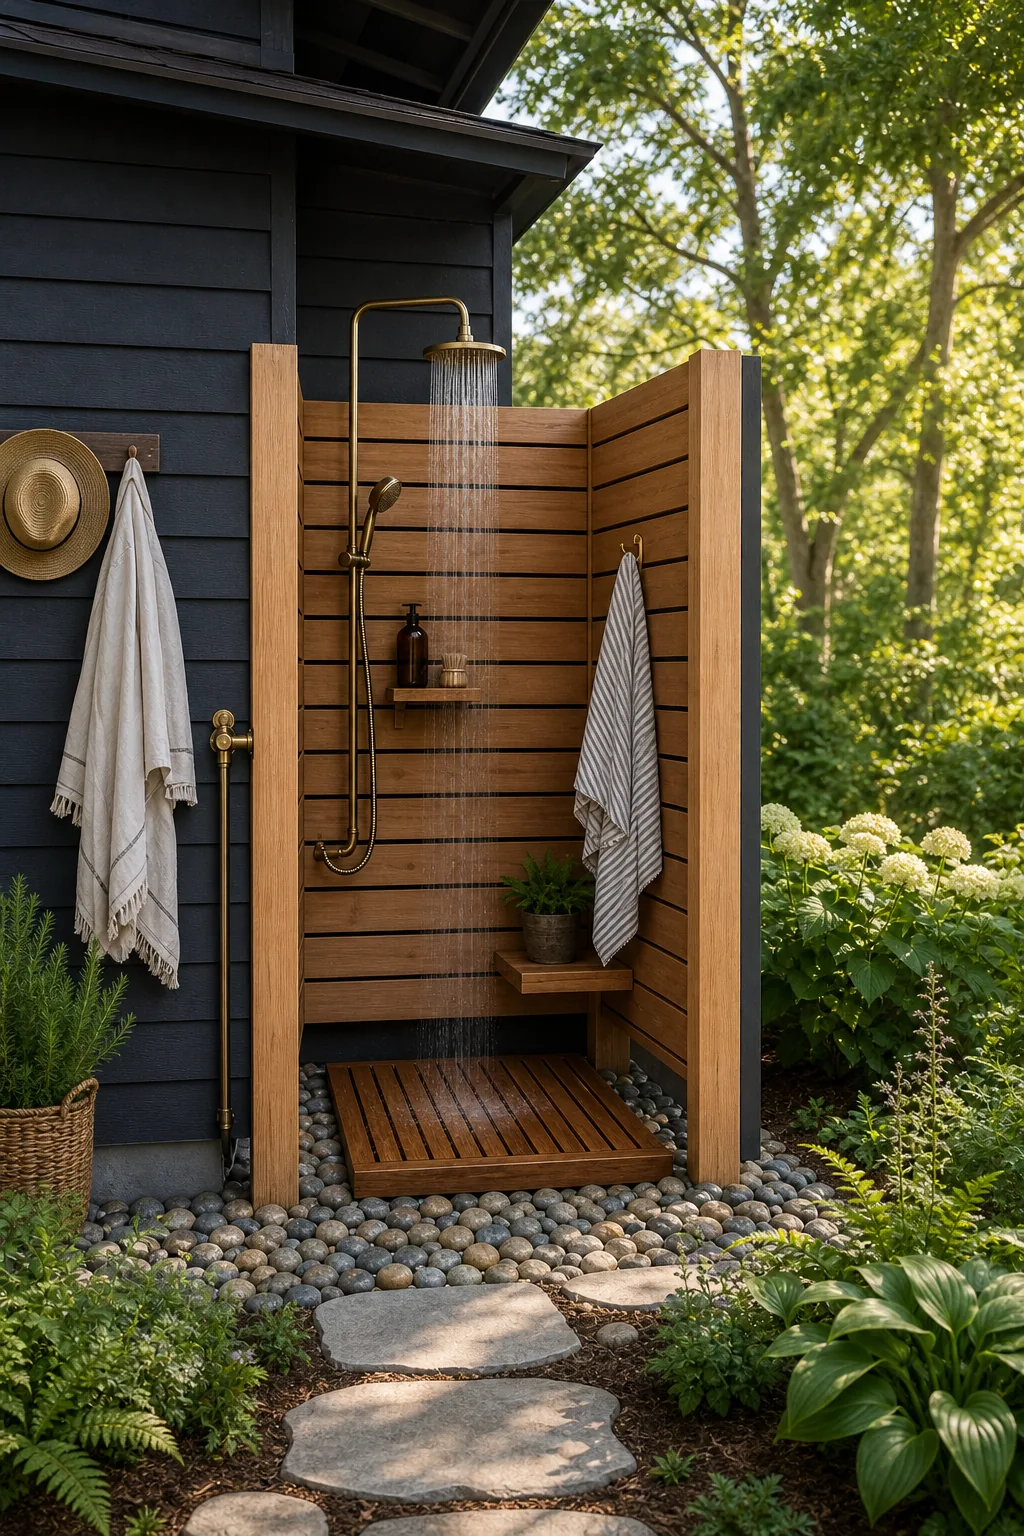
Before you purchase premium cedar lumber or rent heavy excavation equipment to achieve this exact look, verify your site conditions. Run through this final pre-build checklist to ensure your new backyard structure meets all local residential zoning requirements.