
Master Bedroom Layout: The 5 Styling Rules for a Balanced Space
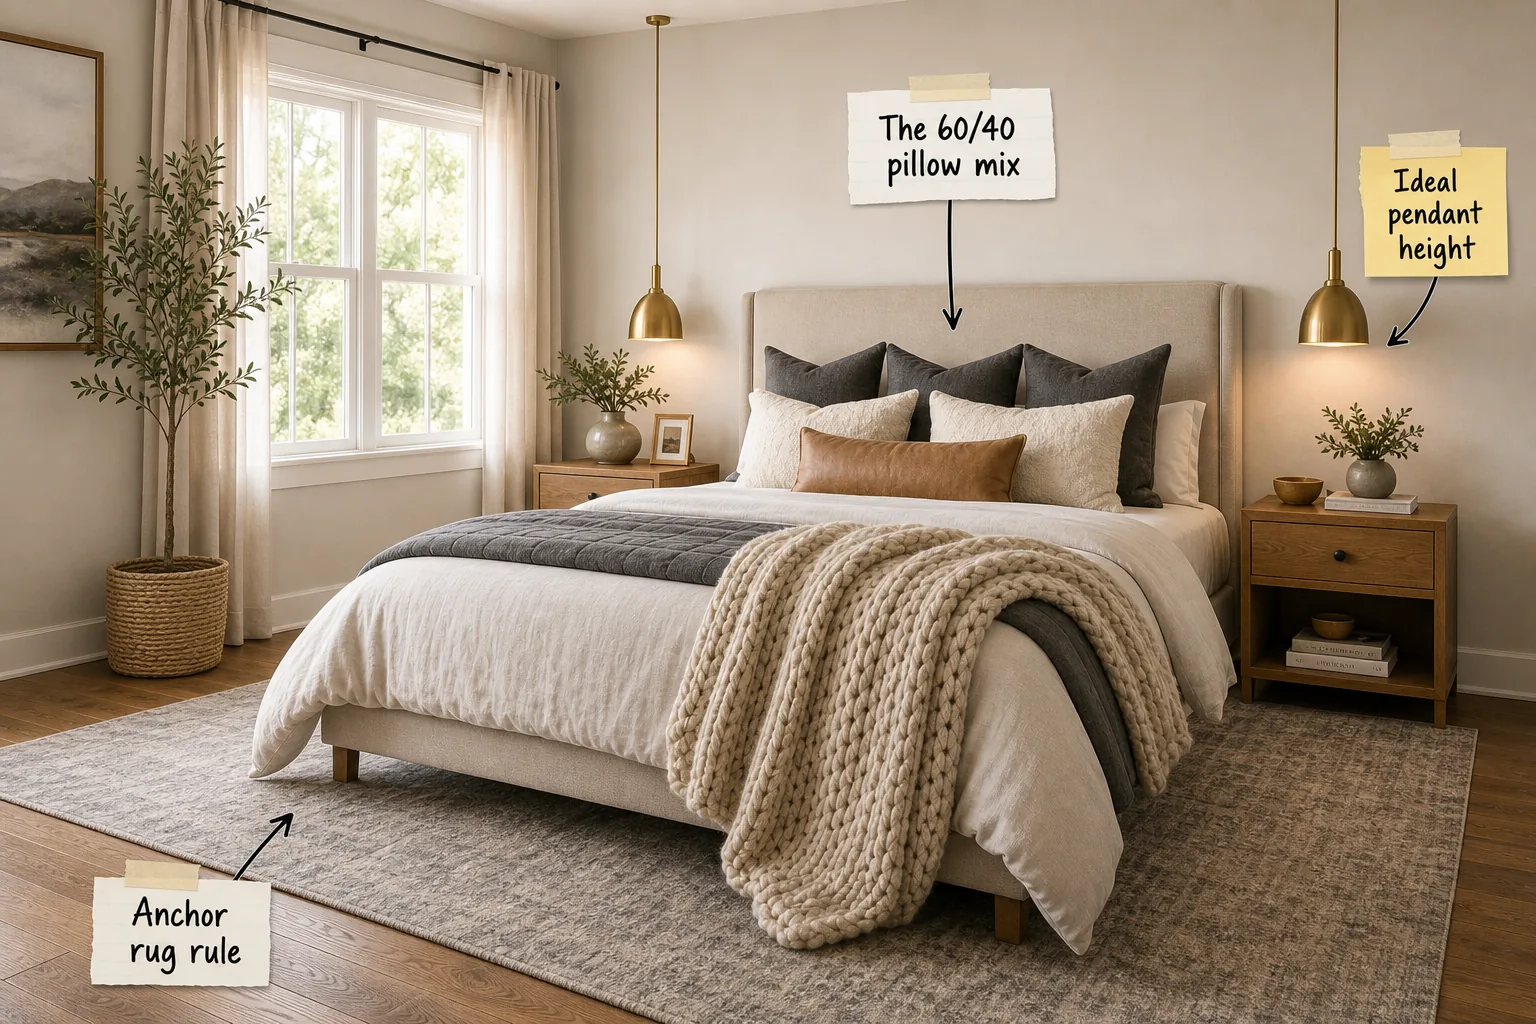
Master the exact measurements, pillow ratios, and rug placements to transform your space with this complete 5-point bedroom layout guide. You will be able to measure, arrange, and style your furniture using a proven framework that perfectly balances every layer from the floor plan up.
The Anchor Rug Rule
Grounding a king bed requires an expansive area rug to establish the anchor rug rule for your room’s foundation. This large textile footprint visually unites the heavy furniture pieces and prevents the bulky mattress from feeling like it is floating aimlessly in the space.
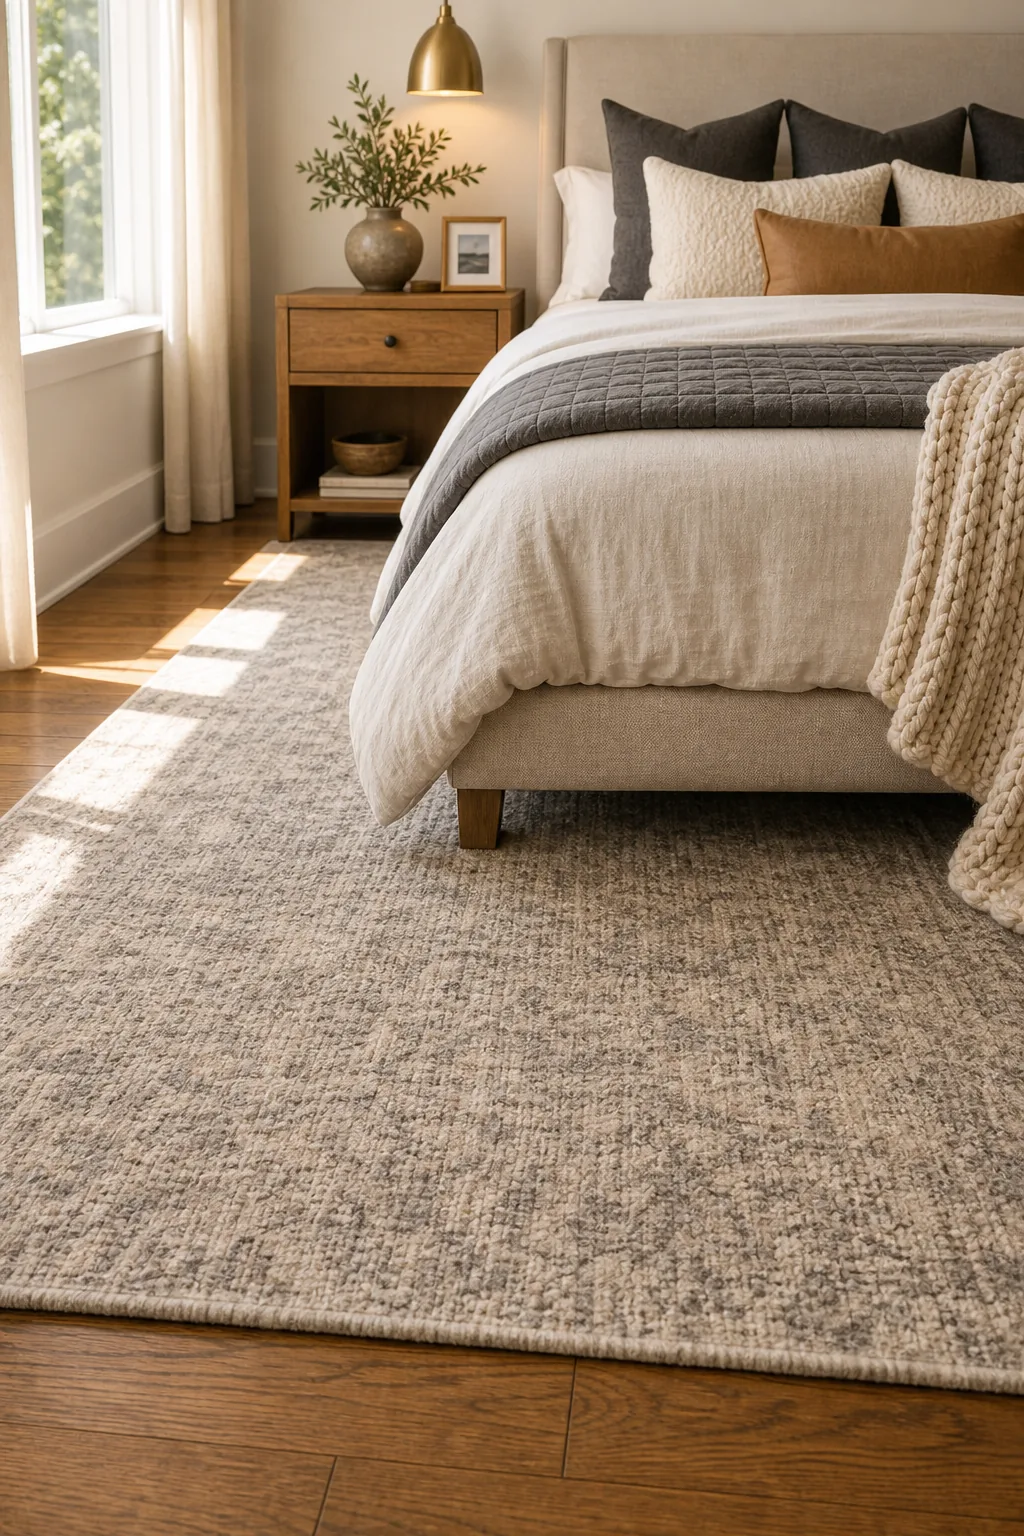
Position the rug to start just in front of the nightstands, leaving 24 to 36 inches of rug visible on the sides and at the foot. This exact placement guarantees a soft landing for your feet while maintaining proper architectural proportions across the floor.
Matching Rugs to Bed Sizes
Selecting the correct textile dimensions ensures your floor plan remains cohesive regardless of your specific mattress size. Using proven proportional pairings prevents the room from feeling disjointed or exposing too much bare hardwood flooring around the primary bedroom furniture.
| Mattress Size | Minimum Rug Size | Ideal Rug Size | Visible Side Perimeter |
|---|---|---|---|
| Queen Bed | 6×9 feet | 8×10 feet | 18 to 24 inches |
| King Bed | 8×10 feet | 9×12 feet | 24 to 36 inches |
| California King | 8×10 feet | 9×12 feet | 24 to 32 inches |
Always measure your available floor space before purchasing a rug to confirm these ideal dimensions will not block door swings or cover floor vents. A properly sized foundation layer immediately elevates the entire room by clearly defining the primary sleeping zone.
Establishing the Symmetry Zone
Matching wood nightstands create a grounding symmetry zone on either side of the mattress to visually anchor the room’s sightlines. This mirrored arrangement calms the eye, centers the bed on the main wall, and builds a structured framework for the rest of your styling choices.
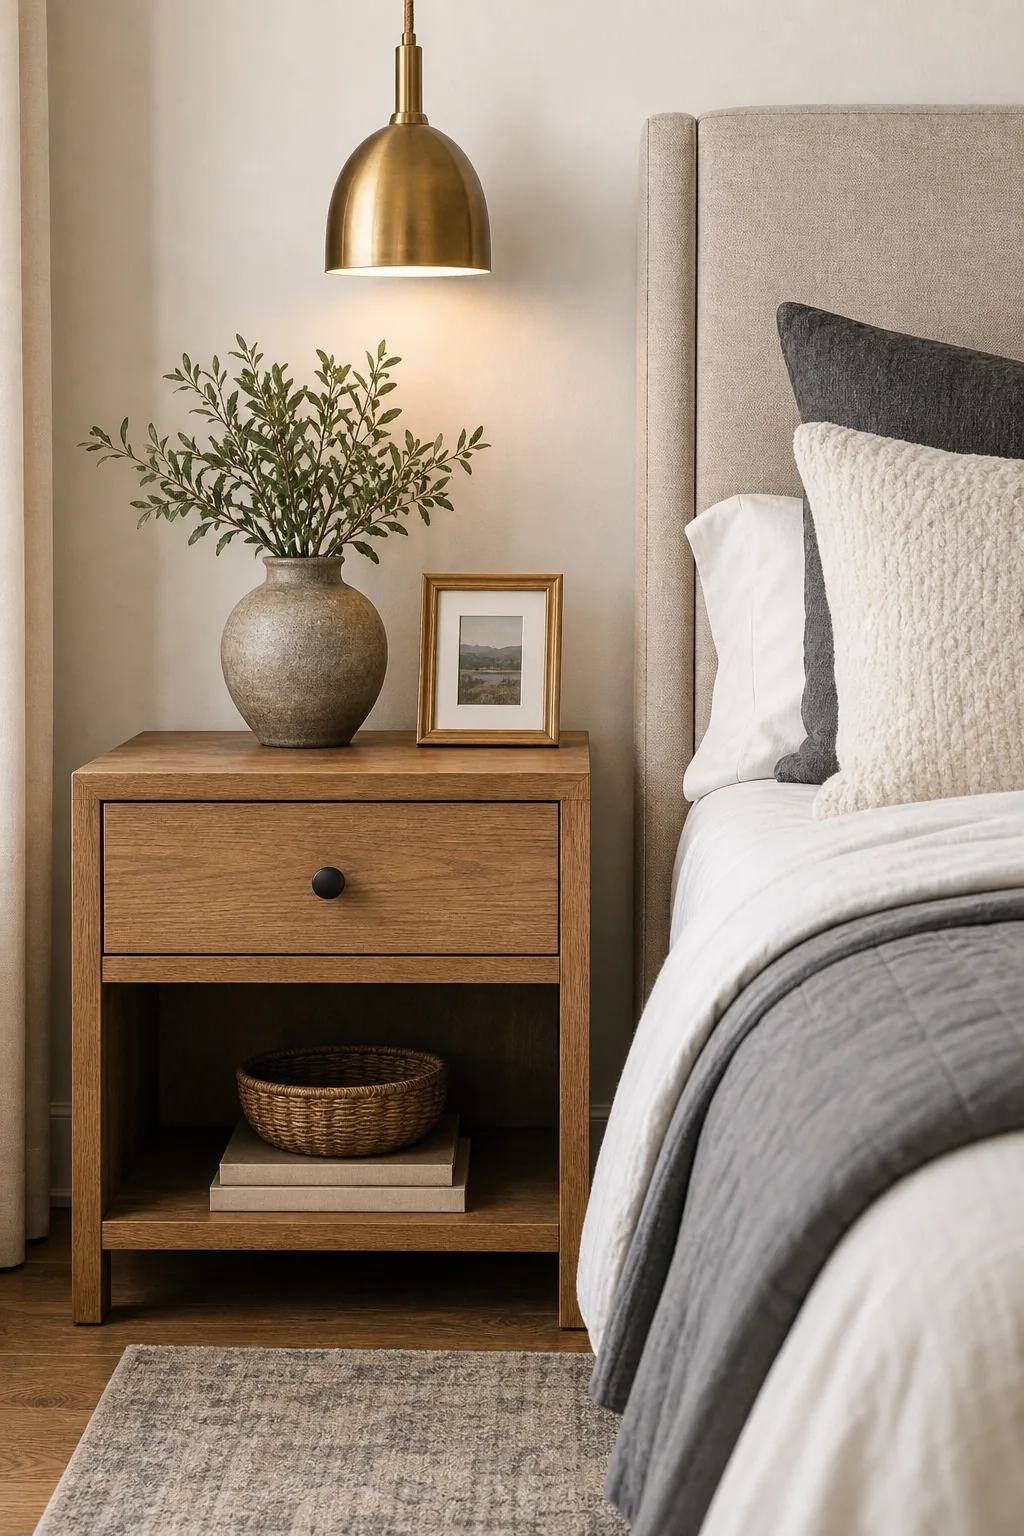
Always leave exactly 2 to 3 inches of breathing room between the nightstand edge and the upholstered bed frame. This precise physical gap prevents a cramped look and allows necessary space for thick duvets or heavy blankets to drape naturally down the sides.
Nightstand Scale and Proportions
Choosing bedside tables that match your mattress height ensures comfortable access to your essentials while maintaining strict visual balance. A nightstand that sits too low will disrupt the established symmetry and make reaching for a glass of water unnecessarily difficult during the night.
Wider mattresses also require more substantial bedside tables to properly ground the expanded visual weight of the frame. Opt for nightstands at least thirty inches wide when framing a king bed to prevent the furniture from looking awkwardly undersized in the expansive space.
Hanging Pendants at the Ideal Height
Suspend your bedside lighting to hit the ideal pendant height of exactly 28 to 32 inches above the mattress top. Hardwiring your fixtures at this elevation replaces bulky table lamps and frees up valuable surface area for books, water glasses, and daily essentials.
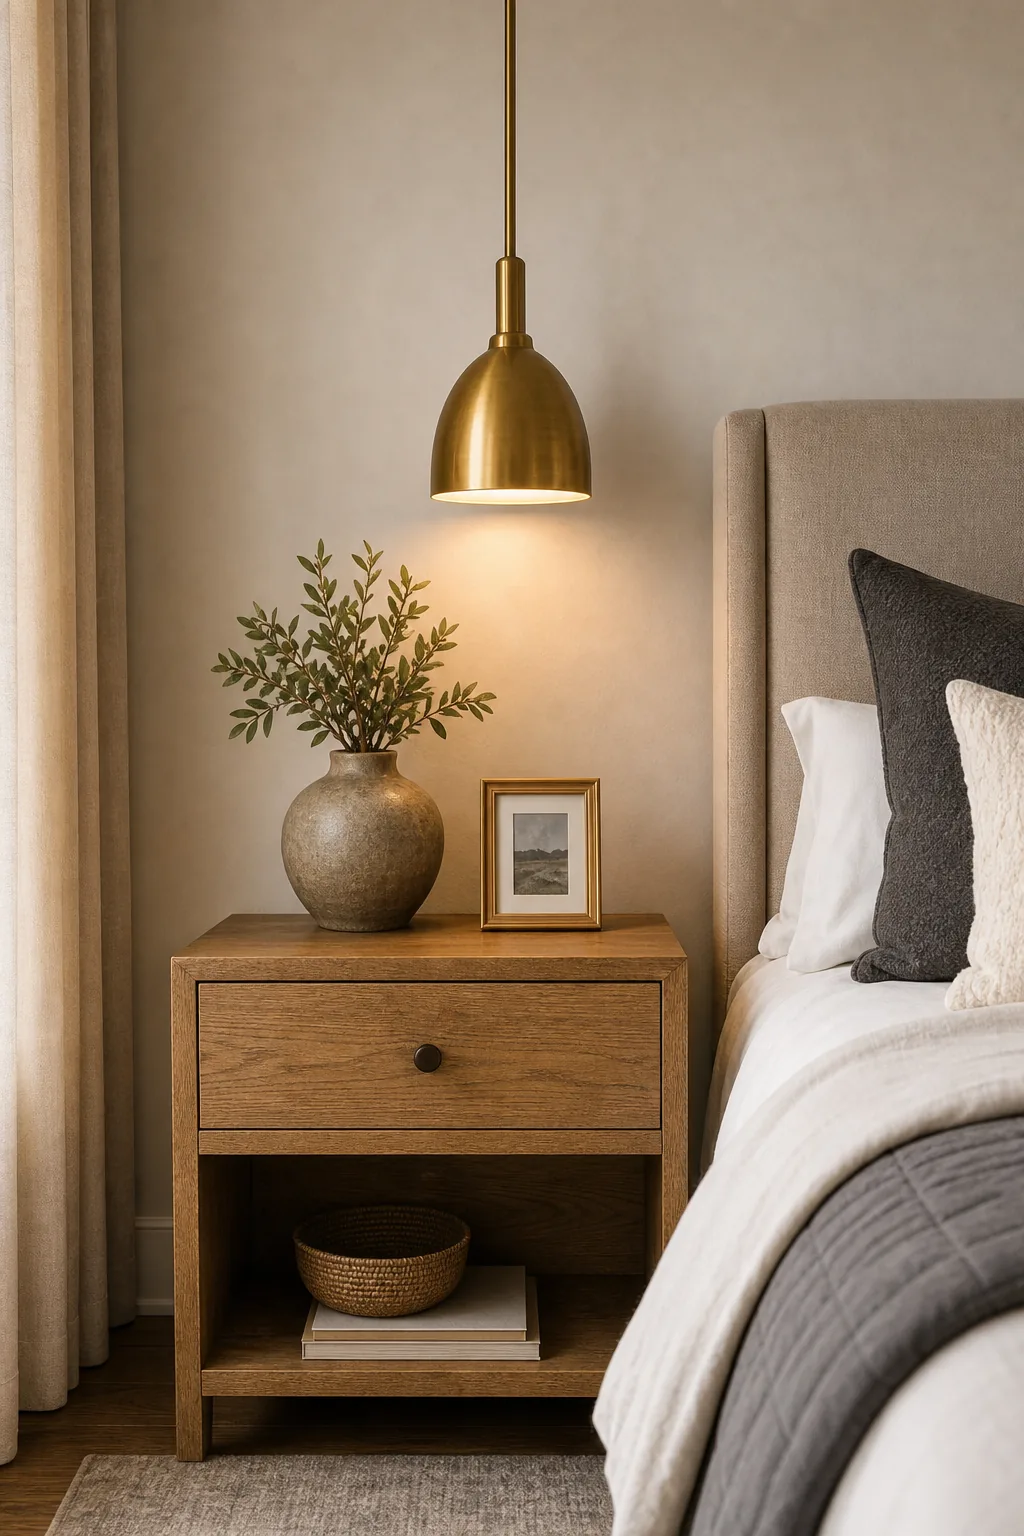
This measurement generally places the fixture 12 to 20 inches above the nightstand, which keeps the light source exactly at eye level when sitting up. The focused downward glow provides perfect task lighting for evening reading without casting harsh overhead shadows across the room.
Bedside Lighting Control
Installing convenient controls for your suspended pendants eliminates the frustration of getting out of a warm bed to adjust the lighting. Planning your electrical layout alongside your furniture placement ensures your evening routine remains completely seamless and genuinely relaxing.
- Install dimmer switches on the wall directly above the nightstand surface for immediate access.
- Choose smart bulbs that can be controlled via a bedside remote or smartphone application.
- Wire the pendants on separate circuits so each person can control their reading light independently.
Properly positioned switches should sit approximately four inches above the nightstand surface to remain easily reachable from a prone position. This deliberate electrical placement maximizes the functional benefits of your suspended pendant lights while keeping messy cords completely hidden inside the walls.
Mastering the 60/40 Pillow Mix
Achieve a styled but uncluttered bed by following the 60/40 pillow mix for your daily decorative arrangement. This specific formula dedicates 60 percent of the visual weight to large, neutral foundation pieces like three dark Euro shams placed firmly against the headboard.
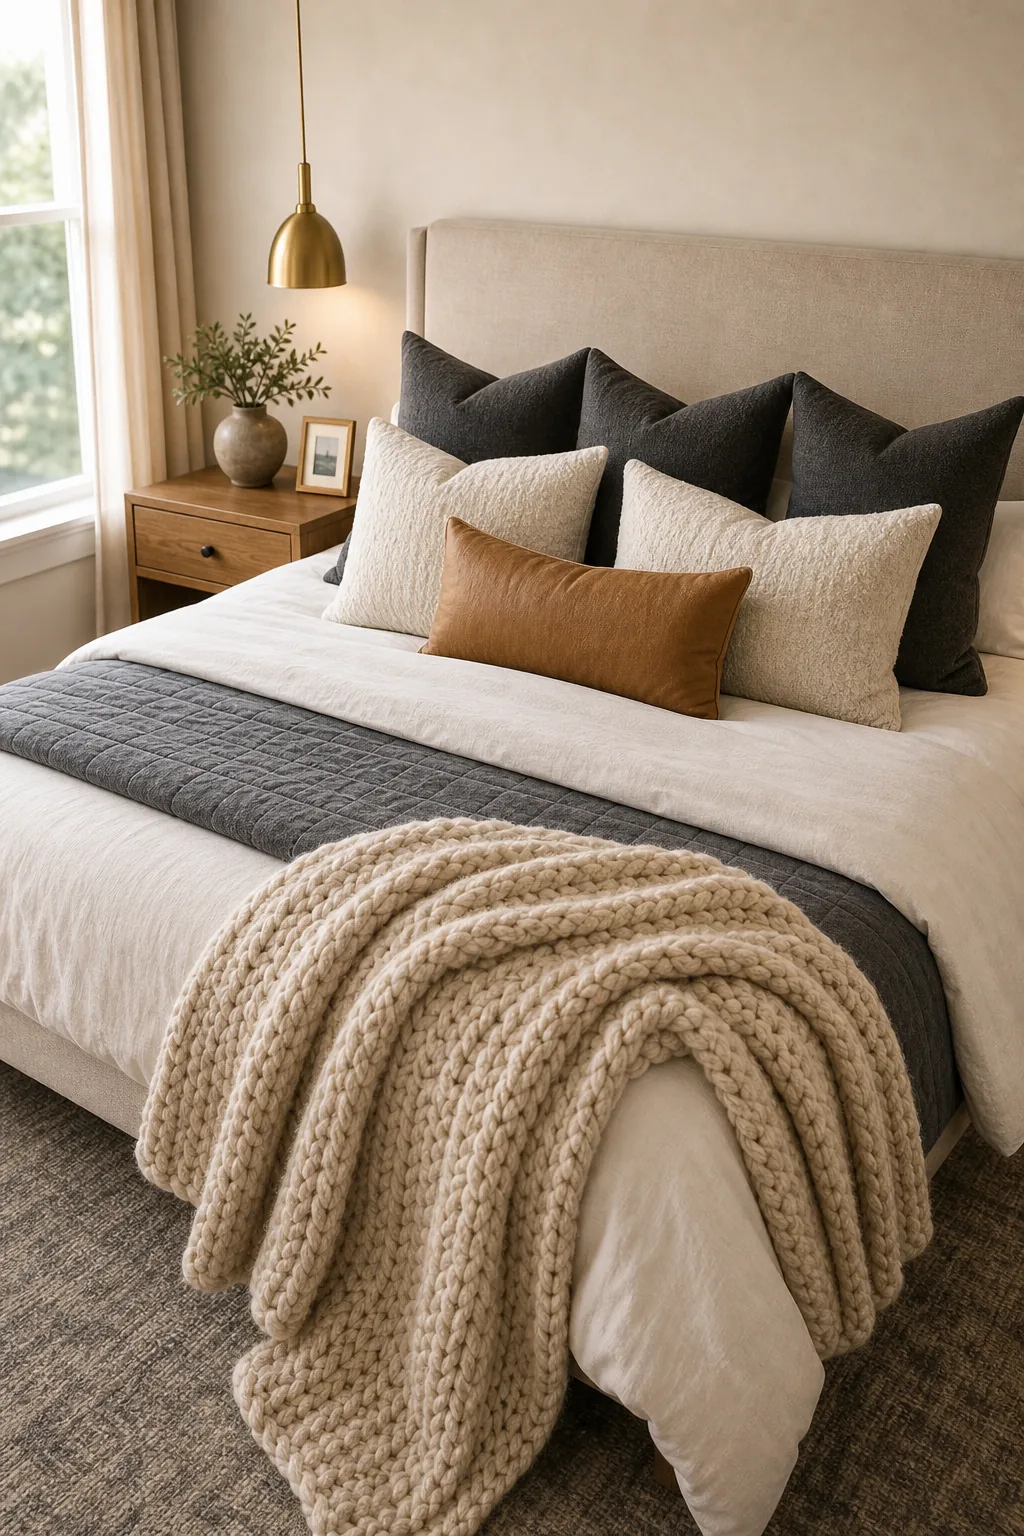
The remaining 40 percent consists of textured or colored accent pillows placed directly in front of the dark foundation layer. This calculated ratio ensures the bed always looks intentionally designed and inviting while remaining incredibly easy to make every single morning.
Selecting Foundation Shams
Darker Euro shams provide crucial visual contrast against light-colored headboards and crisp white sleeping pillows. Utilizing deep charcoal, navy, or rich olive fabrics for these oversized squares creates a strong backdrop that makes your smaller decorative accents truly pop against the bedding.
Applying Texture Layering
Break up flat expanses of smooth linen by practicing intentional texture layering at the foot of the bed. Draping a chunky knit throw adds immediate visual depth, breaks up the monolithic mattress shape, and invites a relaxed, lived-in atmosphere to the sleeping space.

Combine at least three distinct fabric textures, such as crisp linen sheets, a smooth cotton duvet, and a heavy wool blanket. Mixing these varied material weights prevents the room from feeling sterile and introduces necessary tactile warmth to the overall bedroom design.
Seasonal Blanket Weights
Swapping your draped textiles as the seasons change keeps the bedroom comfortable while effortlessly refreshing the visual palette. Transitioning from a lightweight breathable cotton waffle weave in summer to a dense, heavy alpaca wool knit in winter ensures optimal sleeping temperatures year-round.
Balancing Wood and Metal Finishes
Pairing warm wood nightstands with sleek brass pendants perfectly illustrates how to balance organic materials with highly reflective accents. This deliberate material contrast prevents the bedroom from feeling overly matched, flat, or resembling a generic, uninspired furniture showroom set.
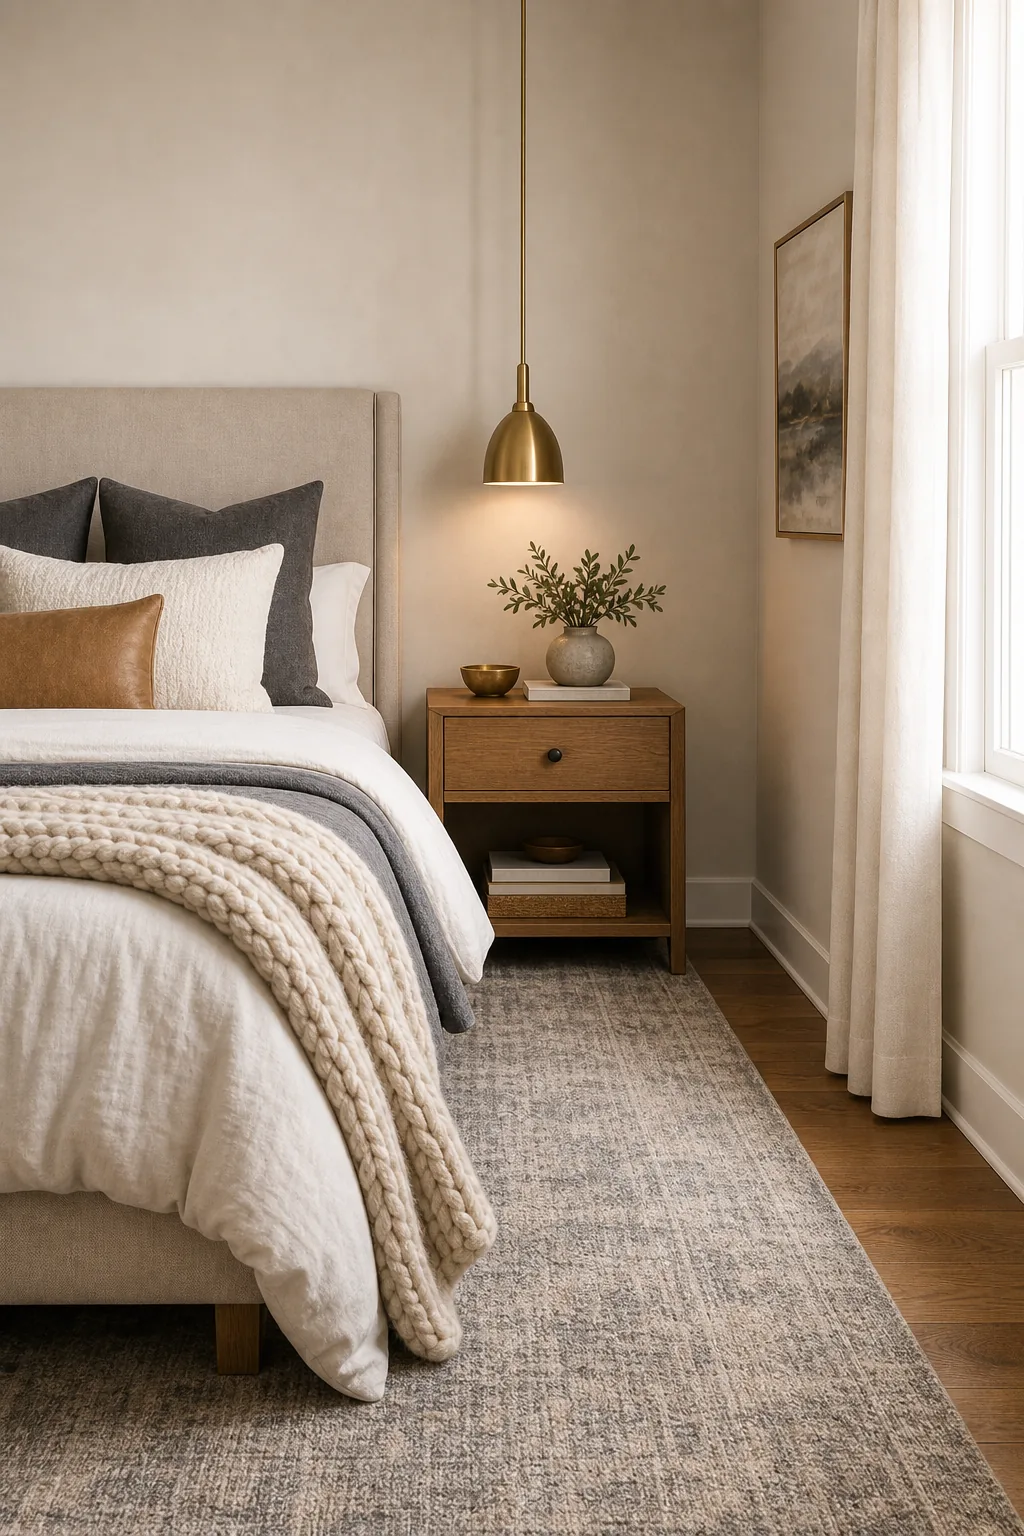
Limit your bedroom hardware to exactly two primary metal finishes to maintain a serene, cohesive atmosphere throughout the space. Restricting your palette ensures the metallic elements act as intentional highlights rather than creating a chaotic visual distraction against the natural wood tones.
Mixing Hardware Tones
Combining a dominant warm metal like unlacquered brass with a secondary cool metal like matte black creates sophisticated, layered depth. Ensuring one finish clearly dominates the room while the other serves strictly as an accent prevents the metals from competing for visual attention.
Common Layout Mistakes to Avoid
Frequent spatial errors like undersized textiles or floating beds on empty walls will quickly undermine an otherwise beautiful design scheme. Identifying these layout missteps early ensures your bedroom feels both intentionally planned and structurally sound before you invest in expensive pieces.
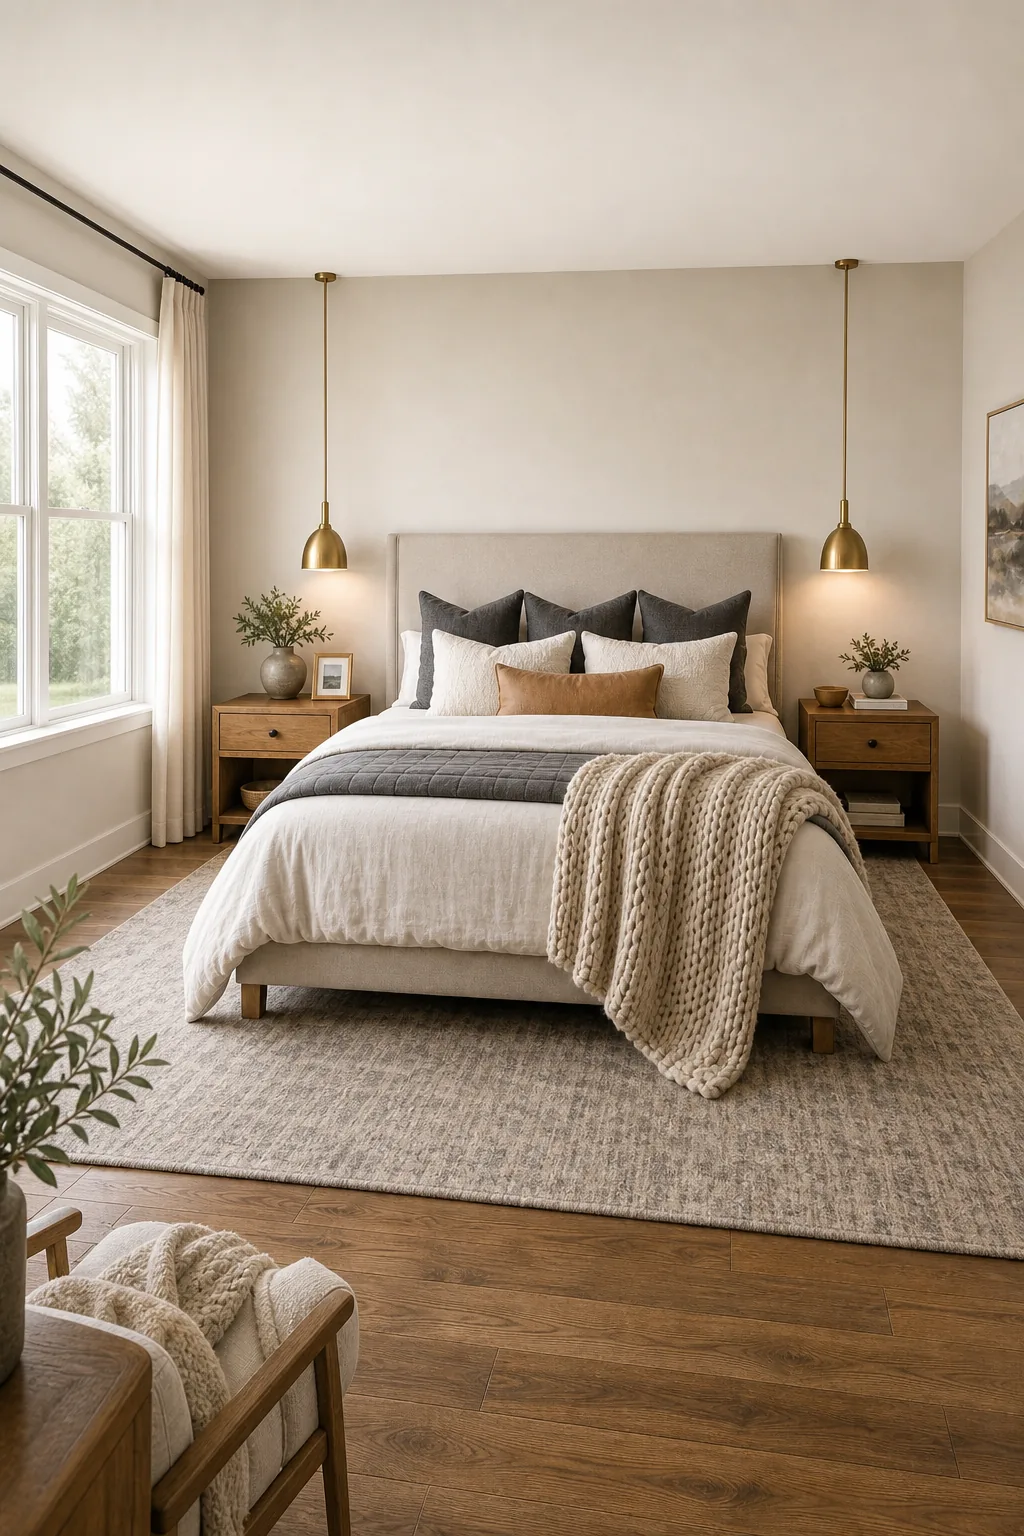
Before finalizing your floor plan, double-check these frequent layout errors that can easily disrupt the room’s visual balance.
Verifying Spatial Clearances
Leaving adequate walking paths around your newly styled bed ensures the room remains highly functional for daily use. Always maintain a minimum of thirty-six inches of clear floor space between the foot of the mattress and any opposing dressers or bedroom walls.
The Complete 5-Point Layout Guide
You can now apply the 5-point bedroom layout guide to confidently measure, arrange, and elevate your own sleeping space. This structured framework guarantees that your floor plan, lighting, and layered textiles will work together to build a truly balanced, restful room.
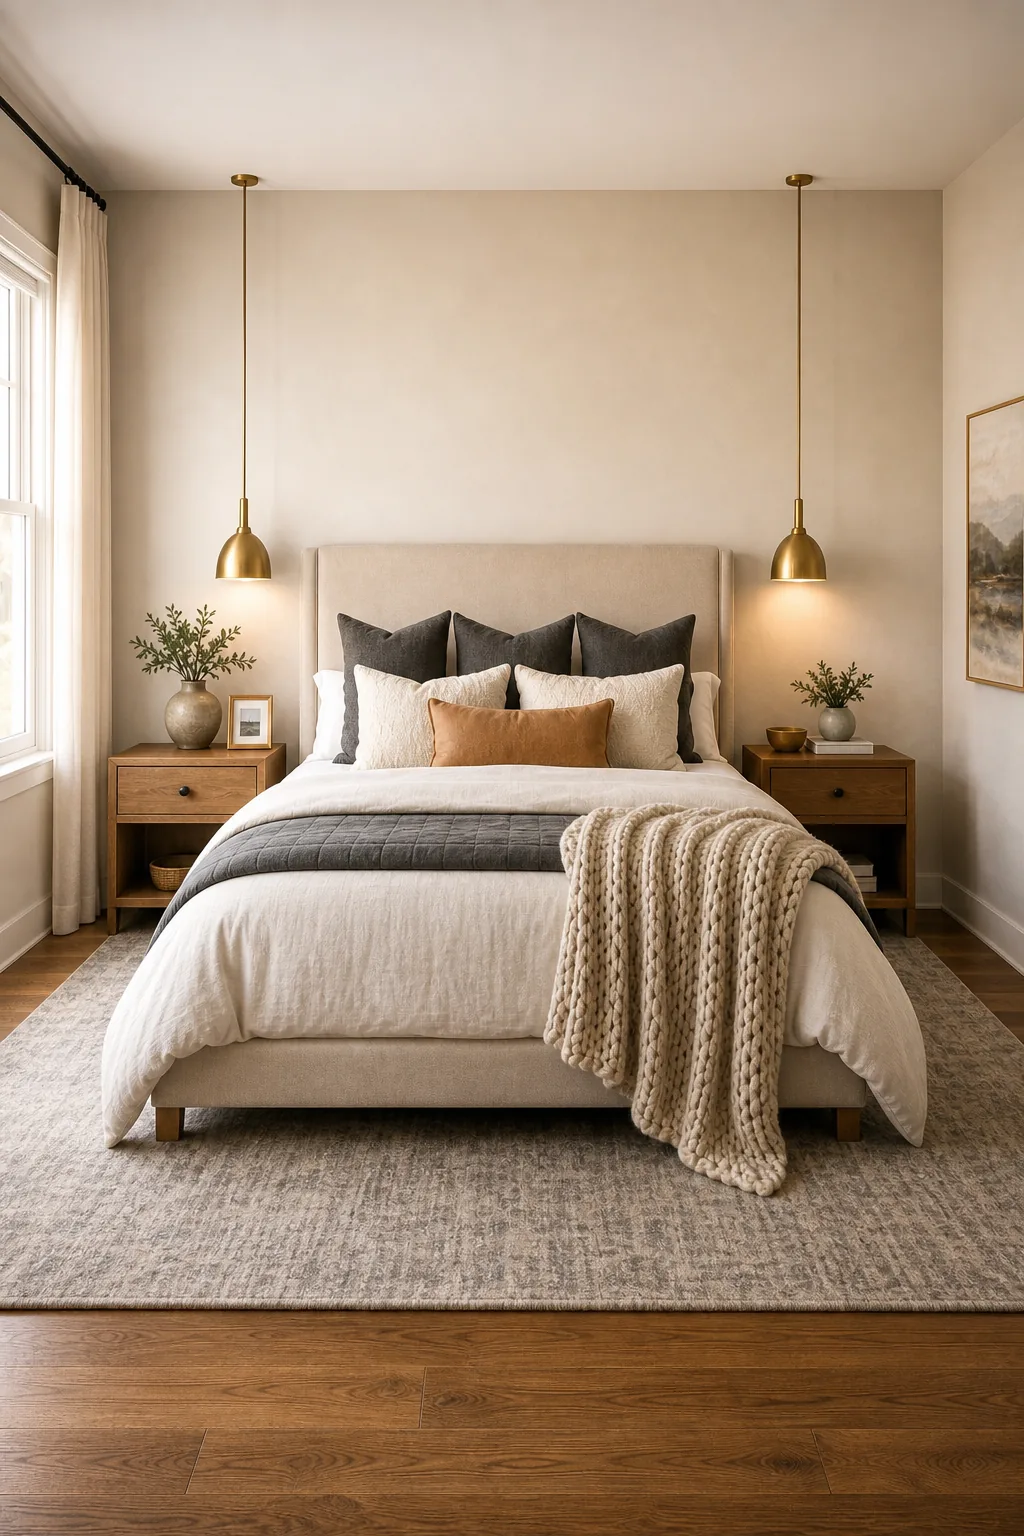
Follow this final checklist to implement the five styling rules and complete your own bedroom transformation.