
DIY Home Photoshoot: The Complete Setup Guide & Checklist
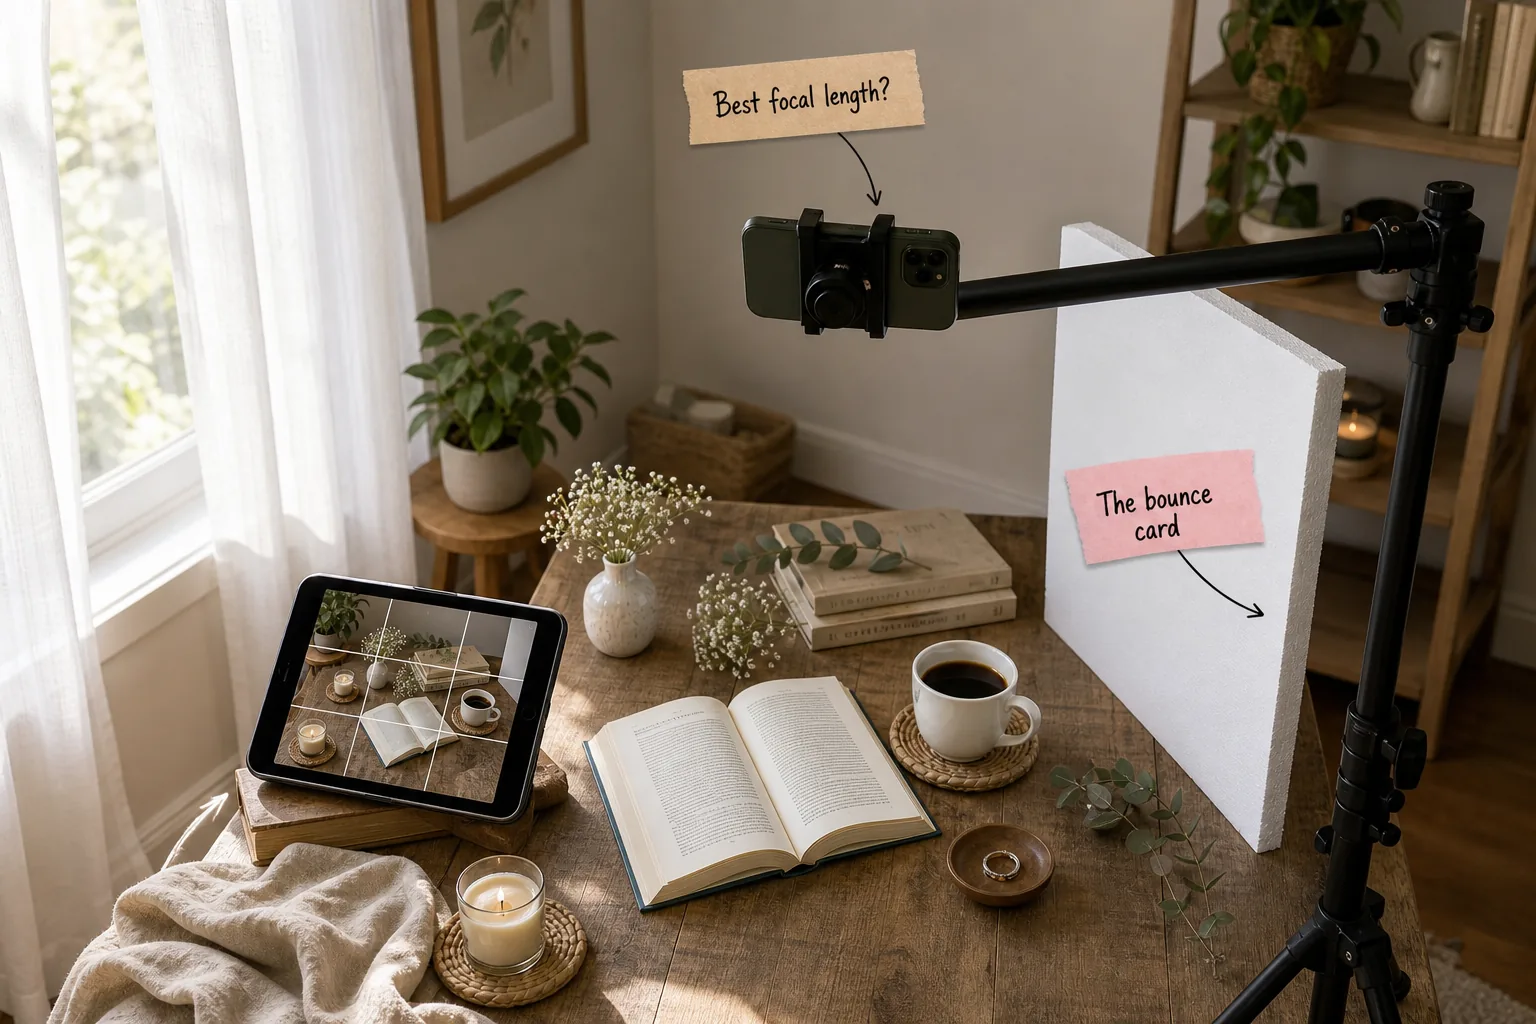
Master your next styling session with this complete DIY home photoshoot setup guide and equipment checklist. You will quickly assemble a professional flatlay studio using diffused window light, a smartphone, and basic household materials to capture stunning, high-resolution imagery.
Finding Your Primary Light Zone
Start by locating a large window that provides indirect sunlight, placing your styling table 12 to 24 inches from the glass to maximize usable brightness. Pulling the semi-transparent fabric across the pane prevents blown-out highlights on your highly reflective ceramic props.
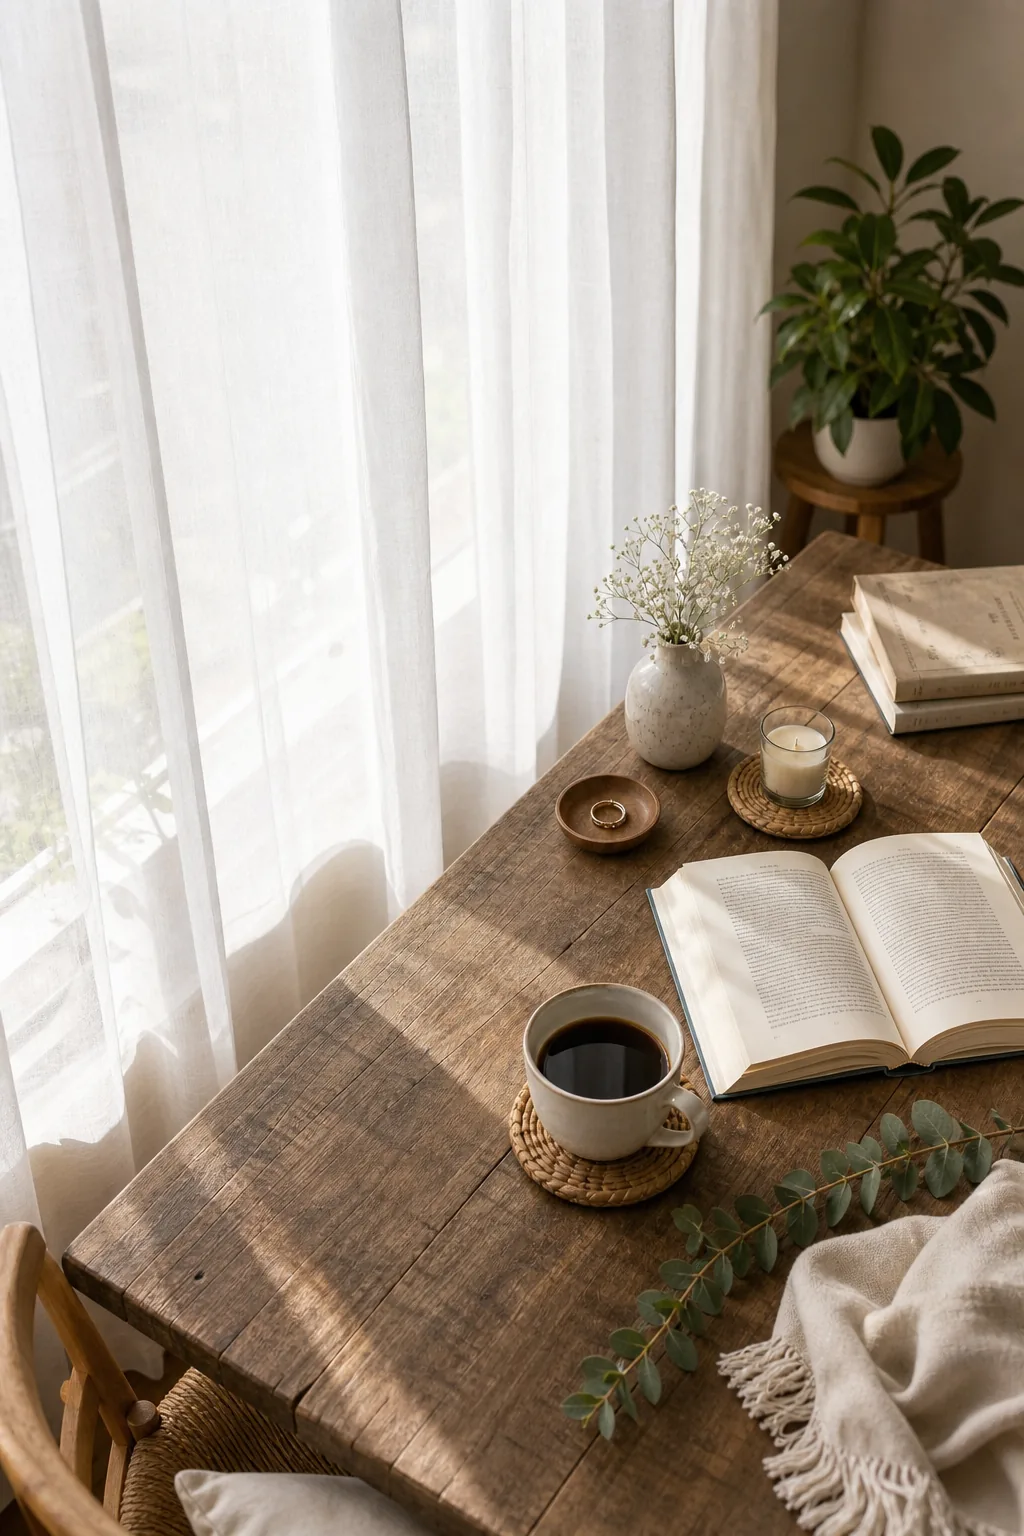
Evaluating the immediate space around your chosen window ensures you have enough physical room to maneuver safely before committing to the final furniture placement. You must maintain easy access to all three sides of the table during the styling process.
Measuring the Studio Footprint
A successful home studio requires adequate clearance for both the photographer and the structural supports. Measure your available floor space to guarantee you can comfortably step around the arrangement without bumping the delicate overhead rig.
- Leave a minimum 36-inch walking path along the primary shooting side.
- Allocate a 24-inch square zone strictly for the tripod or C-stand base.
- Keep a small secondary table nearby to hold props waiting for placement.
- Ensure power outlets remain accessible for charging your phone during the shoot.
- Store extra styling clips and tape in a small container under the table.
- Keep a microfiber cloth nearby to wipe fingerprints off glossy surfaces.
Establishing these clear physical boundaries prevents accidental bumps that could easily knock your carefully styled composition entirely out of focus. This dedicated workspace keeps your workflow efficient and protects fragile ceramic props from unnecessary damage during the lengthy session.
Positioning the Bounce Card
Window light alone creates heavy shadows, so stand a white foam board directly across from the light source to reflect brightness back onto the scene. Ensure this bounce card is parallel to the window and matches the height of your tallest object.
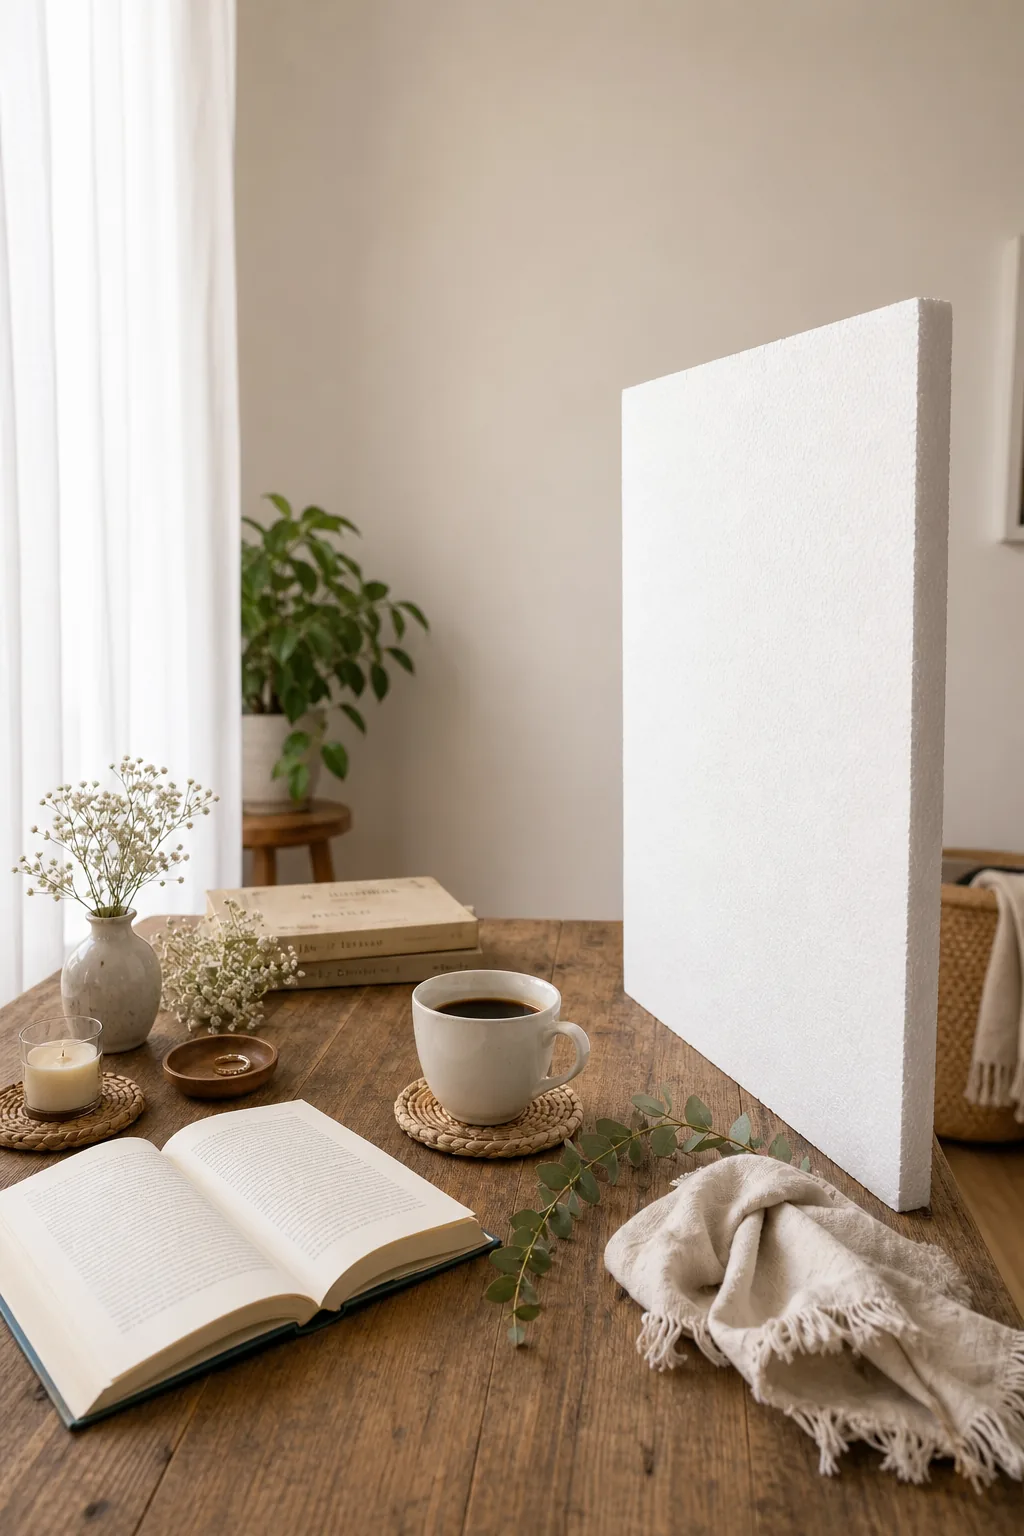
Positioning the reflective surface precisely opposite the primary light source guarantees that the deepest shadows receive a gentle, natural fill light. This technique balances the overall exposure and reveals intricate textures that would otherwise vanish into pure darkness during the final edit.
Creating a Freestanding Reflector
Keeping the reflection board perfectly upright leaves your hands completely free to adjust the camera settings and meticulously style the fragile props on the table. A stable, heavy freestanding base is absolutely essential for maintaining consistent, repeatable lighting between every single shot.
Choosing the Best Focal Length
Using the default camera setting introduces unwanted barrel distortion that subtly curves the straight edges of your table. Switch to your phone’s 2x or 3x telephoto setting to compress the scene and keep lines perfectly parallel across the entire visible frame.
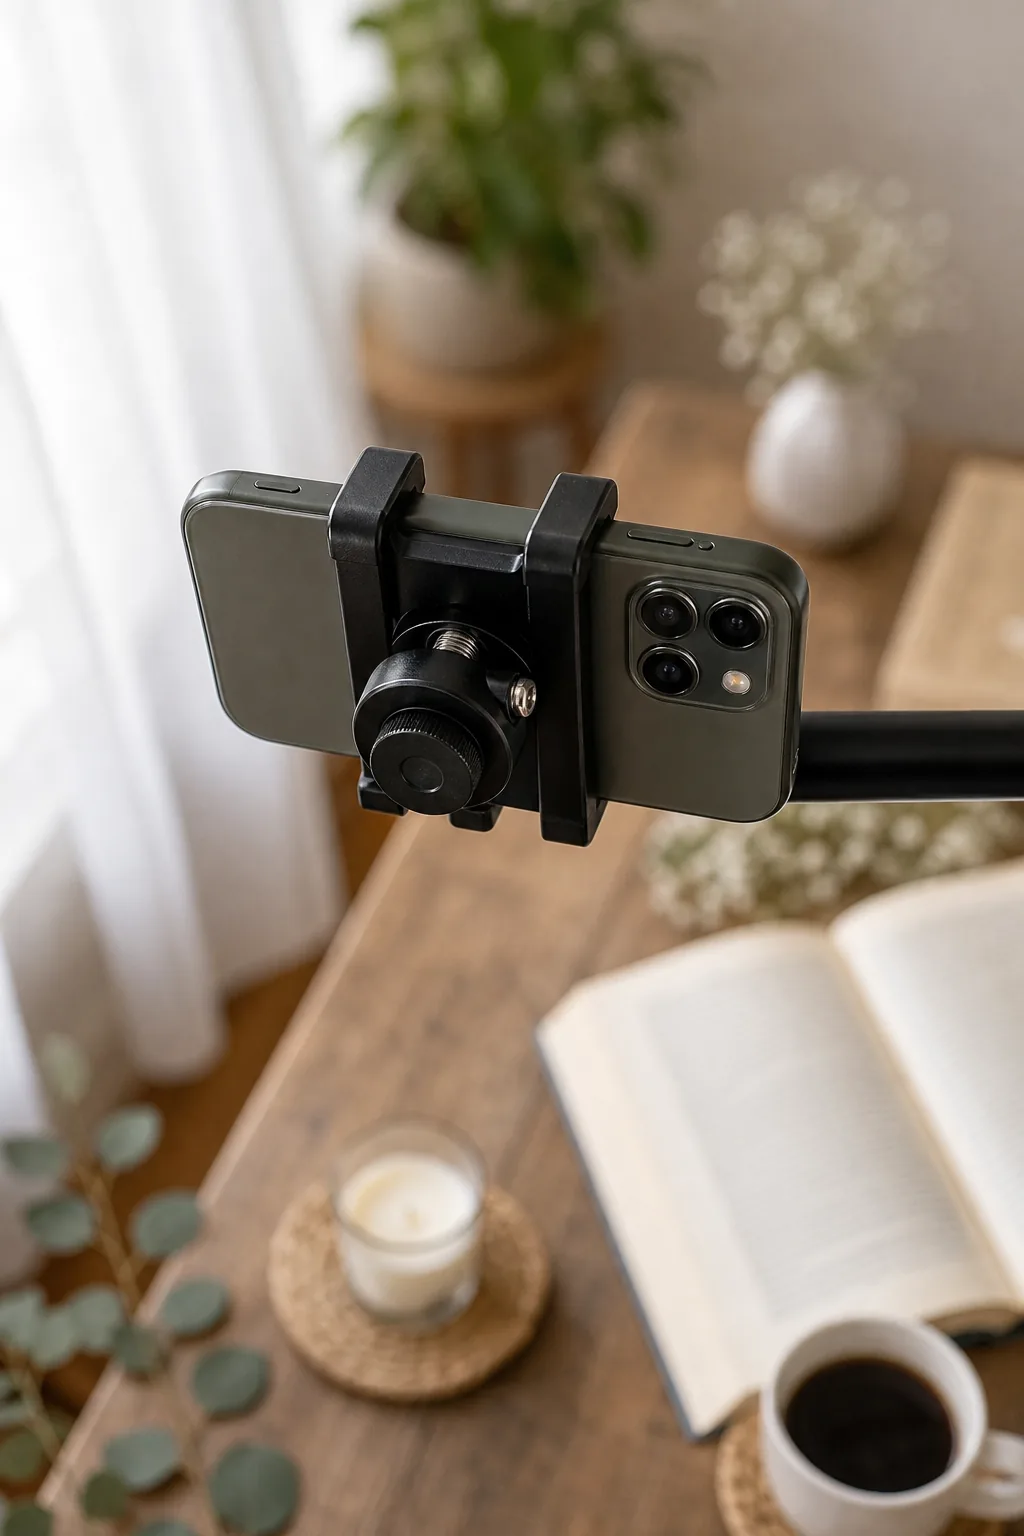
Relying on the optical telephoto lens rather than digital zoom guarantees your final image retains maximum resolution. This optical compression flatters geometric shapes and ensures round objects like plates or cups maintain their perfect circular form regardless of their exact placement.
Understanding Lens Compression
Different focal lengths drastically alter how the background and foreground relate to one another. Selecting the proper optical telephoto lens equivalent prevents cylindrical items from appearing unnaturally oval-shaped when positioned near the outer boundaries of your carefully styled composition.
| Smartphone Setting | Focal Equivalent | Best Application | Visual Effect |
|---|---|---|---|
| 0.5x Ultra-Wide | 13mm to 16mm | Tight architectural spaces | Heavy edge distortion |
| 1x Standard | 24mm to 28mm | General lifestyle portraits | Slight barrel bowing |
| 2x Telephoto | 50mm to 56mm | Overhead flatlay scenes | Natural human eye view |
| 3x Telephoto | 72mm to 77mm | Detail macro styling | Moderate compression |
| 5x Telephoto | 120mm Equivalent | Extreme close-up details | Maximum background blur |
| 10x Digital | 240mm Equivalent | Not recommended | Severe pixelation |
Matching the correct optical focal length to your specific styling needs instantly elevates the professional quality of your photography. Avoid using the standard wide lens for tabletop arrangements, as the inherent barrel distortion will inevitably warp the straight edges of your table.
Securing the Overhead Rig
Holding the phone by hand introduces camera shake and inconsistent angles that ruin a crisp composition. Mount your smartphone to a rigid boom arm, taking time to level the rig so the camera lens sits perfectly parallel to the tabletop.
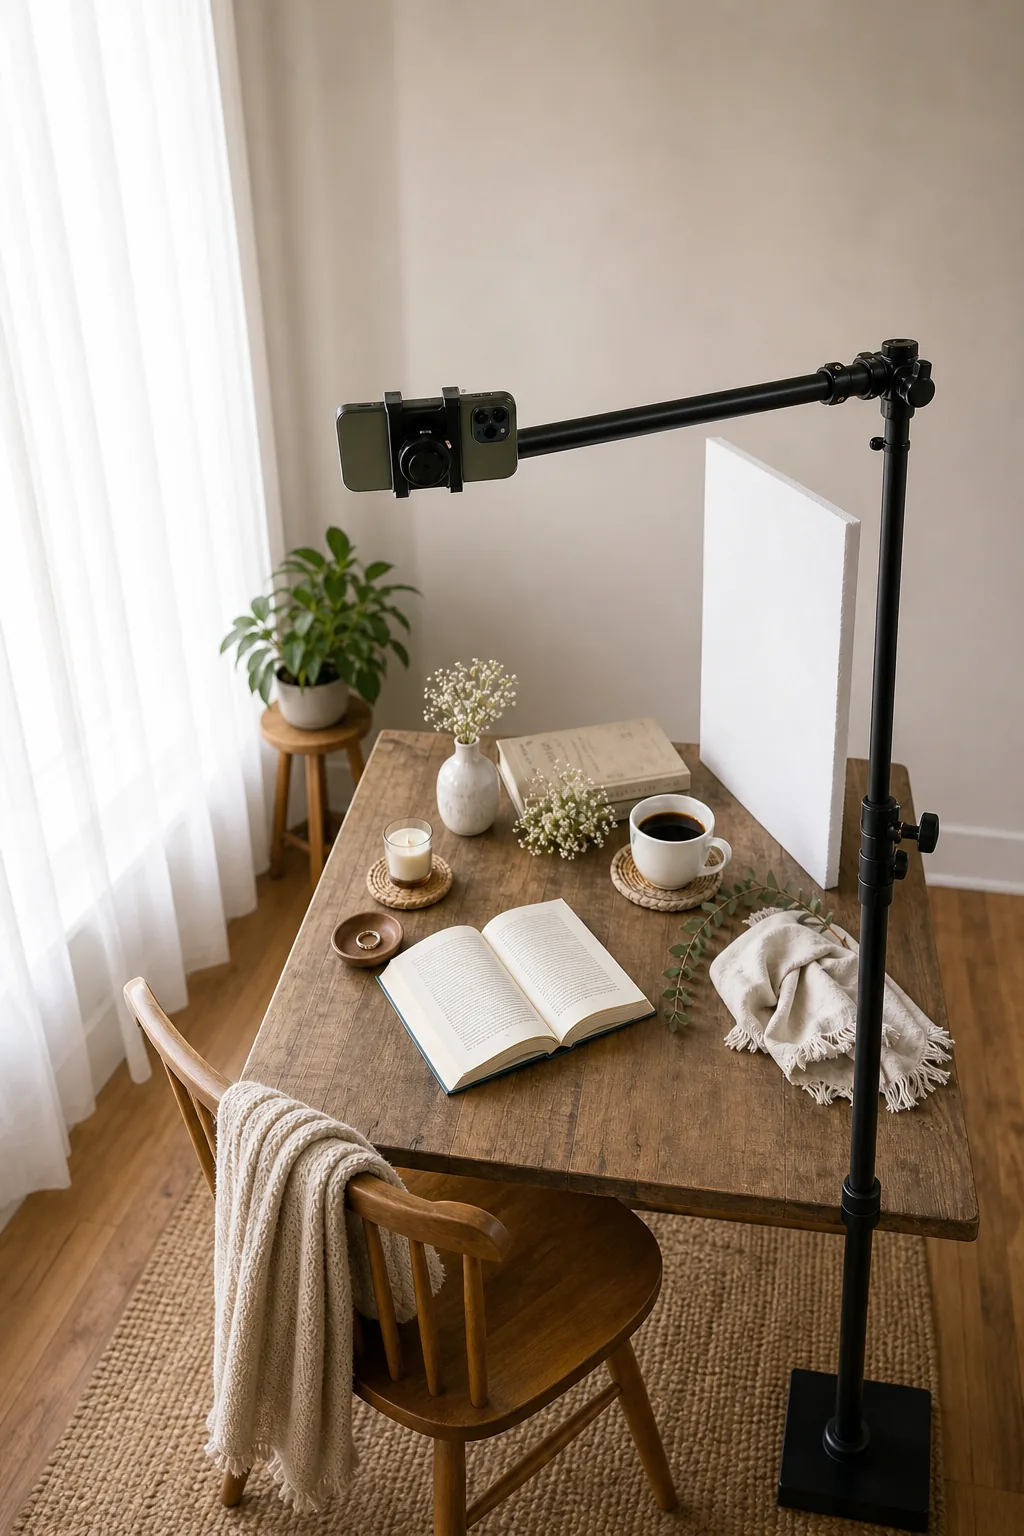
A perfectly level camera prevents the perspective distortion that makes flatlays look amateurish. Use a small bubble level on the back of your phone case to verify the horizontal alignment before locking the swivel joints tightly into their final rigid position.
Stabilizing the Boom Arm
Extending a heavy smartphone horizontally away from the center column dramatically shifts the rig’s center of gravity. You must counterbalance this overhanging weight to prevent the entire stand from tipping forward and crushing your carefully styled tabletop arrangement below.
- Drape a 5-pound sandbag directly over the longest tripod leg.
- Tighten every knuckle joint starting from the base upward.
- Position the boom arm so it extends directly over a supporting leg.
- Lock the rolling casters if your stand features a wheeled base.
- Check that the phone clamp rubber grips are completely free of dust.
- Route any charging cables down the central column to prevent snagging.
Testing the rig’s stability by gently tapping the center column confirms the setup can safely support your device. Taking these structural precautions guarantees peace of mind while you focus entirely on the creative aspects of the photoshoot.
Styling with Negative Space
Resist the urge to fill every inch of the table with props and busy textures. Reserve roughly 30 to 40 percent of the frame as negative space to balance the overall composition and give the viewer’s eyes a place to rest.

Clustering your most detailed items into one specific zone creates a strong visual anchor. Allowing the rest of the surface to remain completely bare draws the viewer’s eye exactly where you want it without causing unnecessary visual fatigue during the viewing experience.
Balancing Texture and Color
Leaving deliberate empty zones prevents the viewer’s eye from feeling overwhelmed by competing visual elements. This crucial breathing room allows the intricate details of your primary hero objects to truly command attention without ever fighting against heavily patterned, distracting styling backgrounds during the final edit.
Aligning the Rule of Thirds Grid
Turn on your smartphone camera app’s native grid feature to overlay a 3×3 matrix directly onto your screen. Carefully shift your tabletop arrangement to align the heaviest visual elements along these invisible power lines rather than relying on a basic center placement.
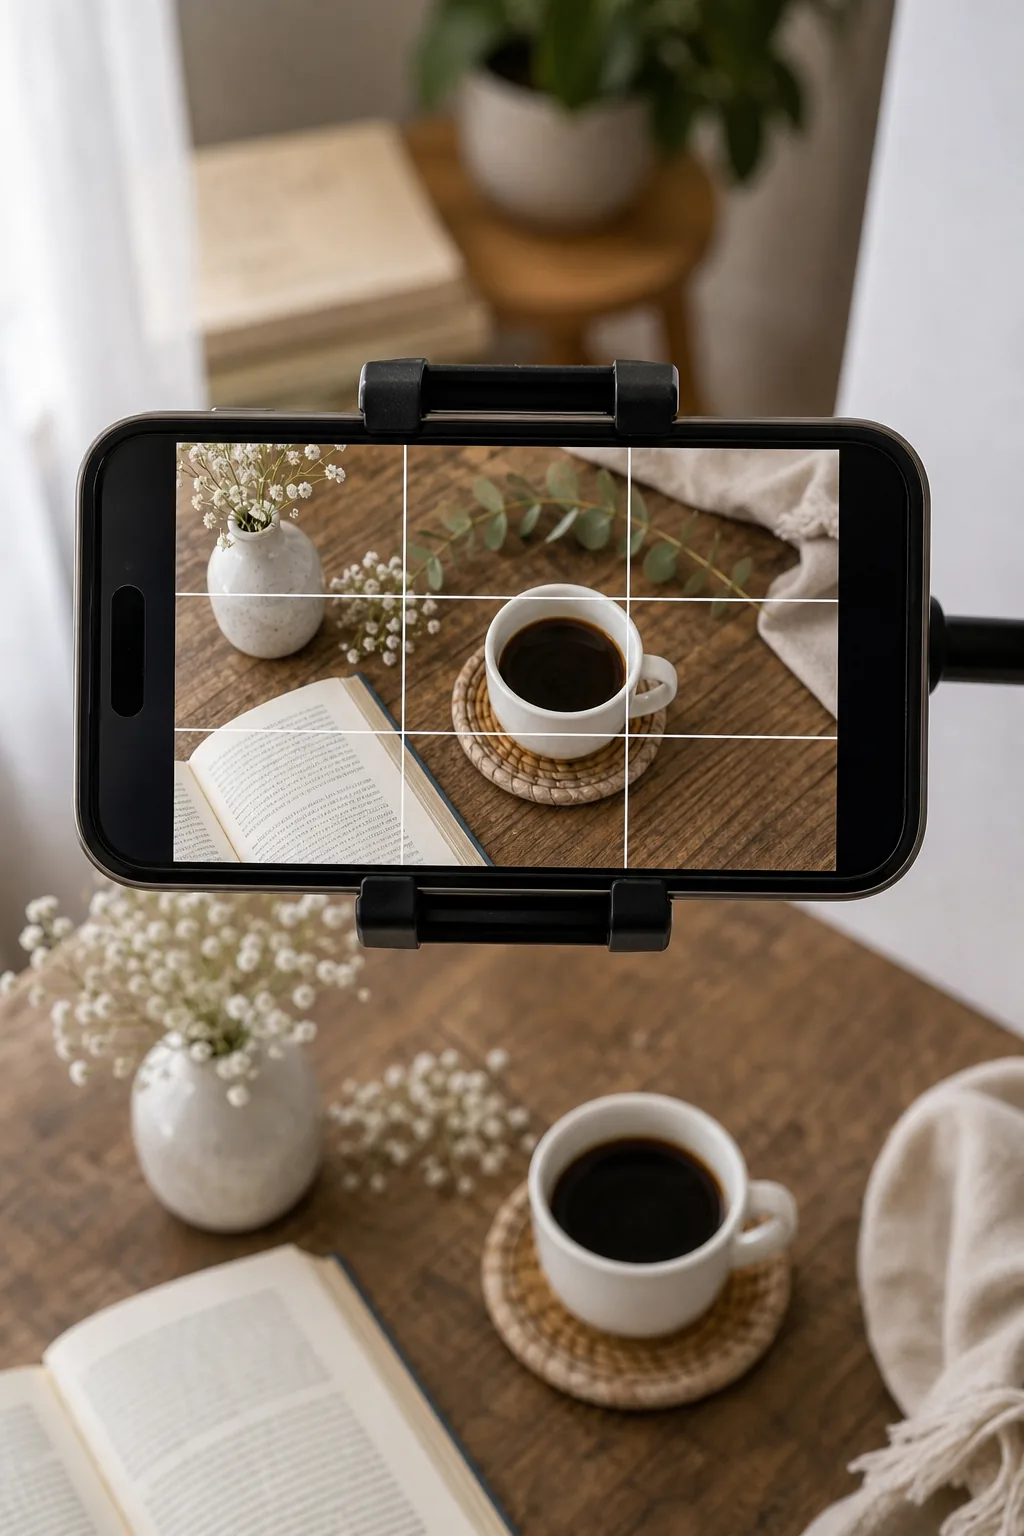
This classic compositional framework instantly transforms a chaotic pile of objects into an organized, professional image. Aligning the main subject along these invisible power lines feels inherently more balanced and aesthetically pleasing to the human eye than a simple center placement.
Anchoring the Hero Object
Placing the most visually heavy item off-center immediately creates a dynamic, engaging photograph. This proven mathematical ratio guides the viewer naturally through the scene, starting from the main subject and gently sweeping toward the supporting secondary props nestled in the corners.
Managing Reflections and Shadows
Once the grid is perfectly set, closely check the screen for any unwanted glare reflecting off shiny ceramic props. Nudge the bounce card an inch closer or further away to soften the shadow gradients without creating a completely flat, dimensionless final image.

Observing how the light wraps around cylindrical objects helps you identify harsh hot spots before you press the shutter. Taking a moment to evaluate the contrast on your screen ensures the highlights remain crisp while the shadows retain rich, readable details.
Fine-Tuning the Gradients
Micro-adjustments to your reflector distance drastically change the overall mood of the final capture. Moving the board closer fills in deep contrast for a bright, airy aesthetic, while pulling it back preserves moody, dramatic shadows that beautifully highlight organic wood textures.
The Complete Setup Equipment Checklist
You do not need expensive studio strobes to replicate this professional look. Assemble your entire physical support system first to ensure a smooth, uninterrupted photoshoot process from the initial lighting tests through to the final high-resolution capture on your device.
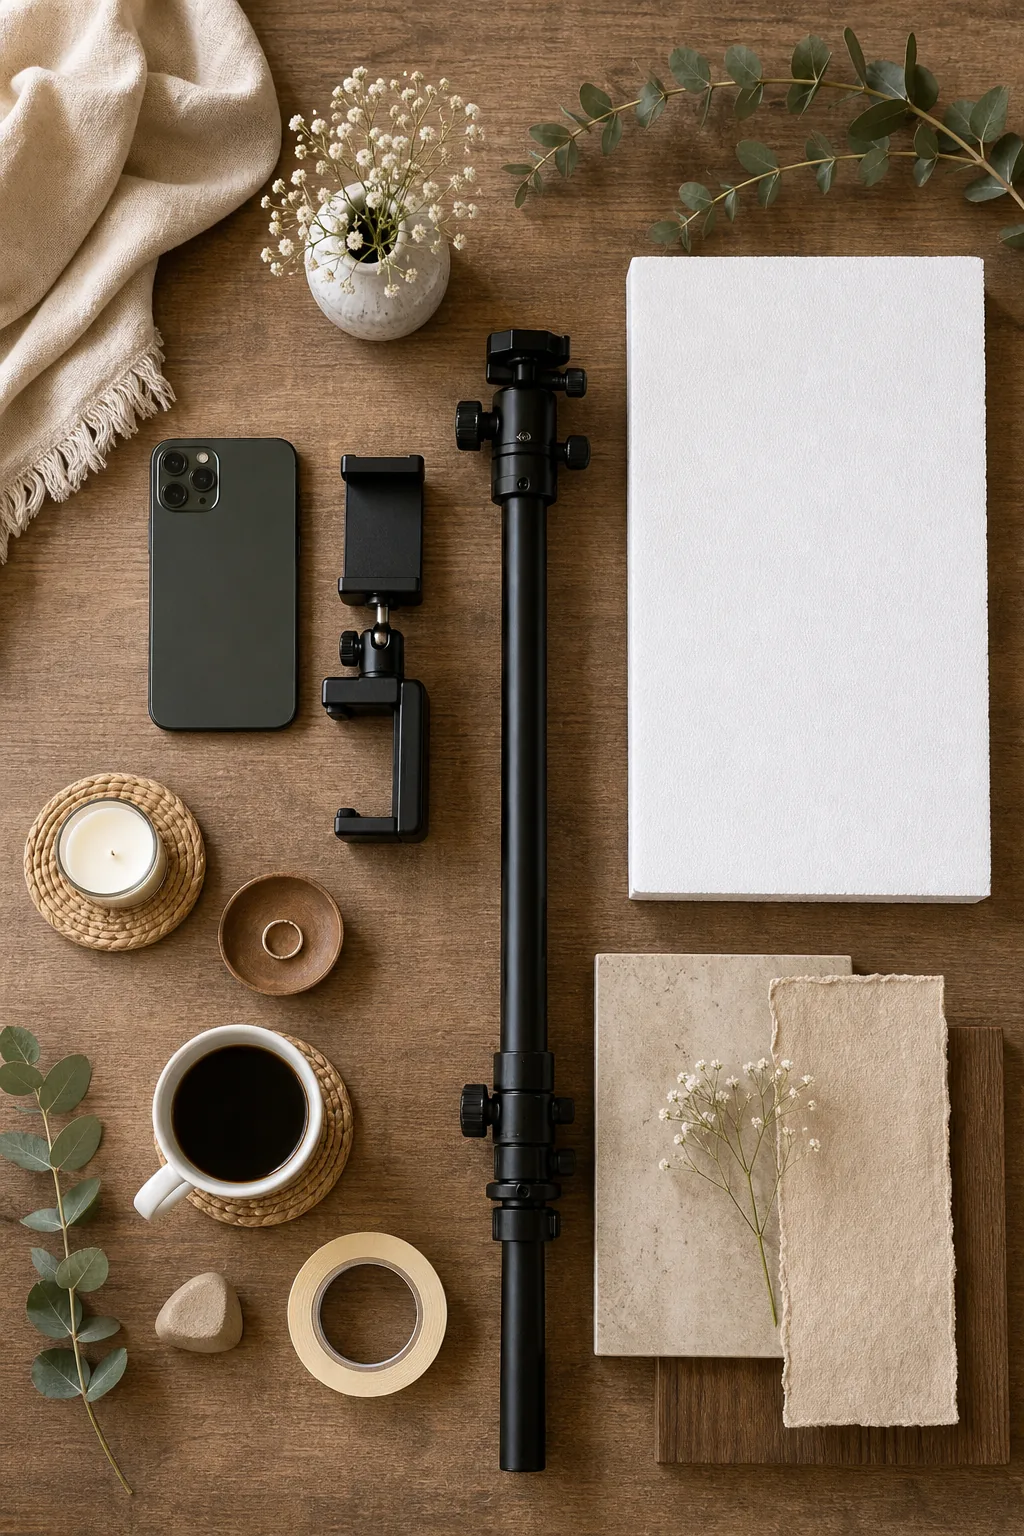
Verify you have these essential structural items ready and within arm’s reach before setting up your primary light zone. Organizing your gear beforehand prevents you from constantly stepping away and accidentally shifting the delicate table alignment during the actual styling phase.