
Hidden Under-Stairs Pull-Out Closet: Hardware & Build Guide
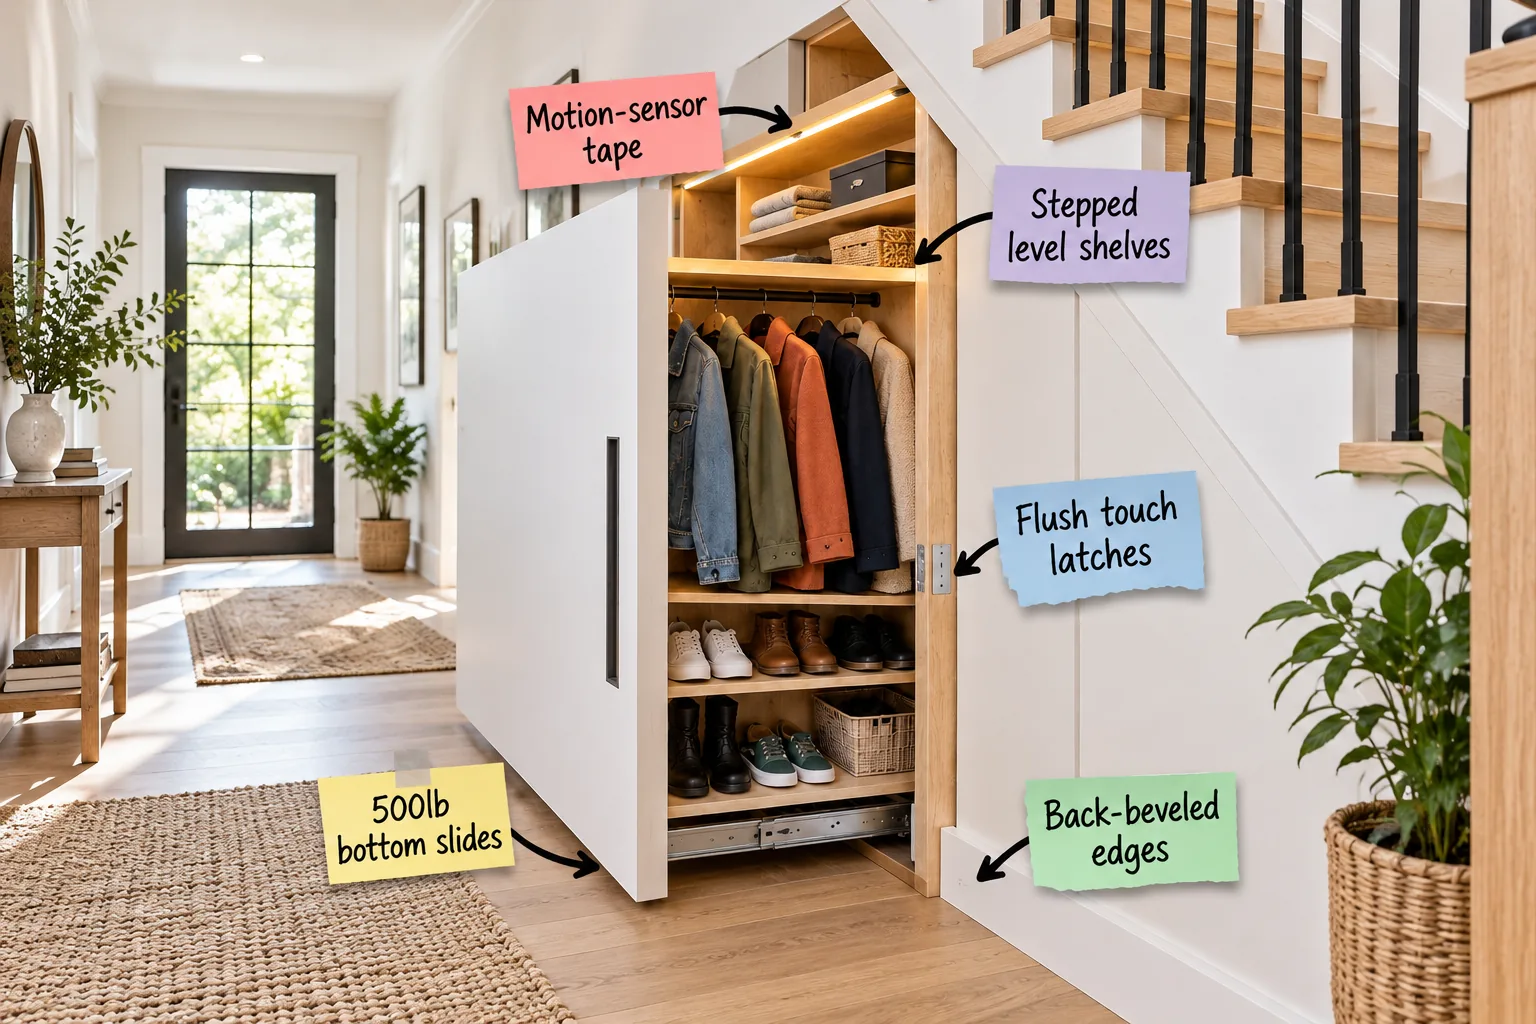
You can absolutely transform that awkward triangular void under your stairs into a massive hidden pull-out closet, and I have the exact hardware list and measurements you need to build it. This complete pull-out hardware and measurement guide will help you source the correct weight-rated slides and calculate every clearance for a seamless finish.
Creating a Seamless Push-to-Open Front
Achieving a truly hidden look requires eliminating exterior handles entirely, which I learned the hard way after my first closet build looked like an obvious, clunky cabinet. By installing heavy-duty flush touch latches on the inner frame, the massive drawer pops open with just a firm press on the drywall-matched panel.
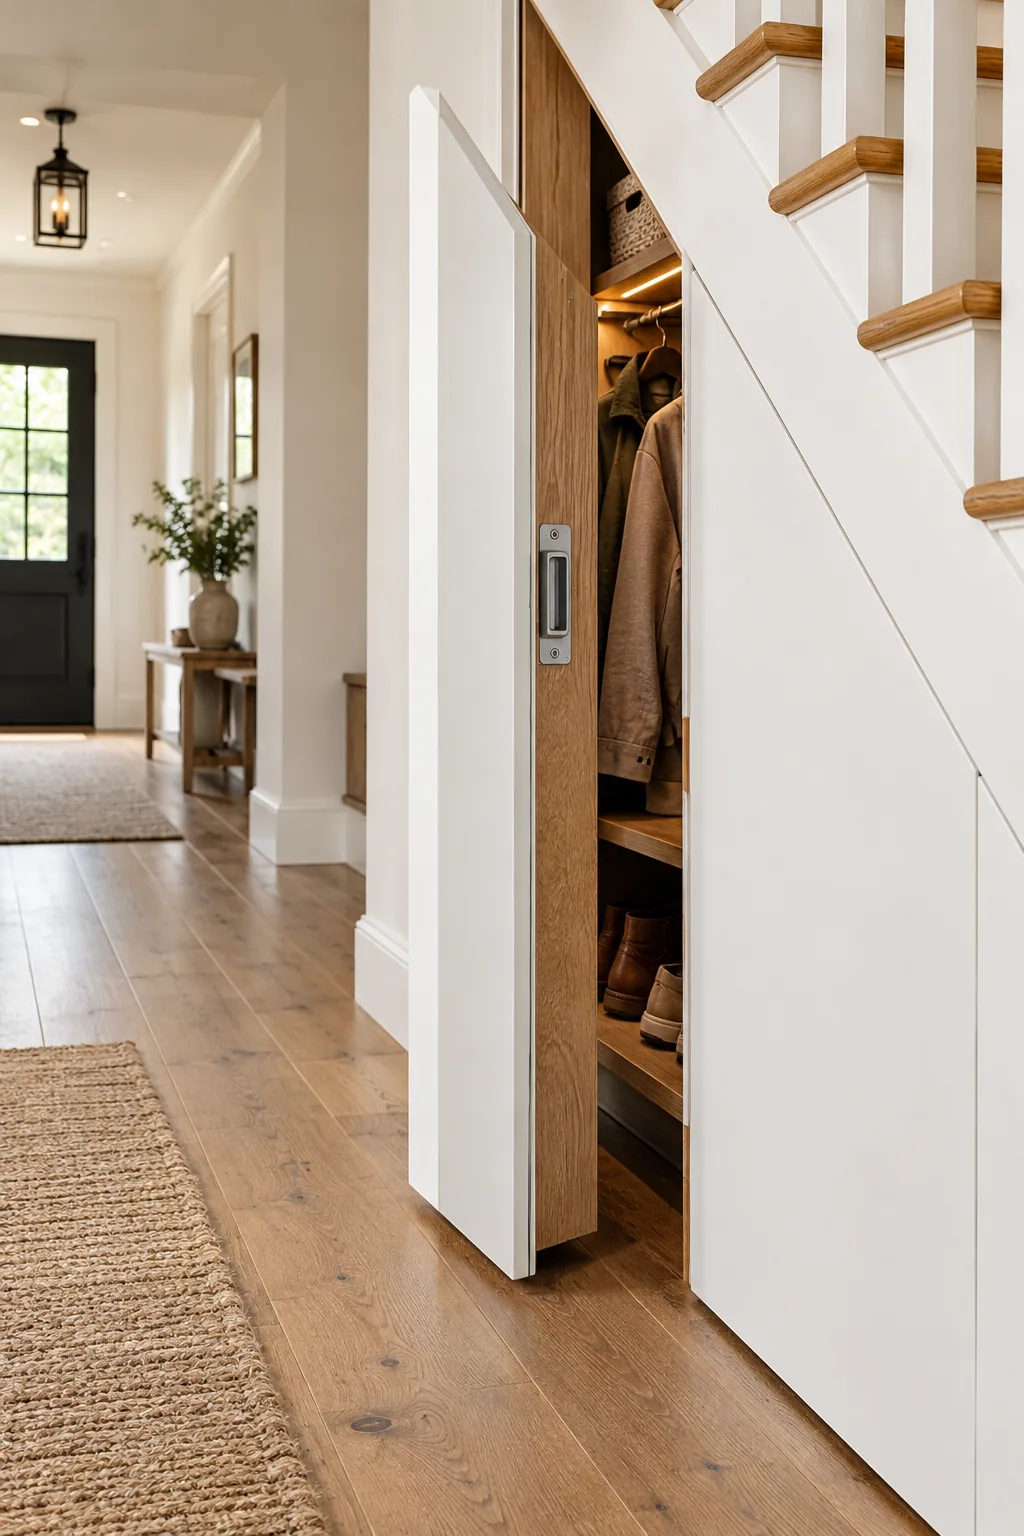
These magnetic mechanisms are strong enough to hold a loaded drawer shut while keeping the hallway perfectly sleek. You will want to position them near the center edge where you naturally push to ensure a reliable release every single time without warping the door.
Angling the Baseboard for Clearance
To make the drawer face sit perfectly flush with your surrounding wall, the baseboard must be attached directly to the moving unit. Cutting back-beveled edges at a 45-degree angle on the trailing edge of the trim ensures it clears the fixed wall without binding or scraping when opened.
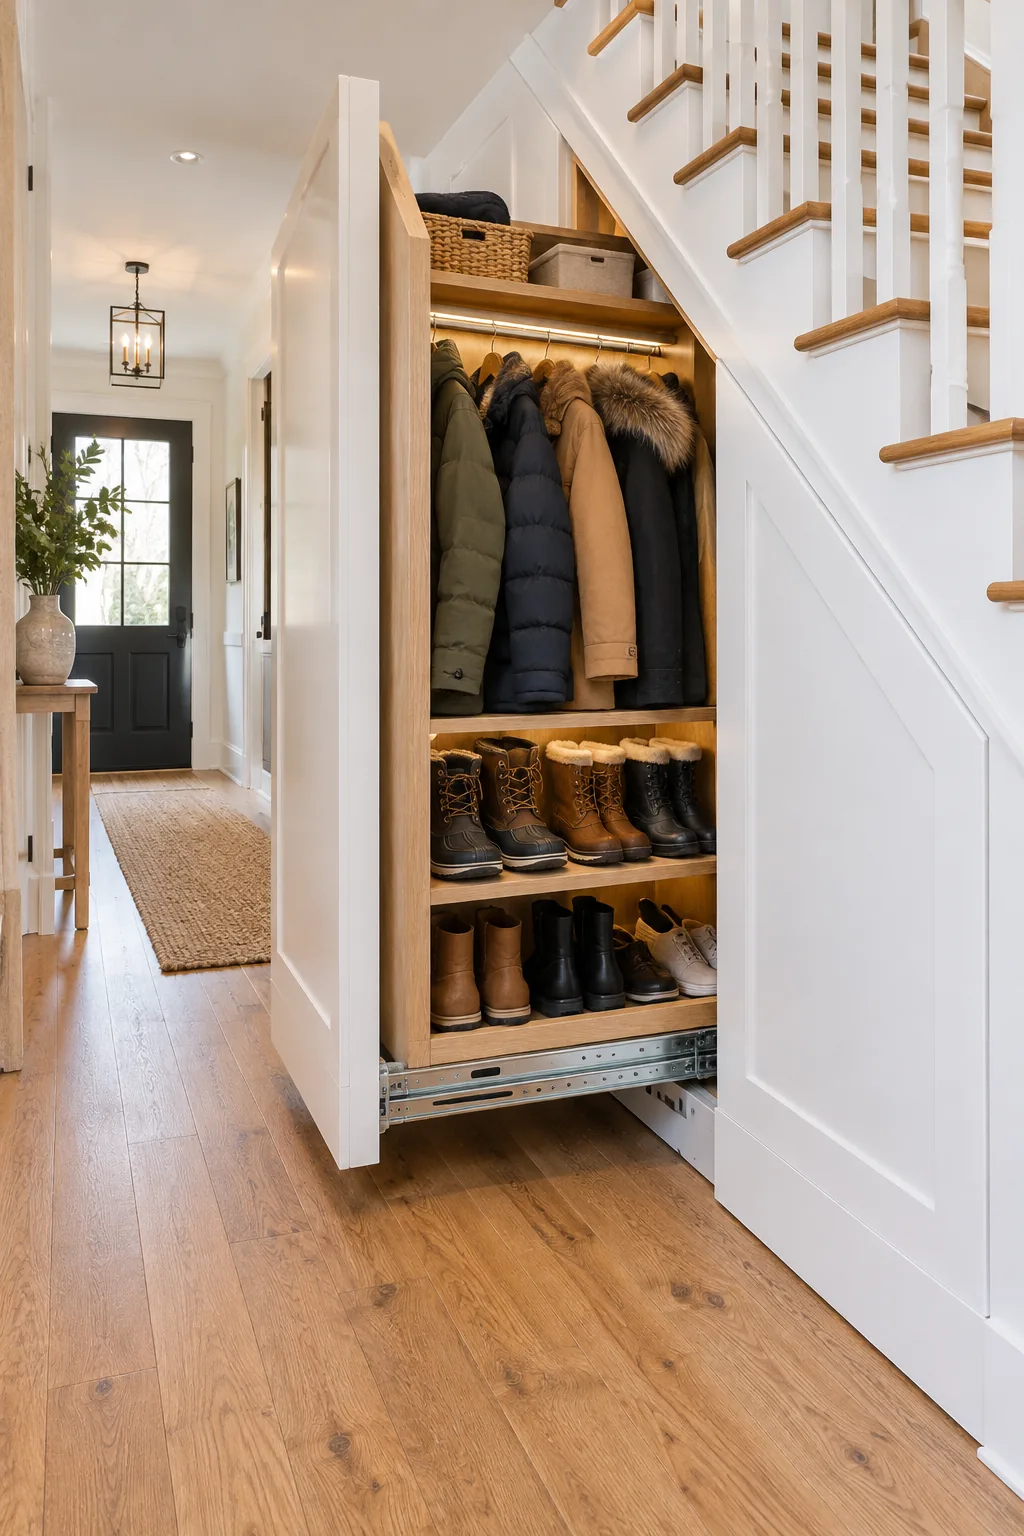
Even with a flawless bevel cut, friction can completely ruin the drawer’s smooth operation if your bottom clearance isn’t calculated correctly. Taking the time to measure your floor variations ensures the heavy unit glides effortlessly without causing permanent damage to your expensive hallway flooring.
Anchoring with Heavy-Duty Bottom Slides
A fully loaded coat and shoe closet can easily exceed 300 pounds, and when I tried using standard drawer runners on my own hallway project, they buckled within a week. You must specify 500lb bottom slides anchored directly into the floor joists to handle the immense cantilevered weight when fully extended.
These industrial tracks mount entirely underneath the drawer box rather than on the sides, providing crucial structural support right where the load is heaviest. Securing them into solid framing rather than just the subfloor guarantees the system will never tip or tear out under pressure.
Framing the Internal Support Structure
Building a rigid internal frame is absolutely essential to prevent the tall drawer from racking or twisting as it rolls outward. You need to select the correct material thickness for each zone of the closet to balance structural integrity with the overall weight of the moving unit.
| Component | Material Thickness | Fastening Method | Primary Purpose |
|---|---|---|---|
| Base Platform | 3/4-inch plywood | Countersunk lag screws | Supports entire structural load |
| Vertical Dividers | 5/8-inch plywood | Wood glue and brad nails | Separates coats from shoes |
| Fixed Shelves | 1/2-inch plywood | Pocket hole screws | Adds horizontal rigidity |
| Back Panel | 1/4-inch plywood | Staples every four inches | Prevents diagonal sway |
| Front Face | 3/4-inch MDF | Construction adhesive | Provides seamless paintable surface |
| Hanging Cleats | Solid 1×2 pine | Screwed into side panels | Anchors heavy steel rods |
Using pocket hole joinery for all horizontal connections keeps the exterior faces completely smooth while providing incredible shear strength. This hidden joinery method ensures the tall, narrow structure remains perfectly square even after thousands of heavy push-and-pull cycles throughout the changing seasons.
Calculating Depth and Drawer Extension
Determine your drawer depth based on the deepest point under your stairs, which typically ranges from 36 to 48 inches for a standard staircase. When I mapped out my own hallway, I realized too late that a fully extended 48-inch drawer completely blocked the walking path, so always measure your available floor space.
Selecting the Right Cabinet Grade Plywood
Standard construction plywood contains internal voids that will eventually compromise your pocket hole screws and weaken the tall drawer box. Upgrading to Baltic birch or a high-quality cabinet grade plywood guarantees a solid core that holds heavy fasteners securely while providing a beautiful, smooth finish for your interior shelves.
Stepping the Upper Shelves
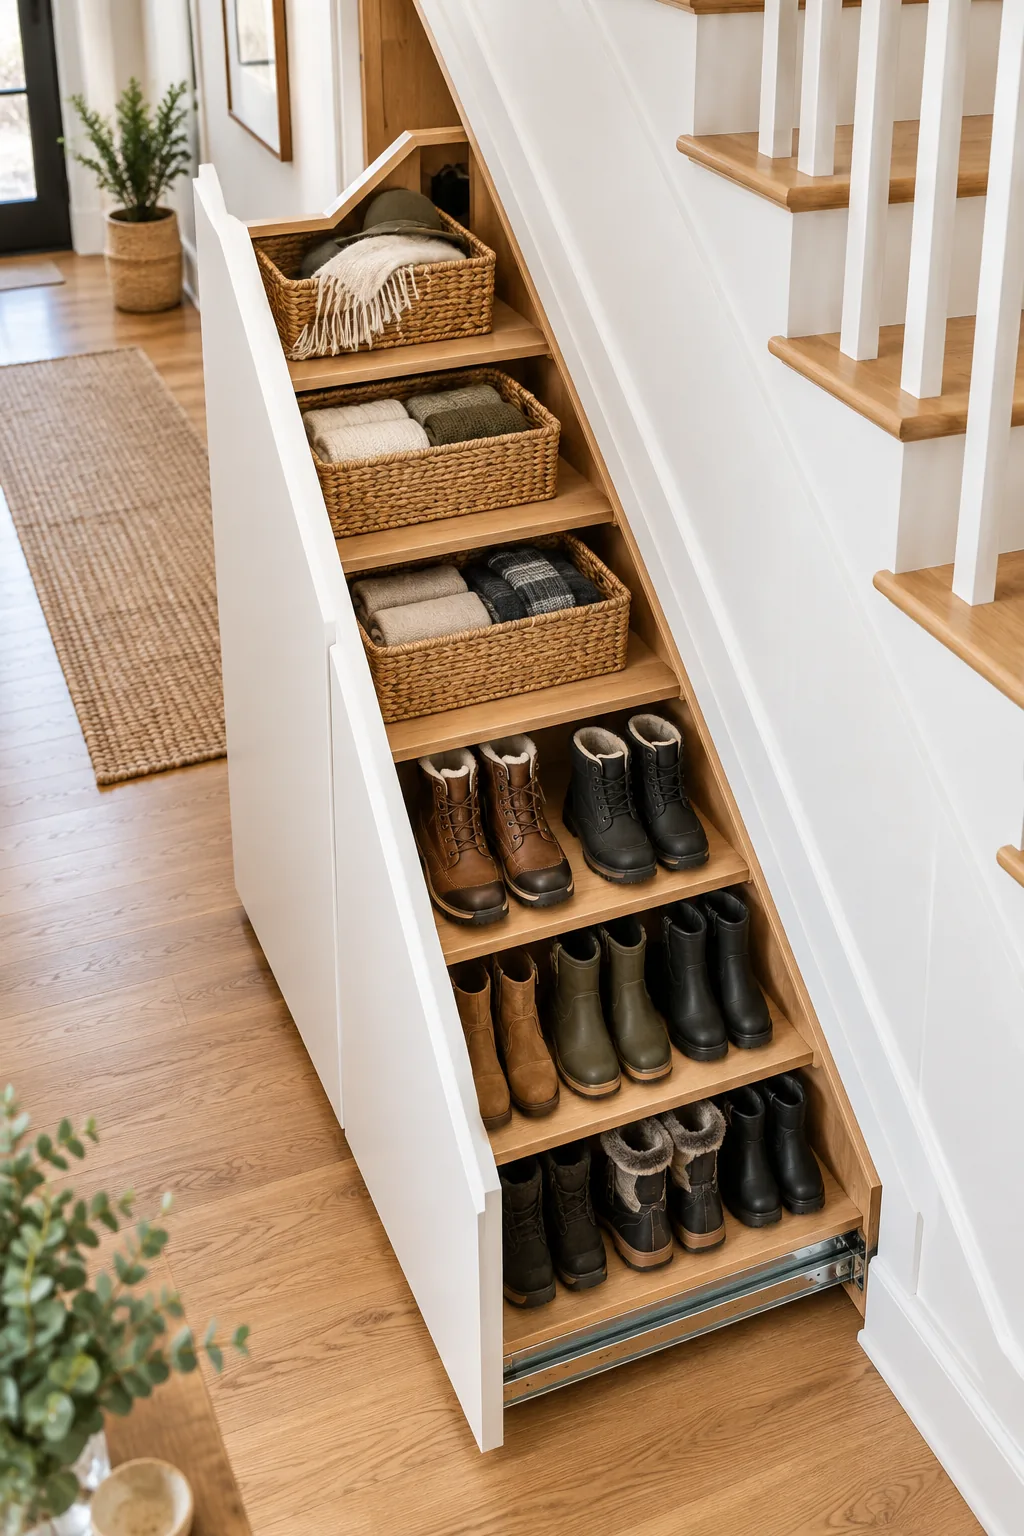
Instead of leaving a large triangular void at the top of the cavity, build stepped level shelves that step down in depth to perfectly follow the 35-to-40-degree slope of the stair stringer. I used this exact technique in my entryway to capture every single inch of awkward headroom for storing small winter accessories.
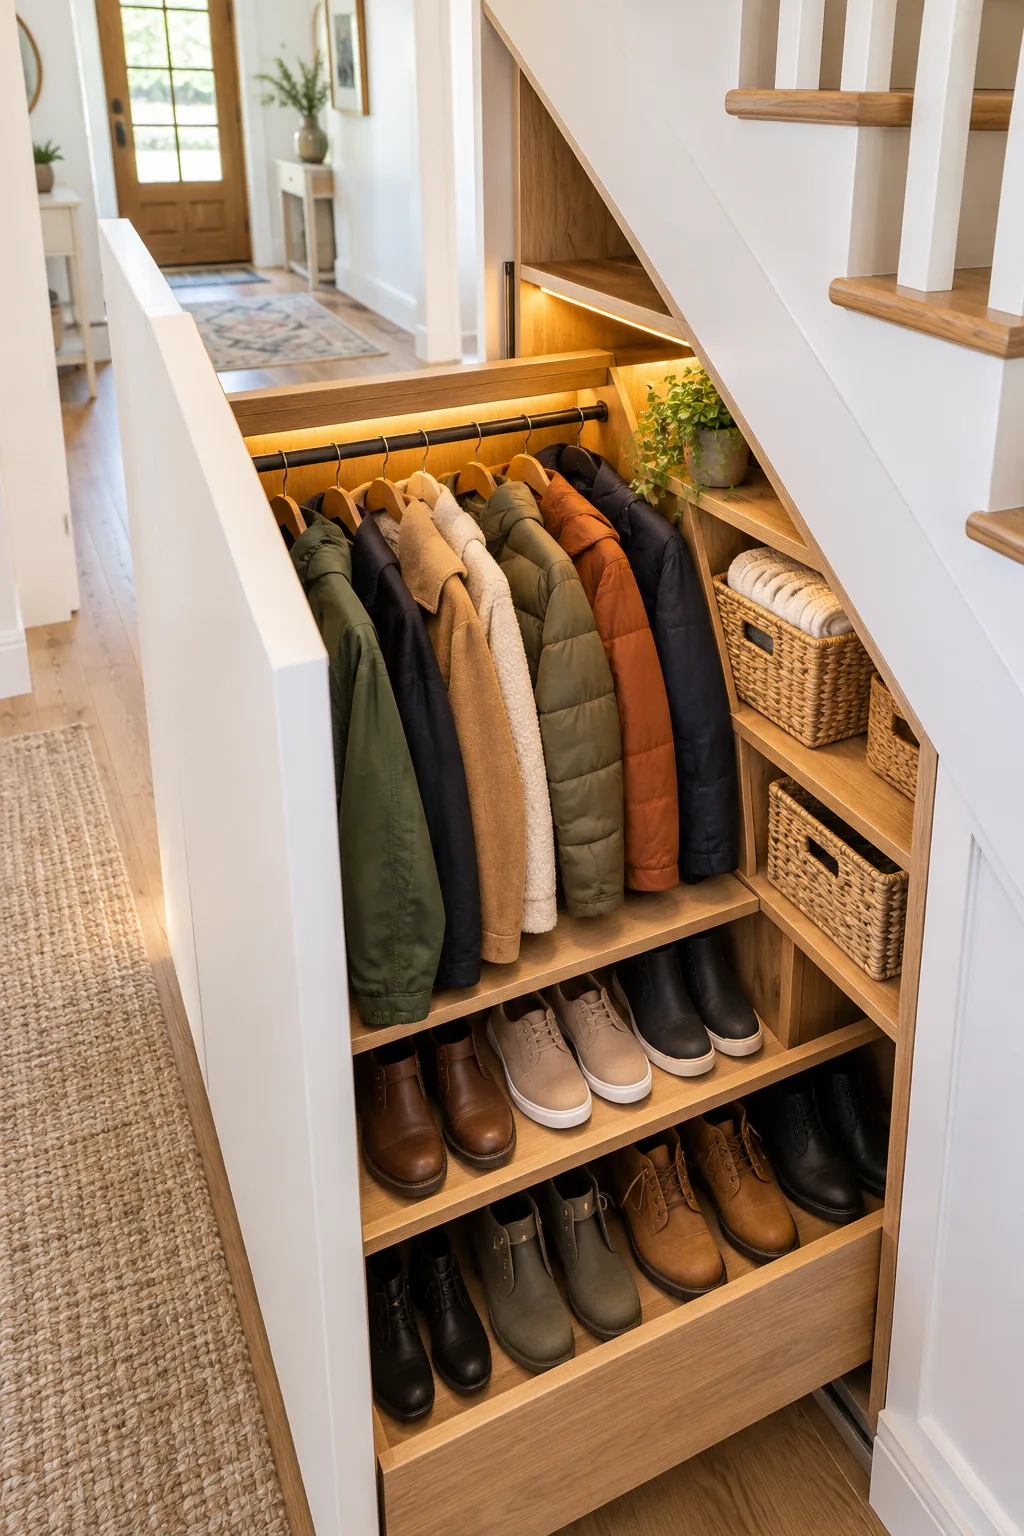
This custom profile maximizes your storage without the shelves themselves needing to sit at an unusable angle. By matching the drop of each shelf to the stair pitch, you create perfectly flat, usable cubbies all the way to the top of the dark enclosure.
Spacing the Coat and Shoe Zones
Divide the main vertical space strictly by function to keep the heavy winter gear separated from everyday footwear. When I built my mudroom pull-out, establishing exact vertical zones was the only way to keep long coats from dragging on dirty boots and ruining the fabric.
- Mount the hanging rod at exactly 40 inches above the first shoe shelf to comfortably accommodate bulky winter coats and long rain jackets.
- Space the everyday lower shoe shelves exactly 8 inches apart to perfectly fit standard sneakers, flats, and ankle boots without wasting vertical room.
- Leave a 12-inch gap for the bottom shelf if you need to store tall rain boots or heavy winter footwear during the snowy season.
- Position a small accessory tray at chest height to catch keys, sunglasses, and loose change the moment you walk through the front door.
- Install a row of sturdy double hooks on the back wall for heavy canvas tote bags and thick scarves that take up too much rod space.
Preventing Side-to-Side Sway
A tall, narrow drawer mounted exclusively on bottom tracks is naturally prone to wobbling from side to side when pulled out quickly. Installing a small, concealed guide wheel at the top inner corner of the drywall cavity keeps the entire structure perfectly vertical and prevents the heavy door face from scraping.
Lighting the Cavity Automatically
A deep, enclosed drawer blocks ambient hallway light, making it nearly impossible to find dark shoes in the back corners. Running a continuous strip of motion-sensor tape along the top interior edge solves this instantly by flooding the space with bright, usable light.
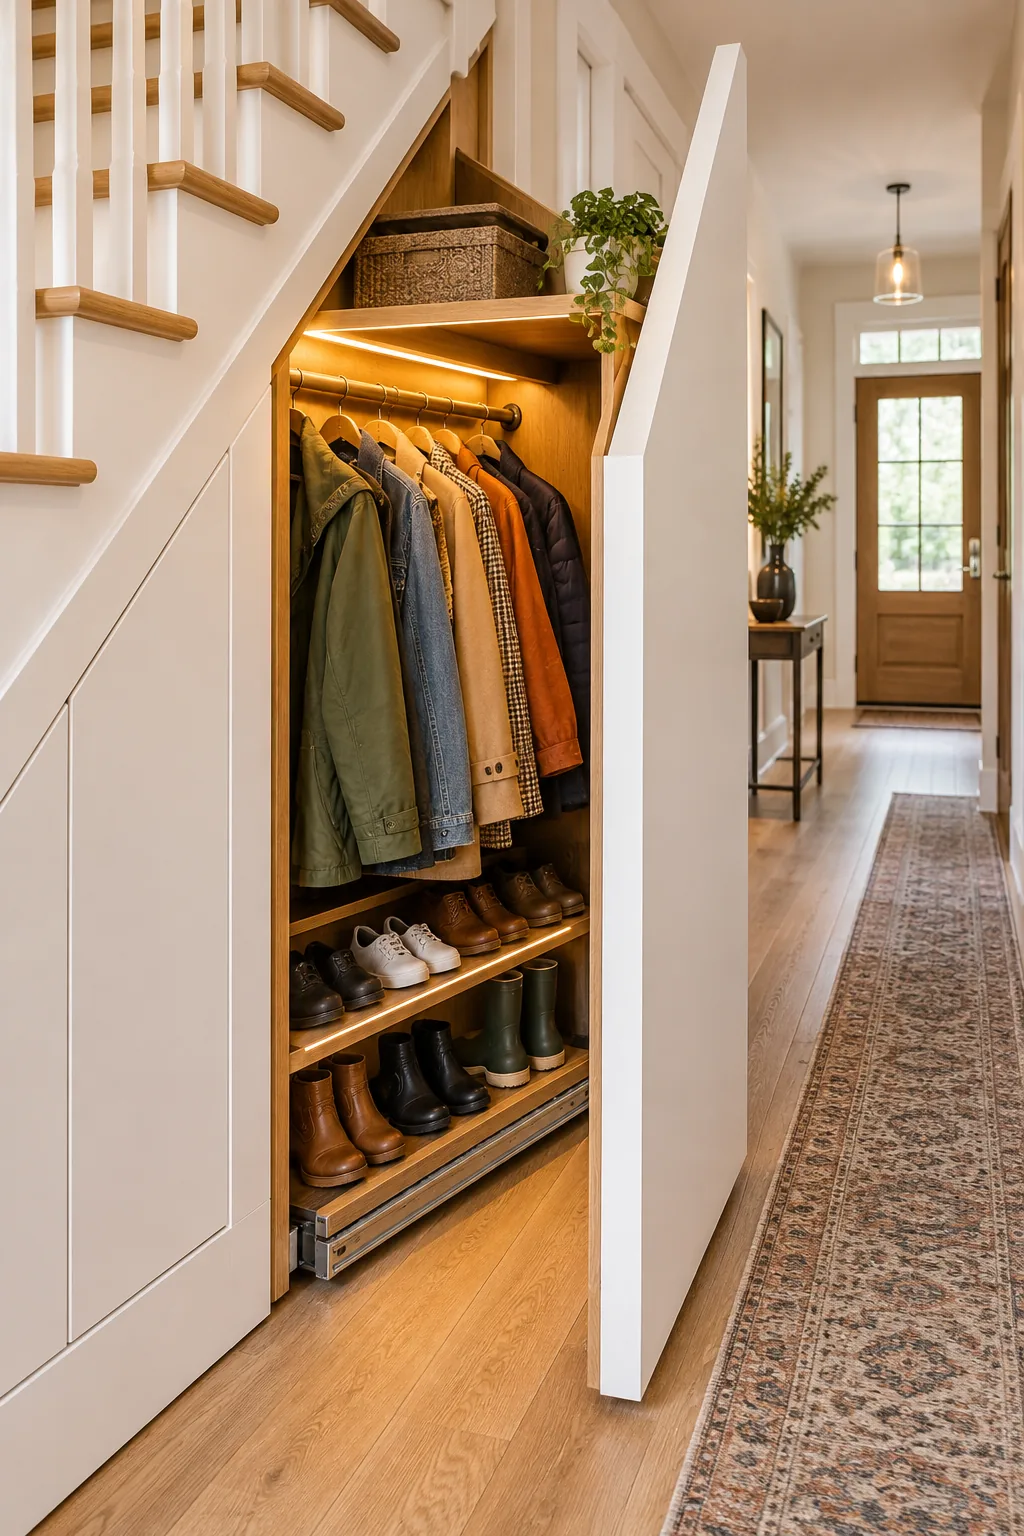
Opt for a 3000K battery-operated LED strip that triggers the exact moment the drawer is pulled open. This eliminates the need for expensive hardwired electrical work while keeping the interior beautifully illuminated every single time you need to grab a coat on your way out.
Finishing the Hidden Door Panel
Achieving a truly invisible finish requires treating the drawer front exactly like the surrounding drywall rather than standard cabinet doors. Skim coating the heavy MDF panel with joint compound and painting it the exact same color as your hallway walls ensures the massive closet completely disappears when closed.
3 Ways to Style Your Hidden Pull-Out Closet
Find the perfect material and color combination to match your home's architecture.
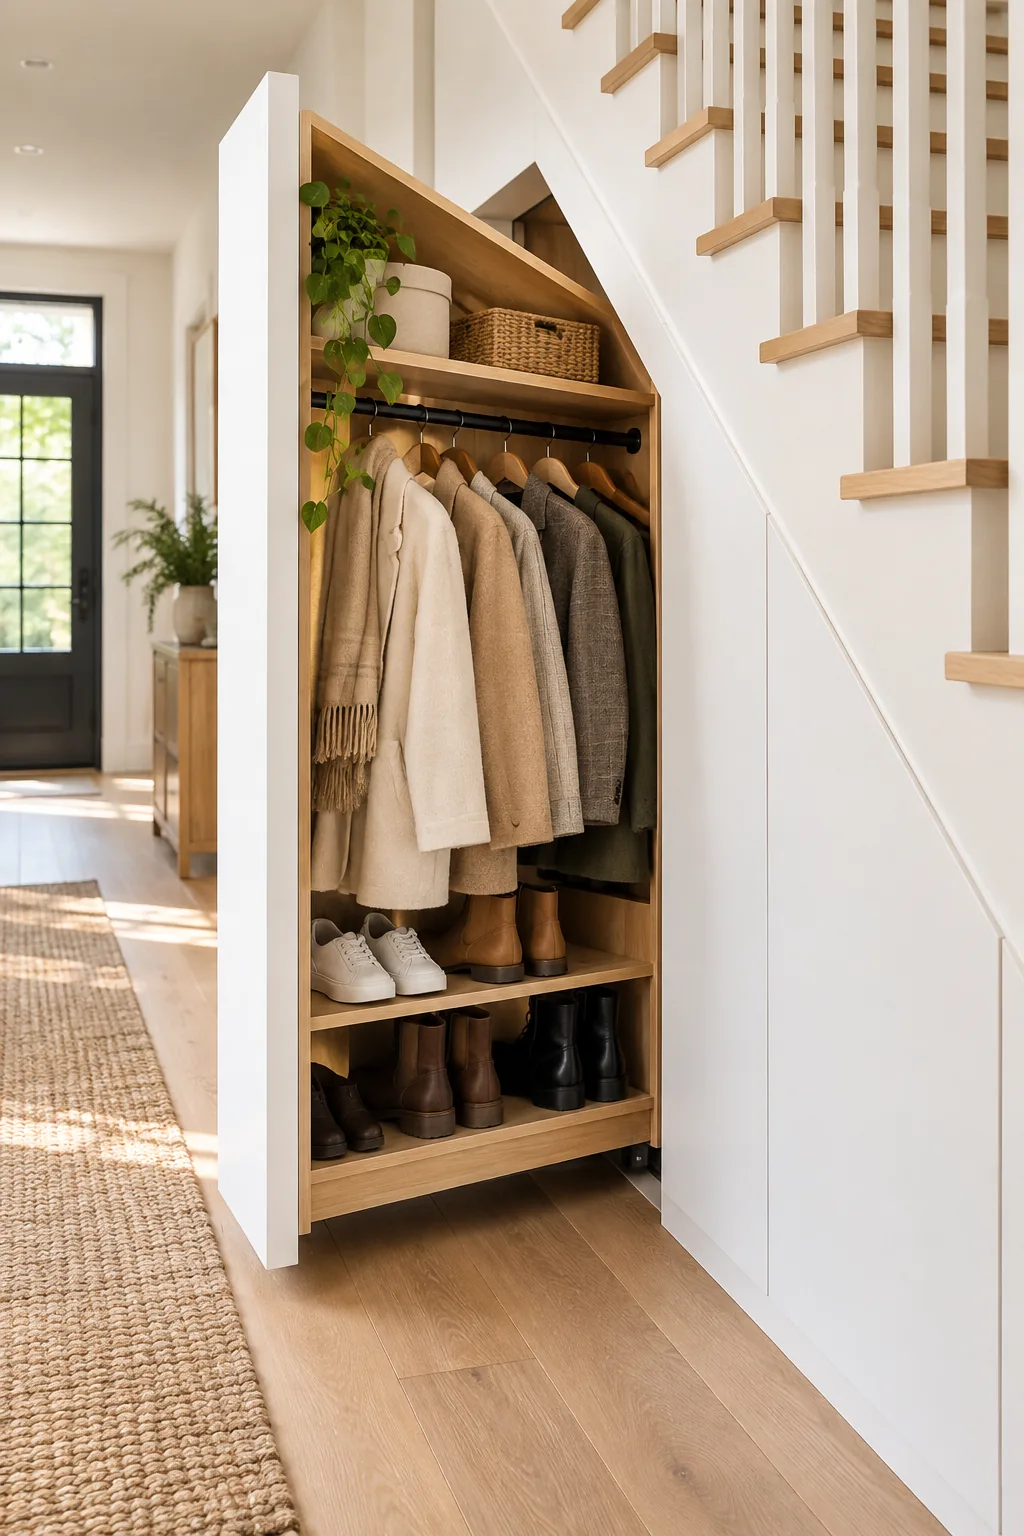
Minimalist Scandi Ash: Light ash wood and matte white panels create a bright, airy look that blends seamlessly into minimalist hallways.
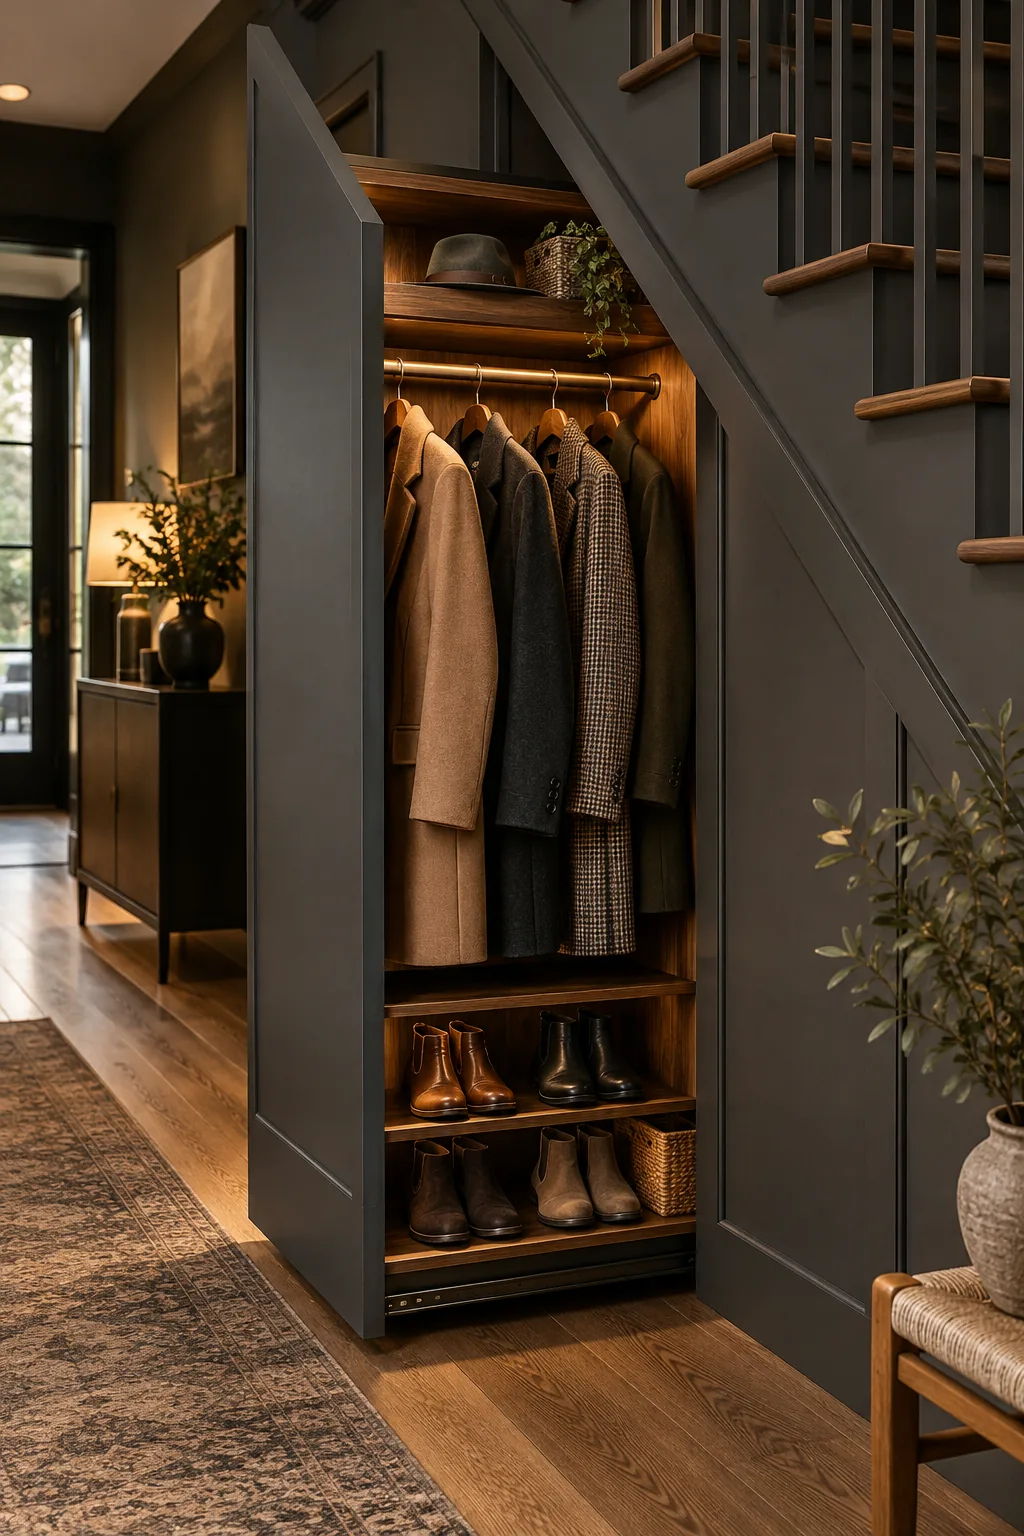
Moody Modern Walnut: Pairing a dark charcoal exterior with rich walnut interior shelving adds sophisticated drama to a modern entryway.
Classic Farmhouse Beadboard: Wrap the exterior in traditional beadboard to disguise the drawer seams perfectly within a cozy, rustic farmhouse interior.
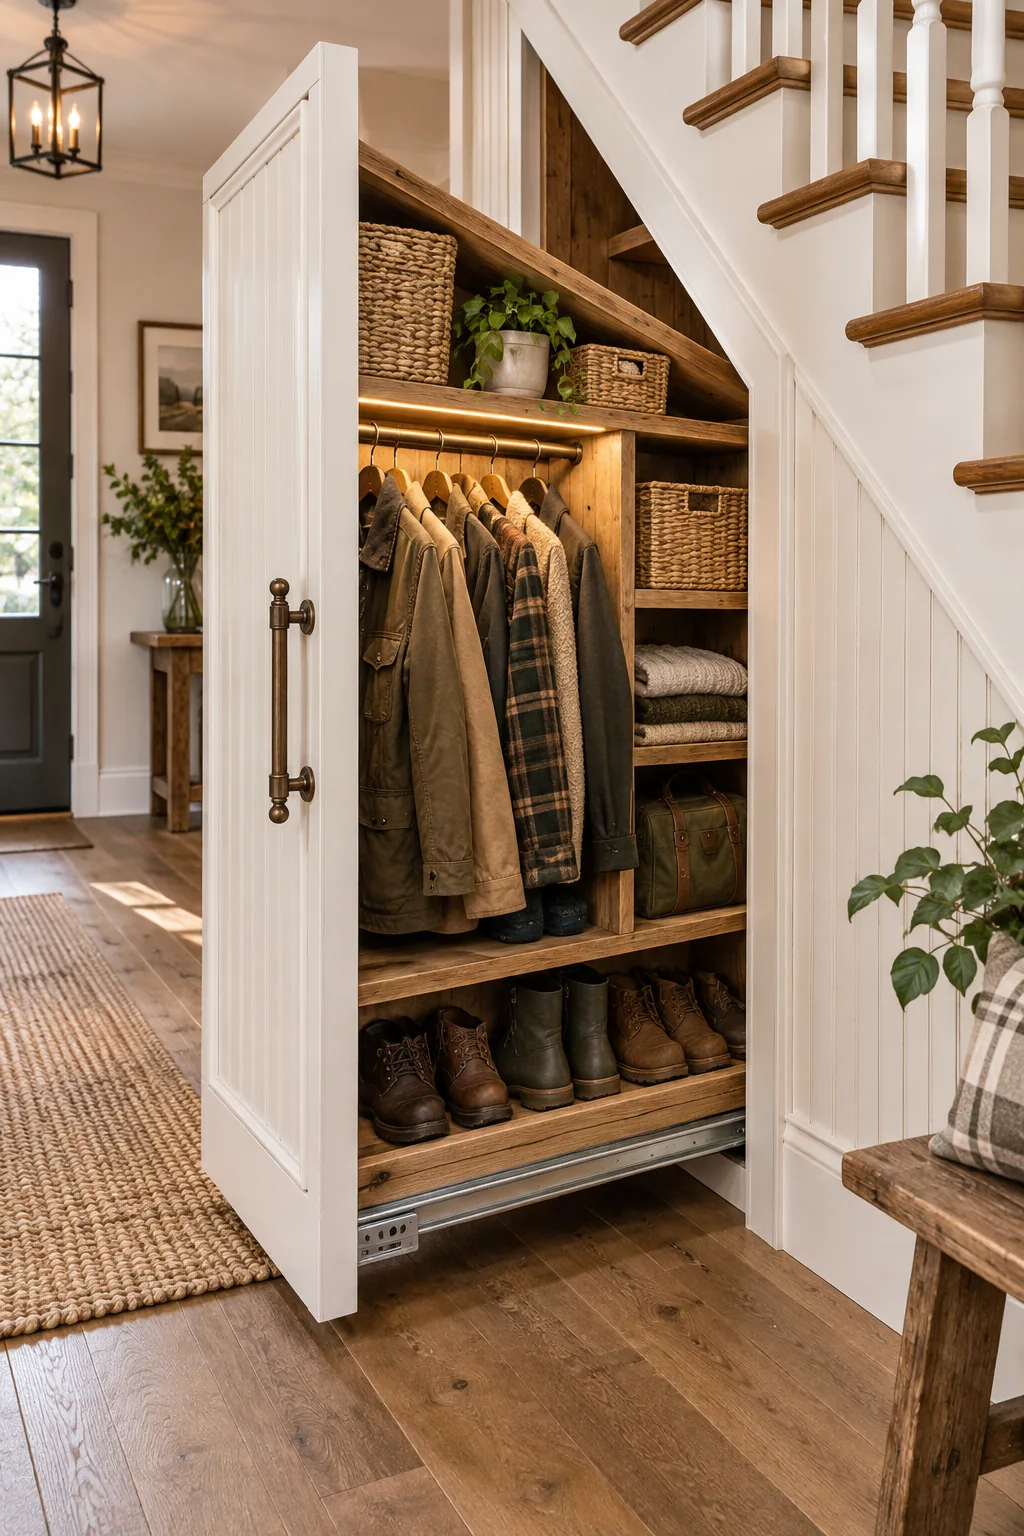
The Complete Pull-Out Hardware List
Gathering the exact structural components before you begin framing is the absolute secret to a durable, seamless build. Use this concrete shopping list to source the heavy-duty hardware required to safely support a massive under-stair pull-out closet without risking a dangerous collapse.
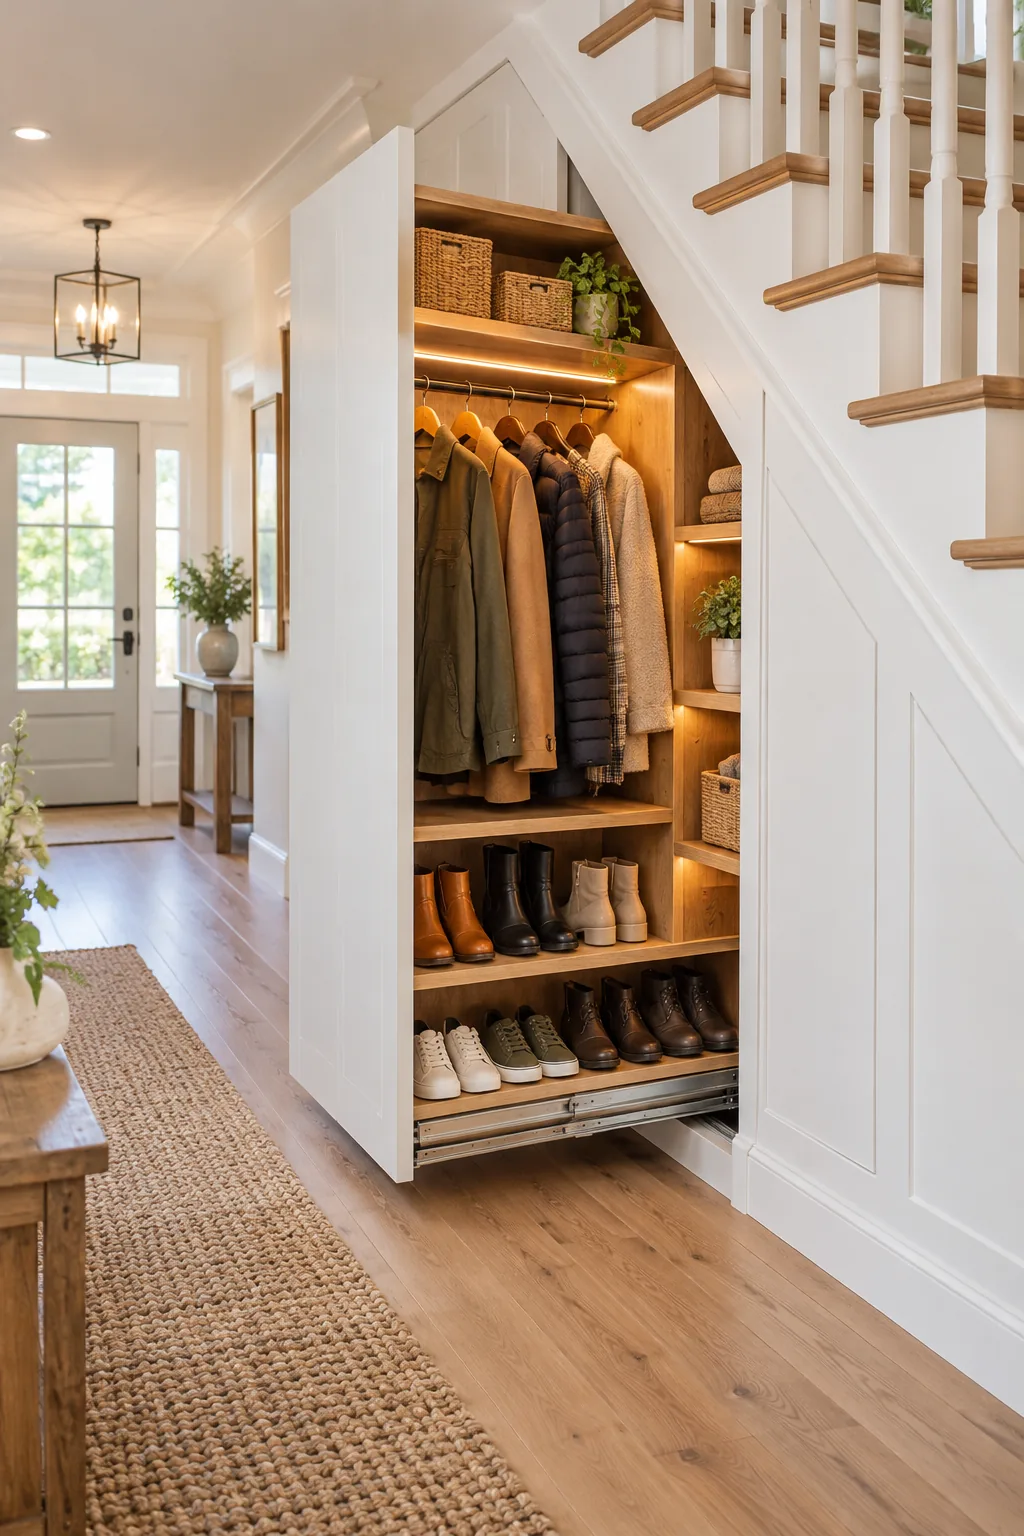
Check off these specific items to ensure your massive custom drawer operates smoothly, stays perfectly aligned, and remains safely anchored under a full structural load.