
Classy Female Executive Office Decor: Hidden Tech Guide
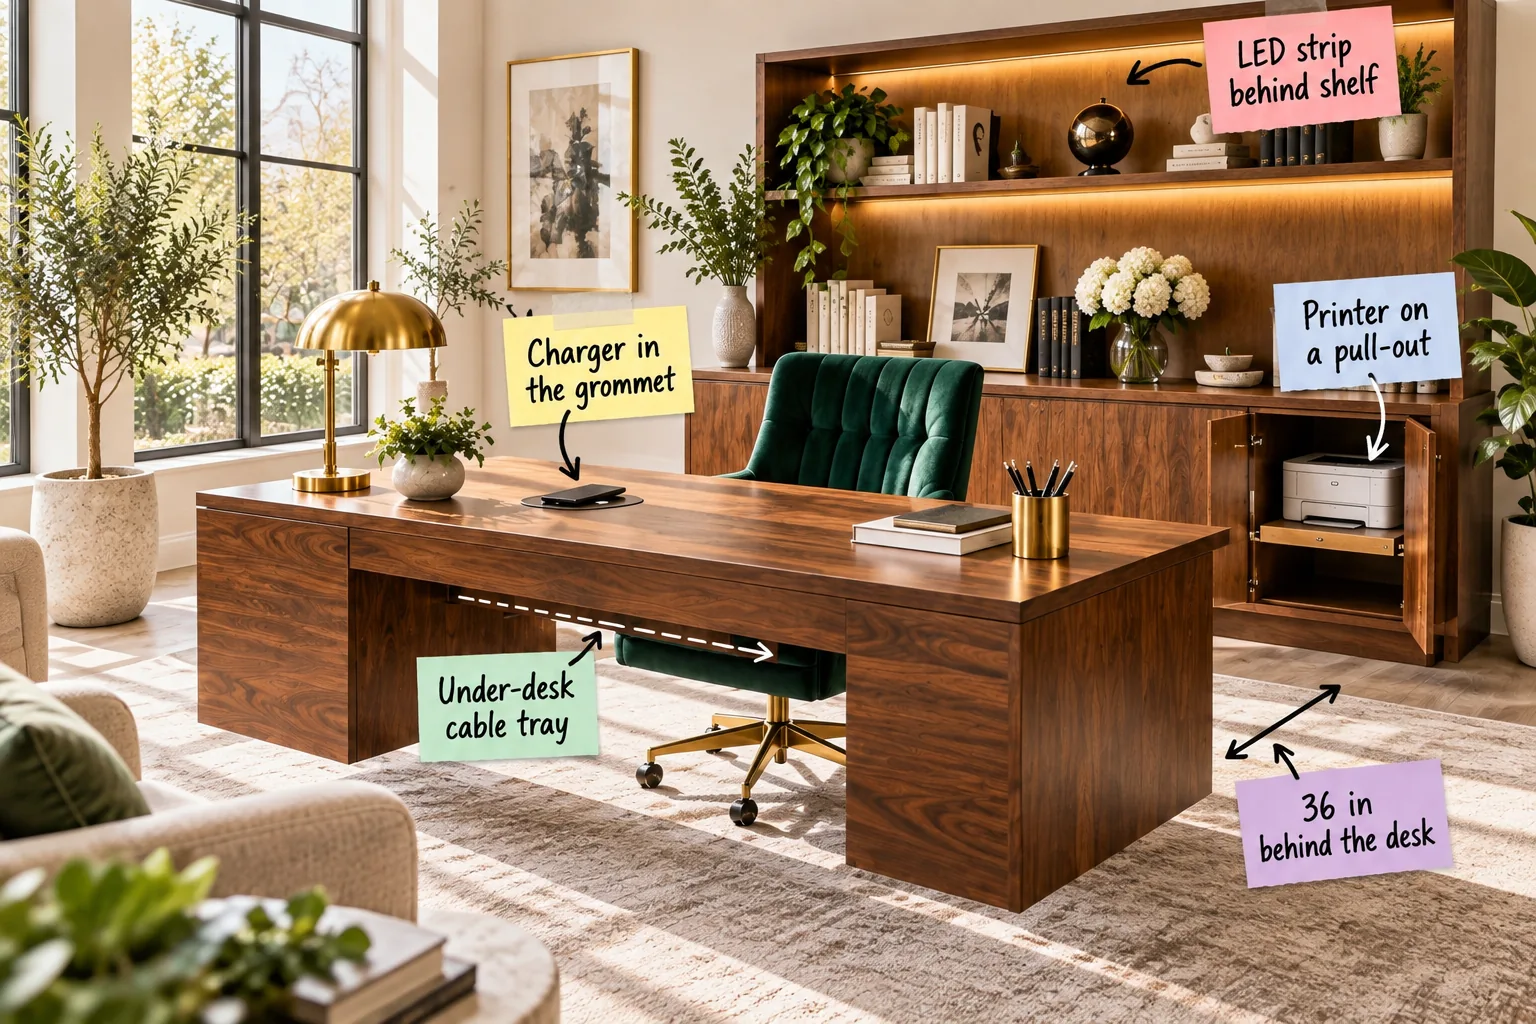
Design a classy female executive office with zero visible cords by planning your built-in details from the start. Print our complete hidden-tech checklist below to shop for the exact flush chargers, pull-out printers, and cable trays needed to recreate this pristine layout.
Flush-Mount Desk Charging
In my own Denver studio, I swapped a tangle of cords for a recessed charger, and it instantly elevated the primary work surface. Specify an 80mm grommet-hole diameter, which accommodates most standard flush-mount charging discs so the rim sits perfectly level with the desktop.
Positioning the Charging Disc
Place the charging grommet exactly eight inches from the desk edge on your non-dominant side. This specific placement ensures your phone remains within peripheral vision for incoming notifications while staying completely clear of your primary writing and typing zones.
Steps for Drilling Grommets
Cutting into a finished walnut desktop requires precision to avoid splintering the expensive veneer. Follow a strict sequence to ensure your charging disc drops in perfectly flush without damaging the surrounding wood grain.
- Apply painter’s tape over the exact drilling location to protect the veneer.
- Score the circular outline lightly using your 80mm hole saw in reverse.
- Drill forward at a steady, medium speed until the pilot bit breaks through.
- Finish the cut from the underside to prevent blowout on the top surface.
Routing Power Out of Sight
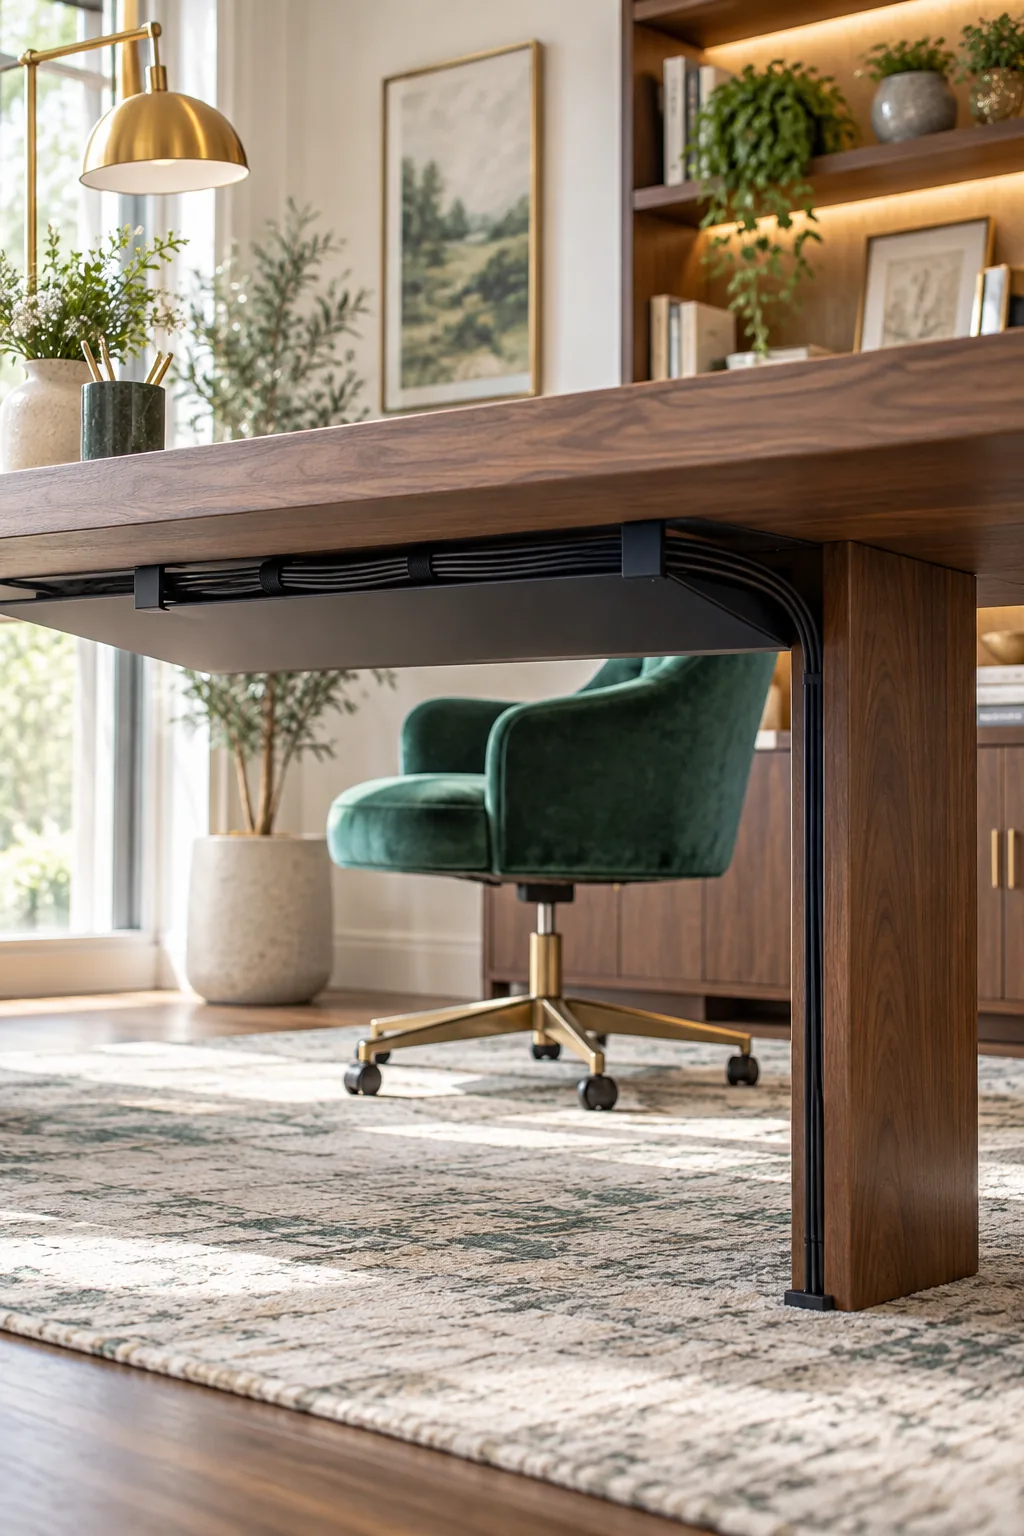
Manage the remaining monitor and lamp cords before they reach the floor by mounting a 24-inch to 36-inch metal cable tray underneath. Attach this directly to the underside of the desk’s back edge to hold heavy power strips safely out of view.
Selecting the Right Cable Tray
Choose a deep, open-wire basket style rather than a solid plastic channel. The open wire mesh allows proper airflow around warm power adapters and lets you secure bundled excess cord length using simple velcro ties at any point along the run.
Managing Monitor Cables
Route thick display cables down the back of your monitor arm using integrated plastic channels. If your monitor stand lacks hidden routing, wrap the cords in a split braided sleeve that matches your desk color to visually consolidate multiple wires into one.
Securing Loose Tray Cables
Once your power strips are resting in the under-desk tray, use reusable silicone cable ties to bundle the slack from your monitor and lamp cords. Keeping these bundles tight against the metal mesh ensures nothing drops down into your visible foot space.
Hiding Wires Down the Desk Leg
Consolidate all power and data lines exiting the under-desk tray into a single, tightly wrapped umbilical cord. Fasten this unified bundle to the back interior corner of the desk leg using adhesive mounting clips so it remains entirely invisible from the doorway.
The Executive Chair Clearance
Establish the floor plan by measuring the gap between the floating desk and the back credenza, keeping the under-desk cable tray clear of your knees. Maintain a strict 36-inch chair clearance to ensure you can push back comfortably without scuffing the rear cabinetry.
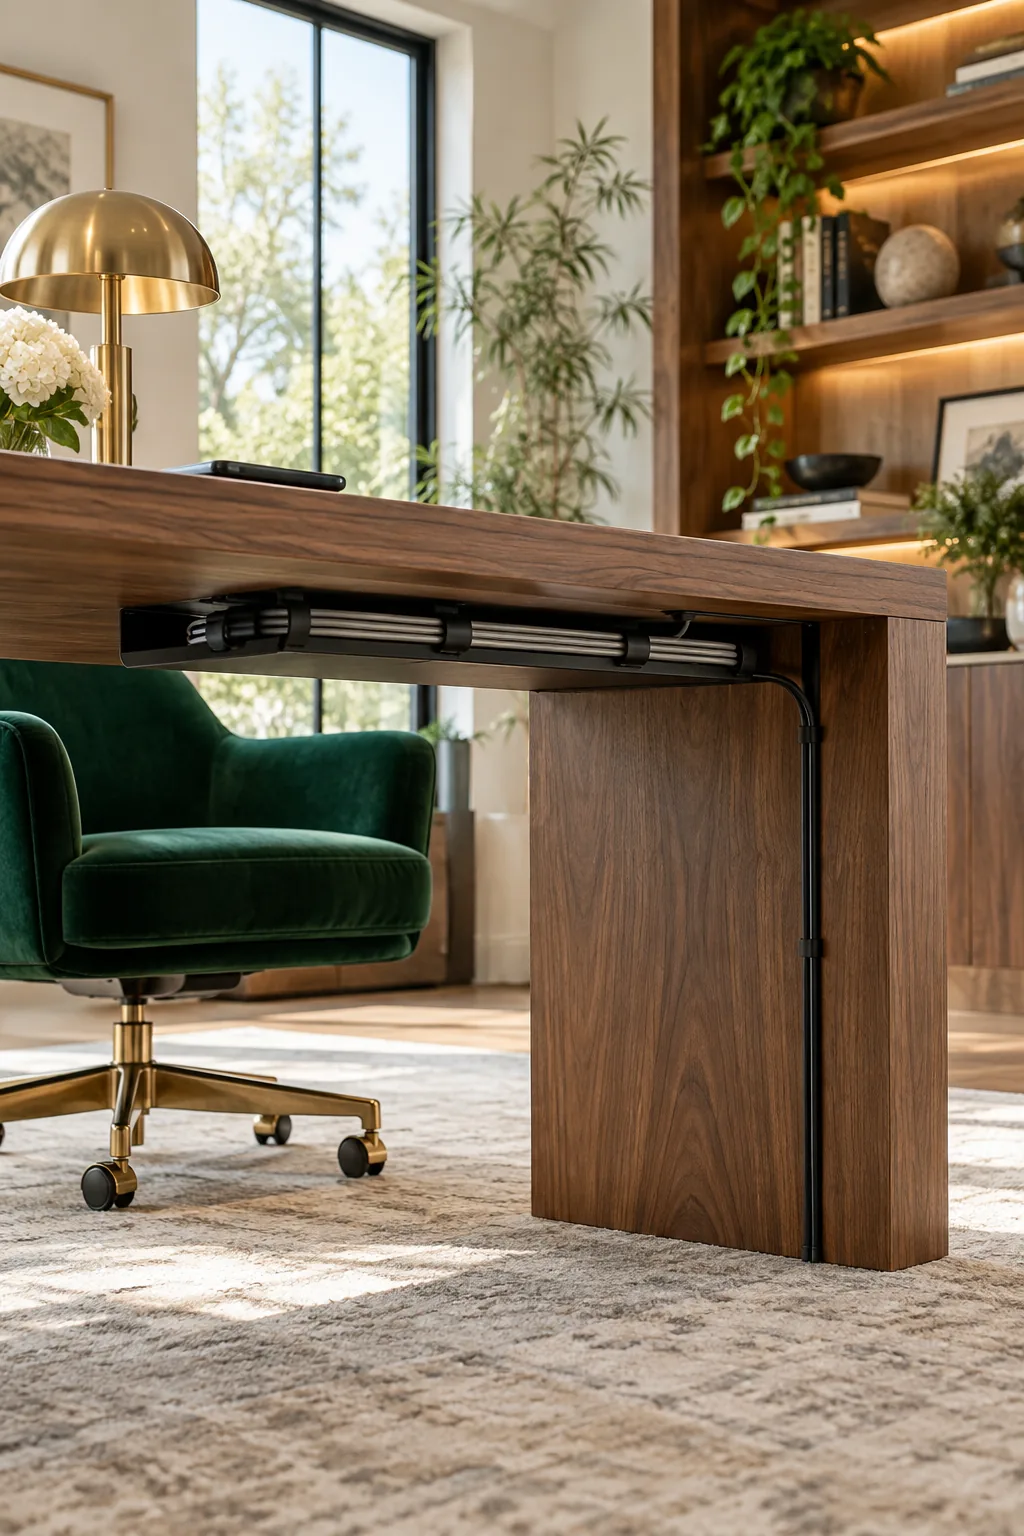
While the 36-inch gap protects the credenza, the flooring beneath the chair requires its own clearance strategy to maintain an effortless glide.
Standard Office Clearances
Mapping out the precise floor plan prevents the layout from feeling cramped once heavy furniture is placed. Use these proven dimensional rules to position your desk, credenza, and seating for optimal flow and comfort.
| Office Zone | Minimum Clearance | Optimal Spacing |
|---|---|---|
| Behind the desk | 36 inches | 42 inches |
| Guest chair legroom | 24 inches | 30 inches |
| Walkway to door | 36 inches | 48 inches |
| Credenza door swing | 20 inches | 24 inches |
Choosing the Right Chair Casters
Standard hard plastic wheels will eventually damage a wool office rug or scratch a hardwood floor. Upgrade your executive chair with soft polyurethane casters designed specifically to glide silently and smoothly over hard surfaces without leaving permanent scuff marks behind.
Rug Sizing for Rolling Chairs
Select a low-pile wool rug that is large enough to encompass the entire desk and the full range of your chair’s movement. An 8×10 or 9×12 rug typically provides enough surface area so your wheels never drop off the edge during a workday.
Desk Placement in the Room
Float the desk in the center of the room facing the door to establish a commanding executive presence. This layout requires floor outlets for power, which is exactly why consolidating everything into a single hidden cord down one leg is so critical.
Managing Laptop Chargers
Keep a secondary laptop charger permanently plugged into the under-desk power strip and route the connector up through a small secondary grommet. This setup allows you to power a portable device instantly without ever pulling a bulky charging brick out of your bag.
Concealing the Bulky Printer
Move to the credenza to hide necessary but unsightly office equipment without sacrificing daily accessibility. Plan for a minimum 20-inch credenza depth to ensure modern laser printers fit comfortably inside the cabinet with enough extra room for rear cable clearance.
Specifying Heavy-Duty Slides
Standard drawer hardware will buckle under the shifting weight of an active printer. Install 18-inch heavy-duty drawer slides rated for at least 100 pounds to create a pull-out shelf that extends fully and remains perfectly stable during high-volume print jobs.
Cabinet Ventilation Strategies
In an early project, I learned the hard way that enclosing a heavy laser printer on a pull-out shelf traps serious heat. You must measure the internal cabinet volume and plan for passive or active airflow to prevent your equipment from overheating.
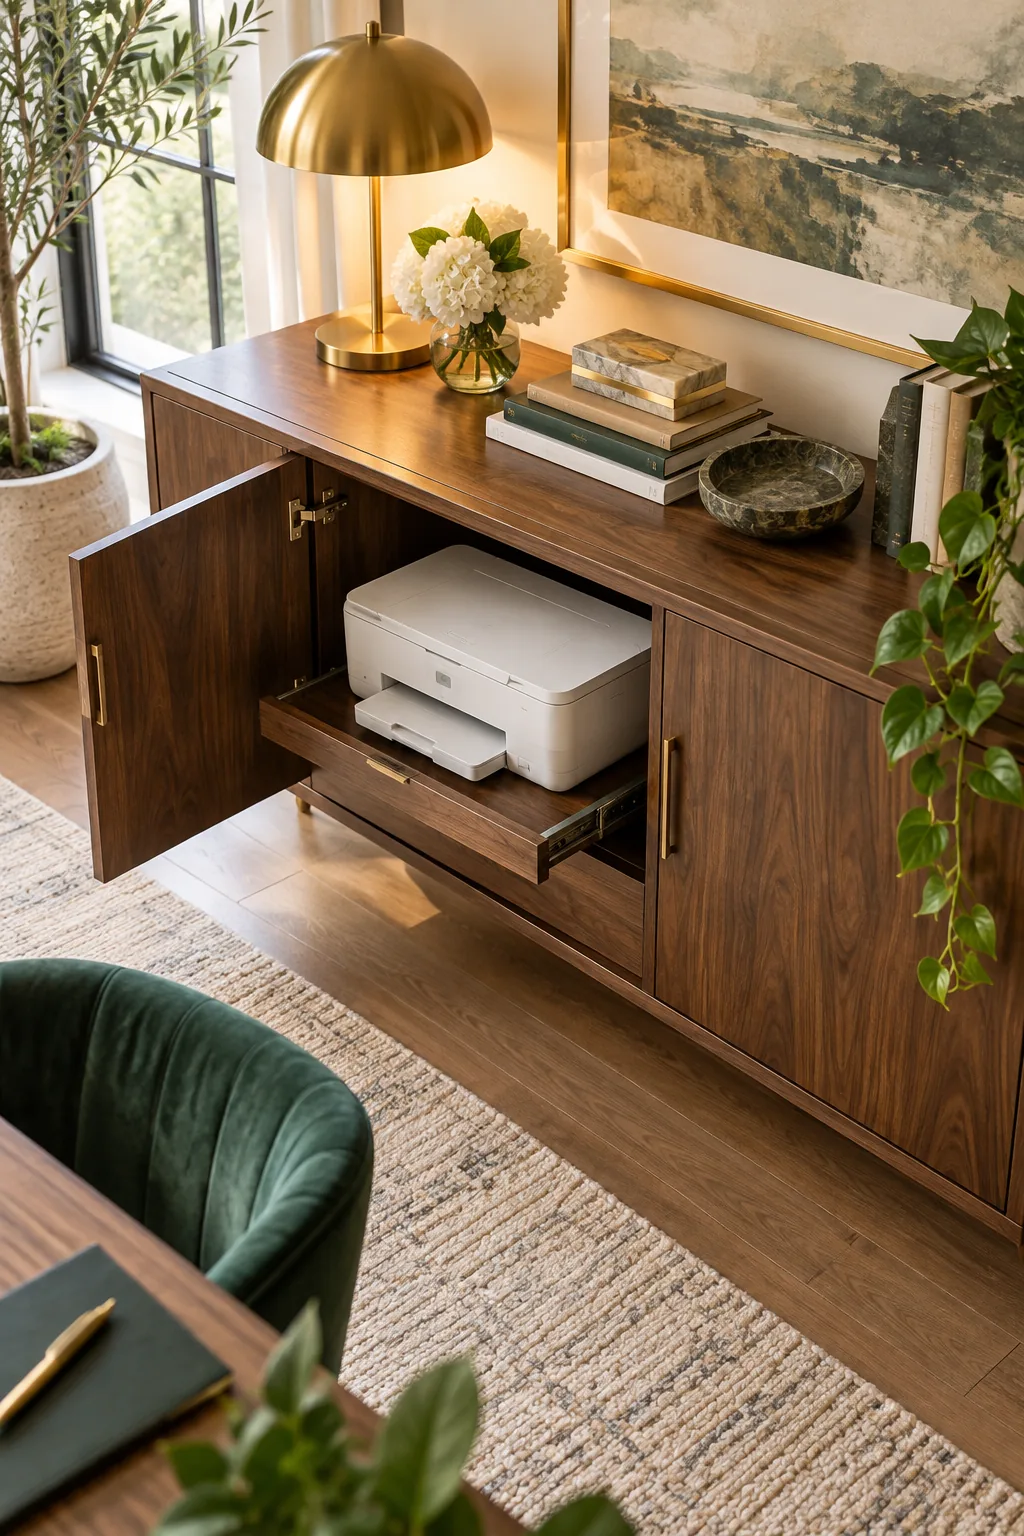
Hiding hardware behind closed doors creates a clean aesthetic, but it introduces new challenges for equipment longevity that require careful planning.
Active Cooling Solutions
Install a low-decibel USB cooling fan directly into the back panel of the printer cabinet. Set the fan to exhaust hot air out the rear, drawing fresh, cool air in through the natural gap around the closed cabinet doors.
Routing Cables Inside Cabinets
Drill a two-inch cable escape hole in the lower back corner of the credenza to route the printer power and data lines. Leave enough slack in the cords so the pull-out shelf can extend completely without straining the connections.
Managing Network Drive Heat
Store local backup drives and network-attached storage on an open shelf rather than inside the printer cabinet. If they must be hidden, place them in a separate ventilated compartment, as spinning drives are highly sensitive to the ambient heat generated by laser printers.
Warm Backlighting for Shelves
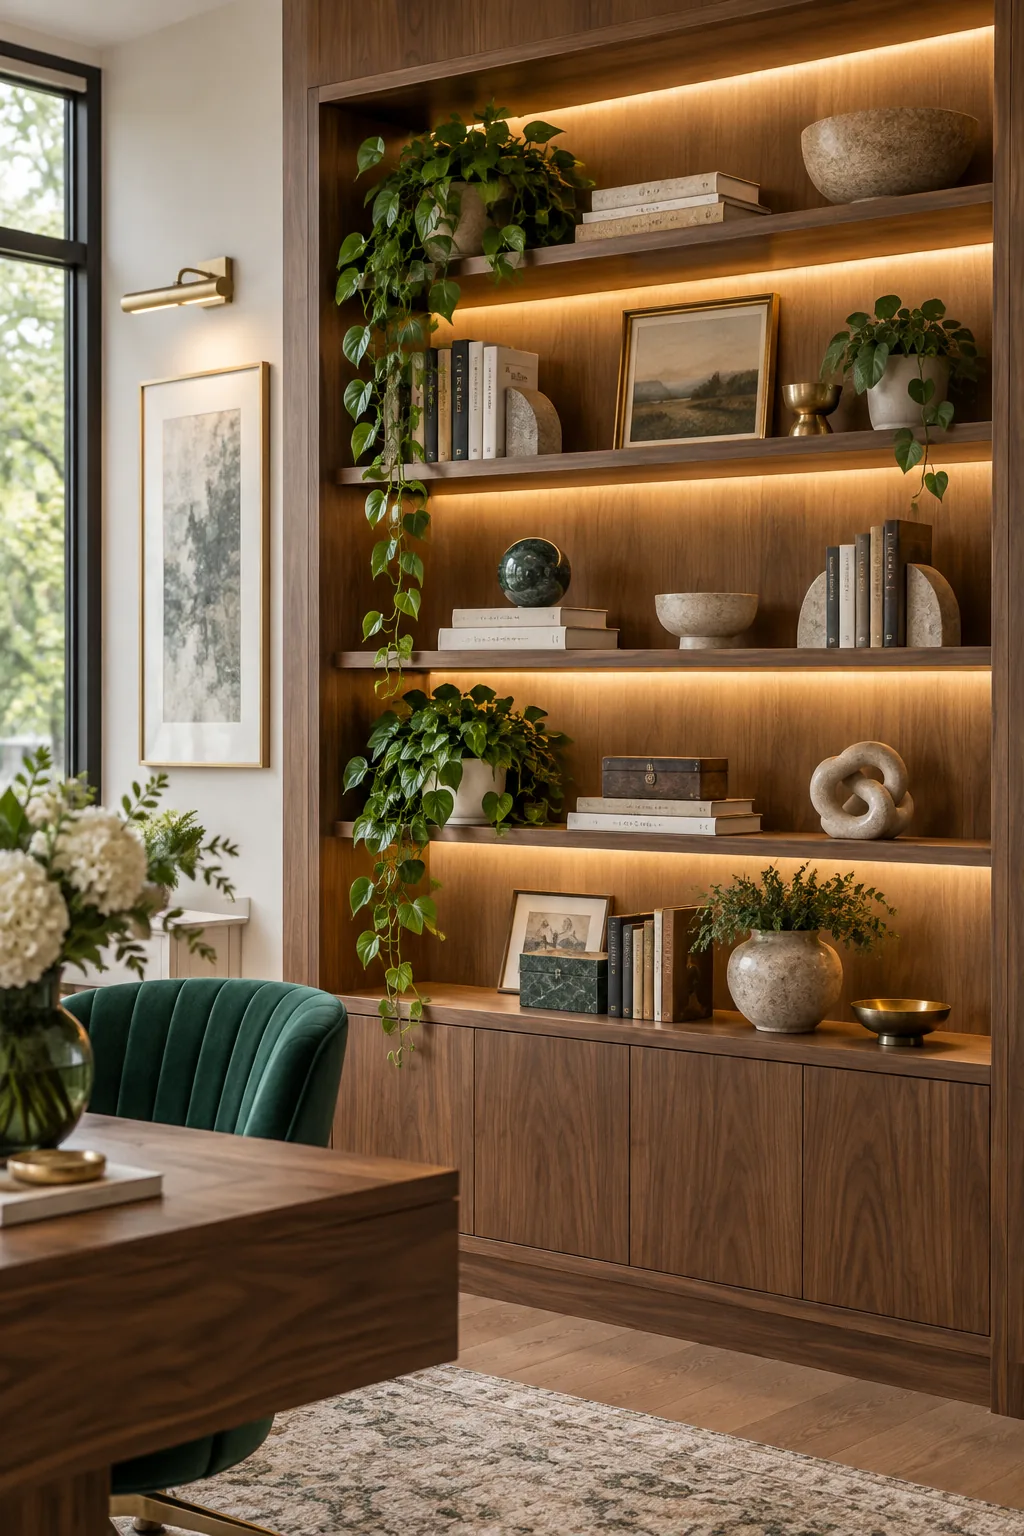
I always finish the background by adding depth to the built-in bookshelf, just like the ambient lighting I use in my own living room. Mount an LED strip along the back edge of each shelf, cutting the length one inch shorter than the shelf width.
Angling the LED Strips
Position the lighting channel at a 45-degree angle facing the back panel of the bookcase. This specific orientation bounces the illumination off the wood, creating a soft, seamless glow that highlights your decor without shining harsh diodes directly into your eyes.
Concealing the LED Power Supply
Route the low-voltage wires from each shelf down a hidden vertical channel milled into the side of the bookcase. House the bulky LED transformer block inside the lower credenza cabinet where it remains accessible for maintenance but completely out of sight.
Dimming the Ambient Light
Connect your bookshelf LED strips to a smart dimmer switch to control the room’s mood throughout the day. Lowering the brightness to twenty percent in the late afternoon creates a calming, focused atmosphere as natural light begins to fade from the windows.
Selecting Seamless Hardware
Tie the hidden tech together by matching all visible metal components across the entire office suite. Ensure that the visible rim of the charging grommet, the credenza door pulls, and the desk lamp all share the same unlacquered brass or brushed gold finish.
Matching Brass Finishes
Order hardware samples before committing, as brushed gold tones vary wildly between manufacturers. Holding the physical metal against your walnut veneer under the room’s actual lighting is the only reliable way to ensure the finishes harmonize perfectly.
Coordinating Wood Finishes
Maintain a cohesive aesthetic by matching the floating desk veneer to the background credenza and shelving. If exact matching is impossible, select a deliberately contrasting tone, like a black oak desk against walnut cabinets, to make the primary workspace stand out intentionally.
3 Executive Office Looks With Hidden Tech
See how seamless cord management elevates completely different design styles.
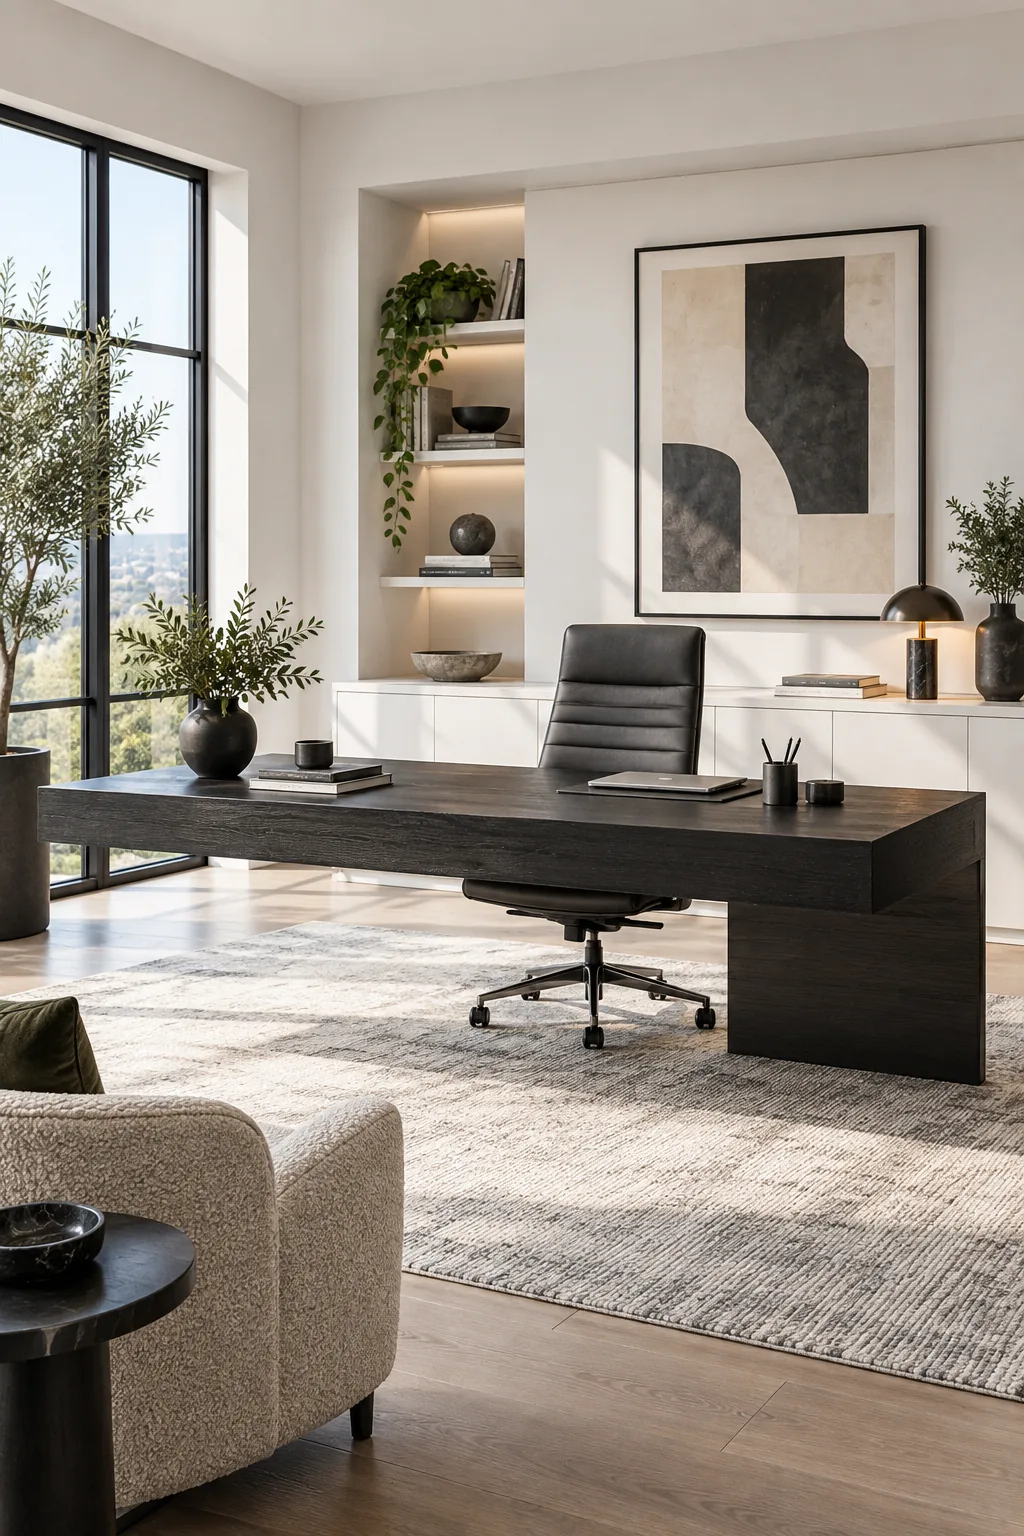
Modern Monochromatic: Stark white built-ins contrast beautifully with a black oak desk, keeping the focus entirely on the sleek architectural lines rather than the concealed tech.
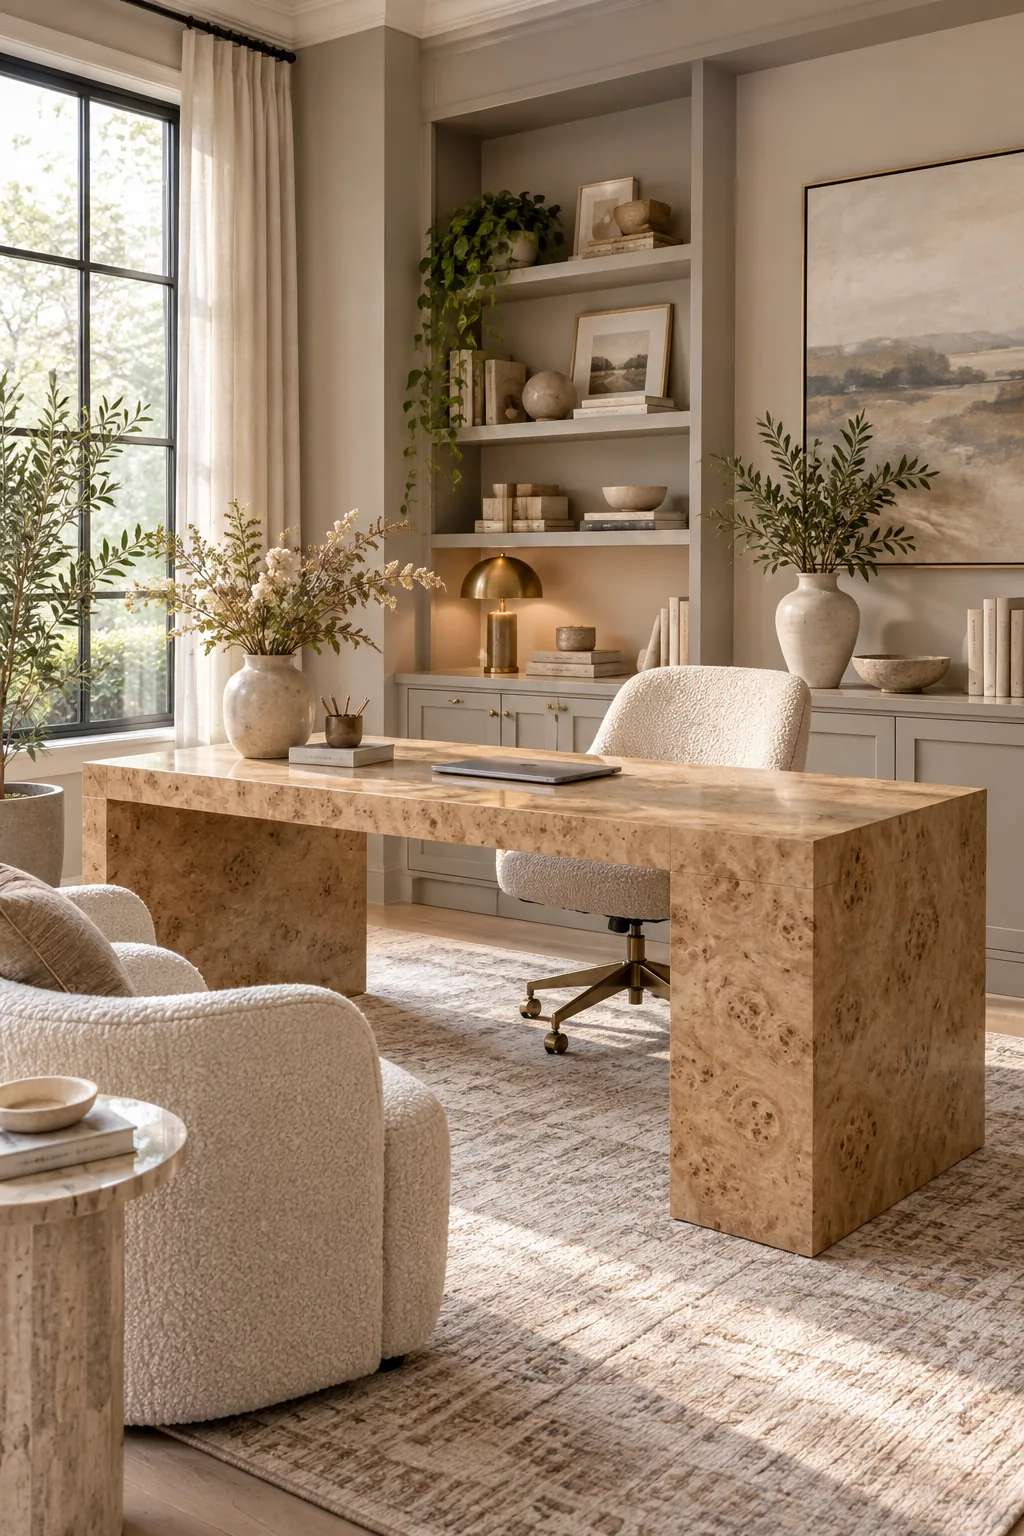
Soft Transitional: A burl wood desk and painted greige cabinetry create a calming, feminine atmosphere where heavy electronics are tucked completely out of sight.
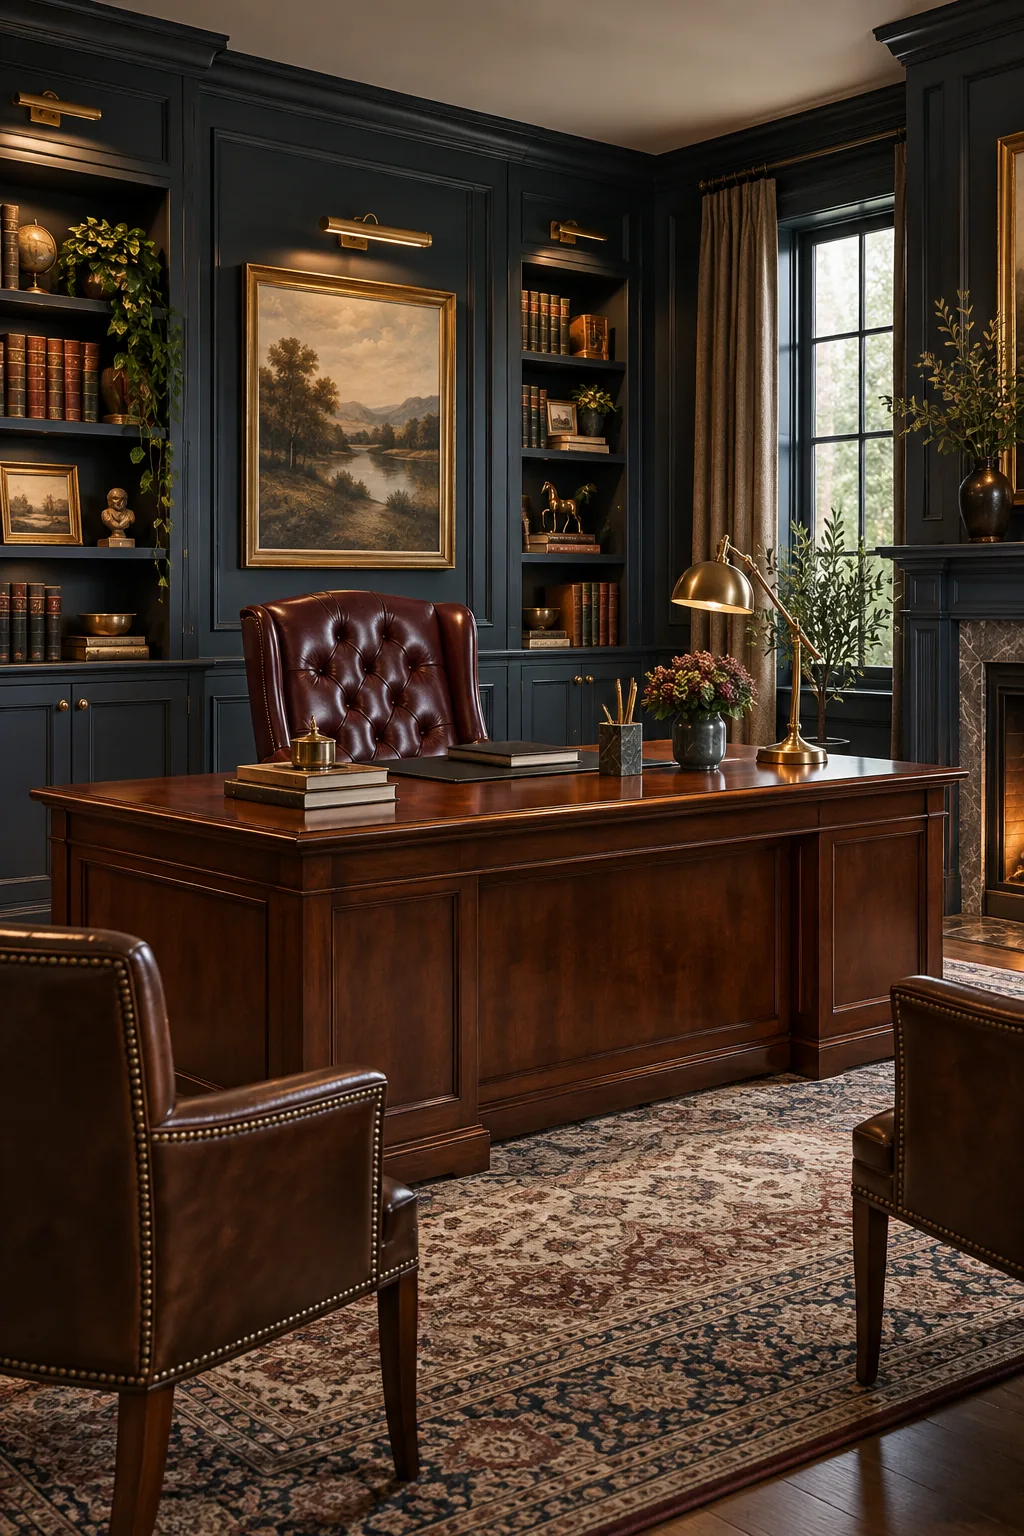
Moody Traditional: Dark navy wainscoting and a rich mahogany desk provide a classic foundation, while modern flush-mount chargers are seamlessly integrated into the antique-style wood.
The Hidden-Tech Office Checklist
Bring all these specifications together before you buy a single piece of furniture so the final office looks effortlessly polished. Verifying your measurements on paper guarantees that every built-in detail will function flawlessly once installed.
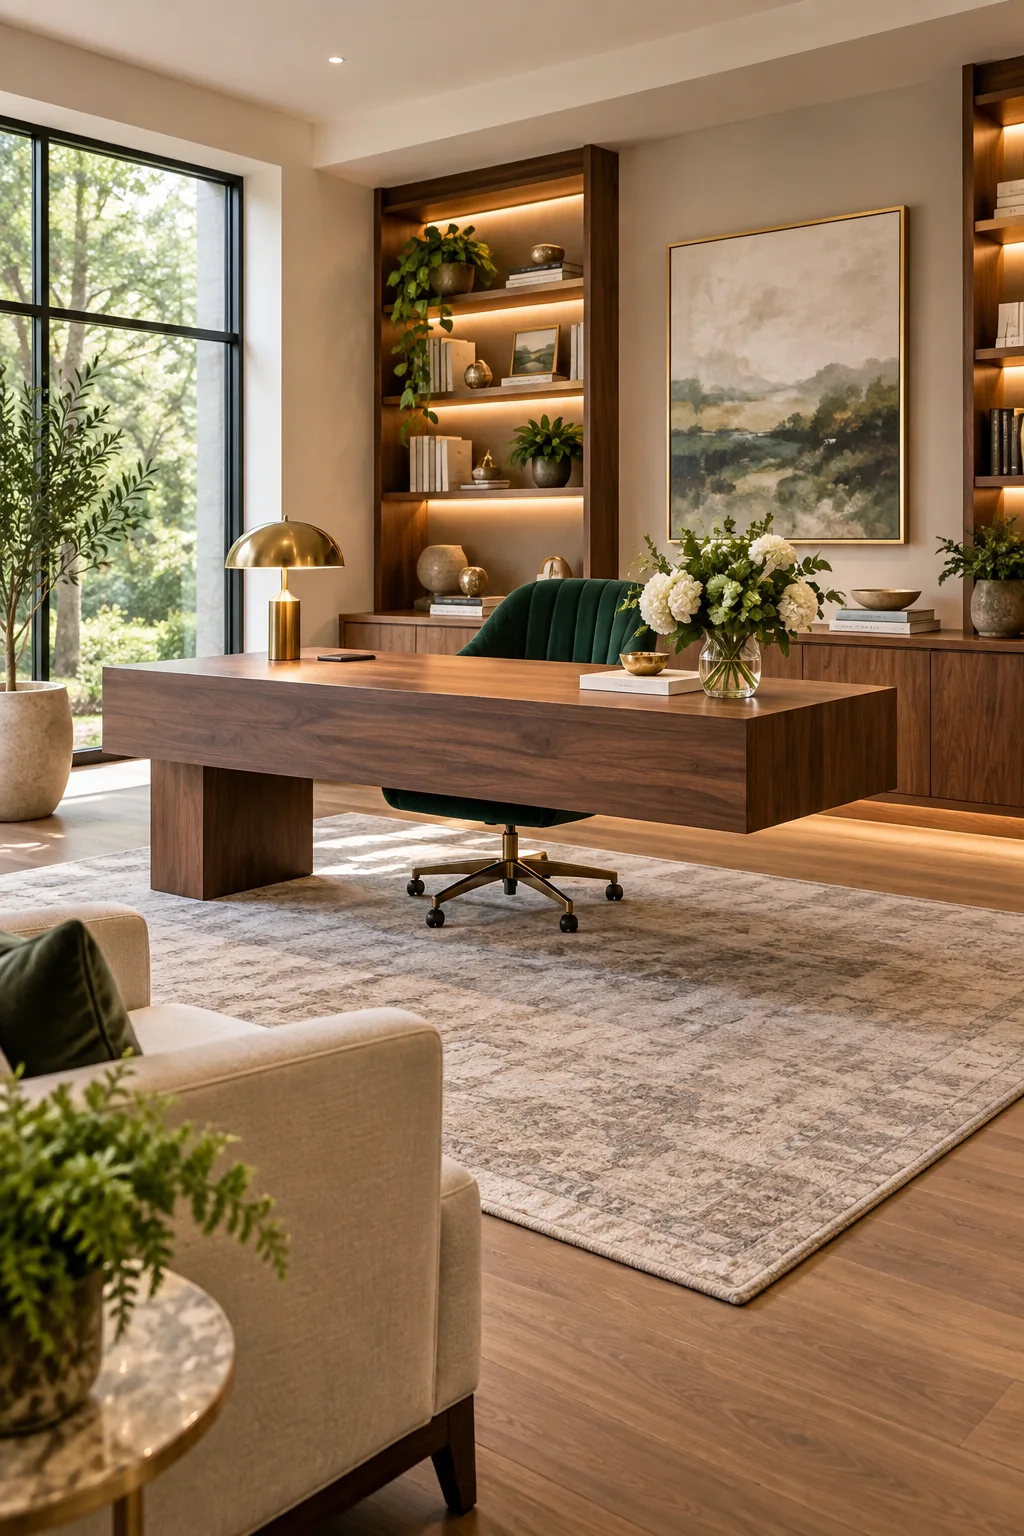
Print our one-page Executive Office Hidden-Tech Checklist to gather your exact hardware sizes, clearances, and specifications before scheduling your professional installation.
- Flush charger: 80mm grommet-hole diameter.
- Cable management: 24-inch to 36-inch metal under-desk tray.
- Floor plan: 36-inch chair clearance behind the desk.
- Printer storage: 20-inch credenza depth with 18-inch heavy-duty slides.
- Shelf lighting: 2700K LED strips cut one inch short of shelf width.