
Small RV Bedroom Layout Guide: Space-Saving Rules & Measurements
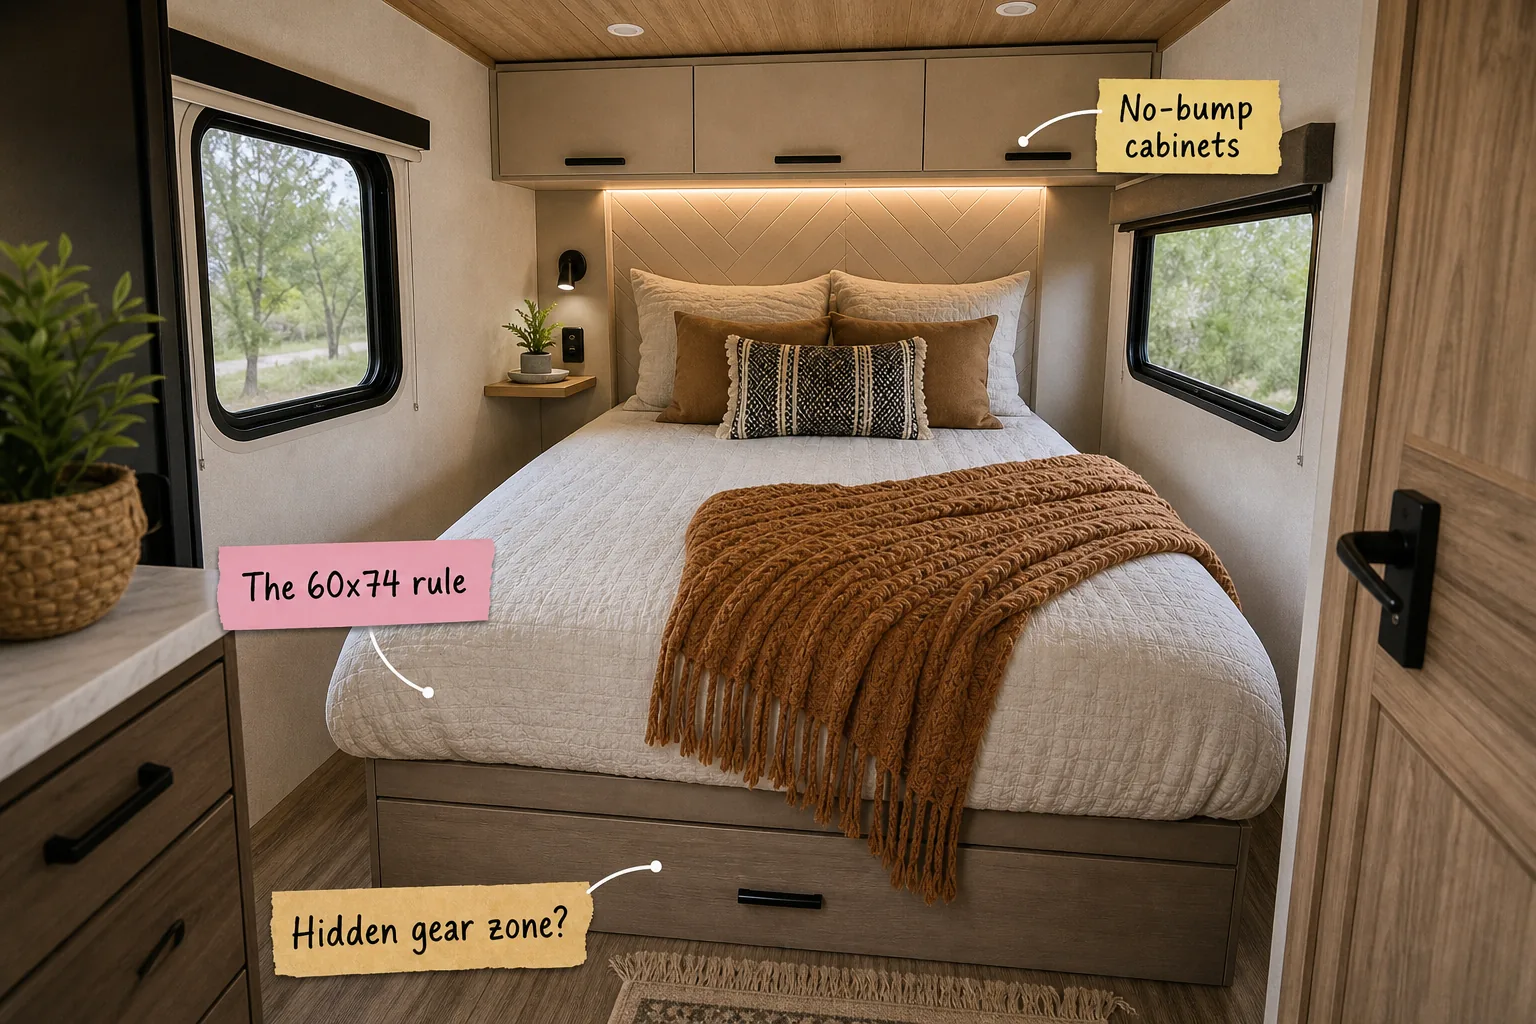
Master your camper renovation with this complete RV bedroom layout and measurements guide. By following these strict spatial rules, you will be able to accurately measure, confidently build, and perfectly arrange a highly functional sleep space that maximizes storage without ever feeling cramped.
The 60×74 Short Queen Rule
The foundation of any successful camper layout starts with the essential 60×74 rule. Choosing this specific RV short queen mattress over a standard residential size immediately saves six crucial inches of overall length at the foot of your custom bed platform.
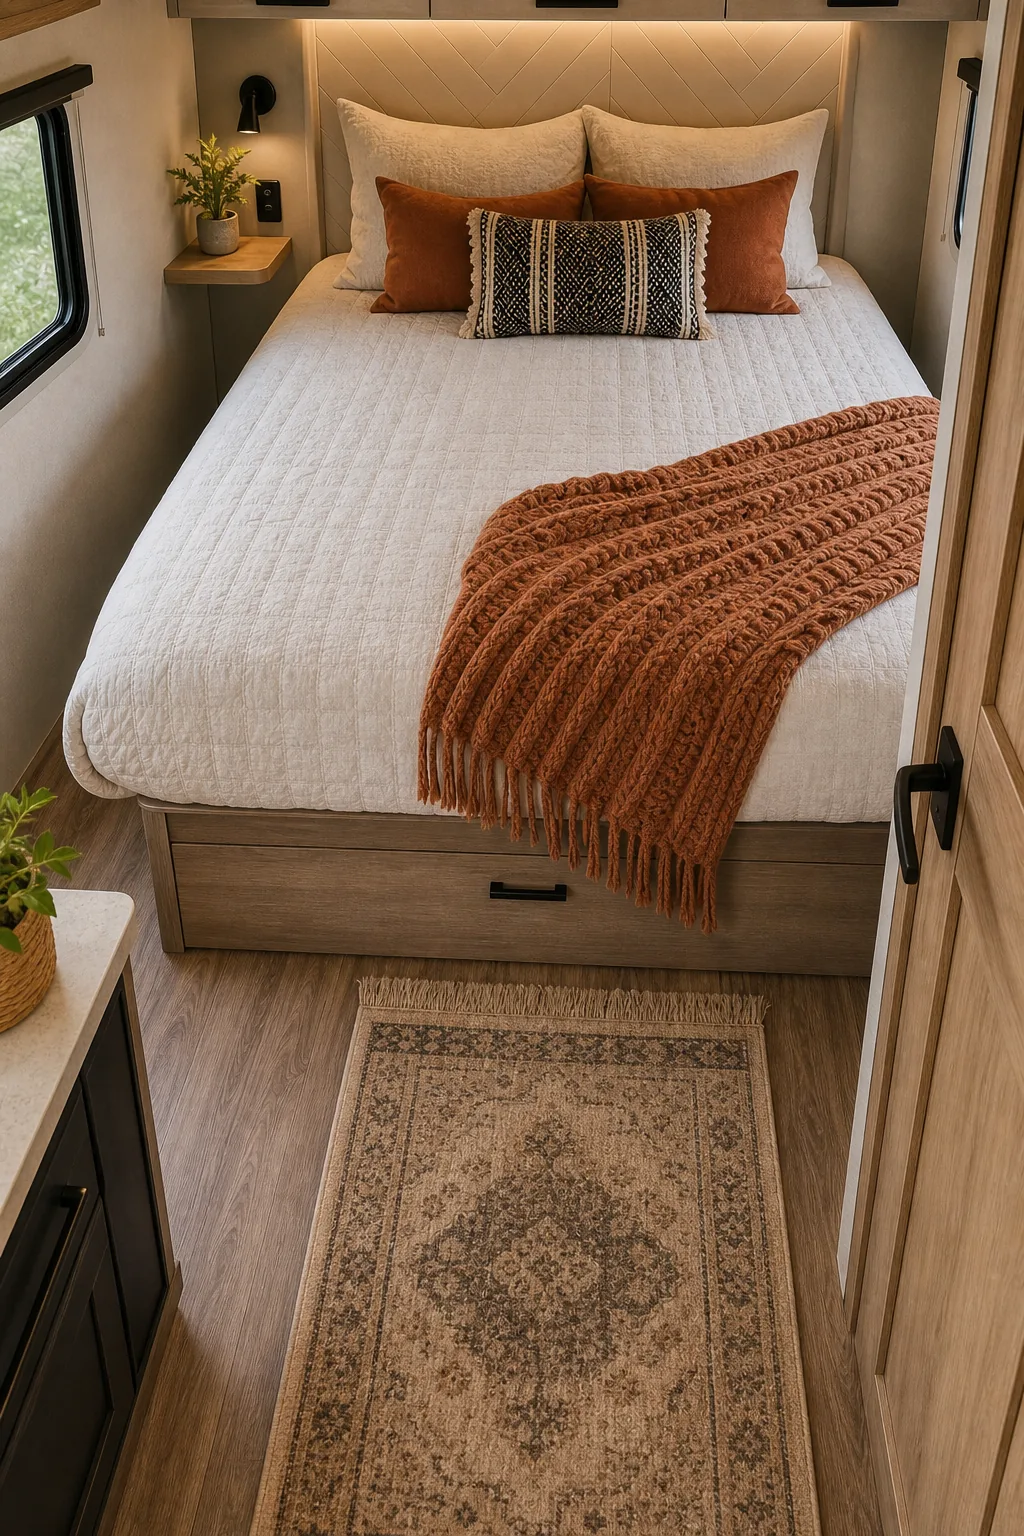
Maintaining this exact mattress footprint guarantees a permanent, walkable path through the room. Preserving those six inches prevents the space from feeling like a wall-to-wall mattress trap, allowing you to comfortably navigate the bedroom and easily access all surrounding storage drawers.
Comparing RV Mattress Dimensions
Understanding the exact spatial difference between mattress options dictates your entire floor plan. Upgrading to a residential size might seem incredibly luxurious, but it immediately consumes the essential floor clearance required for comfortably getting dressed and moving around the enclosed cabin.
| Mattress Type | Dimensions | Walkway Impact | Best Application |
|---|---|---|---|
| RV Short Queen | 60″ x 74″ | Maintains clear path | Standard camper builds |
| Standard Queen | 60″ x 80″ | Eliminates clearance | Large fifth wheels |
| RV Short King | 72″ x 75″ | Narrows side aisles | Wide-body trailers |
| Standard King | 76″ x 80″ | Blocks all movement | Slide-out expansions |
| RV Full / Double | 53″ x 75″ | Maximizes floor space | Solo traveler vans |
| Custom Cut Foam | Variable | Perfectly tailored | Atypical corner beds |
Locking in the shorter 74-inch length allows you to confidently build fixed cabinetry opposite the bed. This strategic measurement ensures your cabinet doors can swing open fully without scraping against the edge of your mattress or completely blocking the main aisle.
Creating the Essential Airflow Gap
Once the mattress size is finalized, you must establish a strict 2-inch airflow gap between the bed frame and all exterior walls. This small perimeter prevents severe condensation and dangerous mold buildup when camping in varying temperatures or highly humid climates.
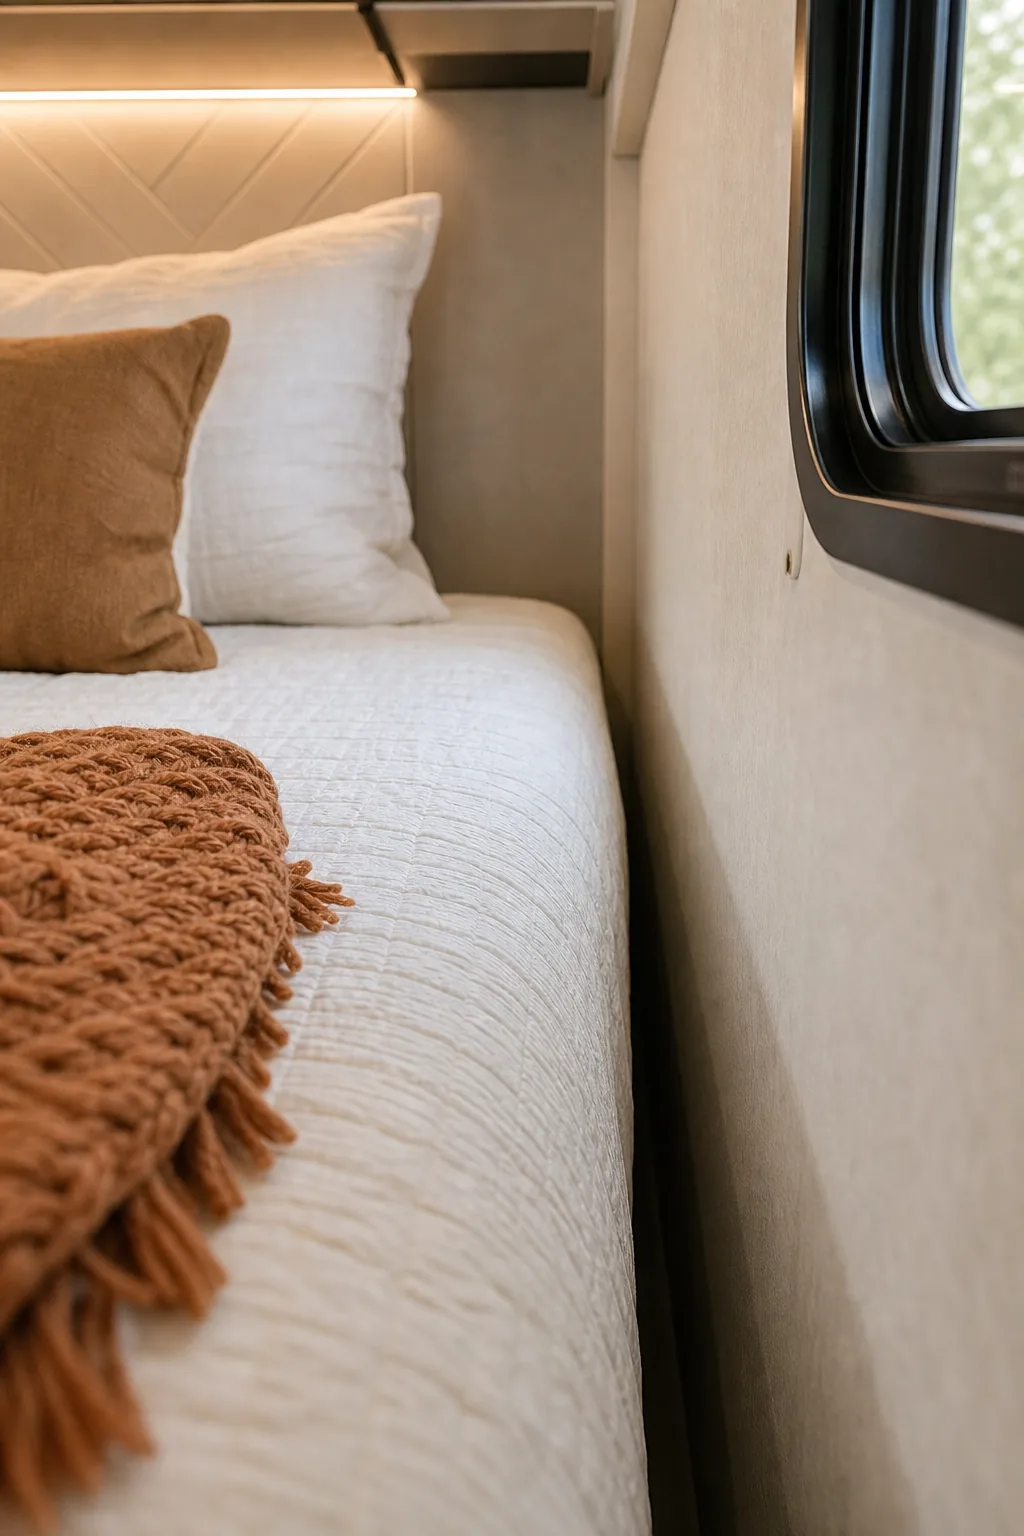
Leaving this intentional void allows warm air from your interior heater to circulate freely against the freezing exterior walls. This simple structural rule permanently protects your expensive mattress investment and keeps the entire sleeping environment healthy throughout the coldest winter months.
Managing Winter Condensation Risks
Moisture control becomes even more critical during winter months when interior and exterior temperature differences reach their peak. Failing to ventilate the mattress perimeter traps human breath and ambient humidity against the walls, rapidly degrading the bedding and rotting the surrounding wood panels.
Unlocking the Hidden Gear Zone
Building a lift-up bed platform instantly transforms the entire 60×74 footprint into the largest single storage bay in your camper. This massive hidden gear zone perfectly houses bulky off-season clothing, extra heavy blankets, and large outdoor equipment that would otherwise clutter the cabin.
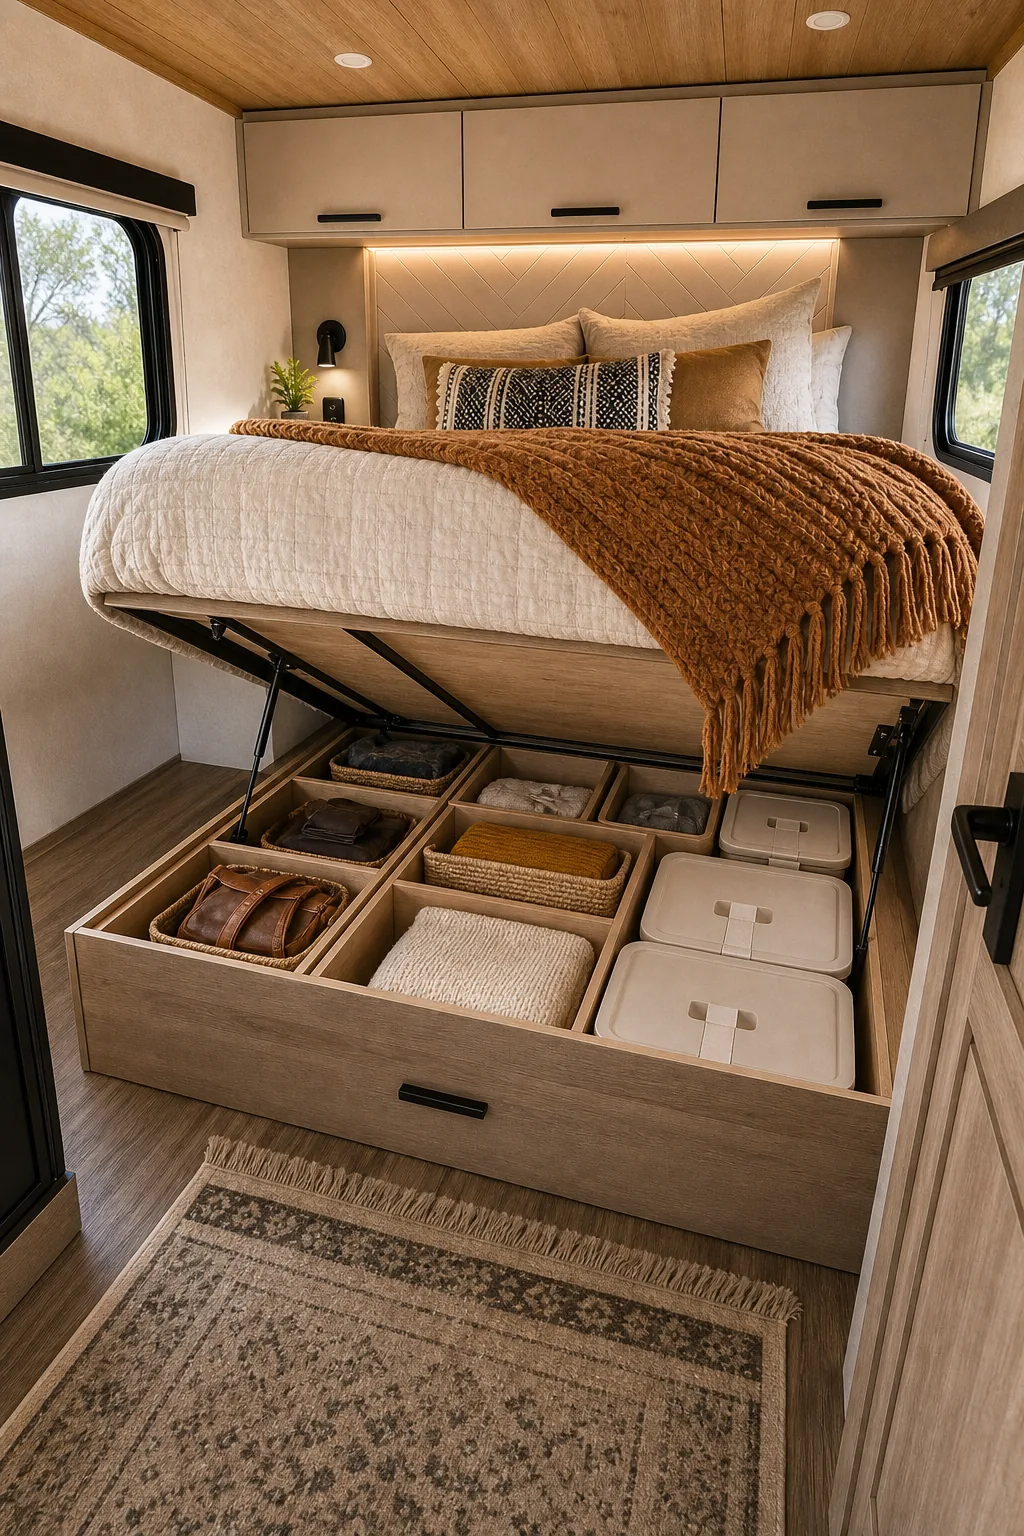
Accessing this lower compartment directly from inside the bedroom eliminates the frustrating need to go outside in bad weather to retrieve necessary supplies. Dividing this vast cavern with thin wooden partitions keeps smaller items perfectly organized while preserving open space for large plastic bins.
Structuring the Plywood Platform
Constructing a sturdy base ensures the mattress remains fully supported while keeping the heavy gear secure below. Using three-quarter-inch birch plywood provides the necessary structural rigidity without adding excessive, unnecessary weight to the pneumatic lift mechanism or the overall vehicle chassis.
Gas Struts for Easy Lifting
To make accessing that deep storage effortless, you must install 80-120 lb gas struts on the wooden platform. Calculating the combined weight of your specific memory foam mattress and thick plywood base dictates the exact strut rating required for smooth, daily operation.
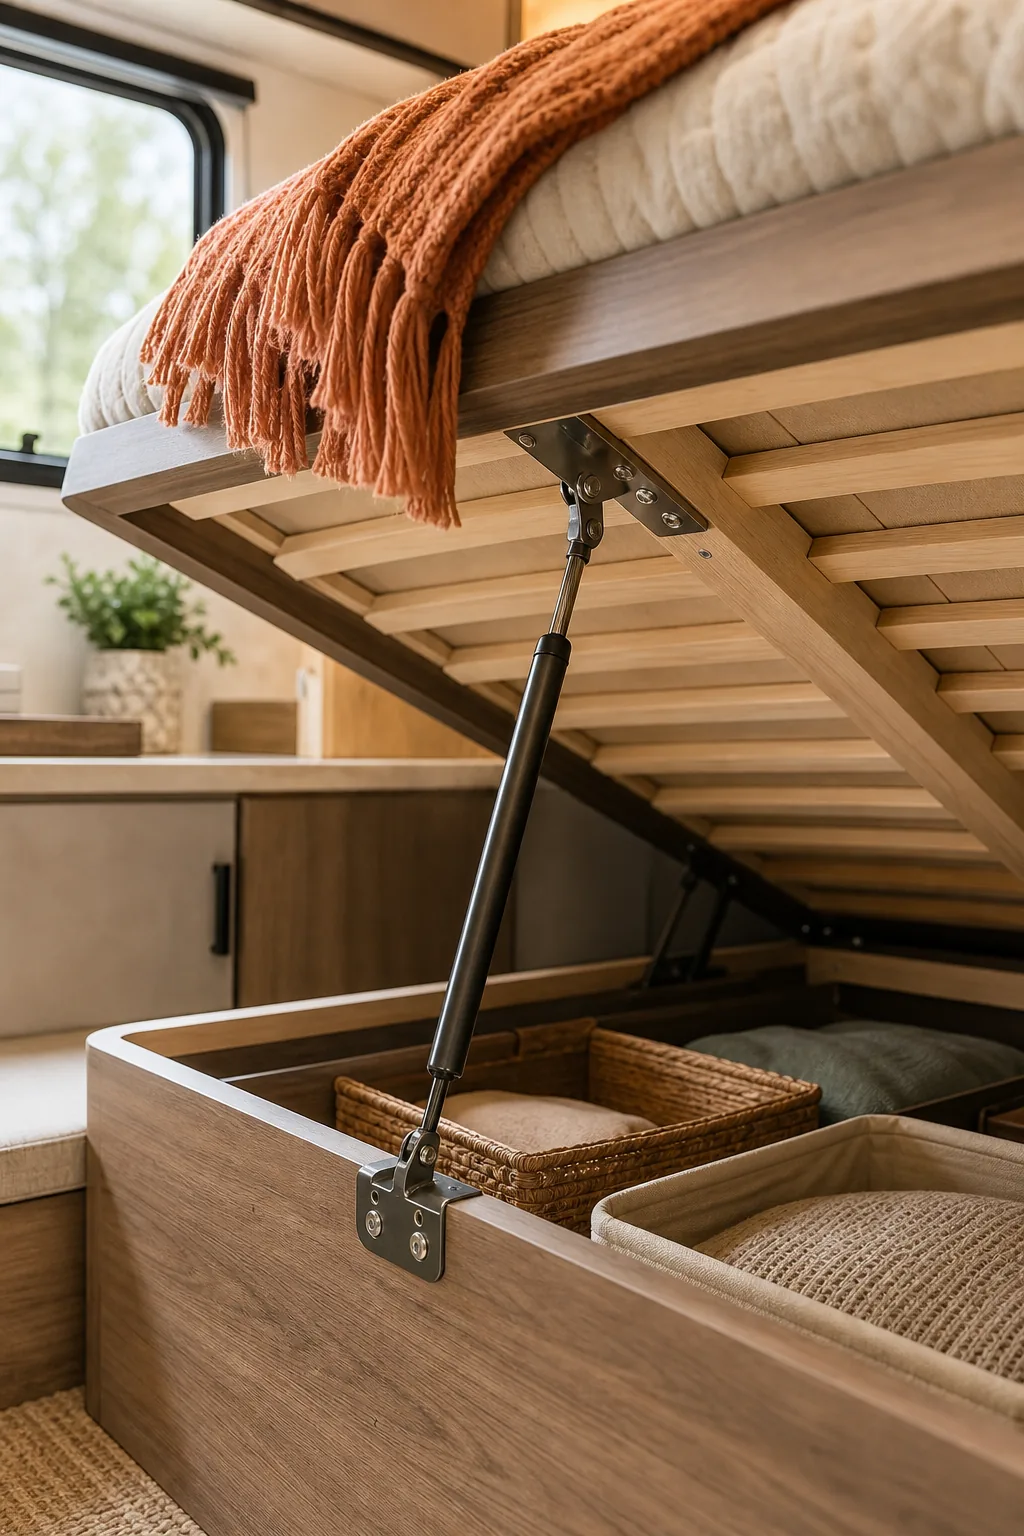
Mounting these pneumatic arms at the correct leverage point ensures the bed raises smoothly and stays securely open while you load gear. Precision is absolutely essential here, as improper placement forces you to dangerously hold the heavy mattress up with just one hand.
Balancing the Lift Mechanism
Selecting the right hardware is crucial for daily usability, but it is incredibly easy to miscalculate the necessary lifting force. Choosing the wrong components will quickly render your massive under-bed storage bay completely inaccessible or actively dangerous to use on a daily basis.
Sizing a Micro Nightstand
Moving outward from the bed, floating a micro nightstand on the side wall provides essential convenience without stealing valuable floor space. Restrict this bedside shelf to a strict depth of 5 to 7 inches to safely maintain your primary walking path.
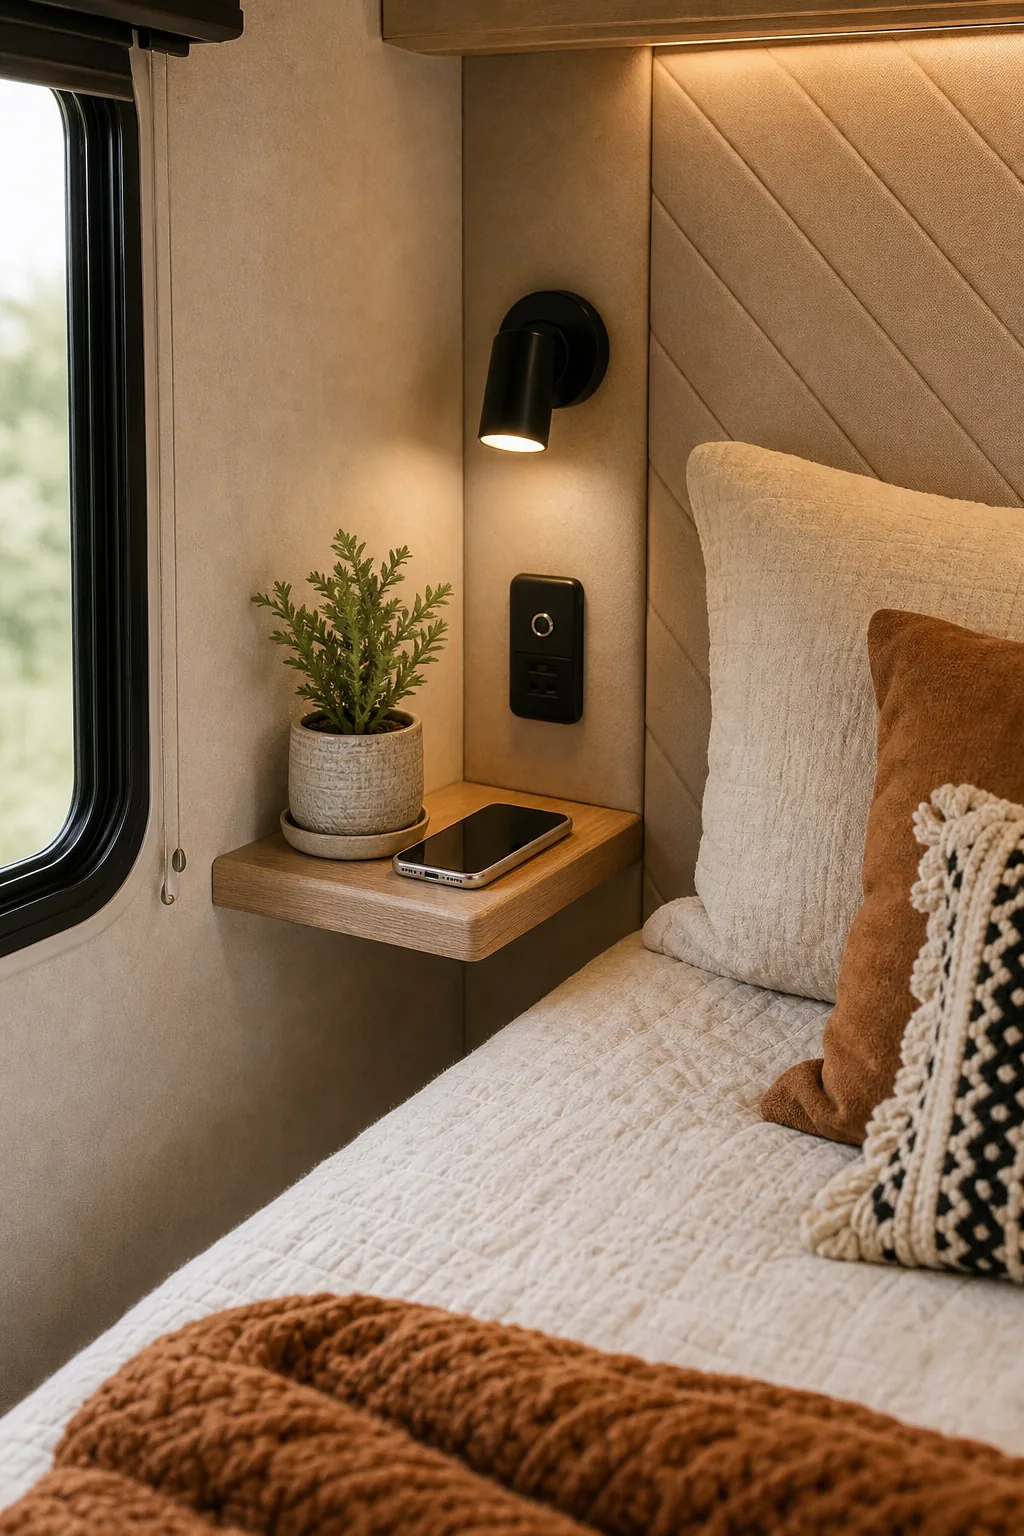
This highly compact profile offers just enough surface area for a smartphone and a small water glass. Keeping the shelf extremely shallow ensures it never blocks access to lower storage drawers or painfully catches your hip as you navigate the narrow aisle.
Routing 12V Bedside Power
Maximizing the daily utility of your micro nightstand requires integrating power directly into the adjacent wall structure. Running hidden 12V wiring behind the decorative paneling allows you to install flush-mounted USB outlets precisely where you drop your phone at the end of the night.
Designing No-Bump Cabinets
Above the pillows, installing no-bump cabinets requires strictly limiting the overhead storage depth to a maximum of 12 inches. This critical spatial restriction guarantees you can sit up comfortably in bed to read or relax without constantly hitting your head against the wooden frames.
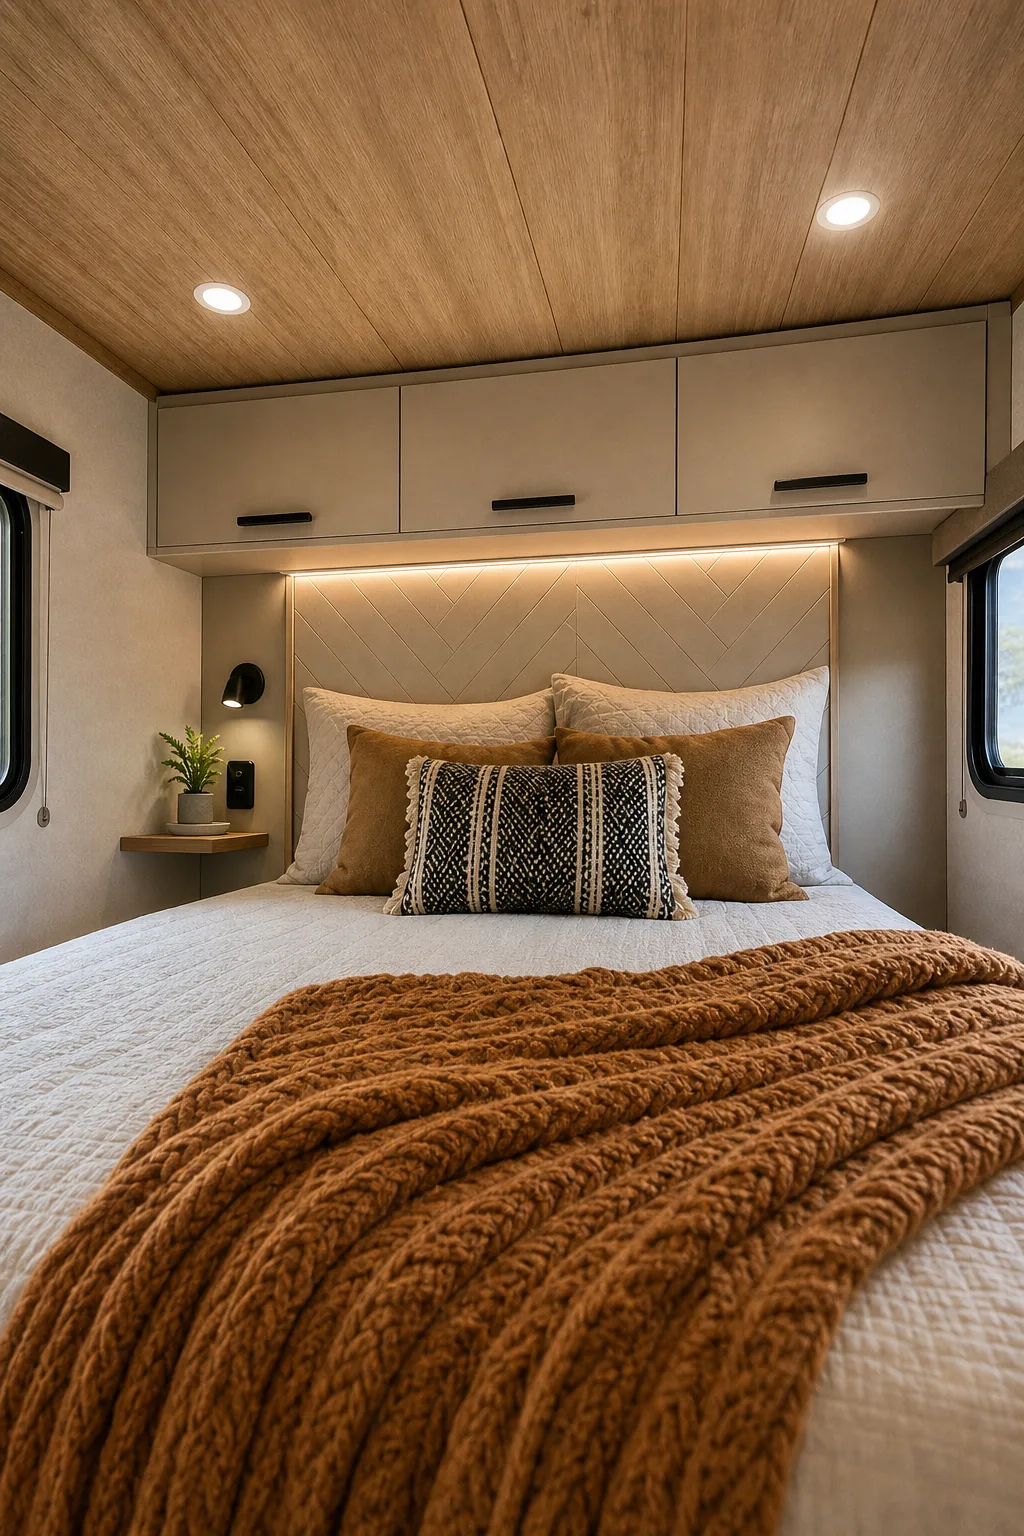
Slanting the lower faces of these cabinets slightly toward the exterior wall increases visual space while retaining highly useful storage volume. This angled design creates a far more open, breathable sleep nook without sacrificing your ability to efficiently stash folded clothes overhead.
Selecting Flush Cabinet Hardware
Maintaining a sleek overhead profile means eliminating absolutely anything that could snag clothing or cause a painful injury. Opting for hidden push-to-open latches rather than traditional protruding knobs keeps the cabinet faces completely flat and protects against accidental head scrapes in tight quarters.
Lighting the Sleep Nook
Proper illumination transforms a cramped corner into an inviting retreat, making 12V LED reading lights an essential bedroom upgrade. Position these directional fixtures exactly 30 to 36 inches above the mattress for optimal task lighting that will not disturb your sleeping partner.
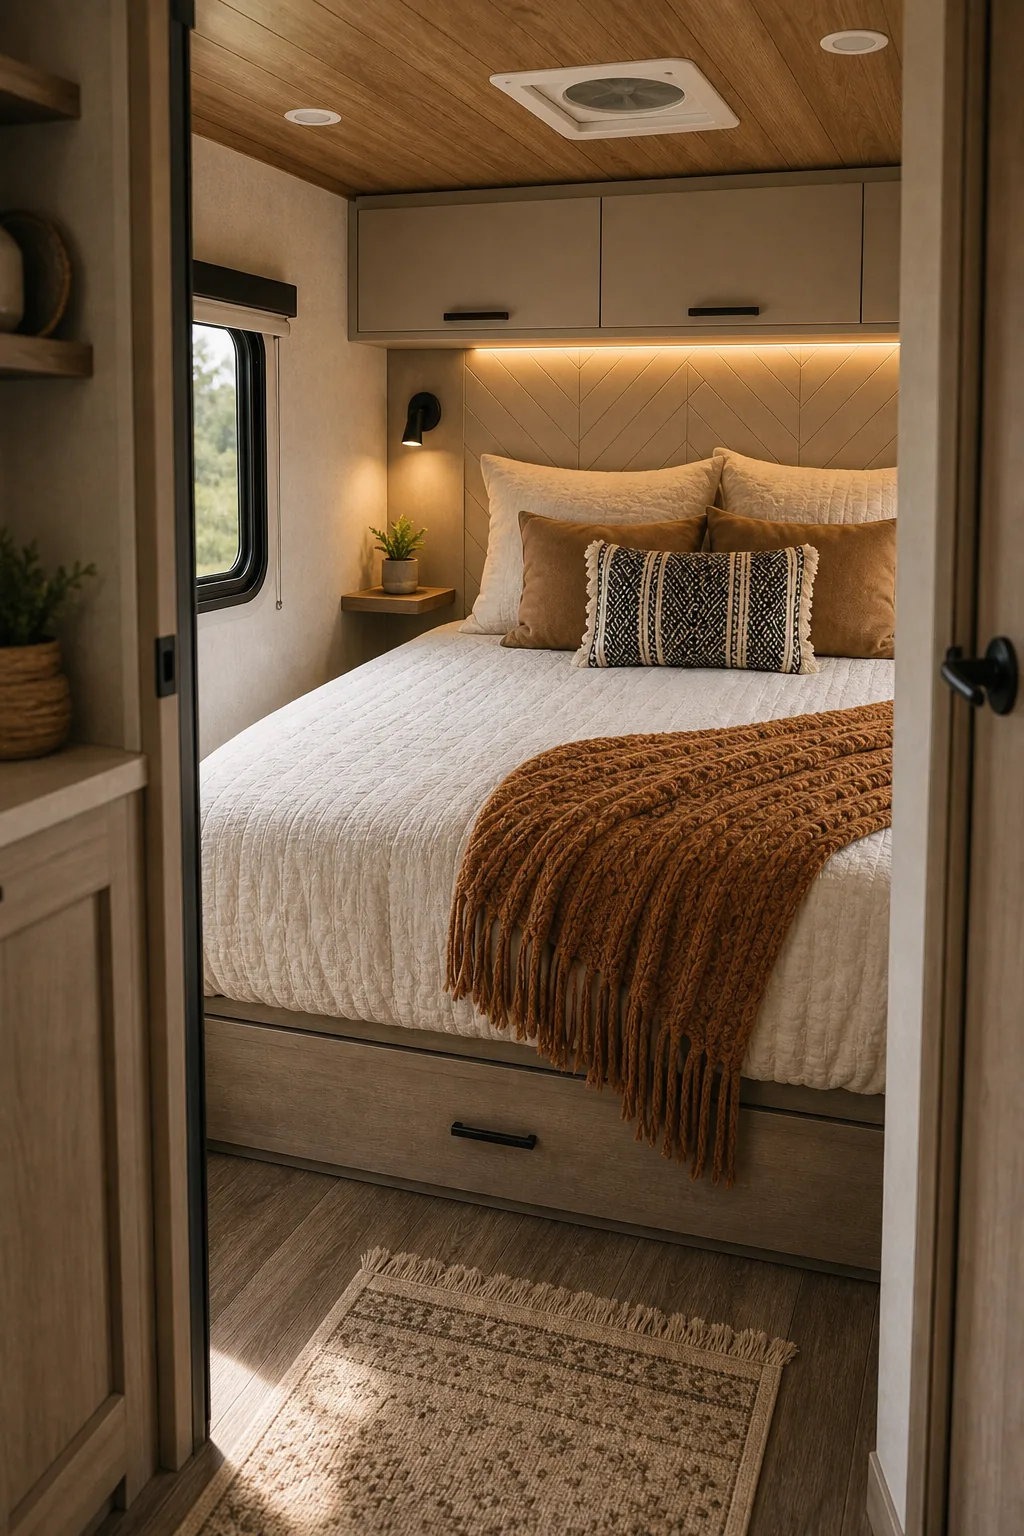
Mounting them directly under the shallow cabinets or on the adjacent side walls prevents harsh, direct glare while you relax. Choosing matte black or brushed nickel finishes ensures the hardware blends seamlessly into the surrounding wooden cabinetry and decorative ceiling panels.
Hardwiring the LED Fixtures
Connecting these highly efficient, low-draw LEDs directly into the camper’s primary battery bank ensures you always have reliable light, even when boondocking completely off-grid. Dedicated switches on each individual fixture allow precise control without needlessly illuminating the entire cabin during the night.
The Complete RV Bedroom Layout Guide
Bringing these precise dimensions together yields the ultimate, highly functional RV bedroom layout guide. Combining the 60×74 short queen, 12-inch deep overhead cabinets, and 5-inch nightstands results in a cohesive, perfectly balanced sleep space that maximizes every square inch of your camper.
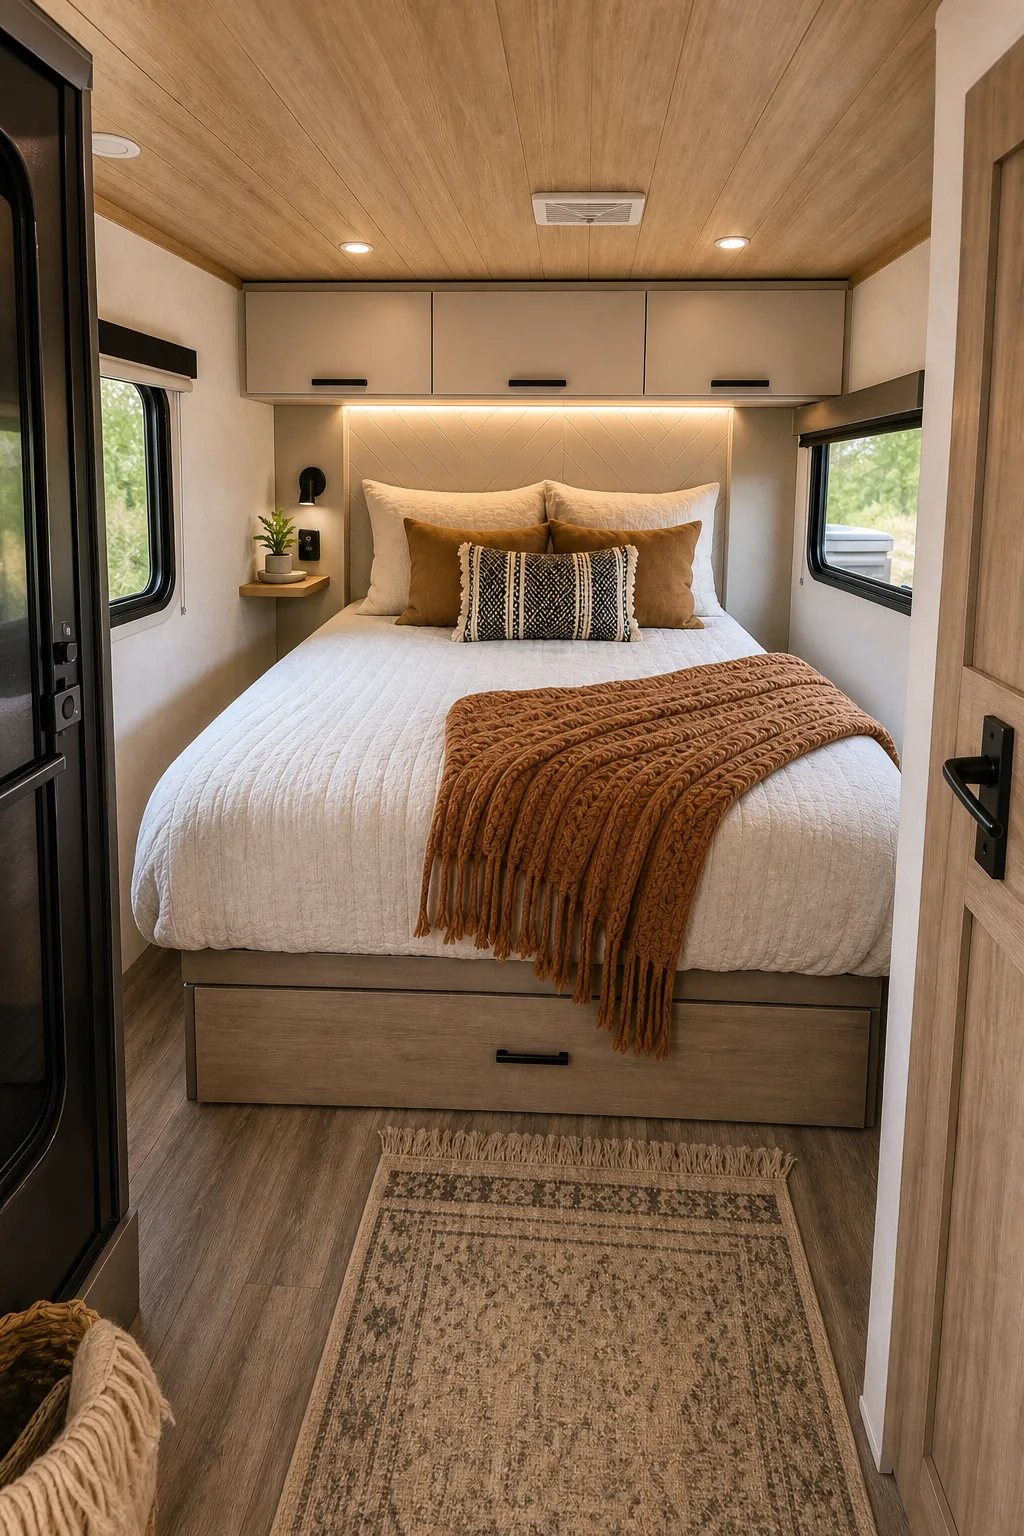
Before making your first permanent cut, run through this final spatial verification to ensure every built element works together perfectly. Taping these exact footprints onto your subfloor clearly exposes any hidden conflicts between swinging doors, sliding drawers, and your essential walking paths.