
Simple Christmas Tree Decorating: The 3-Step Spacing Guide
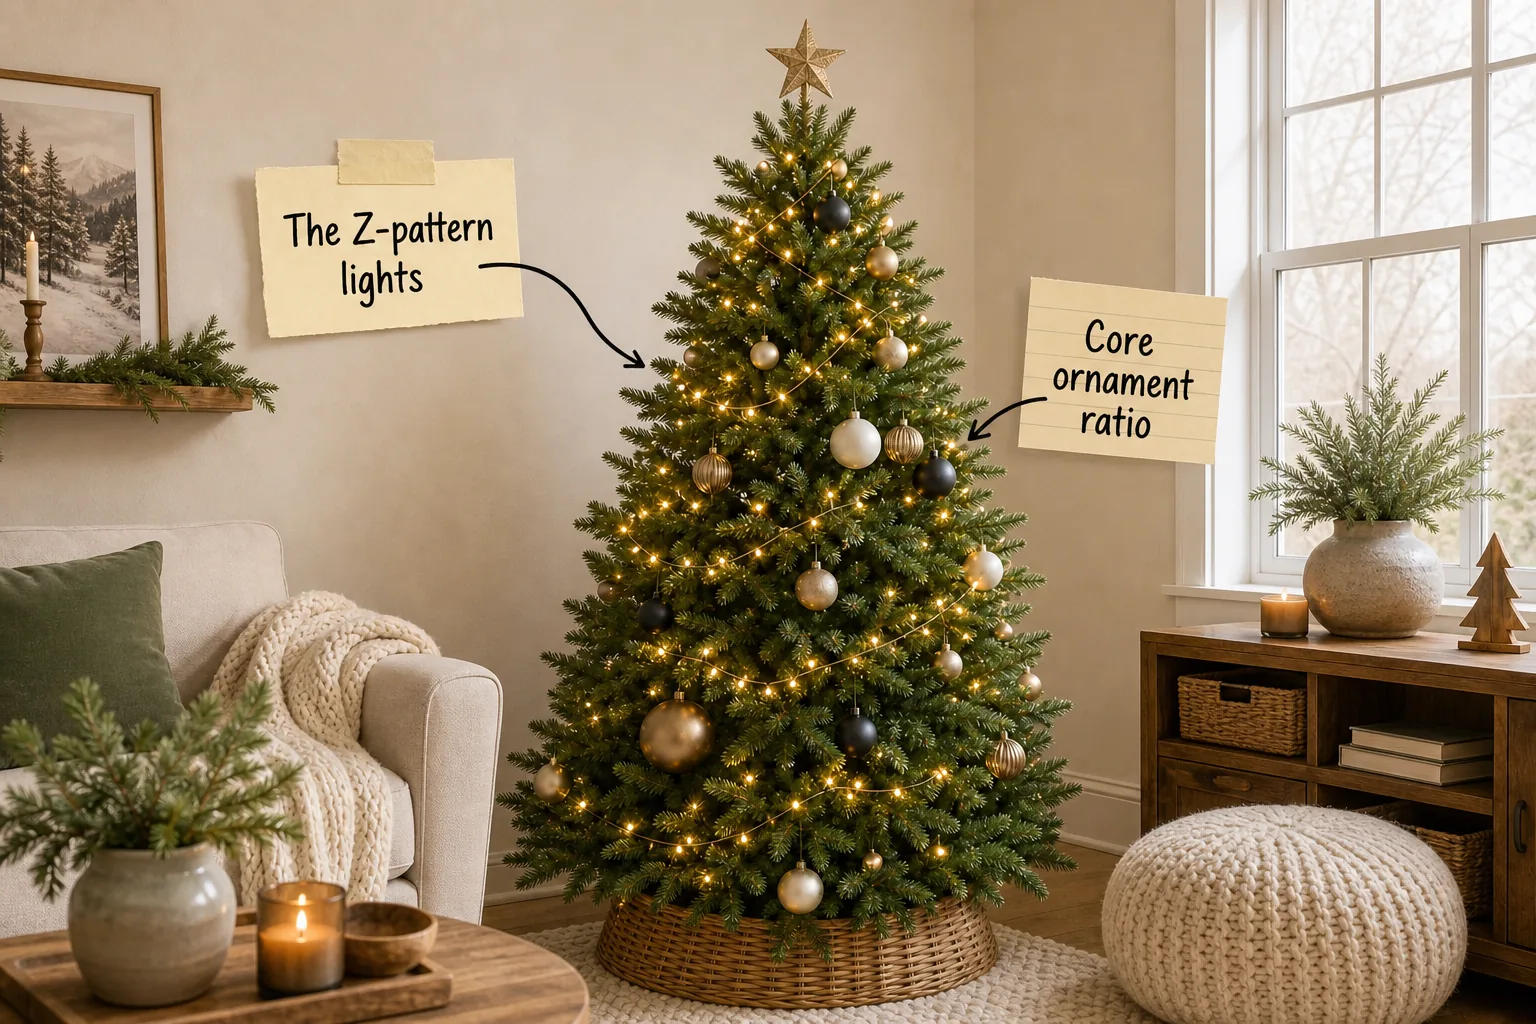
You will be able to decorate a perfectly balanced, sparsely styled Christmas tree without overcrowding the branches by following our exact 3-Step Spacing Guide. This foolproof method guarantees you master a beautifully modern holiday look using precise measurements for lights, anchors, and filler.
The 3-Step Spacing Guide
Understanding the visual difference between working in organized layers versus randomly hanging ornaments is the absolute foundation of a modern aesthetic. By building outward from the trunk, you guarantee every bauble has enough physical breathing room to shine completely independently without touching its neighbor.

This exact method requires lighting the core, setting the heavy anchors, and finally balancing the filler. You must enforce a strict 6-foot step-back rule after completing each distinct layer to verify the overall visual balance before moving forward to the next decorating phase.
Establishing Your Decorating Zones
Before touching a single branch, sort your entire collection by size and finish to prevent accidentally clustering identical pieces. Creating physical staging areas on your floor ensures you pull the correct weight and texture for each specific tree zone.
| Size Category | Diameter | Placement Depth | Ideal Finish |
|---|---|---|---|
| Anchor | Over 5 inches | Deep inner branches | Metallic |
| Core | 3 to 4 inches | Mid-level branches | Glossy |
| Filler | Under 3 inches | Near the trunk | Matte |
| Accent | 2 to 3 inches | Outer branch gaps | Glitter |
| Drop | 4 to 6 inches | Hanging freely | Clear Glass |
| Finial | Elongated | Outer branch tips | Textured |
Grouping your materials according to this strict scale chart prevents the extremely common mistake of placing delicate finials on heavy structural branches. You can now approach the greenery with a clear, mathematically sound plan for every single decorative piece.
Stringing the Z-Pattern Lights
The specific motion of weaving lights side-to-side ensures even coverage and eliminates the frustrating chore of unspooling tangled circles next year. The Z-pattern lights technique pushes the glow deep into the center while keeping the main wires perfectly horizontal across the prominent outer branches.
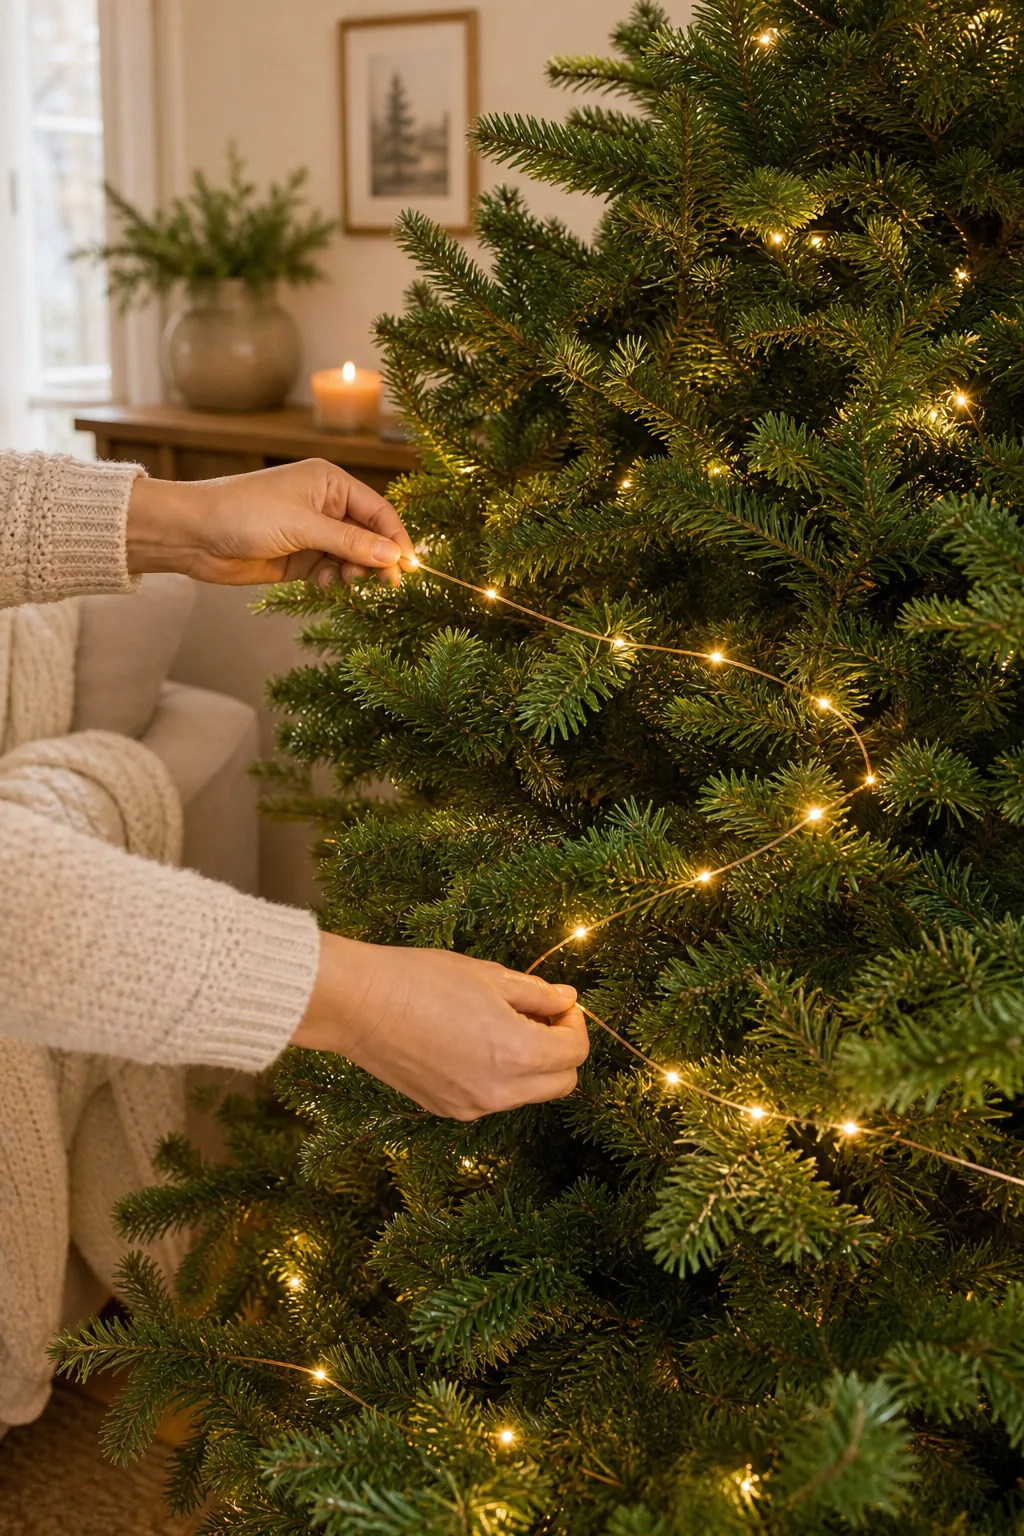
While the Z-pattern saves you from walking in endless circles, the real visual magic happens at the very edges of the branches.
Measuring Your Light Density
Achieving that coveted inner glow requires precise vertical spacing between each horizontal pass of the light strand. You must leave exactly 4 to 6 inches of vertical space between each sweep to illuminate the mid-level branches flawlessly and evenly.
- Measure a 5-inch gap from the bottom branch to start your next horizontal row perfectly.
- Step back three feet to ensure the new row runs perfectly parallel to the floorboards.
- Tuck any sagging cords tightly behind the closest stiff pine needle cluster for a seamless look.
- Check the spacing from a seated position to verify the lights do not blind guests.
- Adjust the wire tension gently to prevent the delicate outer branch tips from bending upward.
Maintaining this exact vertical gap prevents harsh bright bands from forming and ensures a soft, consistent warmth radiating from the trunk all the way to the tips.
Placing the Anchor Baubles
The structural necessity of placing heavy anchors deep inside the tree creates a dark, reflective foundation that grounds the entire overall design. Anchor baubles are the largest, heaviest metallic ornaments in your collection and should never hang near the fragile, drooping outer branch edges.
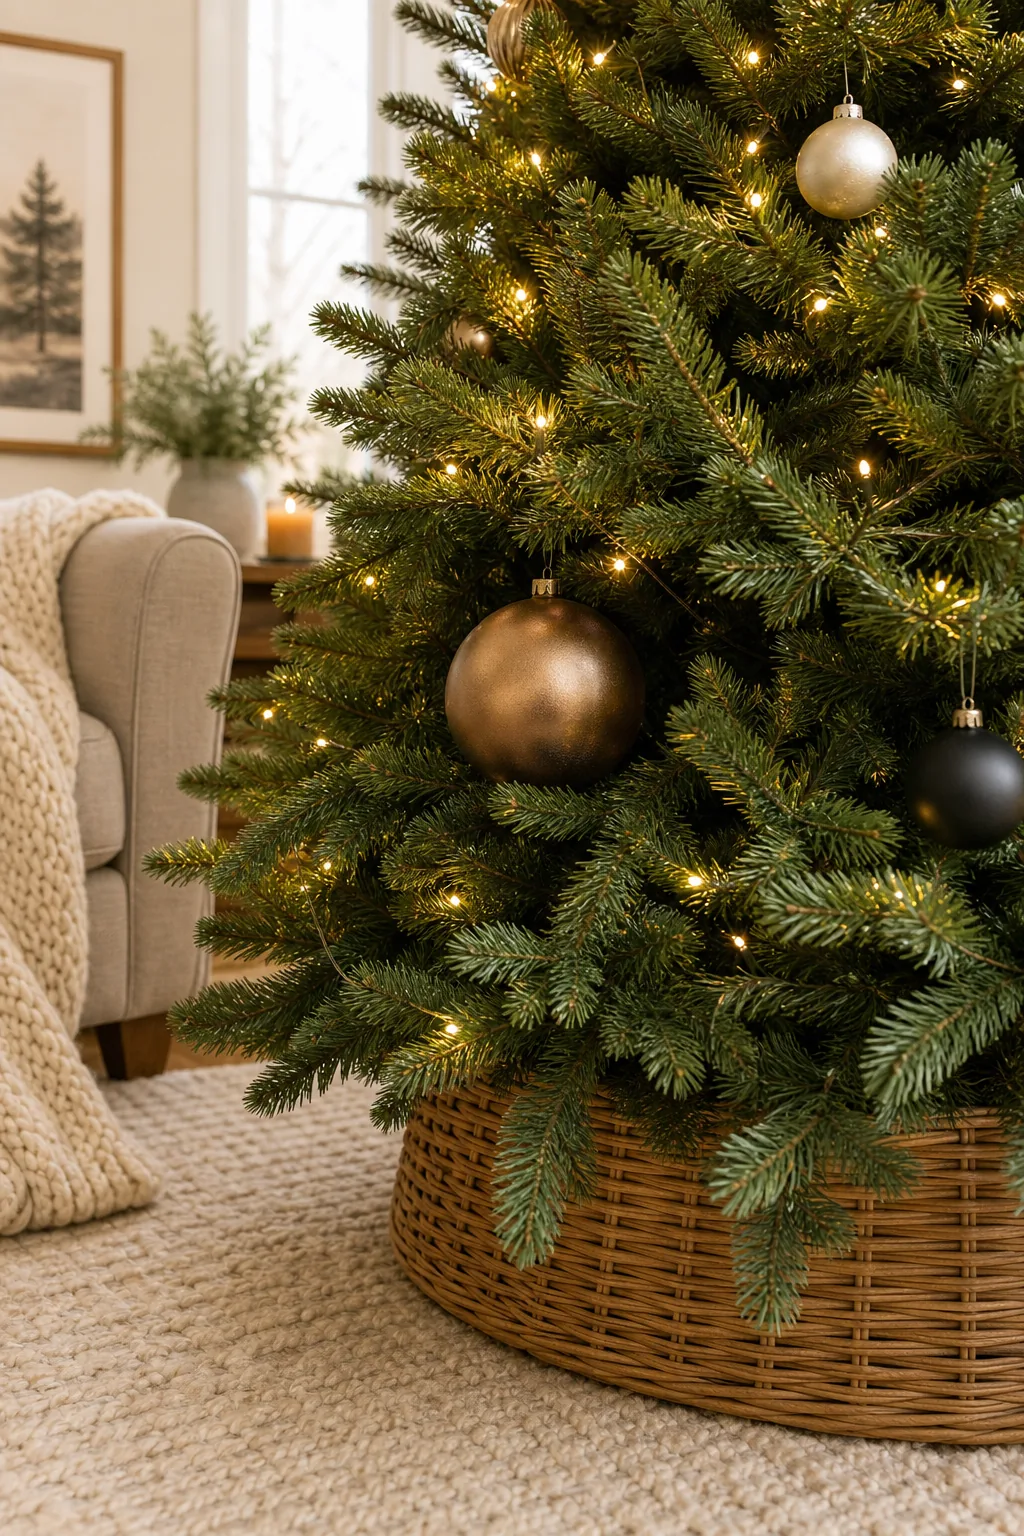
You must nestle these massive spheres deeply inside the lower third of the tree, resting them securely on thick inner branches. Allowing them to sit directly on the greenery rather than dangling from strings removes all awkward visual tension.
Spacing the Foundational Layer
Distributing your heaviest metallic pieces requires a diagonal zigzag approach rather than stacking them in straight vertical columns. Staggering these massive foundational spheres creates an invisible structural triangle that naturally draws the eye upward continuously through the dark inner pine branches, ensuring perfectly balanced visual weight distribution.
The Core Ornament Ratio
The visual balance achieved by spacing three matching items in a loose triangle prevents the sparse modern look from feeling chaotic or accidental. Mastering the core ornament ratio means treating every distinct two-foot section of branches as its own carefully curated, asymmetrical blank canvas.

Getting the ratio right is only half the battle; how you deliberately stagger those three ornaments determines the final sophisticated aesthetic.
Creating Visual Triangles
Mapping out these asymmetrical triangles across the mid-level branches ensures your most beautiful vintage glass pieces command attention without competing for space. You should leave exactly 8 to 10 inches of empty green space between the outer points of each core ornament cluster to maintain that coveted sparse aesthetic.
Where to Tuck Filler
The technique of using matte filler deep inside to hide bare trunk spots transforms a sparse artificial tree into a lush woodland centerpiece. If you are wondering where to tuck filler?, the answer is always in the dark voids directly behind your shiny core ornaments.

You must push these smaller, non-reflective ornaments close to the inner trunk to absorb light and create a convincing illusion of dense foliage. This strategic placement adds profound visual depth without cluttering the delicate outer tips of the tree.
Mixing Finishes for Depth
Pairing highly reflective glass at the front with soft velvet or matte finishes at the back plays a brilliant trick on the human eye. The glossy surface catches the warm white lights brightly, while the dull background piece recedes quietly into the shadows to create an incredible illusion of volume.
Managing Branch Weight
The physical rule of moving heavy items inward to prevent drooping tips protects both your valuable vintage glass and the tree’s elegant silhouette. You must test the natural branch tension gently with your hand before ever committing to a final, permanent ornament placement.

Apply a strict rule of thumb to preserve the shape: if a branch droops more than one inch under the weight of a bauble, you must immediately move that ornament at least three inches closer to the central trunk.
Securing Heavy Ornaments
Relying on standard flimsy wire hooks for your heaviest glass pieces often results in disastrous slips when the central heating turns on and branches relax. Twisting a four-inch piece of green floral wire directly around the thick branch joint guarantees absolute stability for massive spheres throughout the entire holiday season.
Tapering the Visual Silhouette
The aesthetic requirement of using smaller ornaments up high keeps the tree’s natural diamond shape beautifully intact and perfectly proportioned. You must scale down your ornament sizes progressively as you move upward to prevent the delicate upper branches from looking top-heavy or structurally unstable.
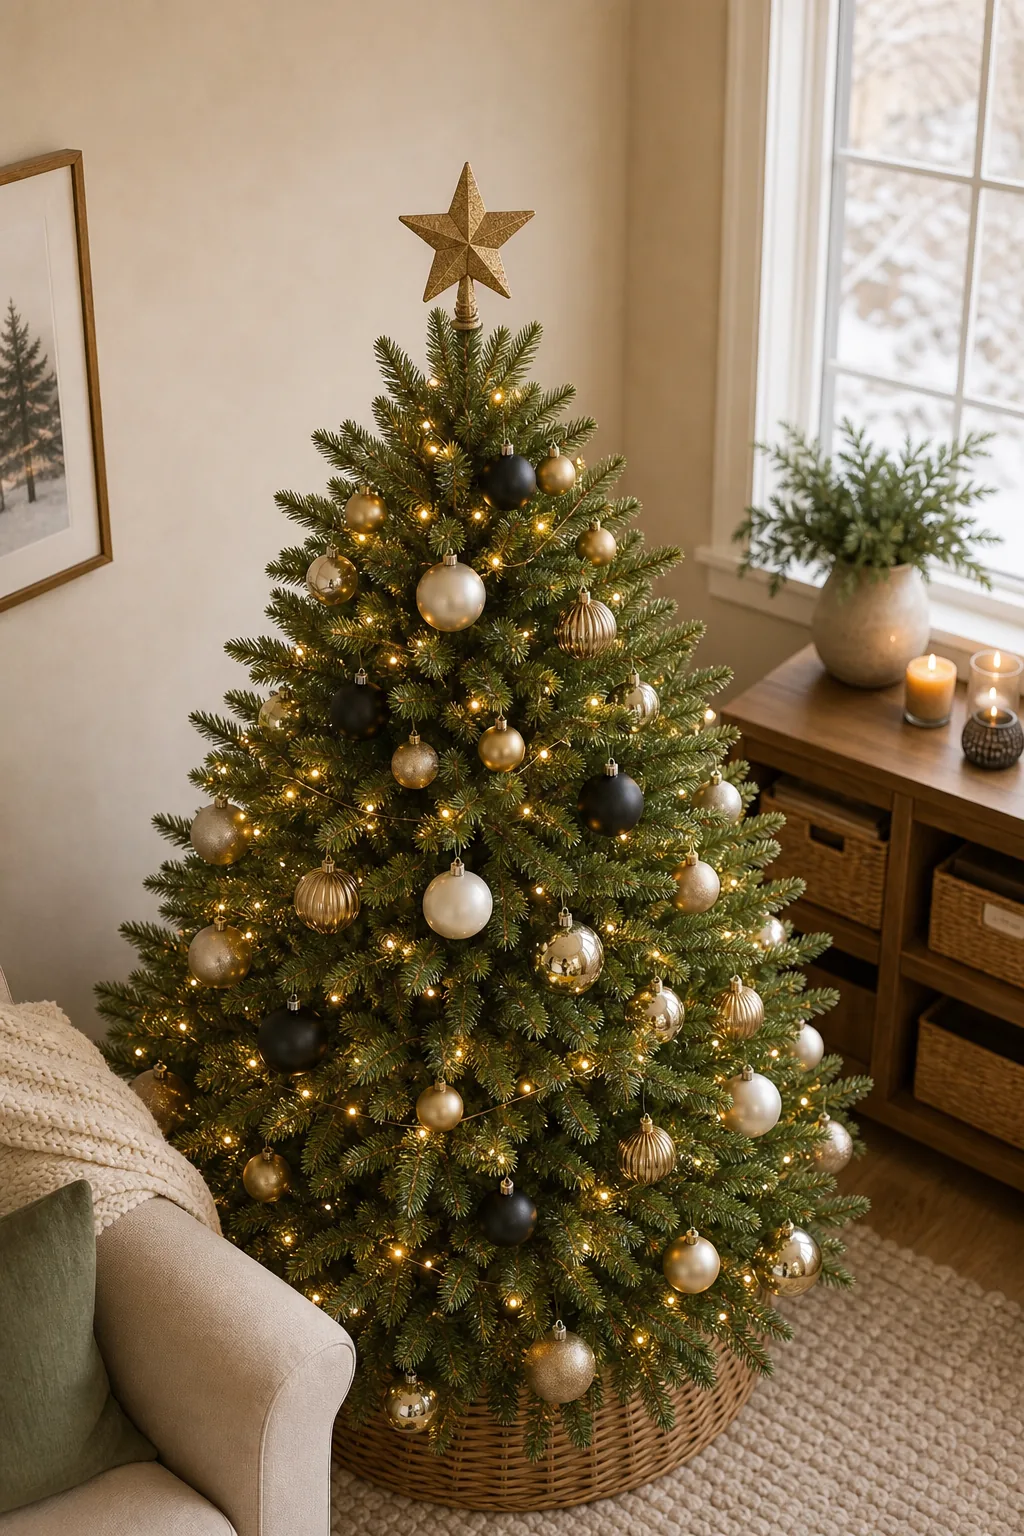
Keep any ornaments larger than 4 inches in diameter strictly confined to the sturdy bottom half of the tree. The upper quadrant should exclusively feature lightweight glass finials, miniature drops, and delicate reflective icicles.
Transitioning to the Topper
Leaving the final twelve inches of the vertical leader entirely bare ensures your decorative star or angel sits completely flush against the pine needles. Crowding this critical upper zone with small baubles creates a messy visual transition that ruins the crisp, tapered silhouette you worked so hard to build.
The 360-Degree Balance Check
The importance of reviewing the fully lit tree from the room’s main seating areas cannot be overstated in sparse modern styling. You must turn off all overhead room lights, step back, and scan the branches specifically for dark gaps or unintended, heavy visual clusters.

Before you pack away the ornament boxes and sweep up the stray pine needles, run through this final, comprehensive visual audit.