
16+ Stunning Party Tray Ideas for Your Next Event
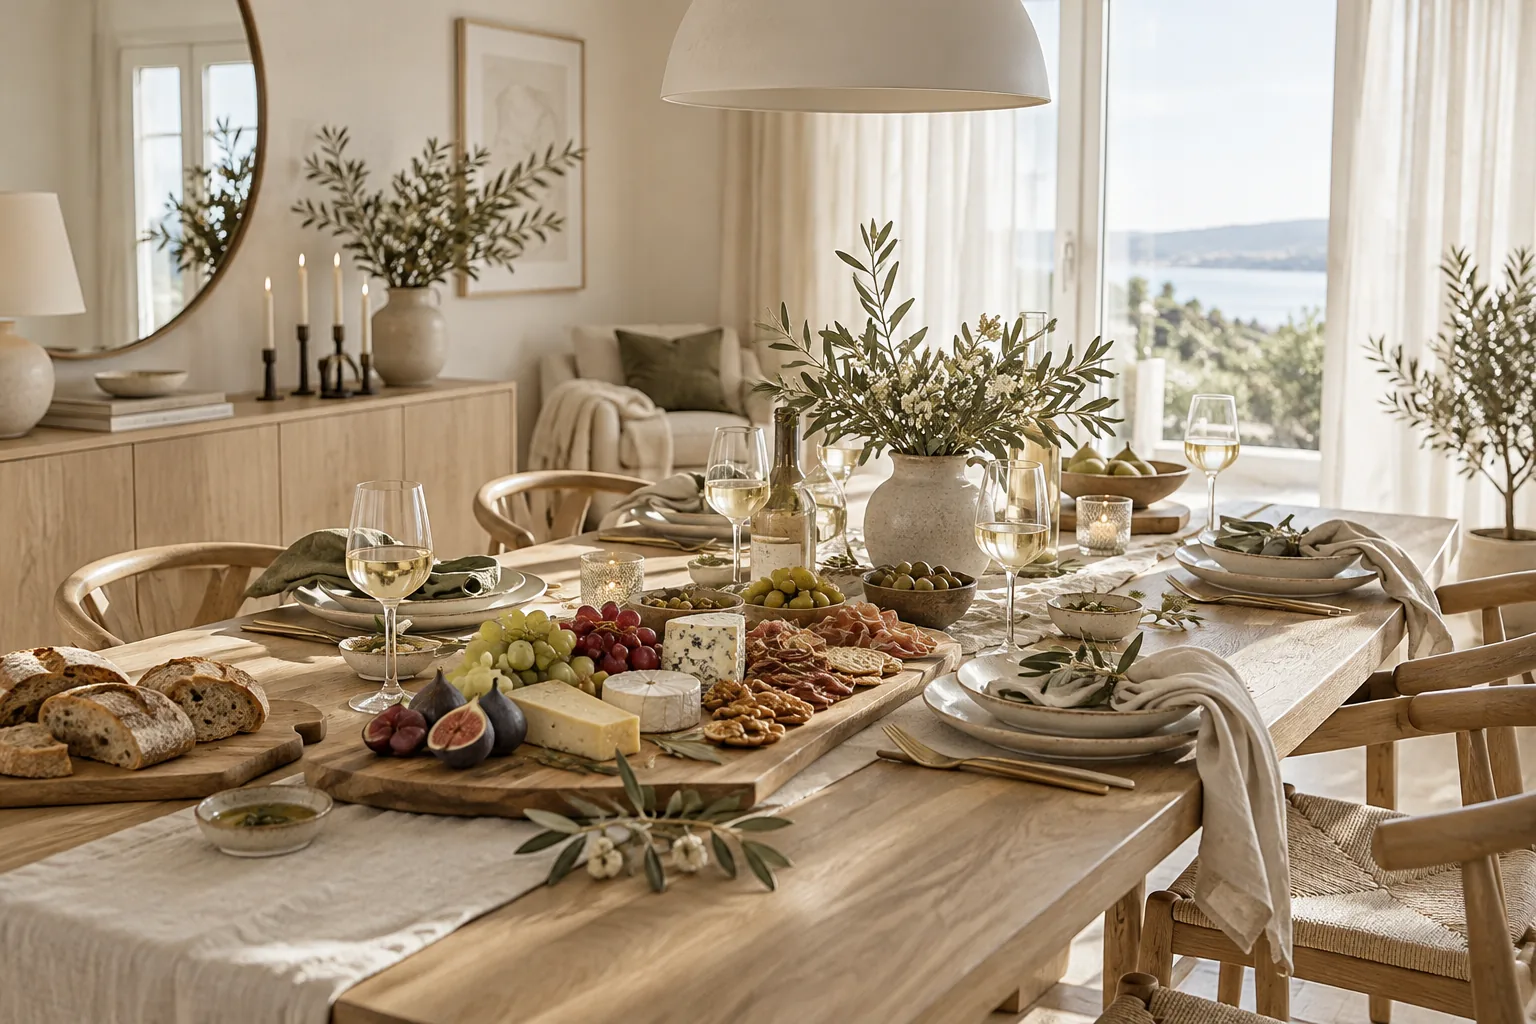
Building a great party tray is all about mixing textures and keeping things easy for your guests to grab. I am going to show you exactly how to style them so they look incredible without taking all day to prep.
1. Pack It Tight
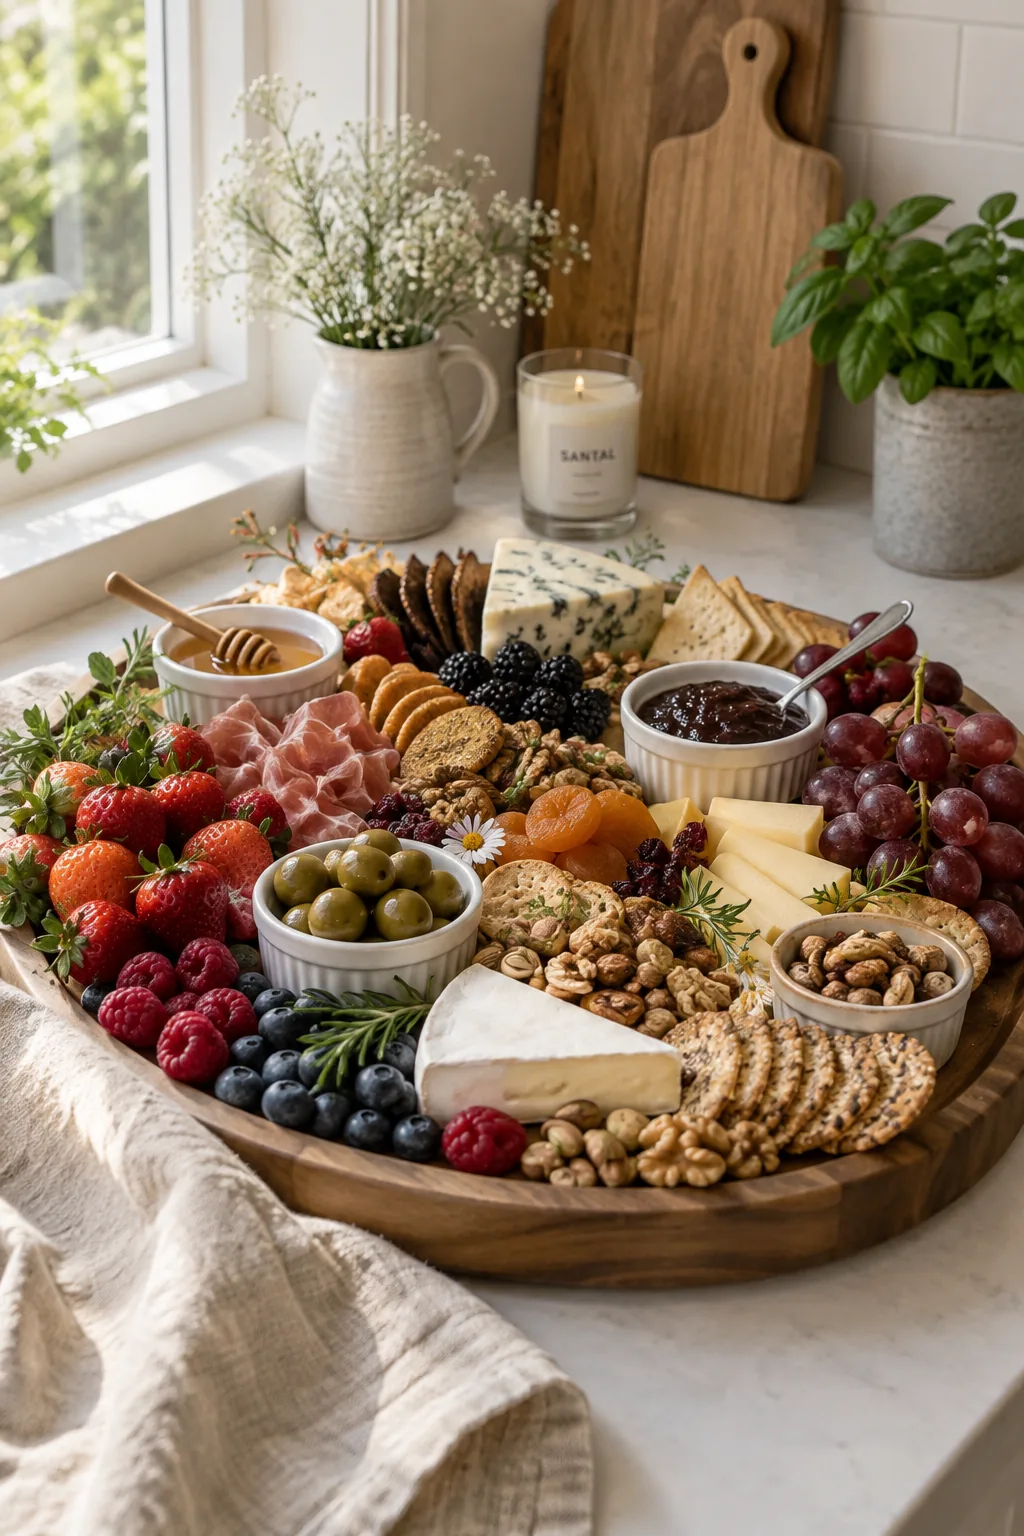
Grouping things tightly is what makes a basic tray look abundant and professional. You want to eliminate any empty space by tucking small items like mixed nuts or fresh berries into the gaps. A large wooden board provides the perfect warm background for this dense styling. Just keep the wet ingredients in small ramekins so they do not soak into the wood.
2. Provide Tiny Tools
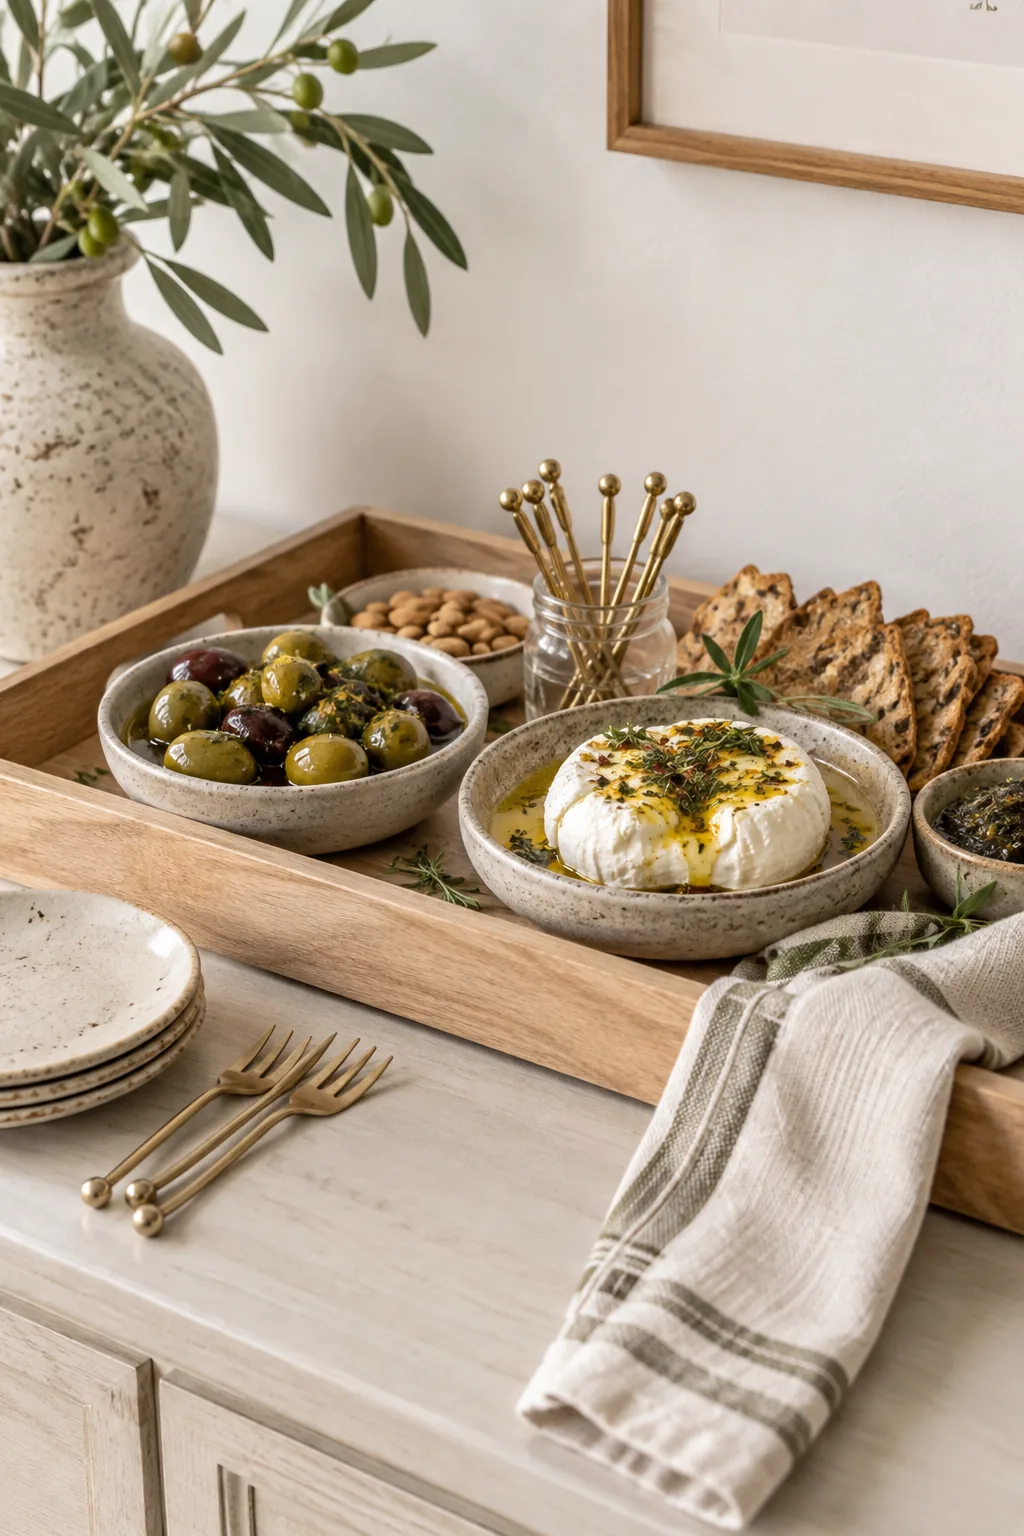
I always keep a stack of tiny forks right on the board.
This simple addition encourages guests to dig into the marinated olives and sticky cheeses without hesitation. You can fan them out in a small corner or place them in a low glass jar. It instantly makes the whole setup feel more thoughtful.
3. Go Monochromatic
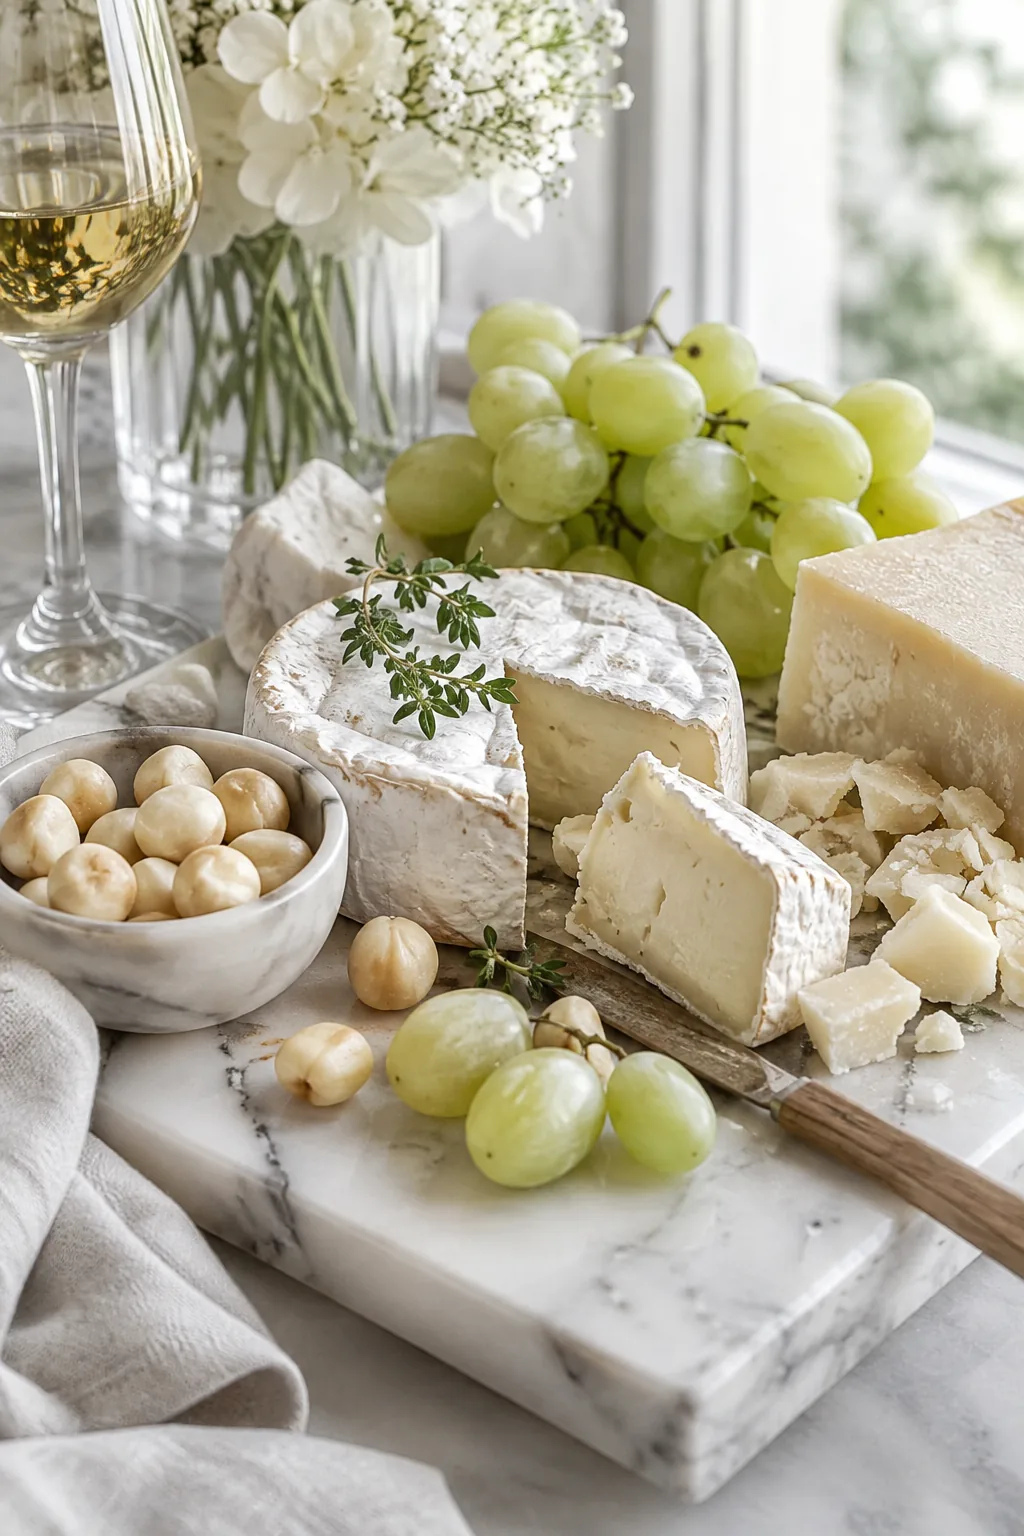
A monochromatic spread creates a highly sophisticated and modern aesthetic that immediately grabs attention. You can achieve this by sticking entirely to pale foods like white cheeses, macadamia nuts, and green grapes. I love using a sleek marble slab to elevate this minimalist vibe even further. It feels incredibly fresh for an evening cocktail hour.
Why it works: Limiting the color palette forces you to play with interesting textures instead.
4. Anchor the Center
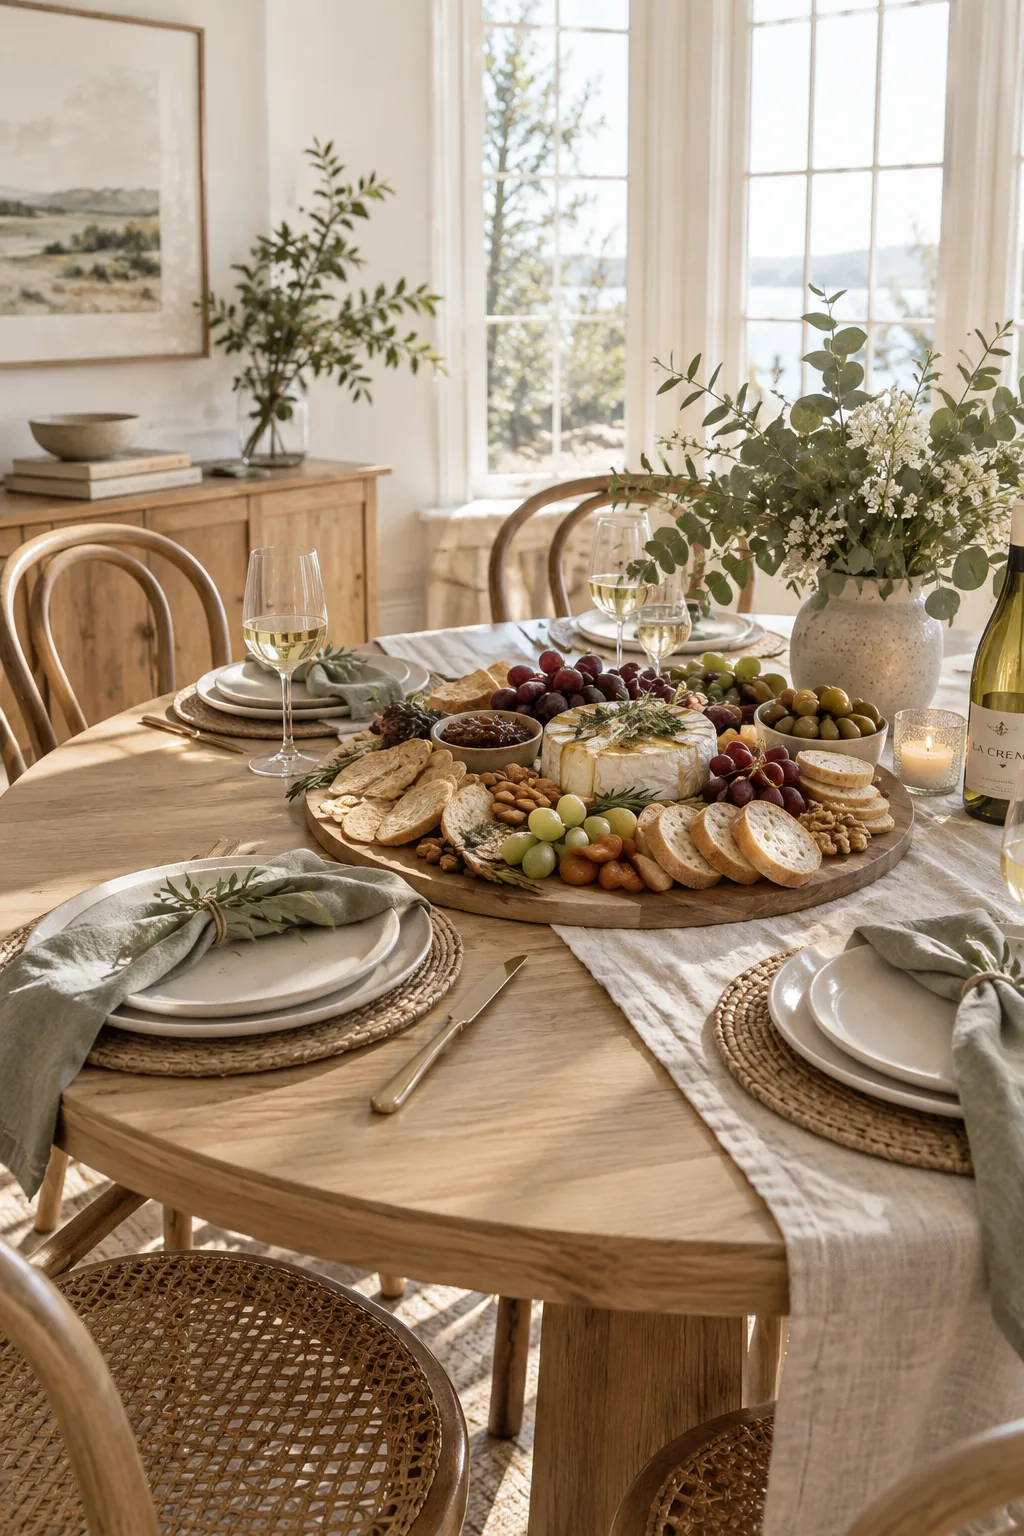
Round trays naturally draw people into the center of the table.
You can use this shape to your advantage by placing your true showstopper right in the middle. A massive wheel of baked brie or a towering bowl of dip anchors the entire arrangement.
Then just fan your crispy crackers and sliced baguette outward in concentric circles.
5. Add Fresh Greenery
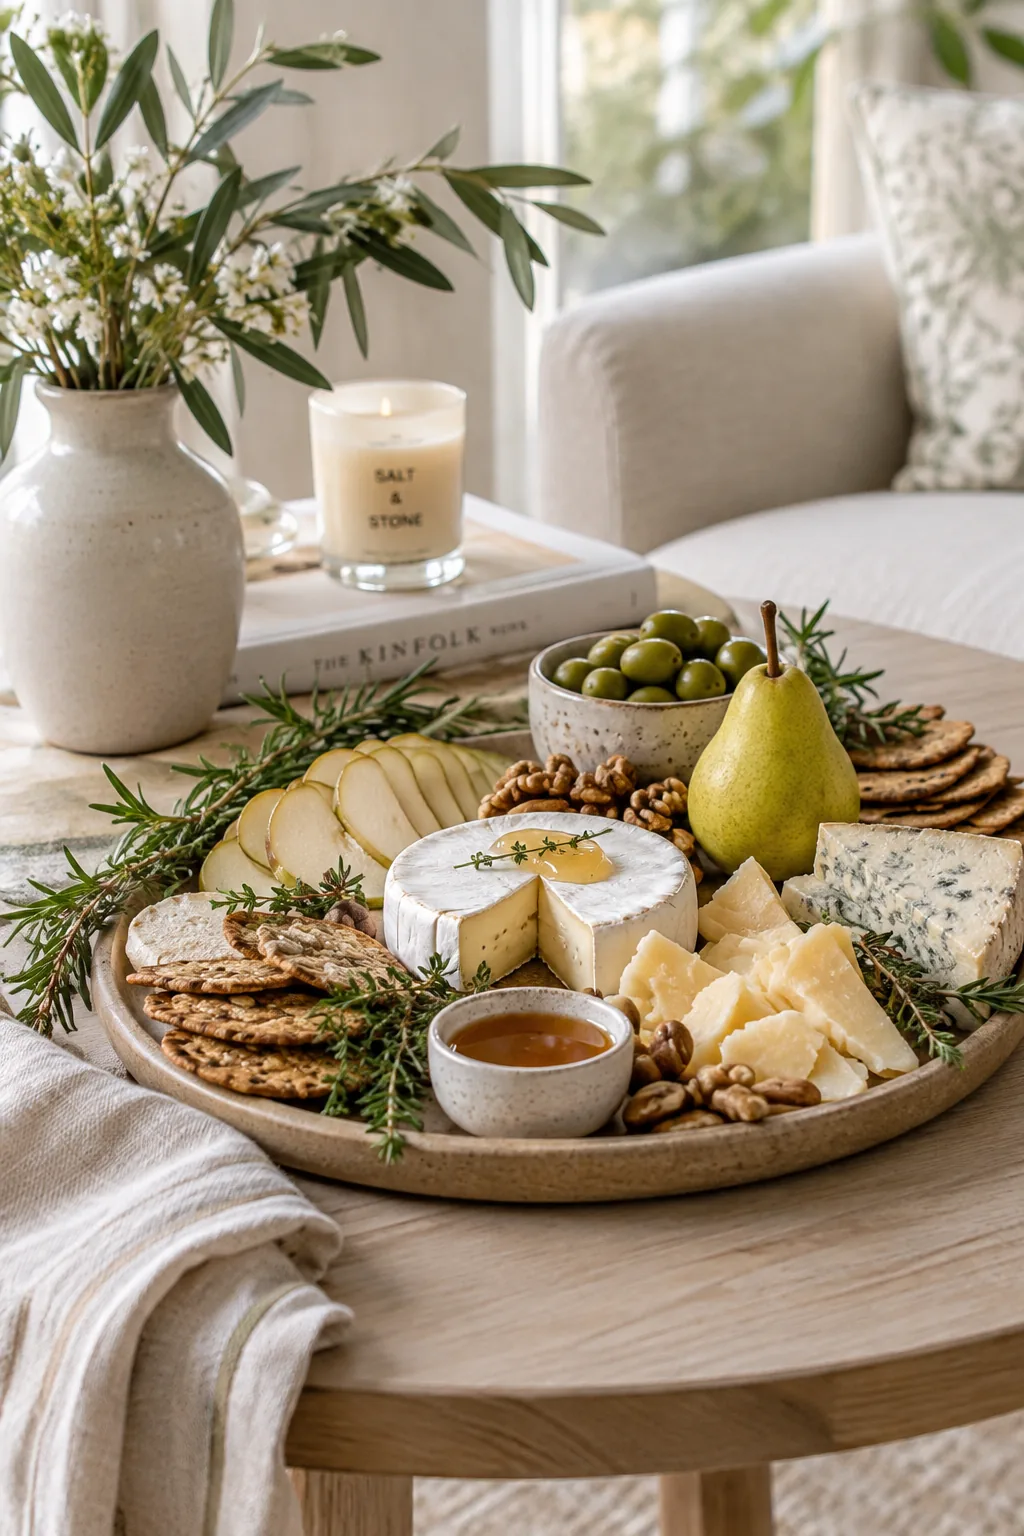
I learned early on that adding fresh herbs completely transforms the final presentation. Tucking sprigs of fresh rosemary or thyme around the edges gives the board an organic, wild feel. Just make sure to wash and dry them thoroughly before they touch the food.
Why it works: The bright green pops against the rich colors of cured meats and adds a subtle aroma.
6. Build Different Levels
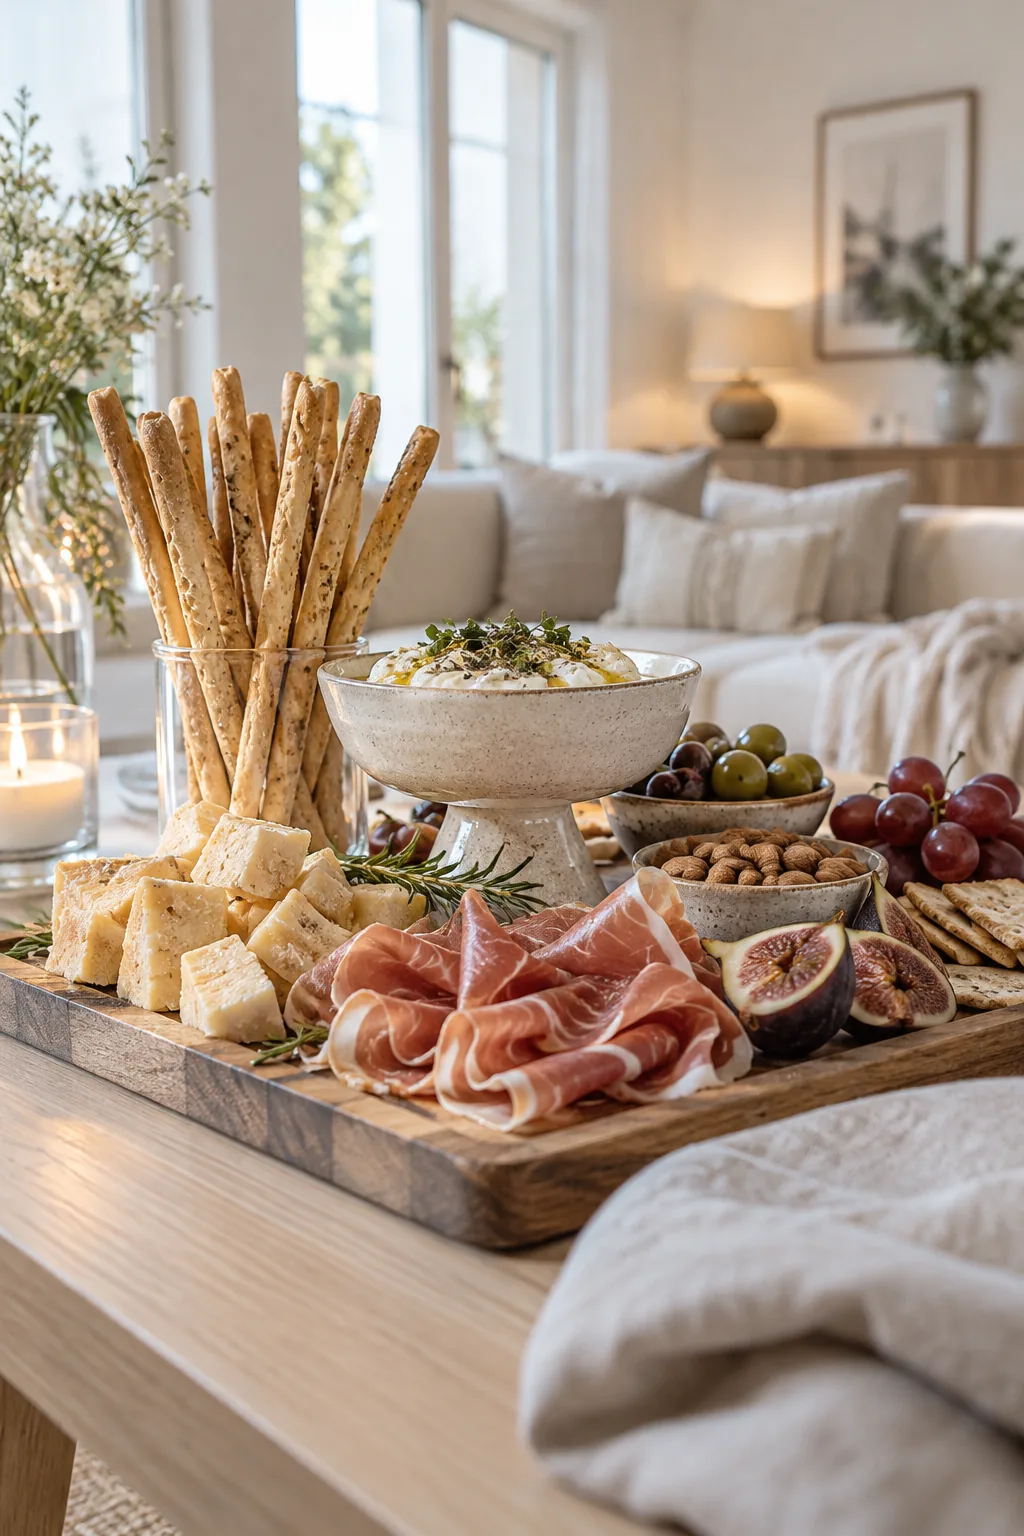
Height variations make a flat spread look so much more inviting from across the room. You can easily build levels by stacking hard cheeses into rough cubes or leaning tall breadsticks in a sturdy glass. I often use a footed bowl for dips to lift them above the flat layers of prosciutto. This keeps the eye moving around the board instead of just scanning a flat surface. It is a simple trick that instantly upgrades your styling.
7. Fold the Meats
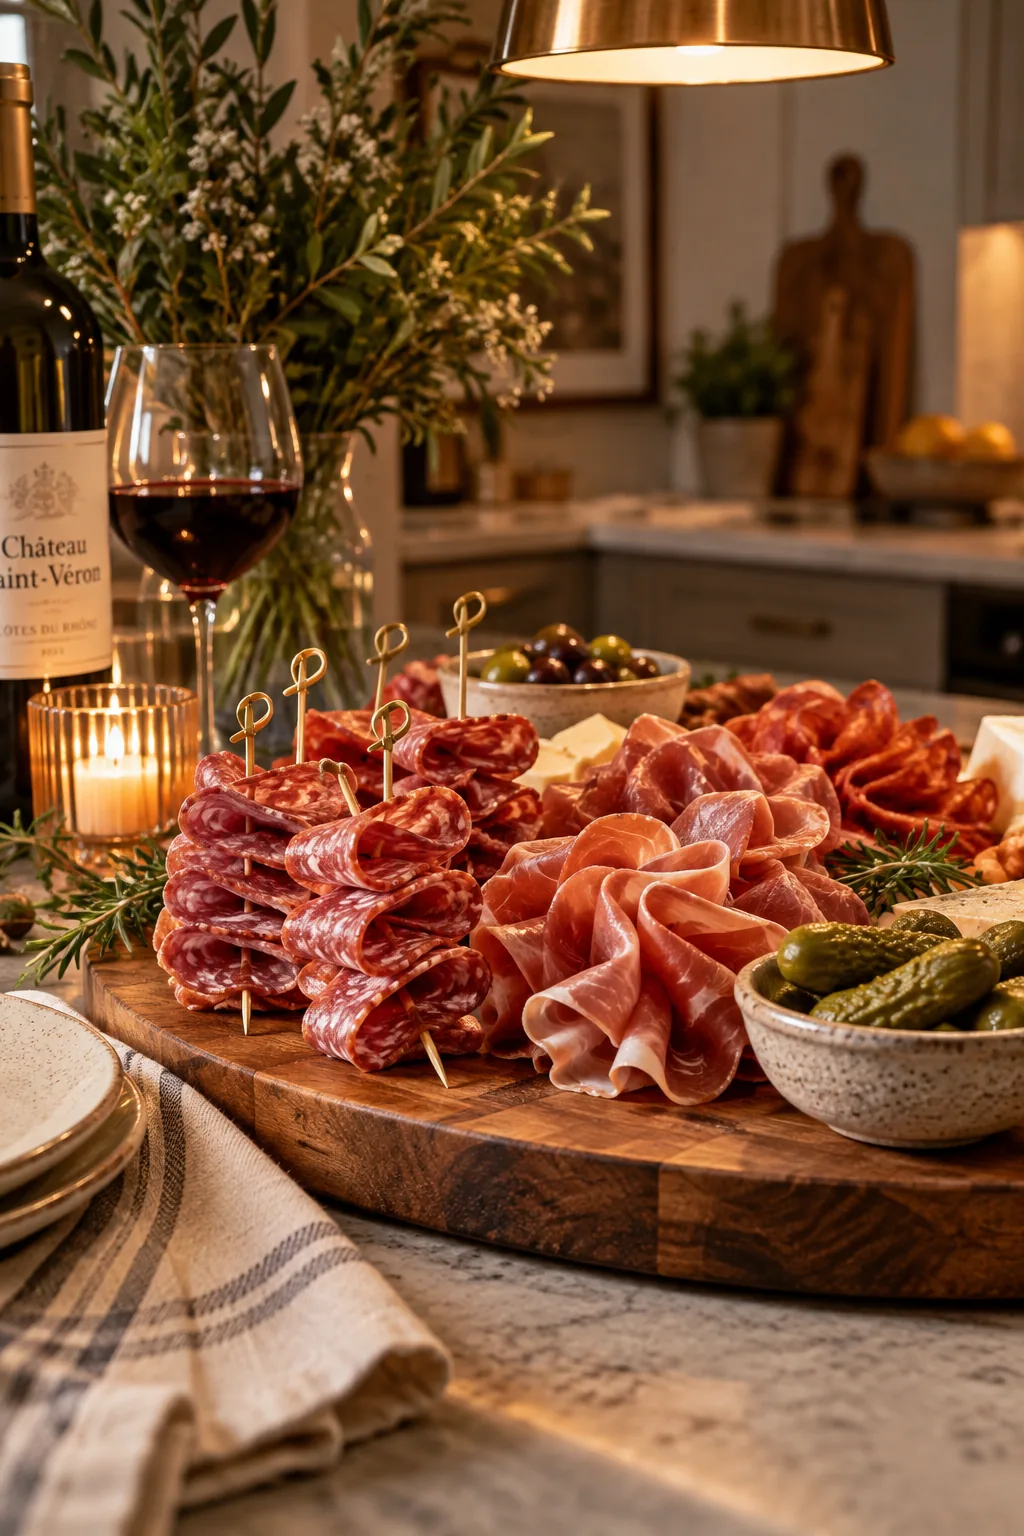
Fold your deli meats instead of laying them flat to save space and add volume. You can pinch slices of salami into quarters and slide them onto a skewer for easy grabbing. Another option is to create a loose ribbon effect by folding the meat back and forth. This technique prevents the meats from looking sad and flat against the wooden tray. It also makes it much easier for guests to pick up just one piece at a time.
8. Include Something Sweet
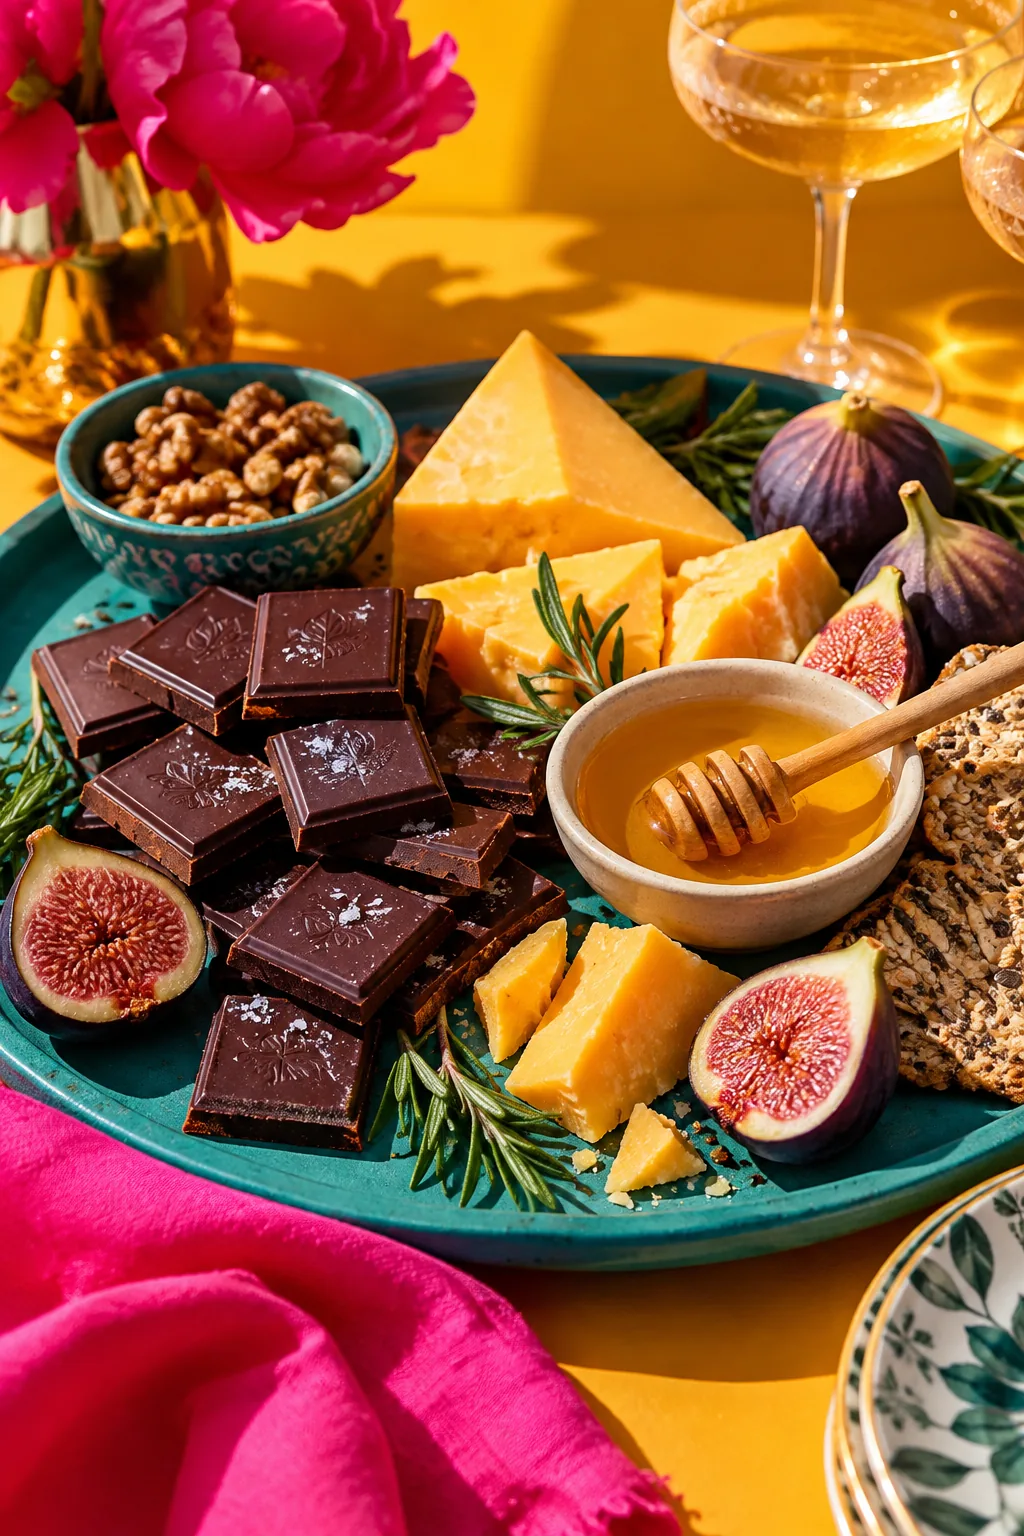
Include a dedicated sweet element to balance out all the heavy savory flavors. A cluster of dark chocolate squares or a small dish of local honey pairs beautifully with sharp cheddar.
9. The Rule of Three
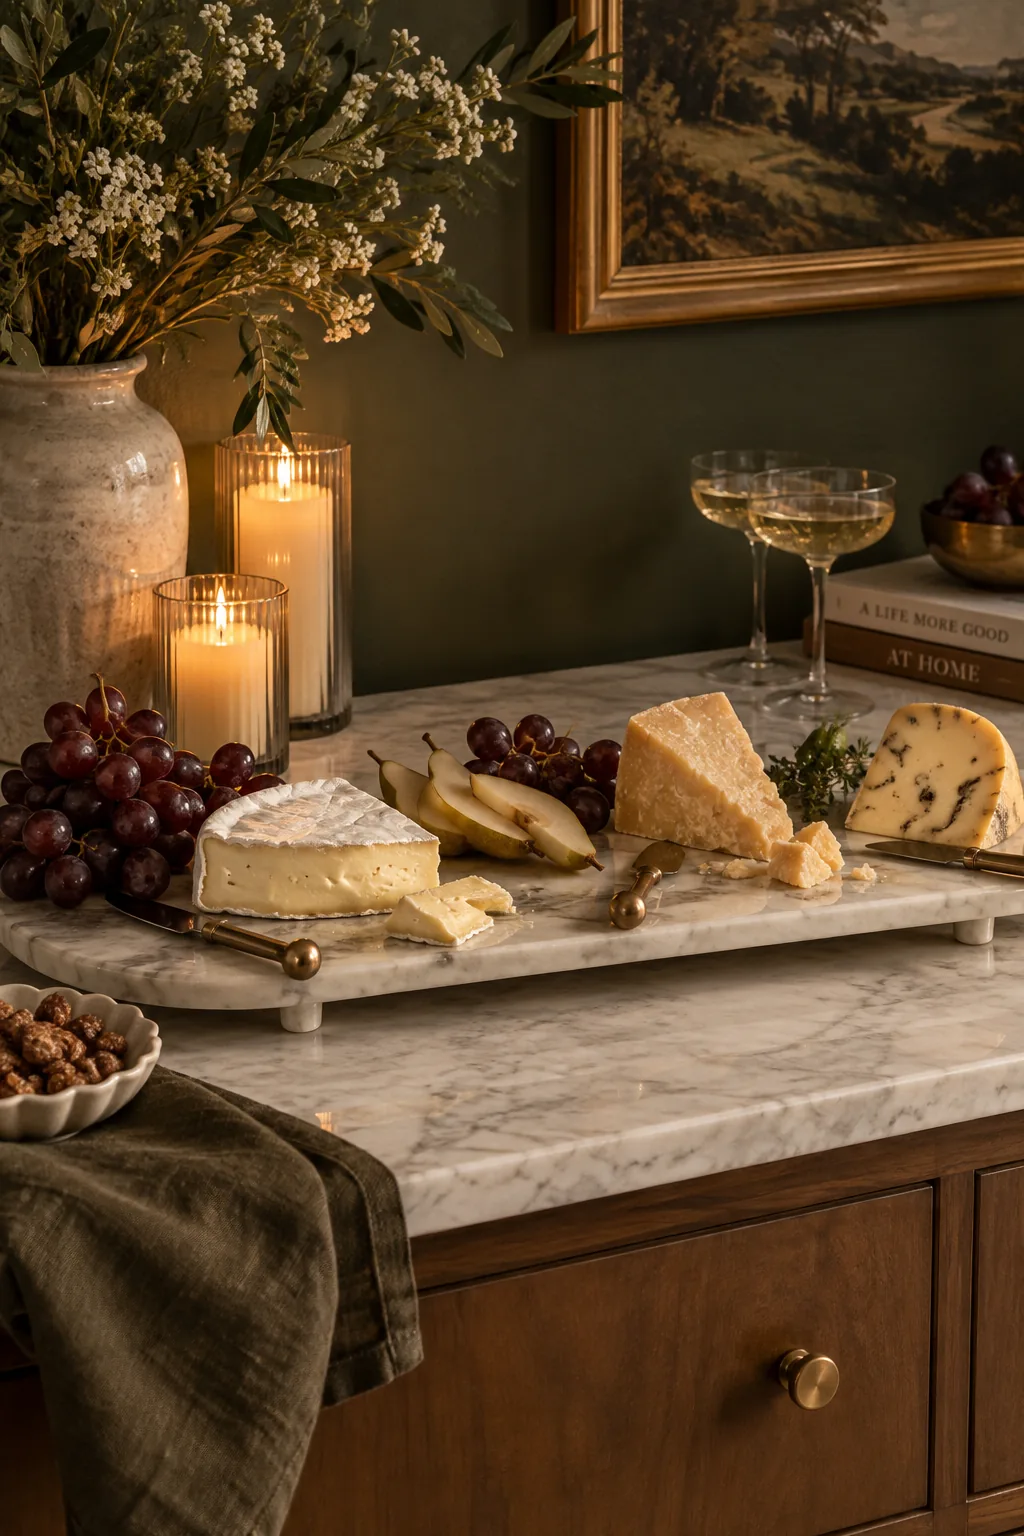
Three different types of cheese is the magic number for a well-rounded board. You need one soft, one hard, and one uniquely flavored option like a truffle gouda to cover all your bases. Space them far apart on the tray before you add anything else. This gives guests room to slice without knocking over your carefully placed fruit garnishes.
10. Try a Breakfast Theme
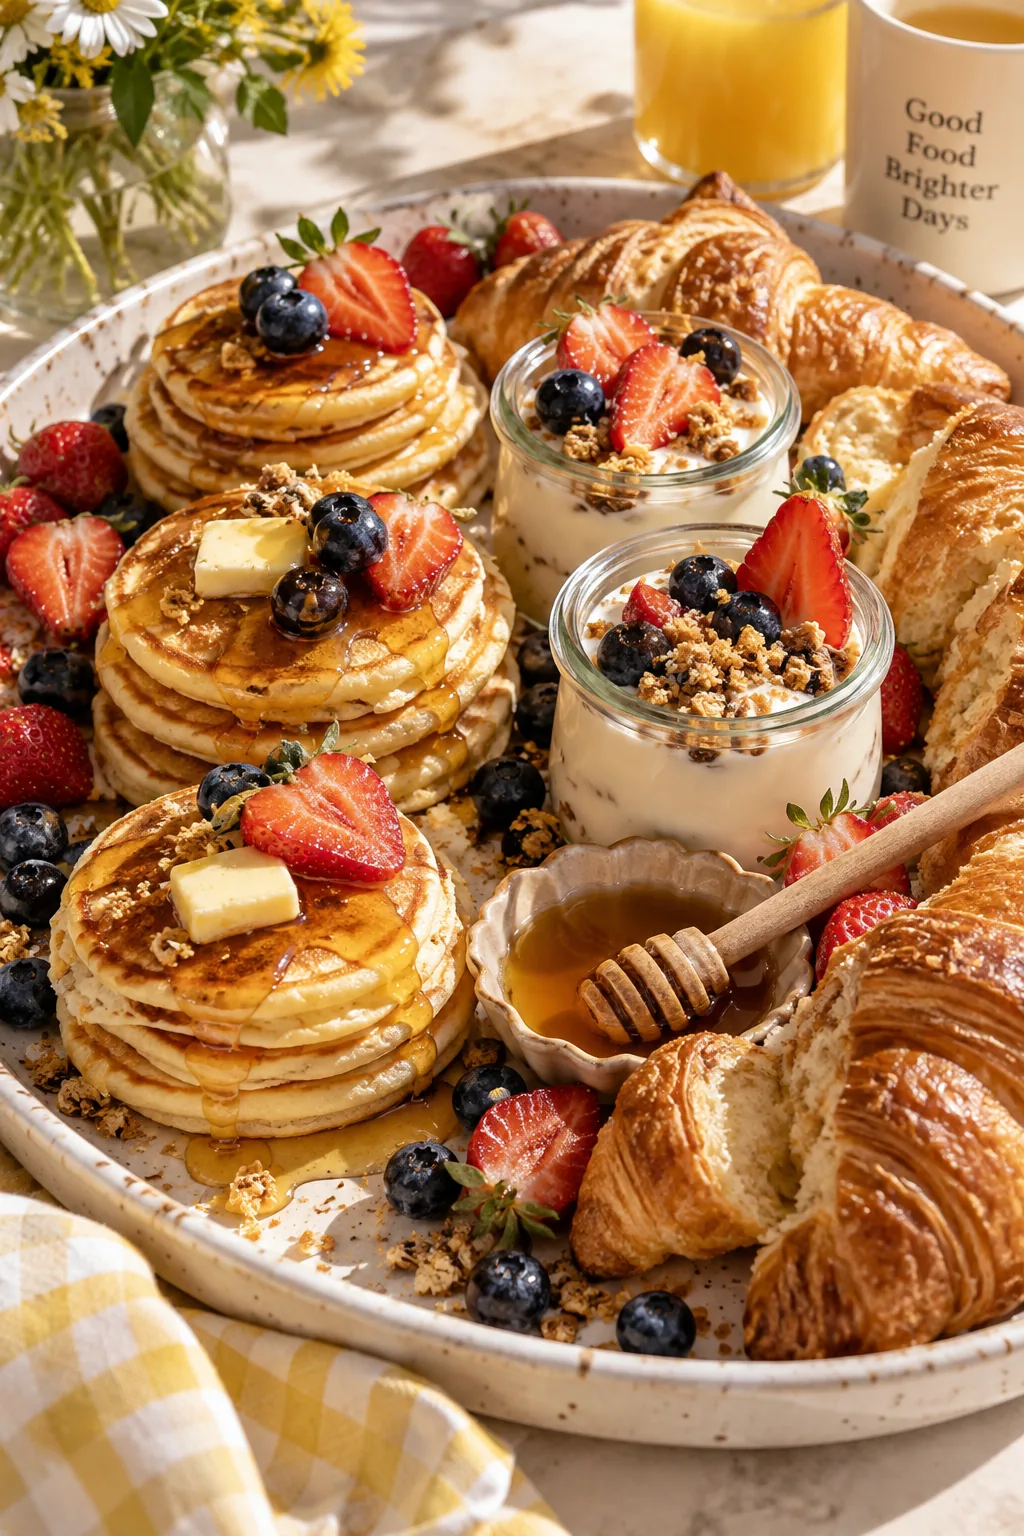
I absolutely love building themed trays for specific holidays.
A breakfast-themed spread is always a massive hit for early weekend gatherings. You can load it up with morning favorites and completely skip the traditional savory meats.
- Mini waffles
- Fresh berries
- Maple syrup dips
11. Embrace Rustic Textures
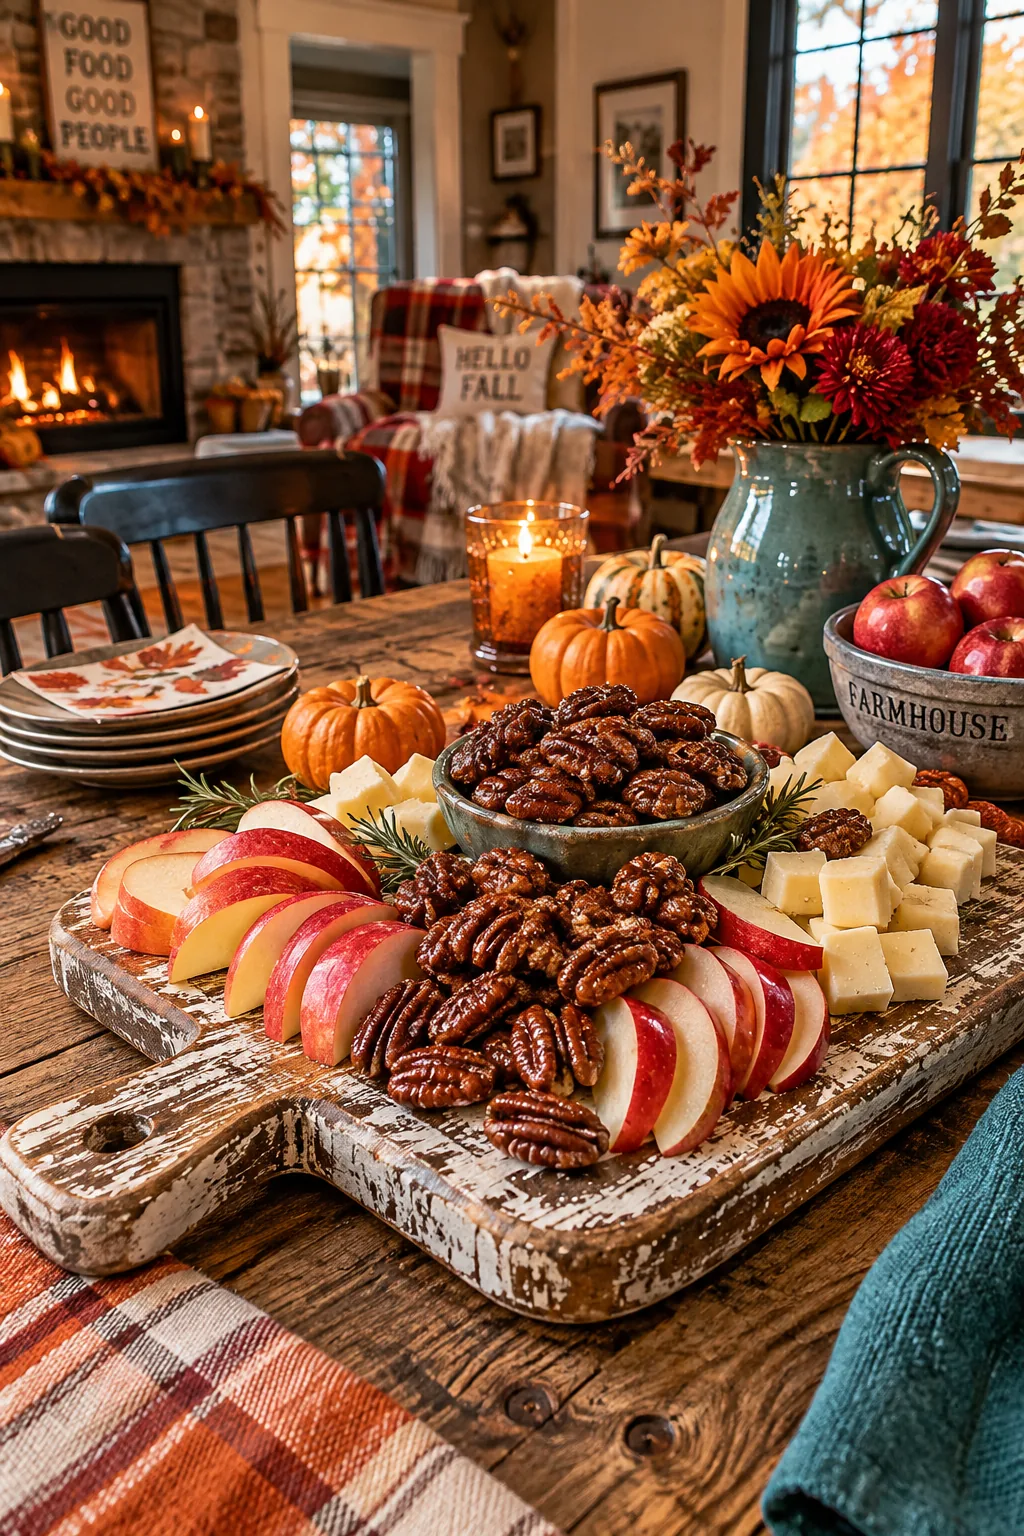
A rustic farmhouse look feels incredibly cozy for fall gatherings.
You can pull this off by using a heavily distressed vintage board as your base. Pile on seasonal elements like candied pecans, sliced apples, and chunks of sharp white cheddar. The rough textures of the food perfectly match the worn wood.
12. Cut Fun Veggie Shapes
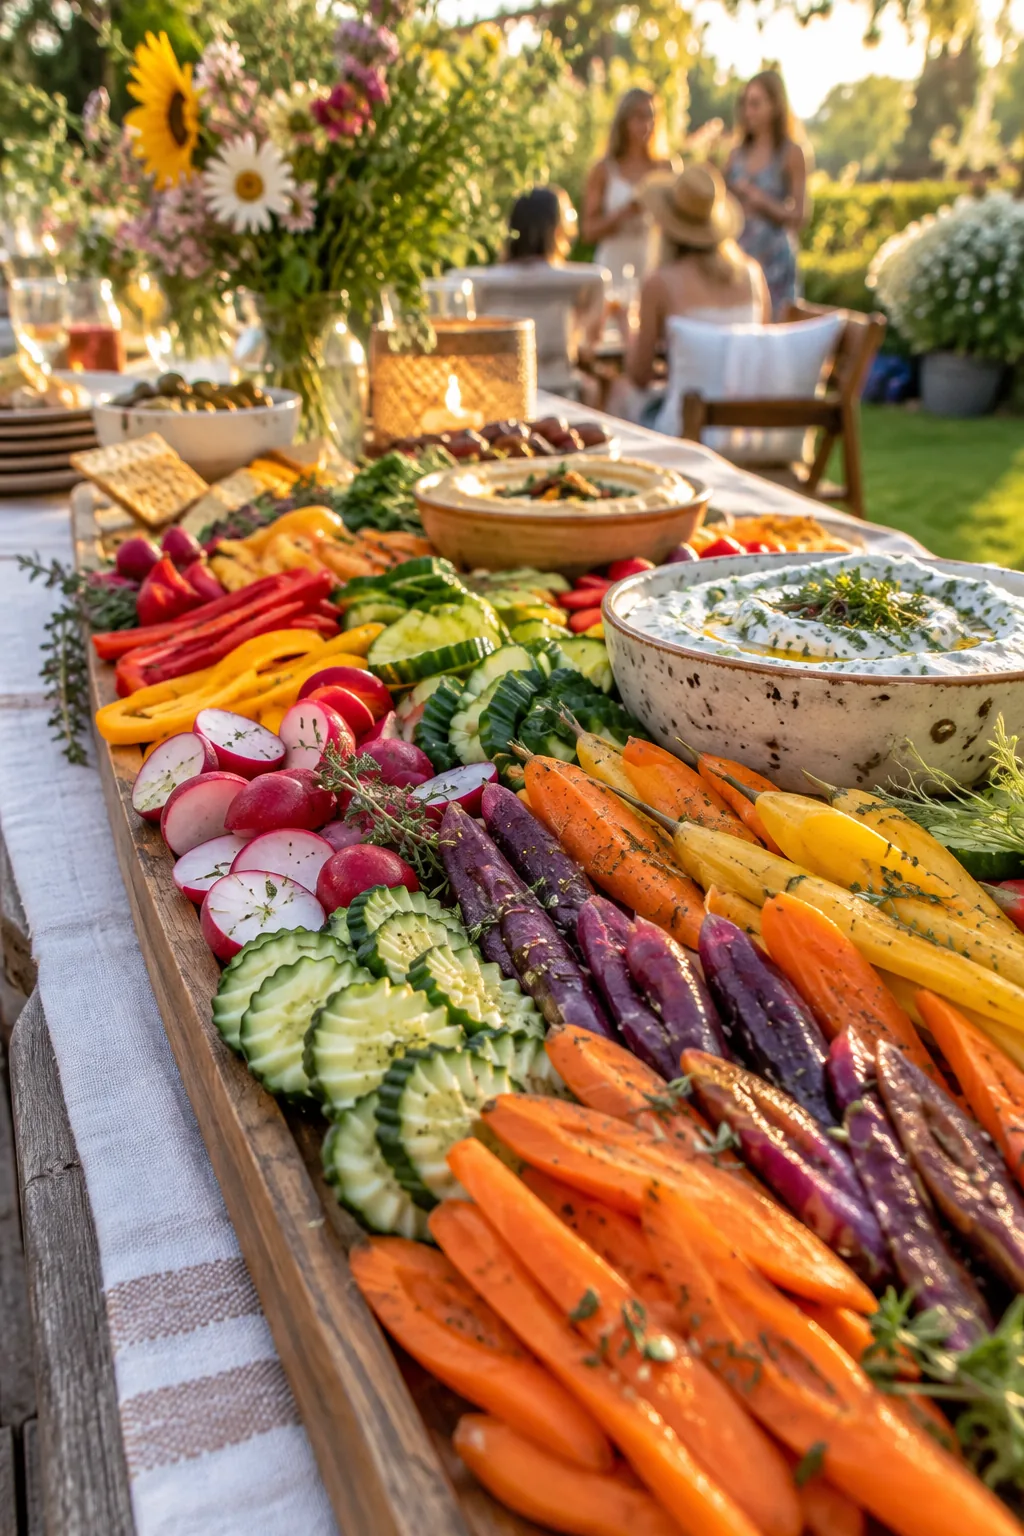
Guests will eat twice as many vegetables if you cut them into unusual shapes. Swap standard baby carrots for elegant rainbow carrots sliced on a sharp bias. You can use a crinkle cutter on cucumbers to give them a fun texture that holds onto dips better. Arranging these vibrant veggies in tight rows creates a stunning rainbow effect on your party platter. It makes the healthy options look just as tempting as the decadent cheeses.
13. Anchor with Bowls
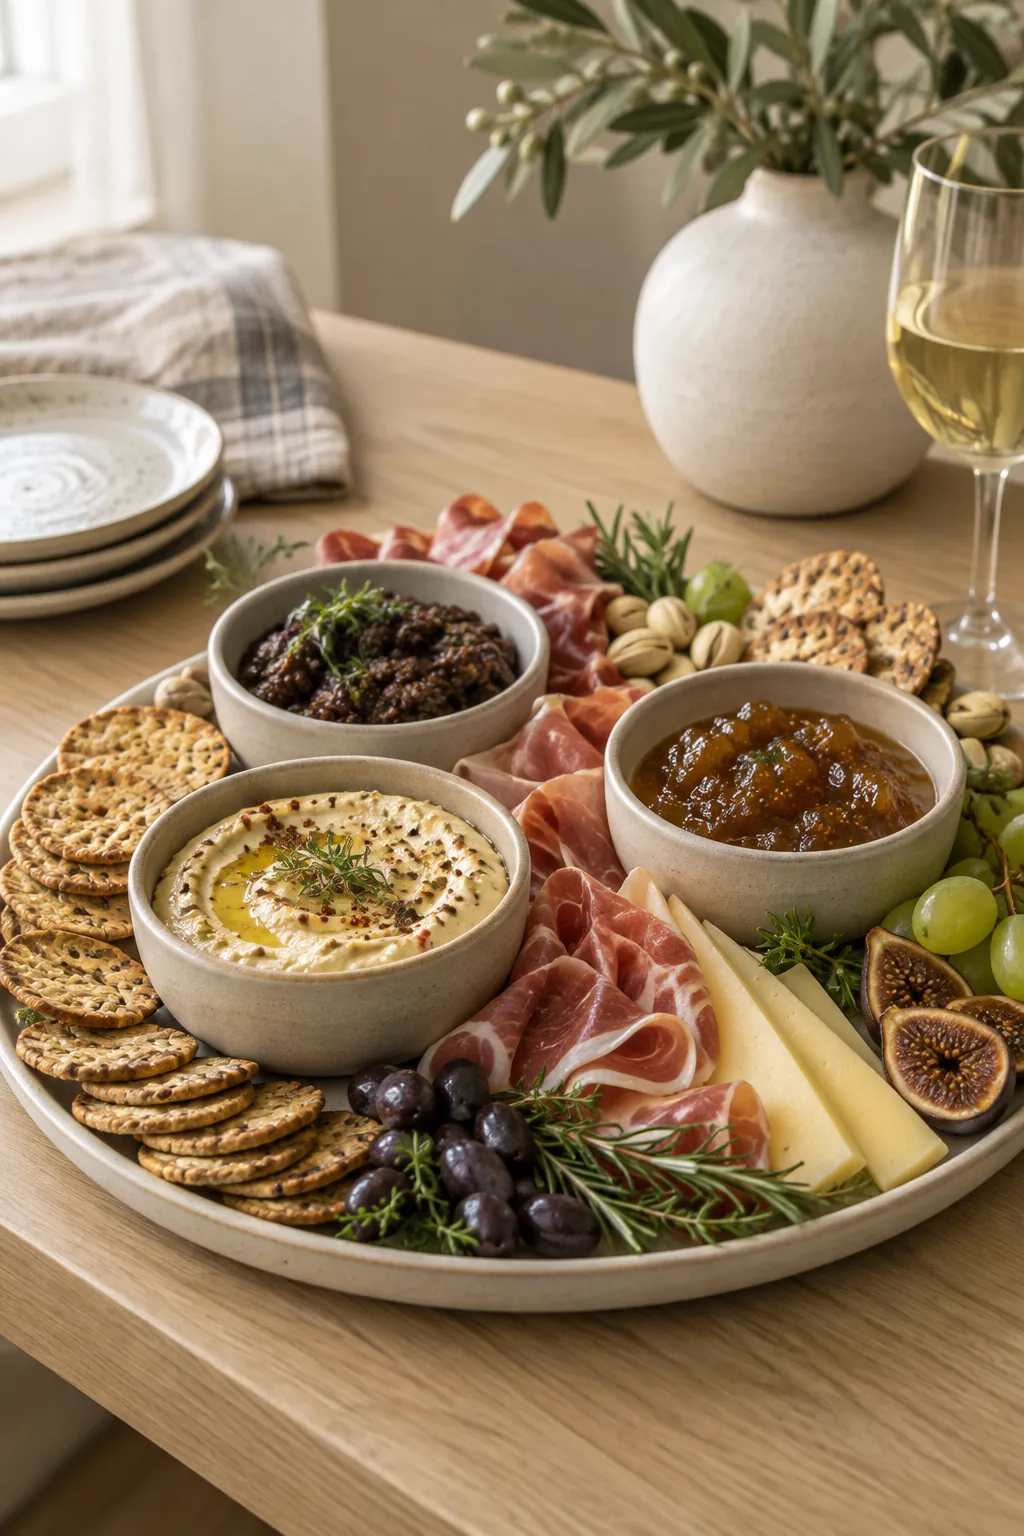
Small bowls serve as functional anchors that dictate the flow of the entire arrangement. Placing three matching ceramic bowls in a triangle formation creates instant visual balance on a large tray. You can fill them with messy items like hummus, olive tapenade, or fruit preserves. Once the bowls are set, simply weave your crackers and meats around them like a river. This method takes the guesswork out of where to put everything else.
14. Group Flavor Pairings
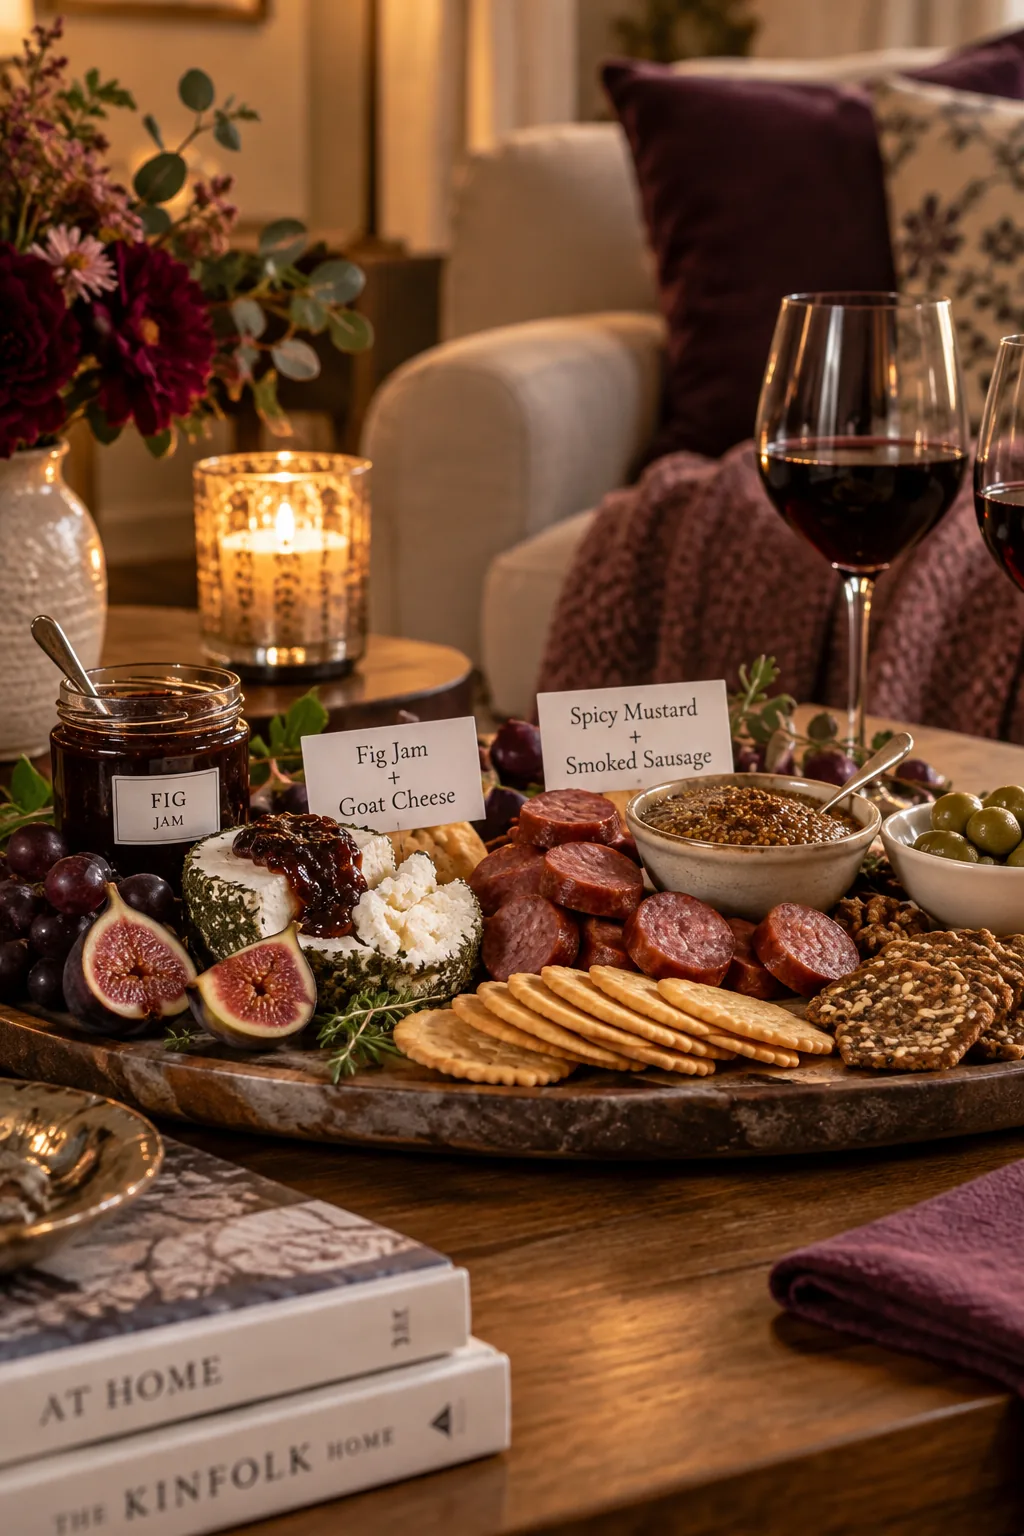
Creating clear flavor pairings right on the board makes the tasting experience foolproof.
You can physically group complementary items together so guests know exactly what to combine. Place the fig jam directly next to the goat cheese, and cluster the spicy mustard by the smoked sausage.
These little intentional clusters show your guests exactly how to build the perfect bite.
- Fig jam
- Goat cheese
- Spicy mustard
15. Garnish with Flowers
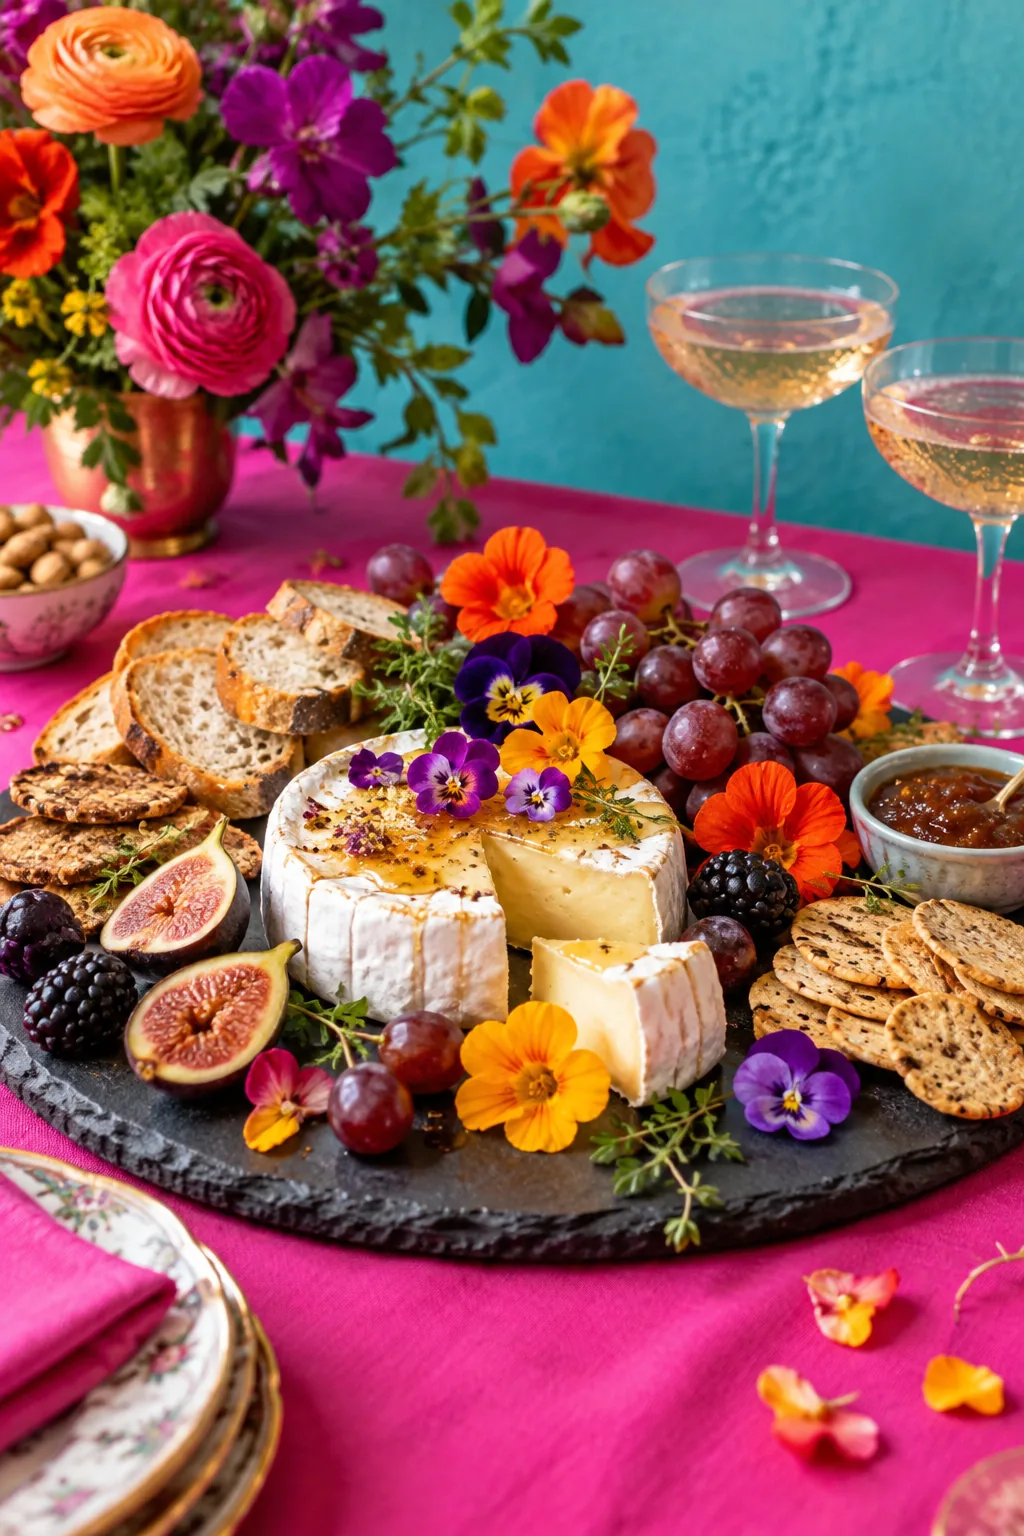
Edible flowers instantly elevate a standard cheese board into a high-end catering display. Scattering a few pansies or nasturtiums across the top adds delicate beauty without altering the flavors. I prefer to place them right before guests arrive so they do not wilt in the fridge. They look especially stunning against a dark slate board or nestled next to a wheel of brie cheese. It is a zero-effort garnish that always gets a ton of compliments.
16. Build a Table Runner
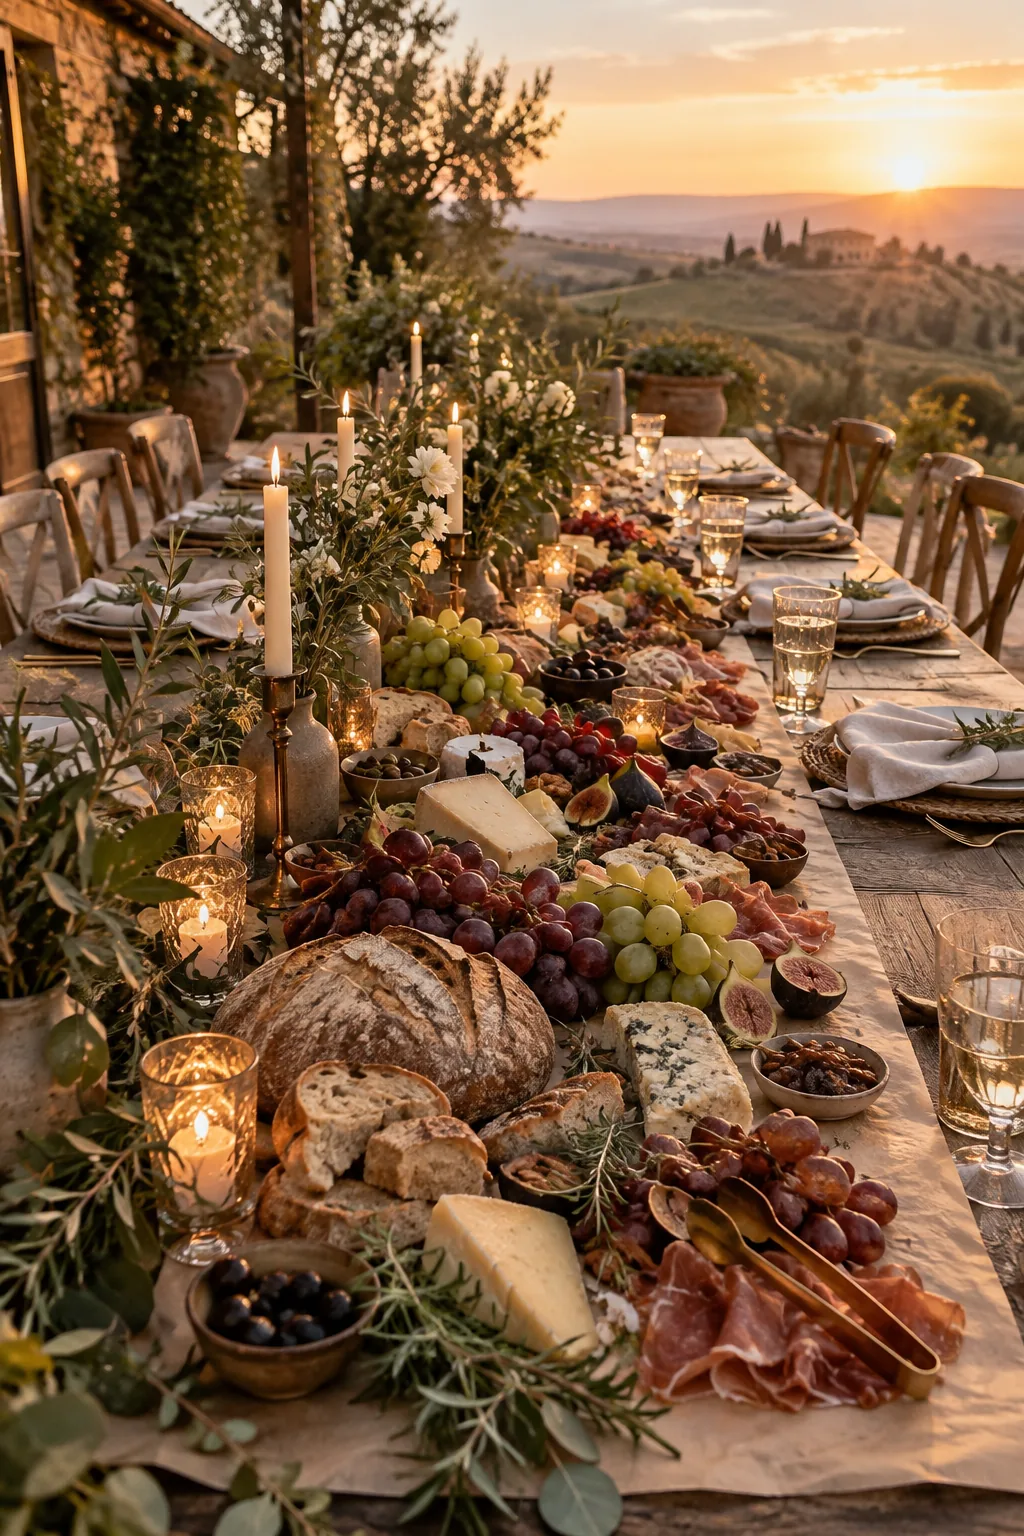
A sprawling, table-length runner creates a jaw-dropping focal point for large dinner parties. Instead of one standard tray, lay down a layer of parchment paper directly on the table and build your spread across the center. You can pile up artisan breads, massive bunches of grapes, and blocks of cheese to create an abundant feast.
Just remember to provide plenty of small serving tongs.
17. Pre-Slice the Hard Items
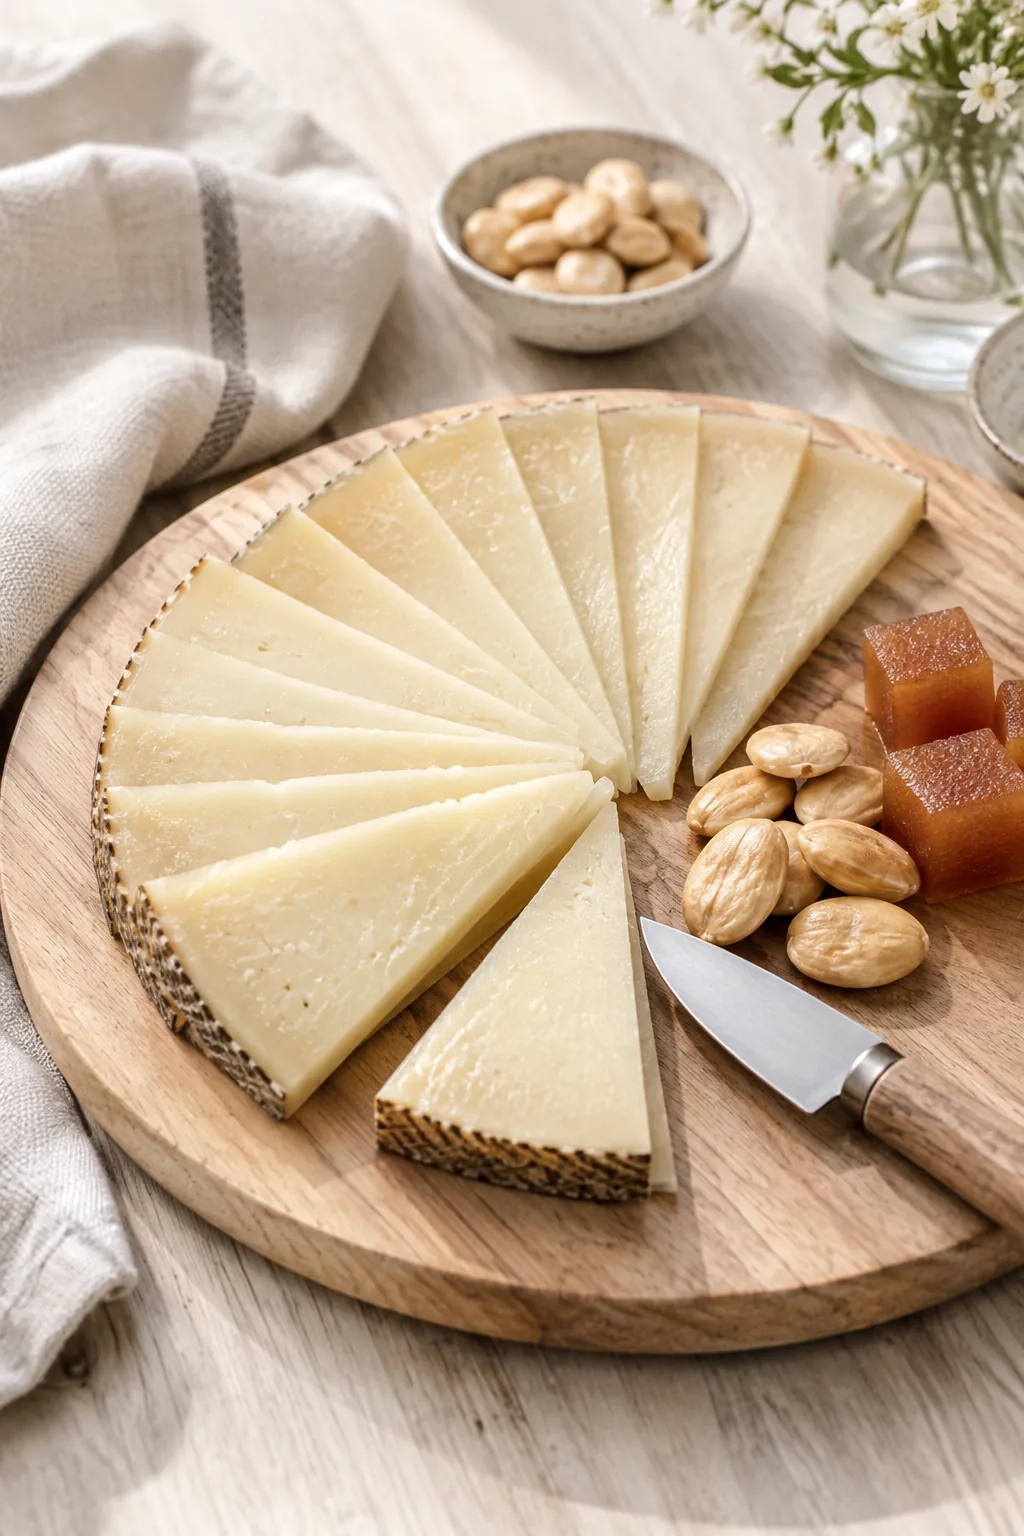
Pre-slicing the difficult items makes the board accessible and keeps it looking neat longer. No one wants to be the first person to hack into a hard wedge of manchego cheese at a party. If you cut it into thin triangles beforehand, guests can just grab and go. You can fan the slices back out into their original shape to maintain that beautiful wedge look. This small prep step ensures your appetizer tray stays inviting instead of turning into a messy cutting board.