
Wood Office Chair Before and After: Sleek Two-Tone Finish
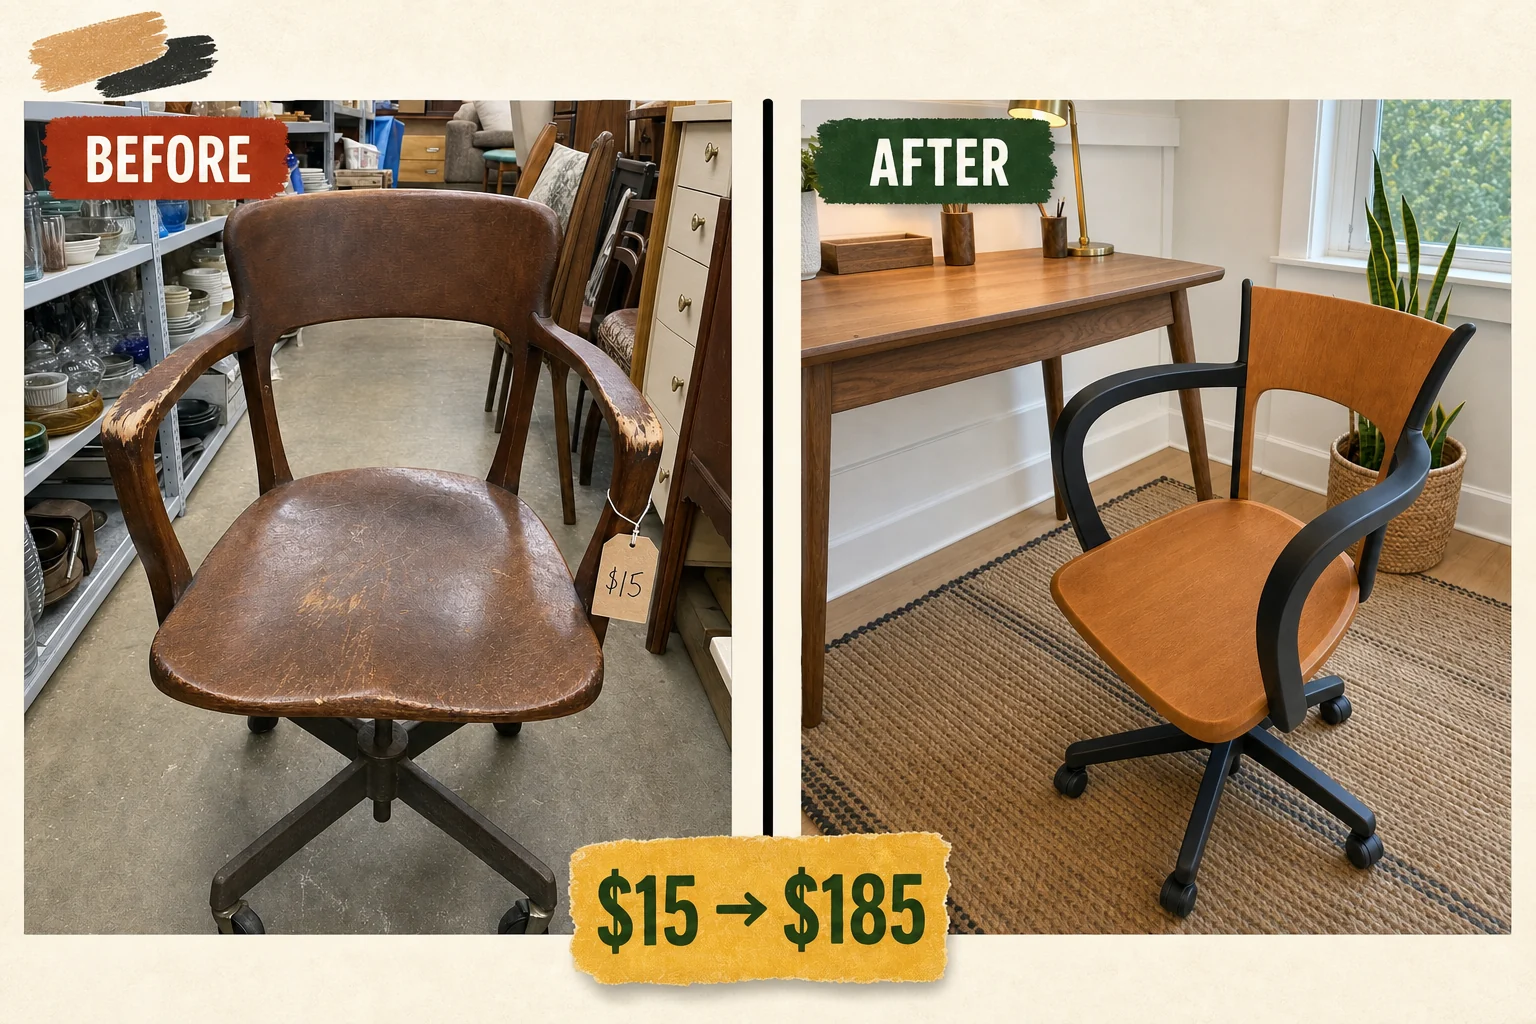
Tucked under a folding table in a cramped thrift store, this heavy wooden swivel chair was priced low due to severe veneer damage. We transformed the battered piece into a sleek, two-tone modern workspace focal point.
Evaluating the Thrift Store Damage
The heavy 1960s wooden office chair featured a solid wood seat, sloping armrests, and a 4-star metal swivel base. Unfortunately, jagged, delaminating cherry veneer on the curved front edges of both arms snagged clothing and scratched skin, making the piece completely uncomfortable to use.
- Deep scratches and dents cut through the factory lacquer into the solid wood seat pan, trapping dirt and ruining the visual appeal.
- The dull, oxidized metal on the 4-star caster base made the entire piece look neglected and dated.
Understanding the Vintage Valuation
Mid-century wooden office chairs are highly sought after, but severe veneer damage destroys their value. By executing a clean two-tone restoration that hides the structural repairs while highlighting the solid wood seat, the piece moves from a thrift-store reject to a boutique-quality vintage find.
| Item | Cost |
|---|---|
| Purchase Price | $15 |
| Epoxy Wood Filler | $8 |
| Sandpaper Assortment | $6 |
| Matte Black Enamel | $18 |
| Hard Wax Oil | $22 |
| Total Investment | $69 |
| Estimated Resale Value | $185 |
| Value Gain | $116 |
Please note that the estimated resale value represents an editorial estimate based on restored condition, rather than a guaranteed completed sale.
Required Restoration Materials
Executing this two-tone transformation requires specific supplies to rebuild the missing veneer, strip the failing finishes, and protect the raw wood.
Materials checklist
Step 1: Dismantle the chair
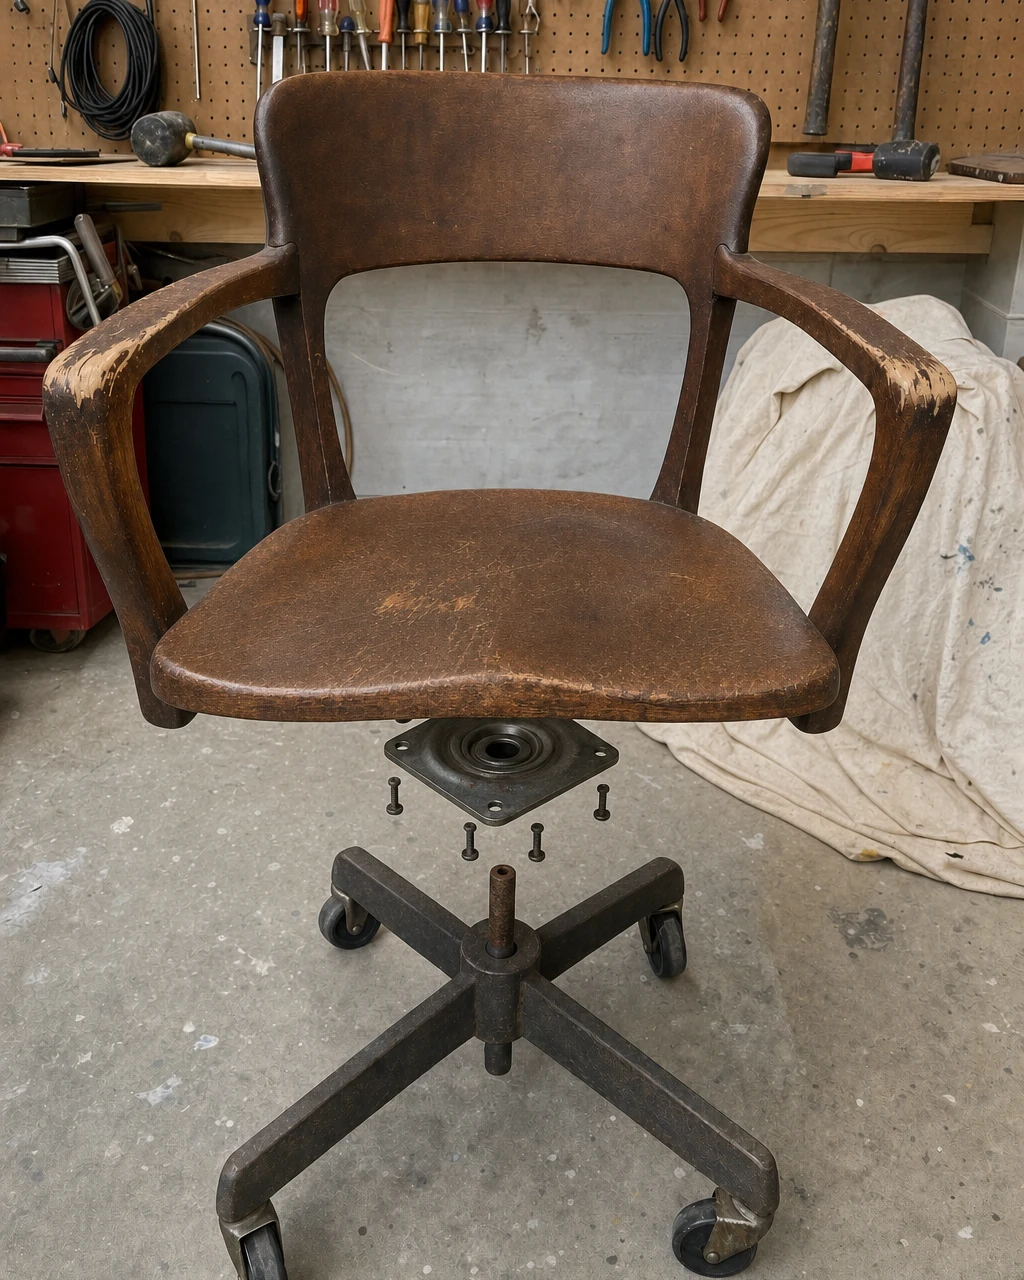
Begin by unscrewing the heavy metal swivel base from the wooden frame to isolate the damaged wooden components for repair. Separating the base prevents accidental damage during the messy repairs and protects the hardware from dust. The inverted wooden chair seat and attached metal swivel mechanism require careful handling.
Hardware Safety
Always support the heavy metal base to prevent it dropping when the final screw is removed. Once detached, set the tarnished metal caster base aside. This leaves the wooden chair body completely separated, providing clear access to the jagged cherry-veneer armrests and the scratched solid wood seat pan.
Step 2: Fill splintered veneer
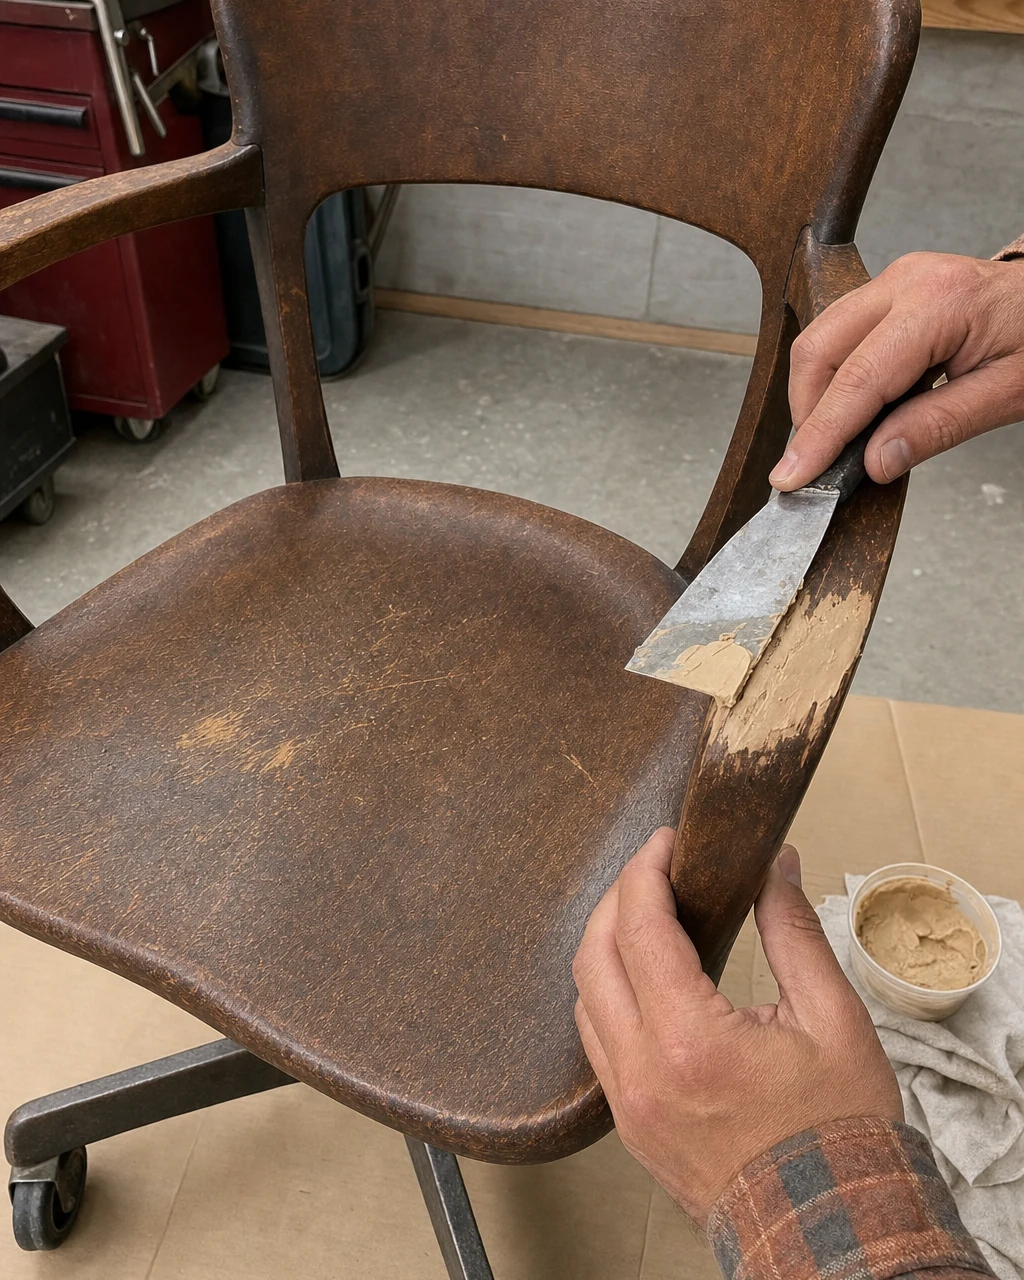
Pack high-performance epoxy wood filler into the missing veneer sections on the arms. Epoxy-based fillers bond permanently to the fragile original cherry veneer, creating a durable structural patch. Leave the patch slightly proud to cure for two hours, ensuring enough material remains to sand perfectly flush.
Curing the Patch
Always wear nitrile gloves when handling epoxy wood filler to protect your skin. Once the two hours have passed, you will see armrests with flush, hardened filler patches covering the splintered gaps, ready for the abrasive stripping process to follow.
Step 3: Sand seat gouges
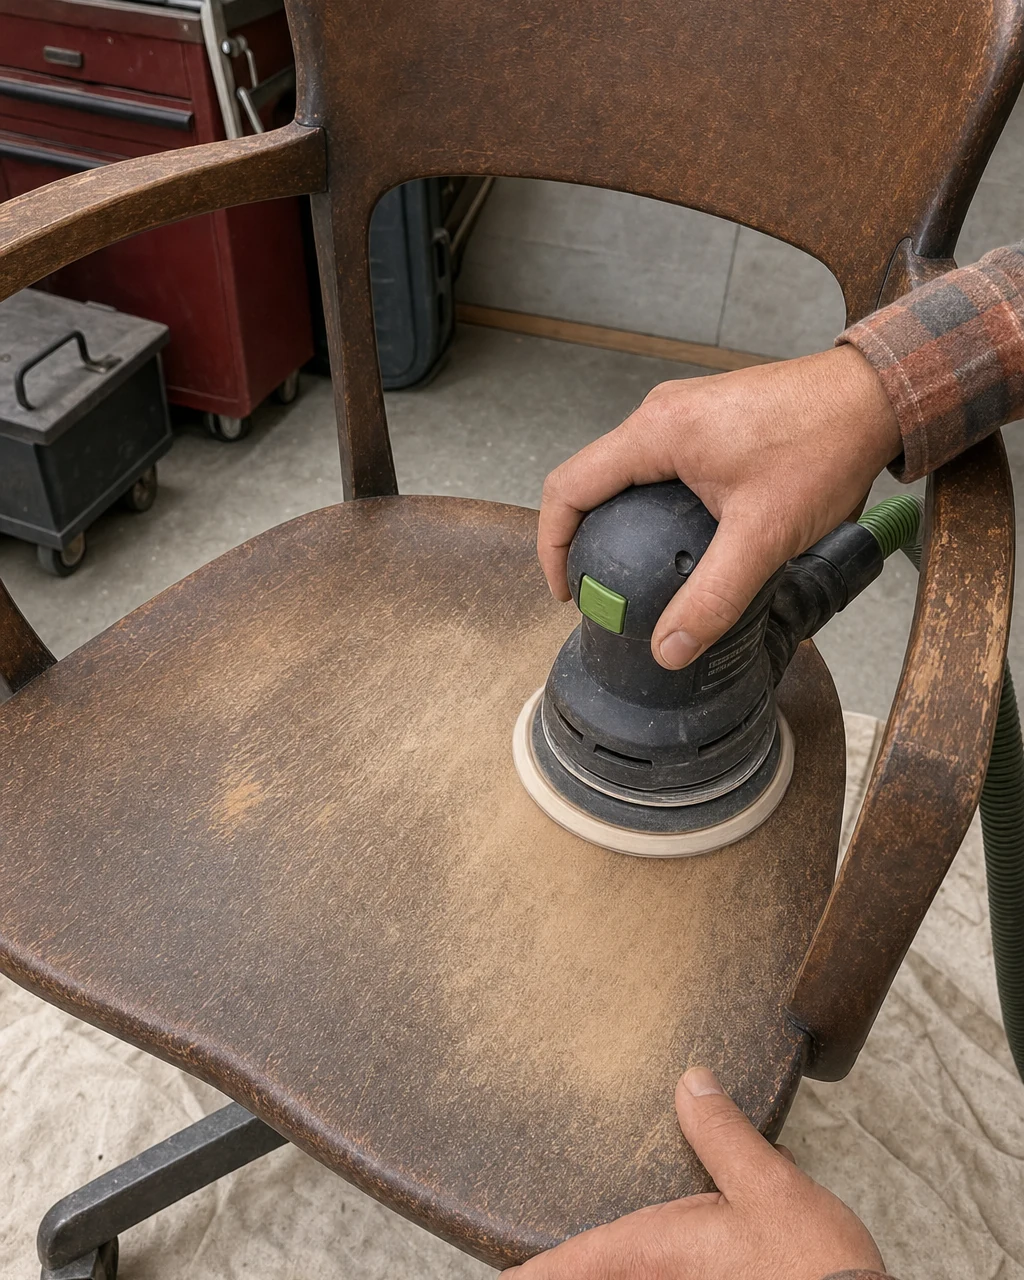
Sand the seat and backrest with 80-grit then 120-grit paper to remove the old finish entirely. Aggressive 80-grit paper easily cuts through the factory lacquer coat. Continue sanding to level the deep surface gouges, working across the scratched solid wood seat pan until the damage disappears.
Smoothing the Surface
Wear a dust mask and safety glasses when power sanding old finishes to avoid inhaling fine particulate matter. The visible result of this thorough preparation is a smooth, raw wood seat and backrest completely free of scratches, providing the perfect foundation for the contrasting finishes.
Step 4: Paint the frame
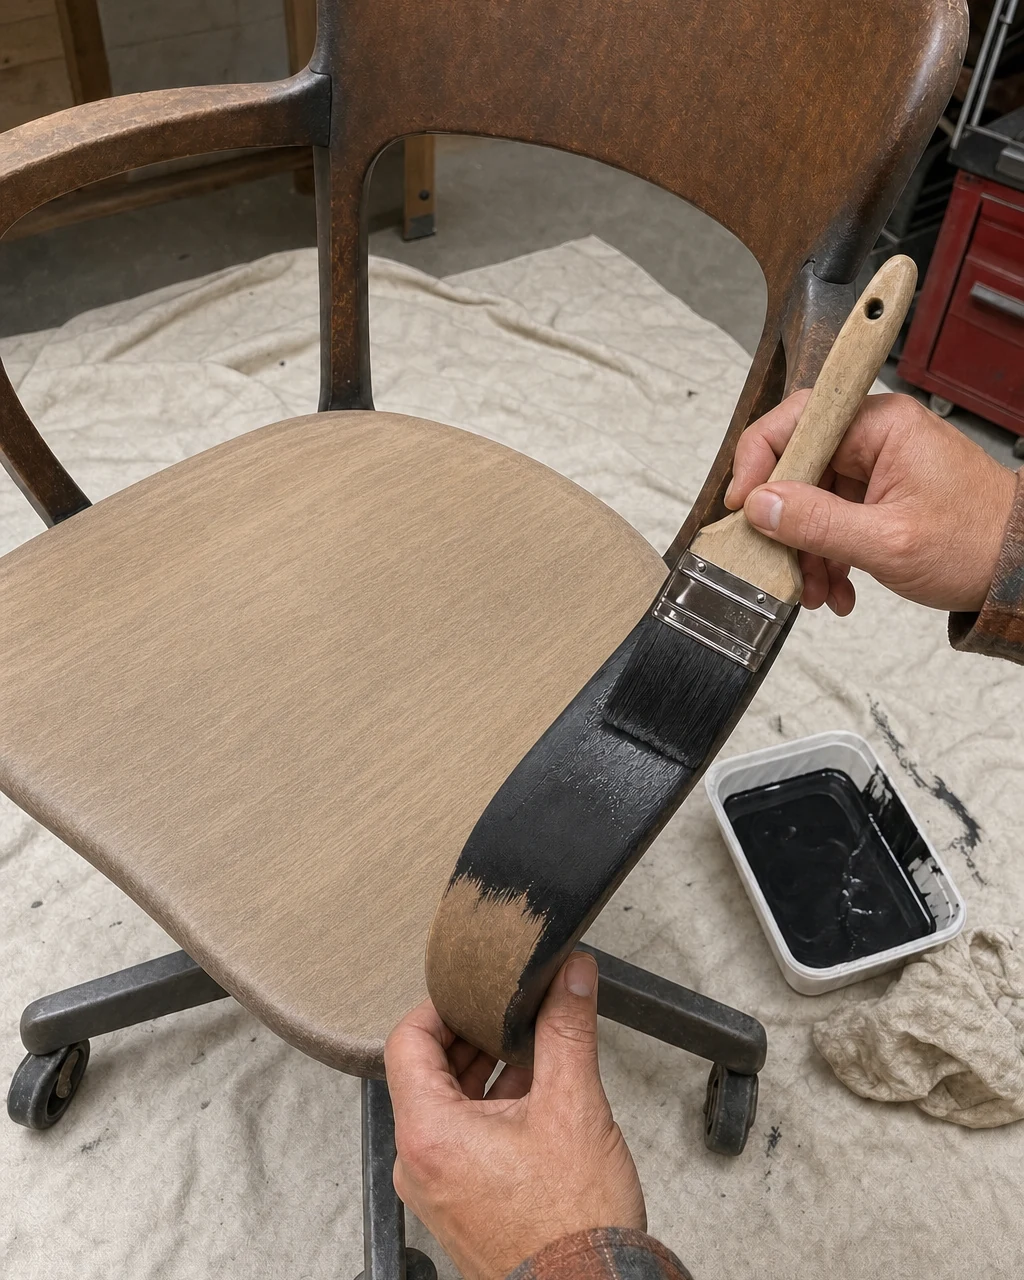
Apply two coats of matte black urethane enamel to the arms and lower frame to hide the repairs. Urethane enamel cures into a hard shell that resists impacts, making it ideal for high-traffic office furniture. Brush the paint carefully over the filled and sanded wooden armrest.
Curing the Enamel
Allow four hours of drying time between coats to ensure a durable, streak-free finish. Ensure adequate ventilation when applying urethane enamel to safely dissipate the fumes. The final result yields matte black armrests and a dark frame that will contrast sharply with the raw wood seat.
Step 5: Oil the bare wood
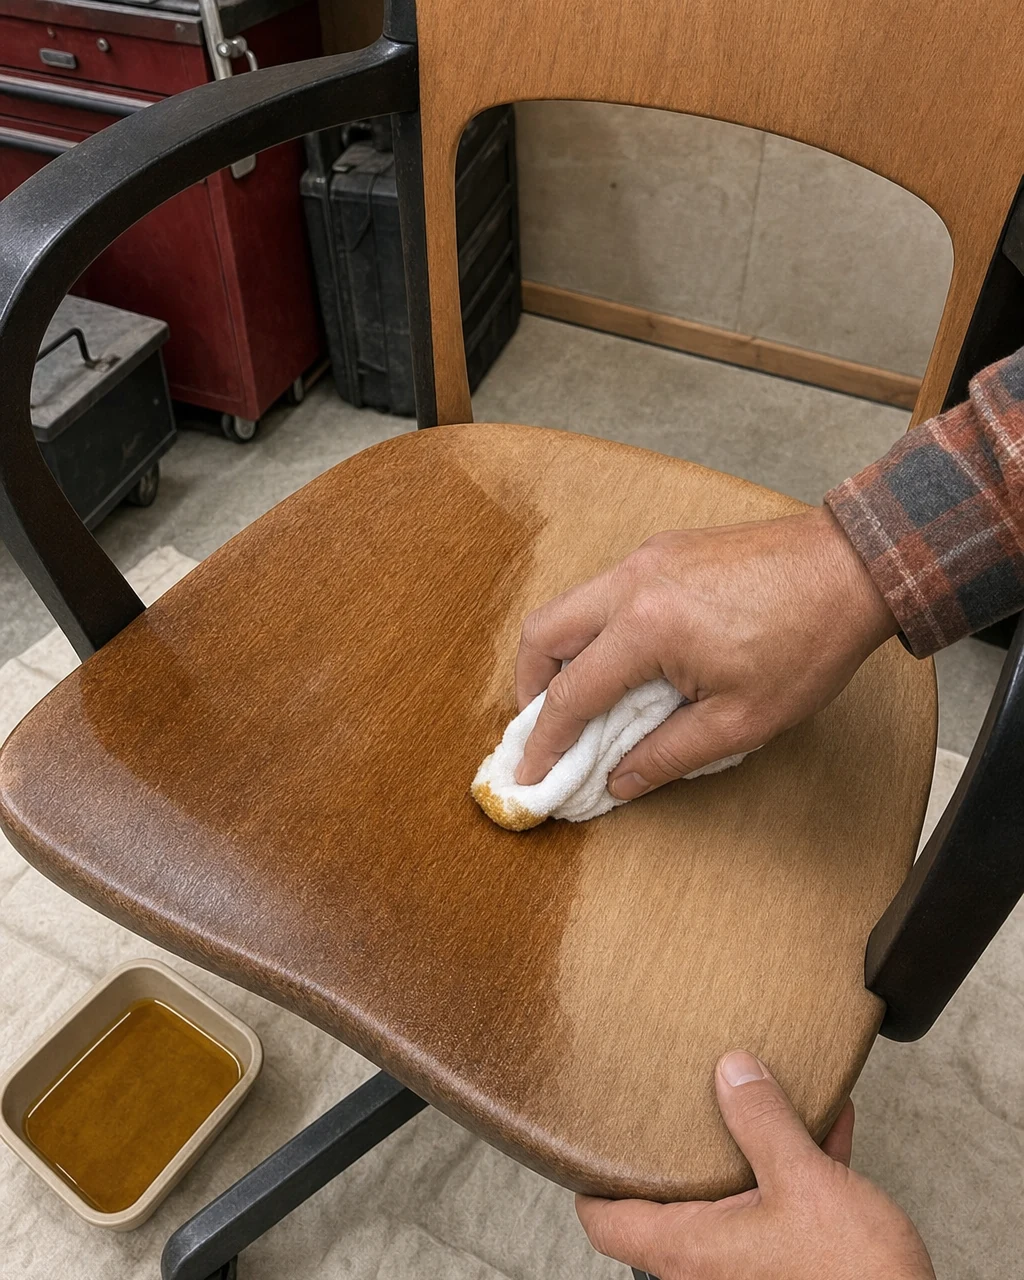
Rub hard wax oil into the bare wood seat and backrest to protect the surface and highlight the natural grain. Hard wax oil nourishes wood without creating a plastic film, preserving the tactile warmth of the raw, sanded wooden seat pan. Wipe the amber oil evenly.
Applying the Finish
Work the finish into the raw wood grain with a white cotton cloth, leaving a rich, glowing surface. Dispose of oil-soaked rags in a water-filled metal container to prevent spontaneous combustion. The seat and backrest will now showcase a rich, glowing wood grain that pops against the black.
Step 6: Reattach the base
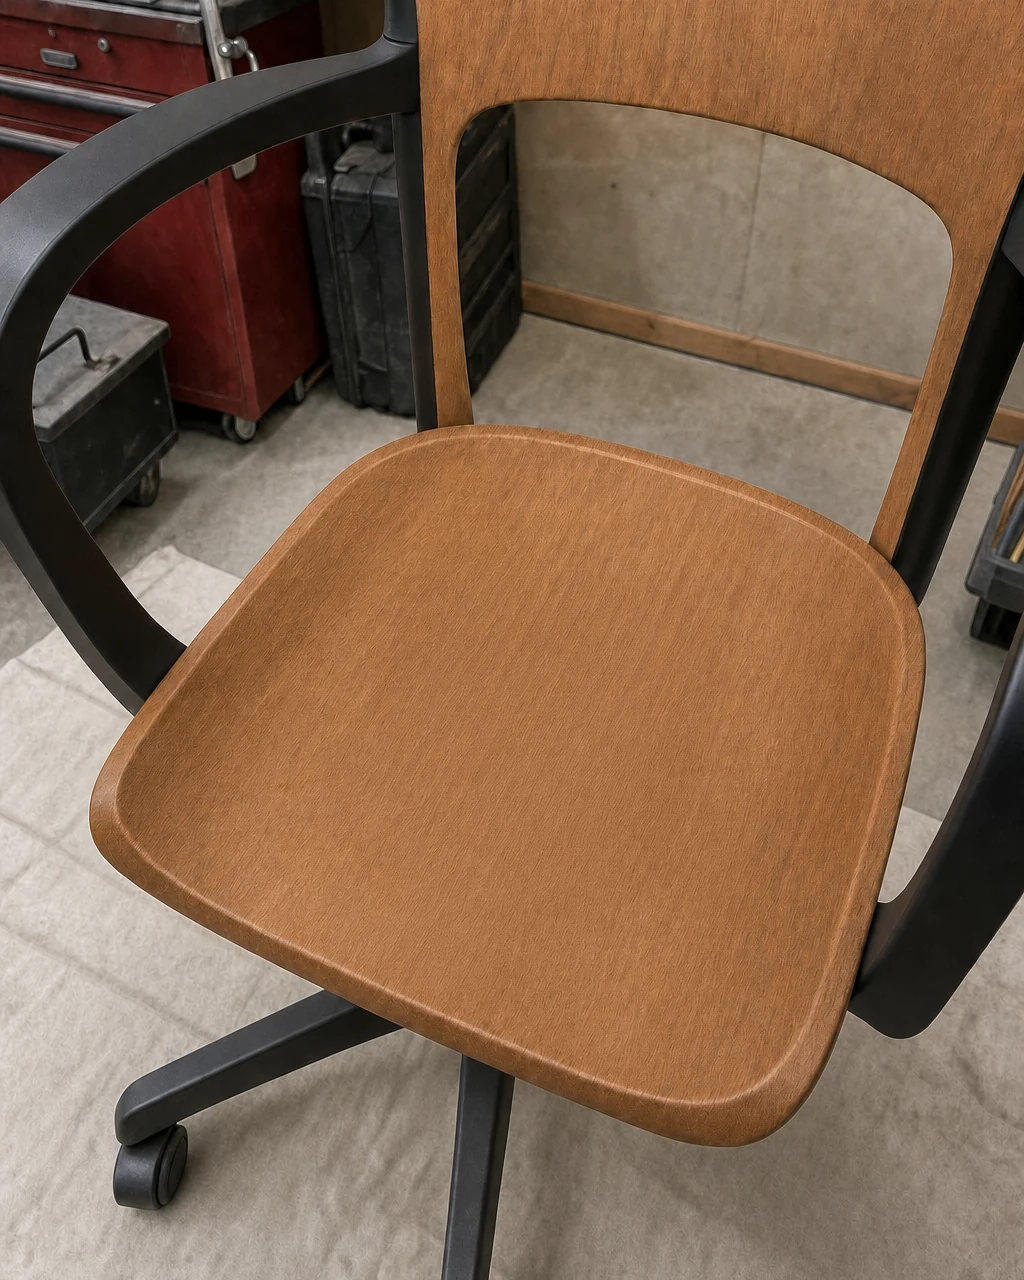
Screw the polished metal swivel base back into the original mounting holes on the finished wooden seat to complete the assembly. The two-tone design modernizes the silhouette while preserving its history, resulting in a fully assembled, restored chair ready for daily use in a modern office.
Securing the Hardware
Ensure all screws are driven straight to avoid stripping old wood holes on the underside of the finished seat. Driving the fasteners securely through the metal base plate into the wood guarantees structural stability, finalizing the transformation into a fully assembled, two-tone restored chair.
Step 7: Style the workspace
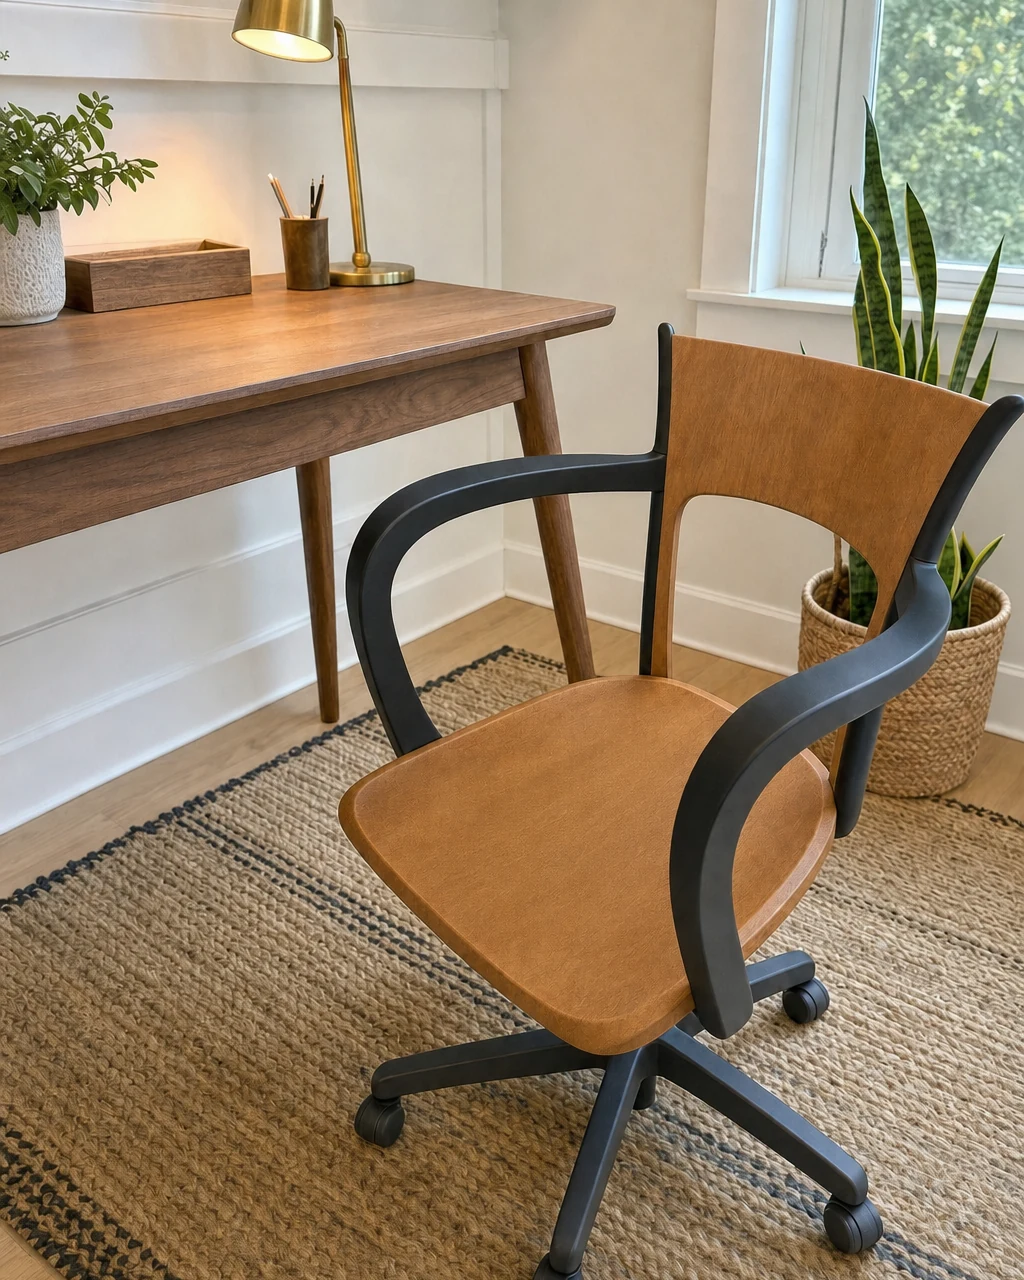
Position the chair at a mid-century desk with a task lamp to highlight the new contrasting finishes and restored functionality. Quality mid-century seating commands high prices in boutique vintage shops. This restored piece now serves as a stylish, functional focal point in a home office.
Final Placement
Always lift the heavy chair by the wooden base frame, not the newly painted armrests, to protect the fresh urethane enamel. The sharp visual boundary between the painted black armrests and the natural oiled wood seat creates a striking, modern workspace focal point.