
Front Yard Decor Measurements: The Curb-to-Door Cheat Sheet
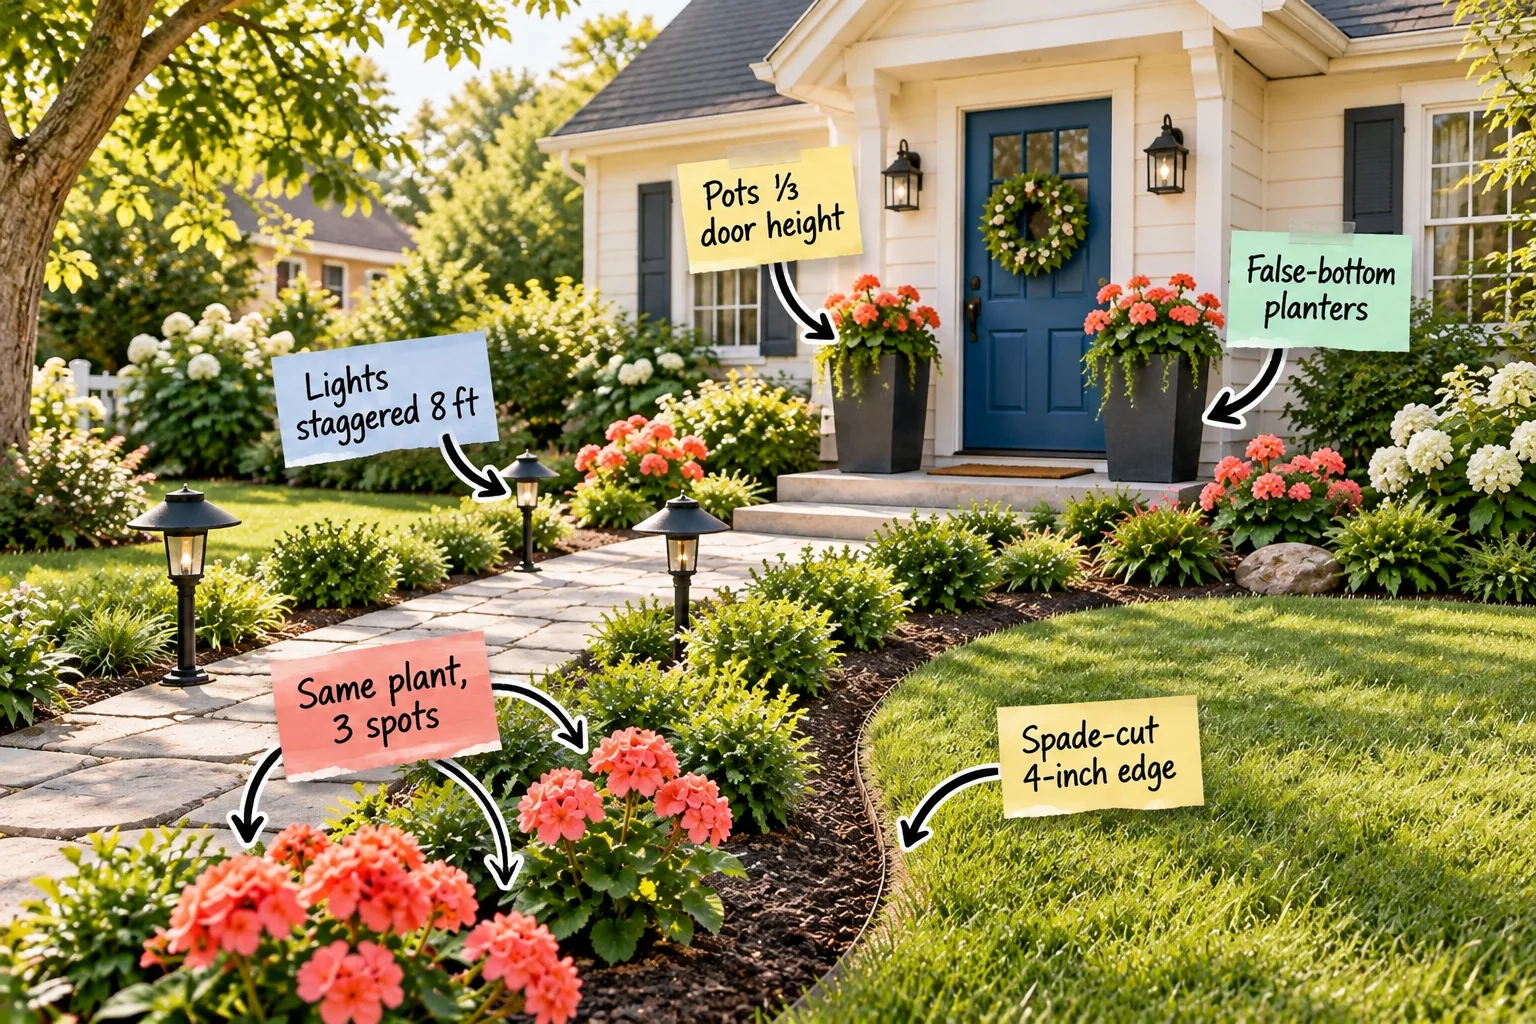
Getting your front yard landscaping exactly right comes down to using professional proportions. Grab our printable Curb-to-Door Measurement Sheet below to finally measure, space, and arrange every detail from the street curb all the way up to your welcoming entryway.
Digging a Four-Inch Spade-Cut Edge
When I first moved into my Austin home, bermuda grass constantly invaded my mulch until I learned to cut a sheer 4-inch deep vertical trench using a half-moon edger. This creates a razor-crisp line that physically stops grass roots from creeping across the boundary.
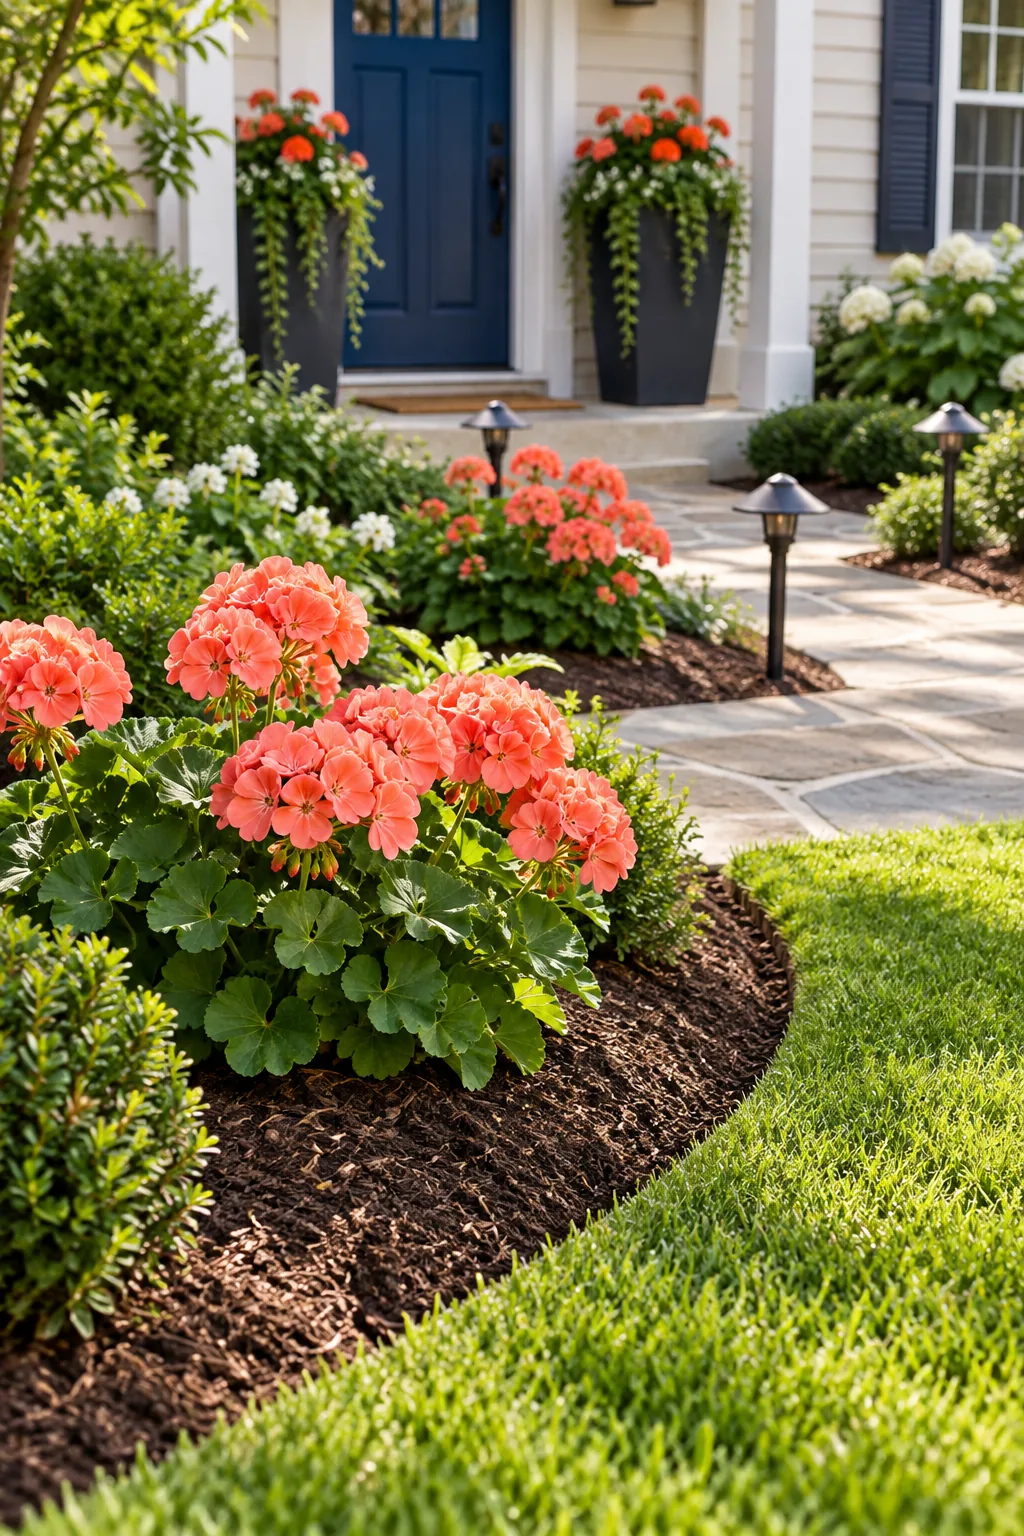
A sharp, maintenance-free edge requires the exact right geometry to actually prevent your lawn from crossing the boundary into the soft planting bed.
Removing the Excavated Turf
Scoop out the loosened grass clods and shake the valuable topsoil back into the garden bed before composting the remaining heavy root mass. This step ensures you maintain the necessary soil volume while completely eliminating the invasive grass runners.
Composting the Yard Waste
Pile the discarded bermuda grass clumps in a dedicated hot compost bin far away from your fresh garden beds. The intense heat of the pile will eventually break down the resilient root systems so they cannot sprout again.
Smoothing the Trench Floor
Run a flat-headed shovel firmly along the bottom of your new boundary trench to create a perfectly level base. This flat floor deters future weed growth and helps the trench hold its sheer shape through heavy spring rainstorms.
Assessing Your Front Yard Zones
Before you start planting, mapping out your curb-to-door transition ensures every landscaping layer works together seamlessly.
- The curb zone: This is where crisp edges and initial lighting set the tone.
- The pathway zone: Here, repeated plantings guide the eye inward.
- The entryway zone: Large-scale planters anchor the front door.
Tackling these three distinct areas in their natural order keeps your weekend project highly focused and prevents costly, frustrating return trips to the local garden center.
Repeating One Plant in Three Spots
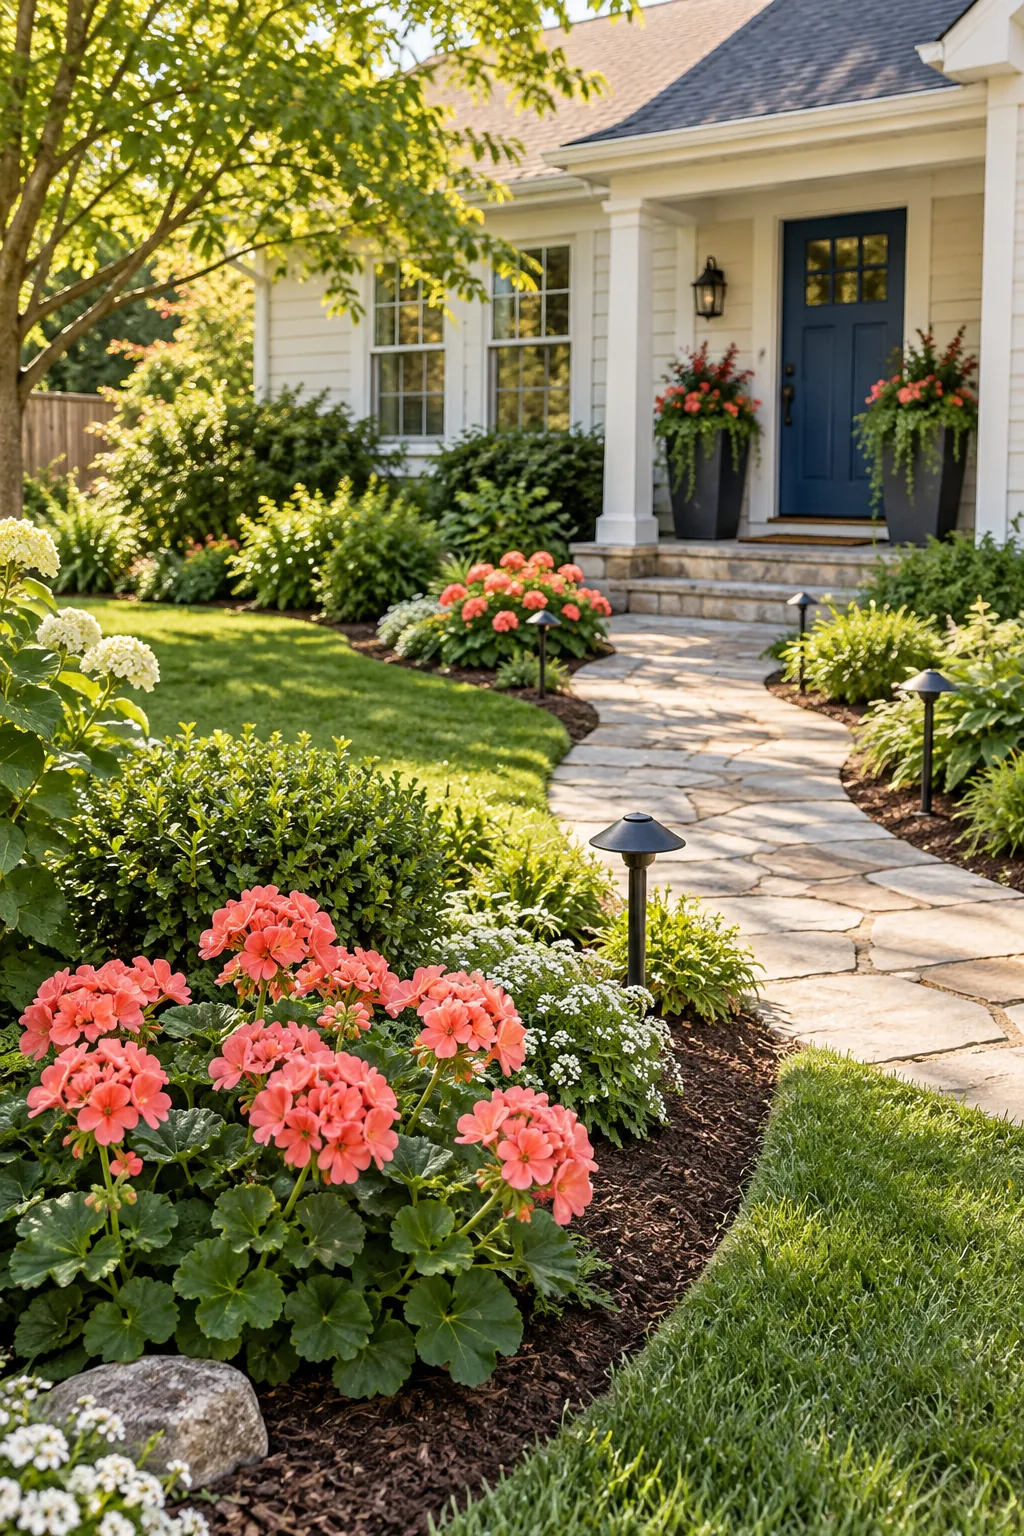
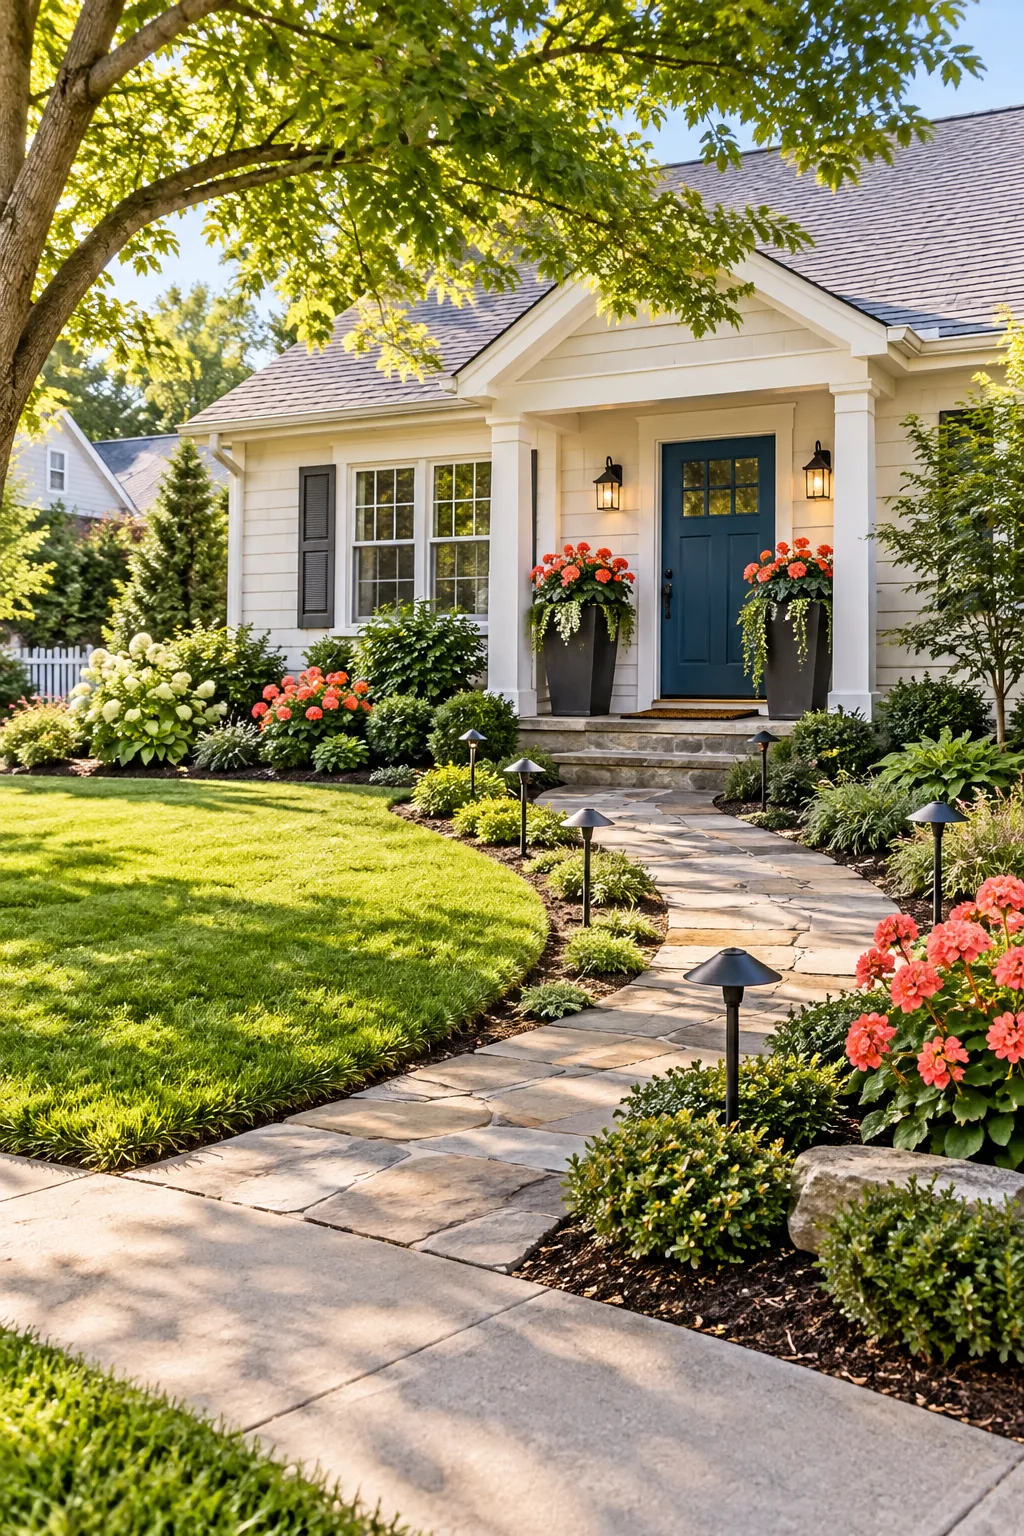
You can lead the eye naturally up the walkway by planting the exact same colorful flower at the path entrance, mid-bed, and in the porch pot. This simple three-spot repetition creates a deliberate, welcoming visual path right to your front door.
Selecting the Right Anchor Flower
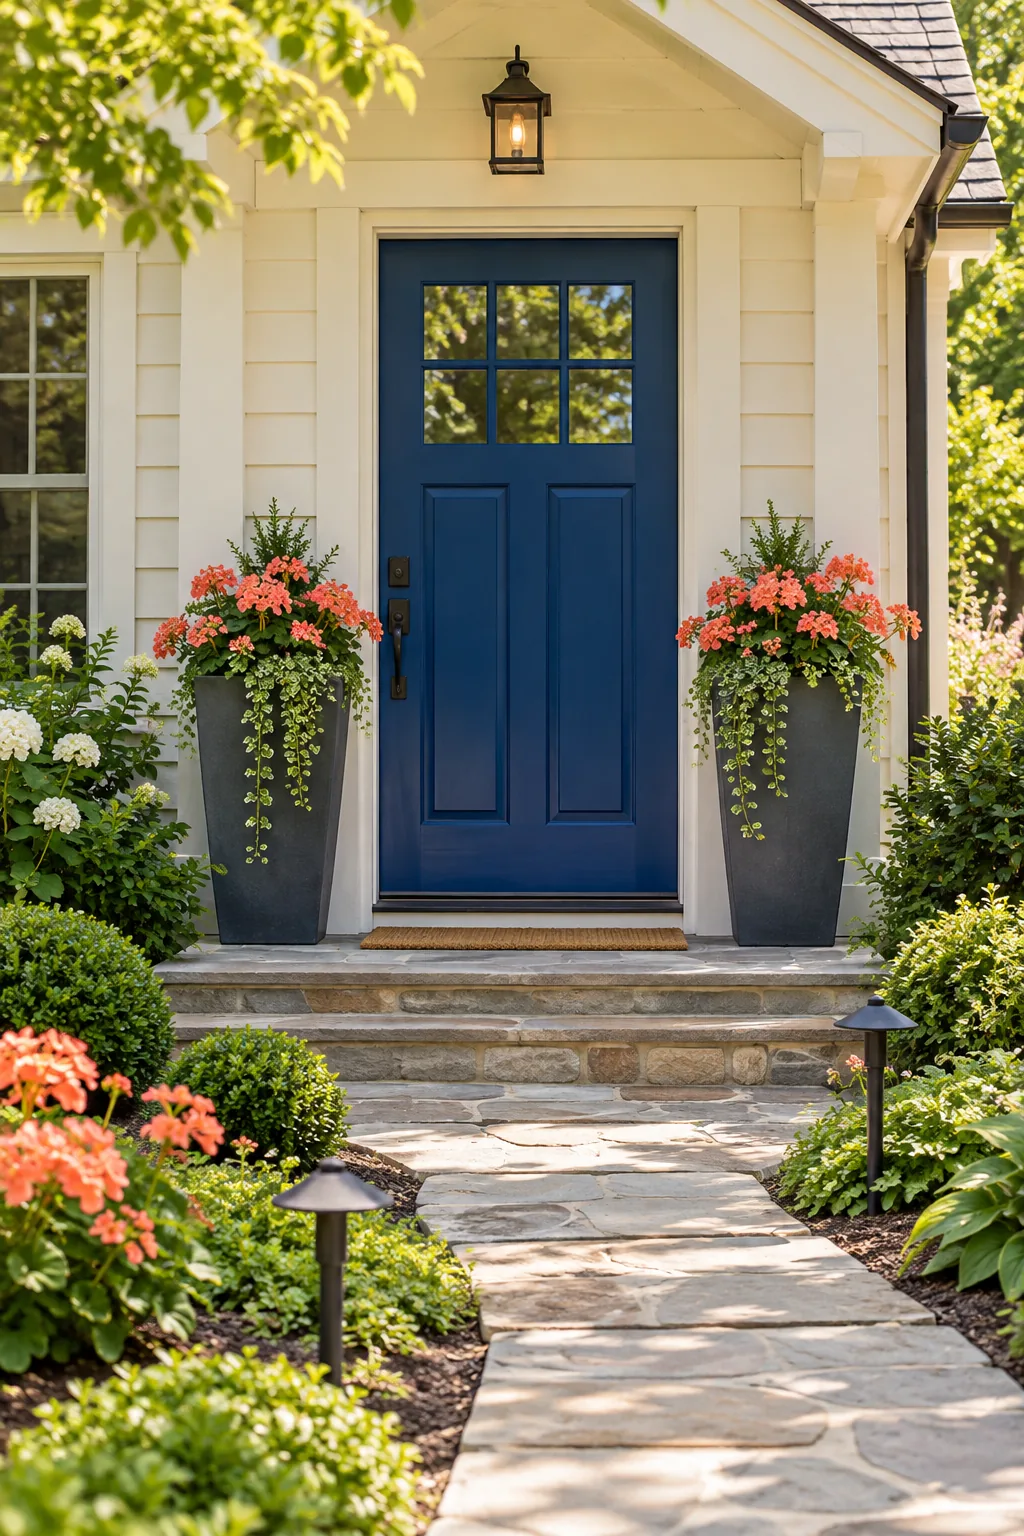
For this three-spot repetition to work effectively, you need a highly resilient plant like deep coral geraniums. These classic anchors bloom continuously through your specific local growing season while providing a striking contrast against dark green foliage and traditional brick.
Spacing Your Anchor Plants
Leave at least twenty-four inches of breathing room between your main anchor flowers and any surrounding green shrubs. This generous spacing allows the colorful blooms to act as distinct focal points rather than blending into a messy botanical jungle.
Planting the Pathway Entrance
Dig your first hole just behind the fresh spade-cut edge, ensuring the mature foliage will spill slightly over the trench. This strategic placement softens the hard boundary without completely hiding the crisp, professional line you just worked hard to create.
Mulching the Garden Beds
Spread a thick two-inch layer of dark hardwood mulch carefully around your new plants. Taper the mulch down to a very thin dusting right where it meets the vertical trench drop so it never washes over the edge during storms.
Staggering Path Lights Eight Feet Apart
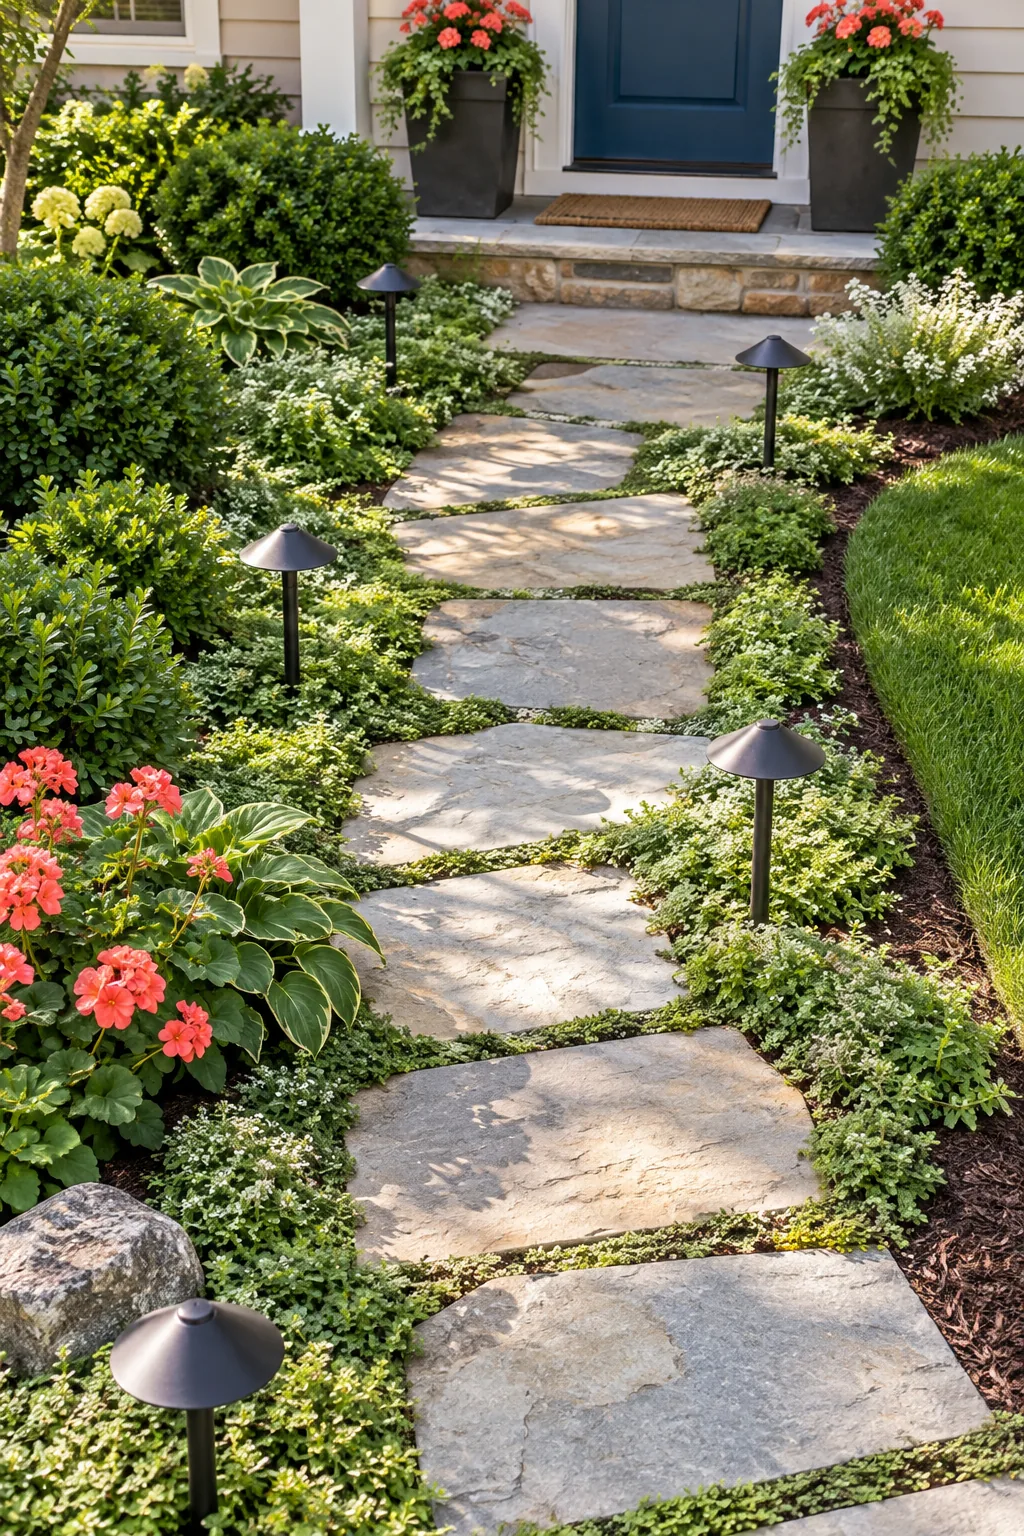
You can completely avoid that rigid airport-runway effect by staggering path lights on opposite sides of the walk every eight feet. This specific spacing provides safe, overlapping pools of illumination without overcrowding a smaller front yard.
Calculating the Total Fixture Count
Measure your total walkway length from the sidewalk to the porch steps and divide that number by eight. This simple math determines exactly how many fixtures you need to purchase for a beautifully balanced, overlapping nighttime illumination pattern.
Positioning the First Light
Place your initial lighting fixture at the very start of the stone path near the driveway. Angle the top shield carefully to cast a warm glow directly onto the first stepping stone, welcoming guests safely out of their cars.
Testing the Illumination Overlap
Wait until dusk to temporarily stick your path lights into the soil before burying the cables permanently. Walk the entire stone path to verify the staggered eight-foot spacing leaves absolutely no dark, dangerous gaps between the glowing light pools.
Wiring Your Staggered Layout
Run your main low-voltage cable in a gentle zigzag pattern underneath the walkway stones to connect the alternating fixtures. Alternatively, you can save effort by running two completely separate straight lines along each border of the garden path.
Sizing Planters to One-Third Door Height
I used to buy tiny pots that disappeared on my porch until I learned flanking planters should reach exactly one-third the height of the front door. This specific proportion ensures the arrangement looks substantial and balanced from the street.
| Door Height | Ideal Planter Height |
|---|---|
| 80 inches (Standard) | 26 – 27 inches |
| 84 inches (Tall) | 28 inches |
| 96 inches (Grand) | 32 inches |
Measuring Your Entryway Clearance
Before ordering massive decorative containers, measure the exact width of your porch landing. You must ensure the new planters leave a minimum thirty-six-inch clear walking path for guests, delivery drivers, and carrying heavy groceries into the house.
Selecting Weather-Resistant Containers
Choose heavy-duty fiberglass or thick resin pots rather than traditional fragile ceramic. These modern materials easily withstand freezing winter temperatures without cracking while perfectly mimicking the elegant, heavy look of real carved stone or poured concrete.
Drilling Extra Drainage Holes
Flip your new massive planters upside down and use a half-inch masonry bit to add three extra drainage holes. Proper water flow prevents the dreaded root rot that quickly kills expensive porch arrangements during heavy summer downpours.
Packing Tall Planters With False Bottoms
Once you invest in massive containers to hit your one-third door height ratio, fill the bottom half with inverted plastic nursery pots before adding soil. This false-bottom technique saves serious money on potting mix and keeps the heavy arrangement manageable.
You do not need to buy specialized inserts to take up that extra empty space in the deep base of your tall decorative pots.
Adding the Potting Soil Layer
Cut a piece of permeable landscape fabric to cover your false-bottom filler entirely. Next, pour in a high-quality, moisture-control potting mix to fill the top twelve inches of the container, giving your plants plenty of rich nutrients.
Mixing in Slow-Release Fertilizer
Blend a generous handful of granular, slow-release blooming fertilizer into the top six inches of your fresh potting soil. This hidden nutrient boost guarantees your porch anchor flowers will push out vibrant new blooms all the way through late autumn.
Arranging the Porch Foliage
Plant your final matching anchor flower right in the center of the large pot. Surround it with fast-growing trailing vines that will gracefully spill over the dark charcoal rim, completing your cohesive three-spot repetition plan.
Watering the New Layout
Soak the freshly planted porch containers heavily until water runs freely out the bottom drainage holes. This deep watering ensures the dry potting mix settles firmly around the delicate root systems, eliminating hidden air pockets.
Wiping Down the Planter Rims
Use a damp microfiber cloth to wipe away any splashed potting soil or muddy water from the dark charcoal planter exteriors. A pristine container surface elevates the entire front entry and makes your DIY landscaping look like a high-end professional installation.
Three Ways to Style Your Front Entry
Take these professional measurements and apply them to your home's unique architectural style.
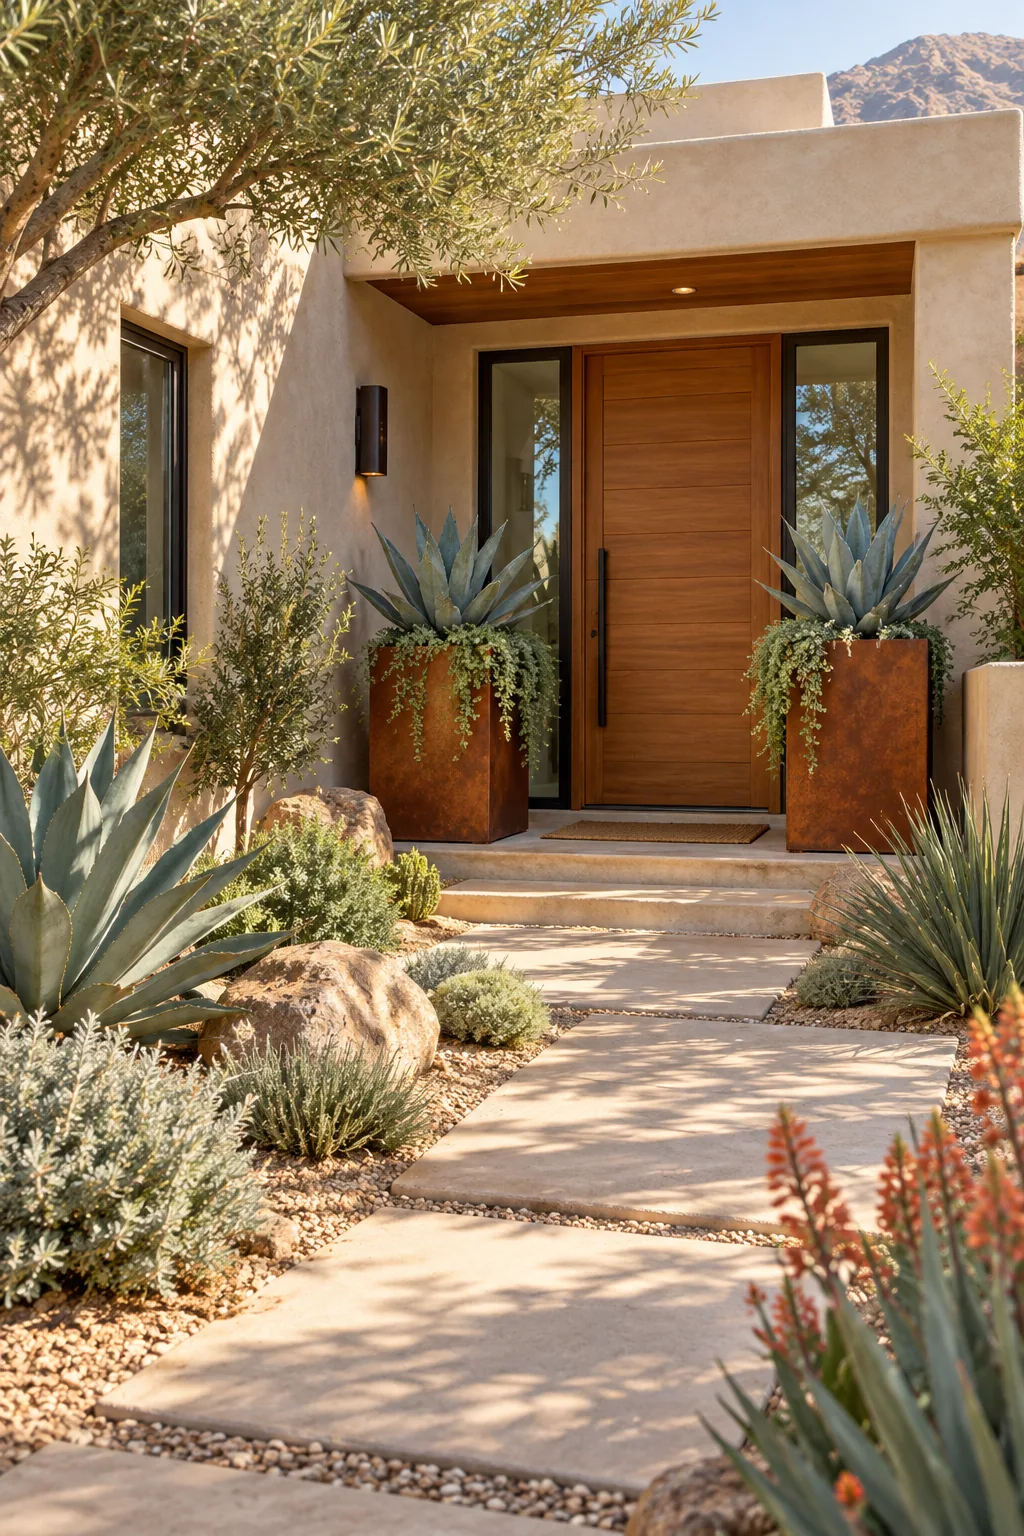
Modern Desert Entry: Warm terracotta tones and rusted corten steel planters bring a sleek, arid aesthetic to this minimal stucco entryway.
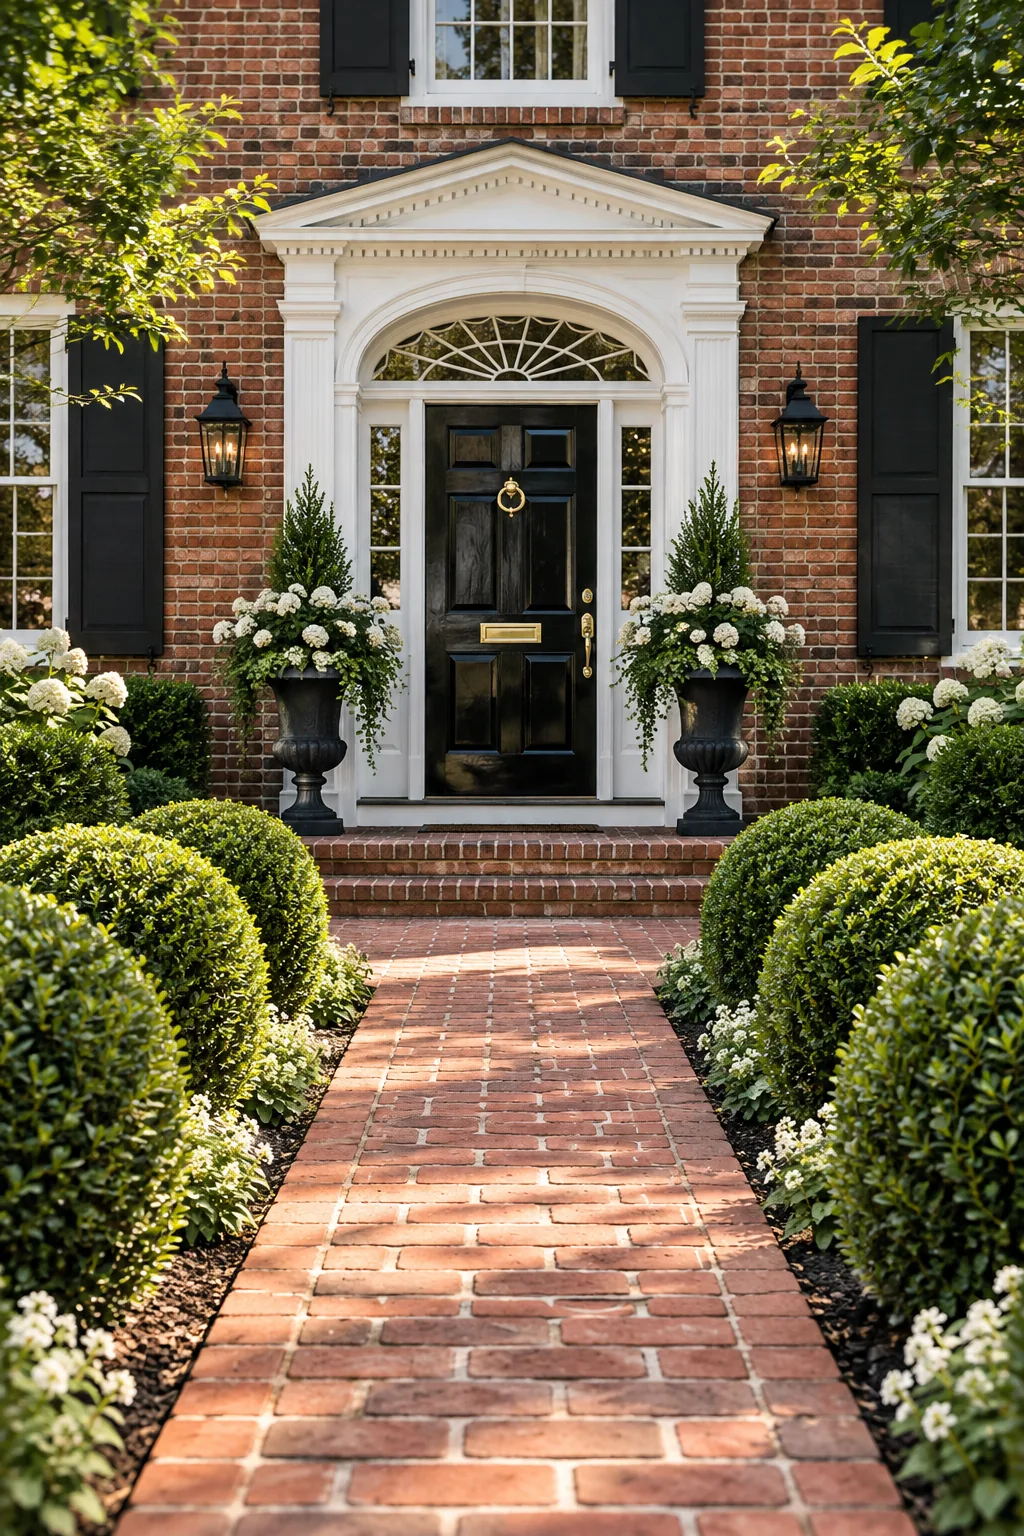
Classic Colonial Brick: Symmetrical boxwoods and heavy cast iron urns create a highly formal, traditional welcome against classic red brick.
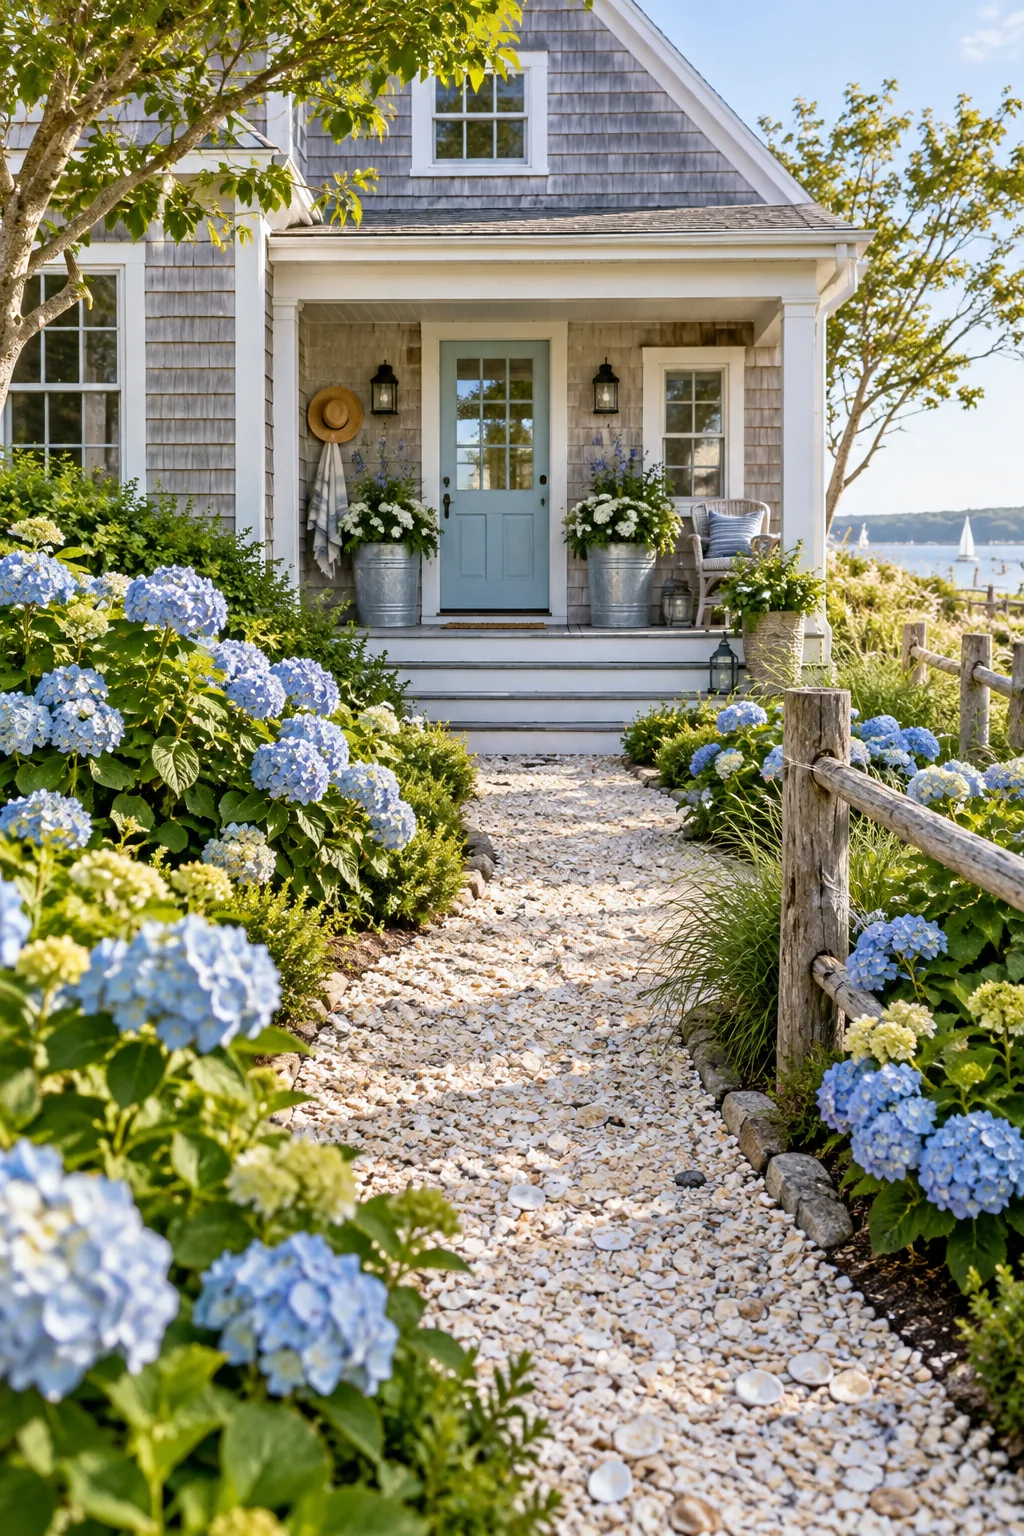
Coastal Cottage Walkway: Galvanized metal pots and a crushed seashell path give this hydrangea-lined walkway a relaxed, beachside atmosphere.
Your Printable Curb-to-Door Measurement Sheet
I keep these exact numbers taped inside my garden shed so I never have to guess when buying supplies for my own yard. All these specific measurements work together seamlessly to create a balanced, professionally styled exterior.
Download your free Curb-to-Door Measurement Sheet below to keep your 4-inch edge depth, 8-foot light spacing, and false-bottom fill depths handy at the garden center.