
Bread Box Before and After: Bold Botanical Fabric Makeover
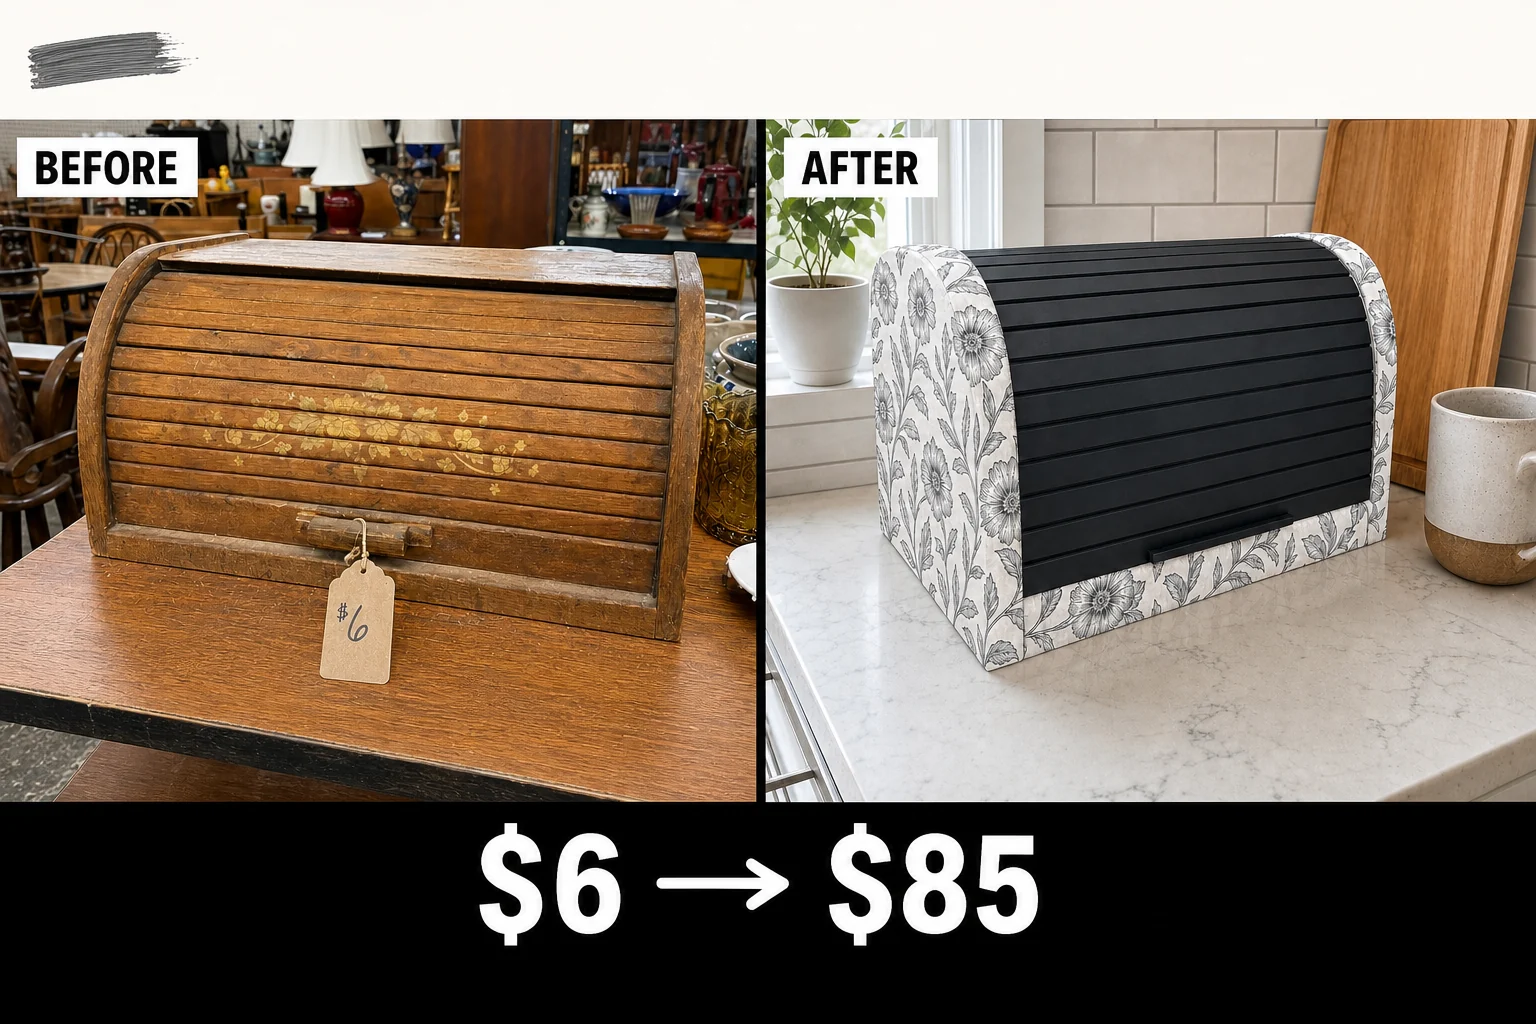
Tucked between broken appliances, this jammed 1980s oak bread box had great bones but peeling floral decals. Wrapping the dated shell in bold botanical fabric and painting the roll-top black creates a modern graphic contrast for any kitchen counter.
Assessing the Thrifted Bread Box
Found in a crowded charity thrift store furniture aisle with metal shelving and handwritten paper tags, this solid oak bread box sat between mismatched plates and a broken toaster. The rectangular base and curved top front profile offered a classic silhouette, but the piece suffered from several distinct issues.
- Jammed tambour door: The slatted door sticks halfway up the curved track, making the bread box frustrating to open and close.
- Outdated surface decoration: Peeling and faded yellow floral decals on the front slats date the piece to the 1980s and look visually cluttered.
- Worn exterior finish: Scuffs and scratches in the original clear coat on the solid oak sides prevent proper adhesion for new surface treatments.
Valuation and Resale Potential
By addressing both cosmetic and functional issues, this modernized piece commands a premium at artisan craft markets. The combination of a bold, modern botanical print and a restored, smoothly functioning roll-top mechanism elevates this from a dated thrift find to a bespoke kitchen accessory.
| Item | Cost |
|---|---|
| Thrifted Bread Box Purchase | $6 |
| Botanical Cotton Canvas | $8 |
| Matte Black Enamel | $7 |
| Heavy-Duty Decoupage | $9 |
| Paraffin Wax Block | $3 |
| Medium-Grit Sponge | $4 |
| Total Investment | $37 |
| Estimated Resale Value | $85 |
| Value Gain | $48 |
This estimated resale value reflects the transformation into a high-contrast botanical kitchen statement piece, rather than an actual completed sale.
Step 1: Remove the Back Panel
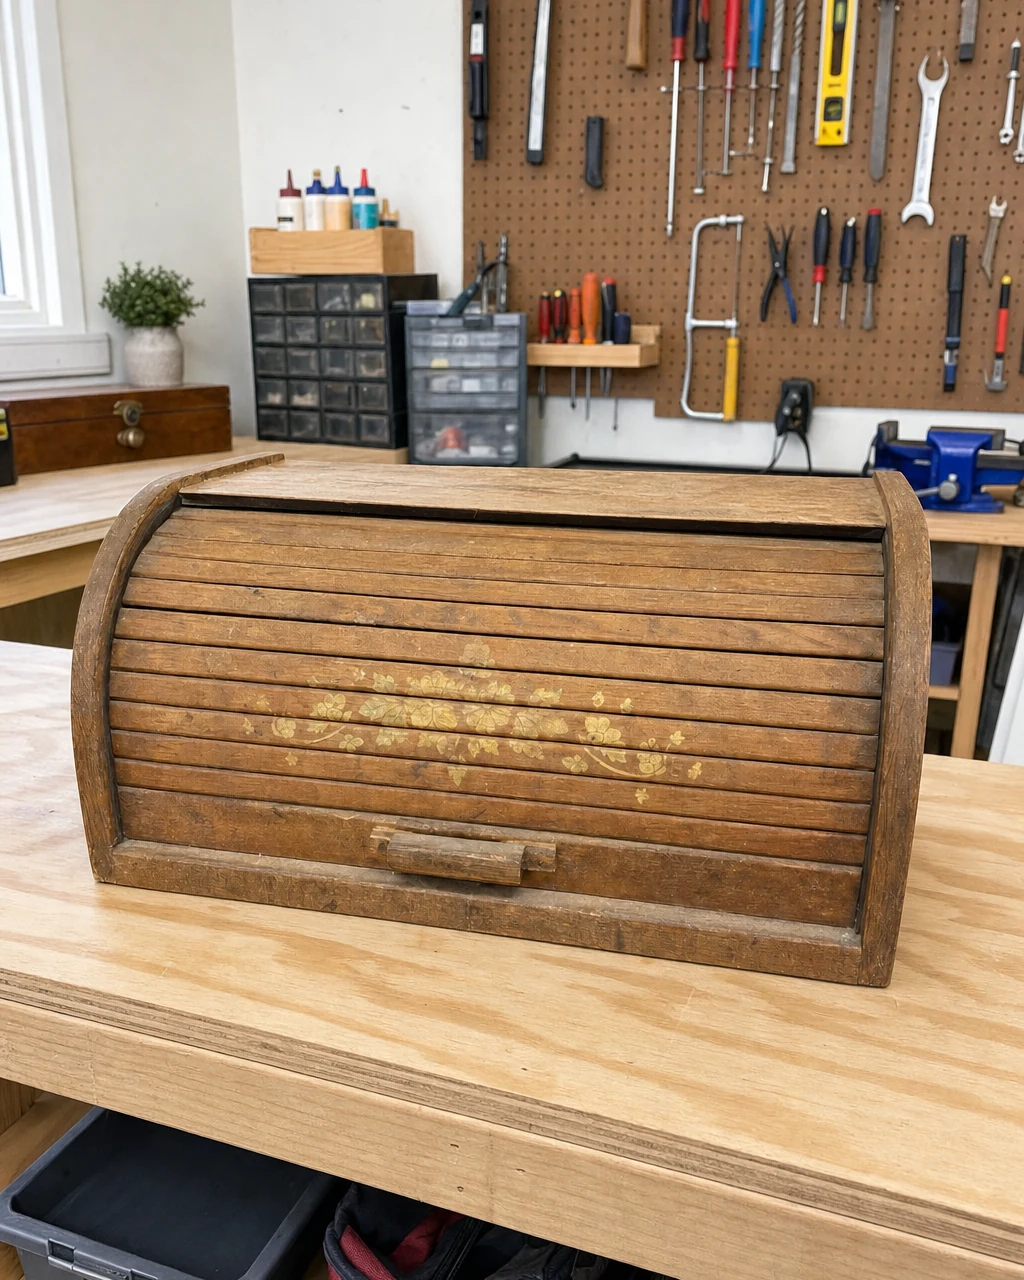
Unscrew the thin plywood back panel using a Phillips screwdriver to slide the tambour door completely out of its tracks for unobstructed prep work. Removing the back panel provides full access to the interior tracks and frees the jammed door. Keep track of the small original screws in a magnetic dish to ensure proper reassembly.
Isolating the Components
The detached back panel and partially removed tambour door can now be prepped separately from the main oak shell. This approach prevents accidental damage to the flexible slatted tambour door mechanism while addressing the scuffed clear coat on the solid oak side panels.
Step 2: Sand Away Decals
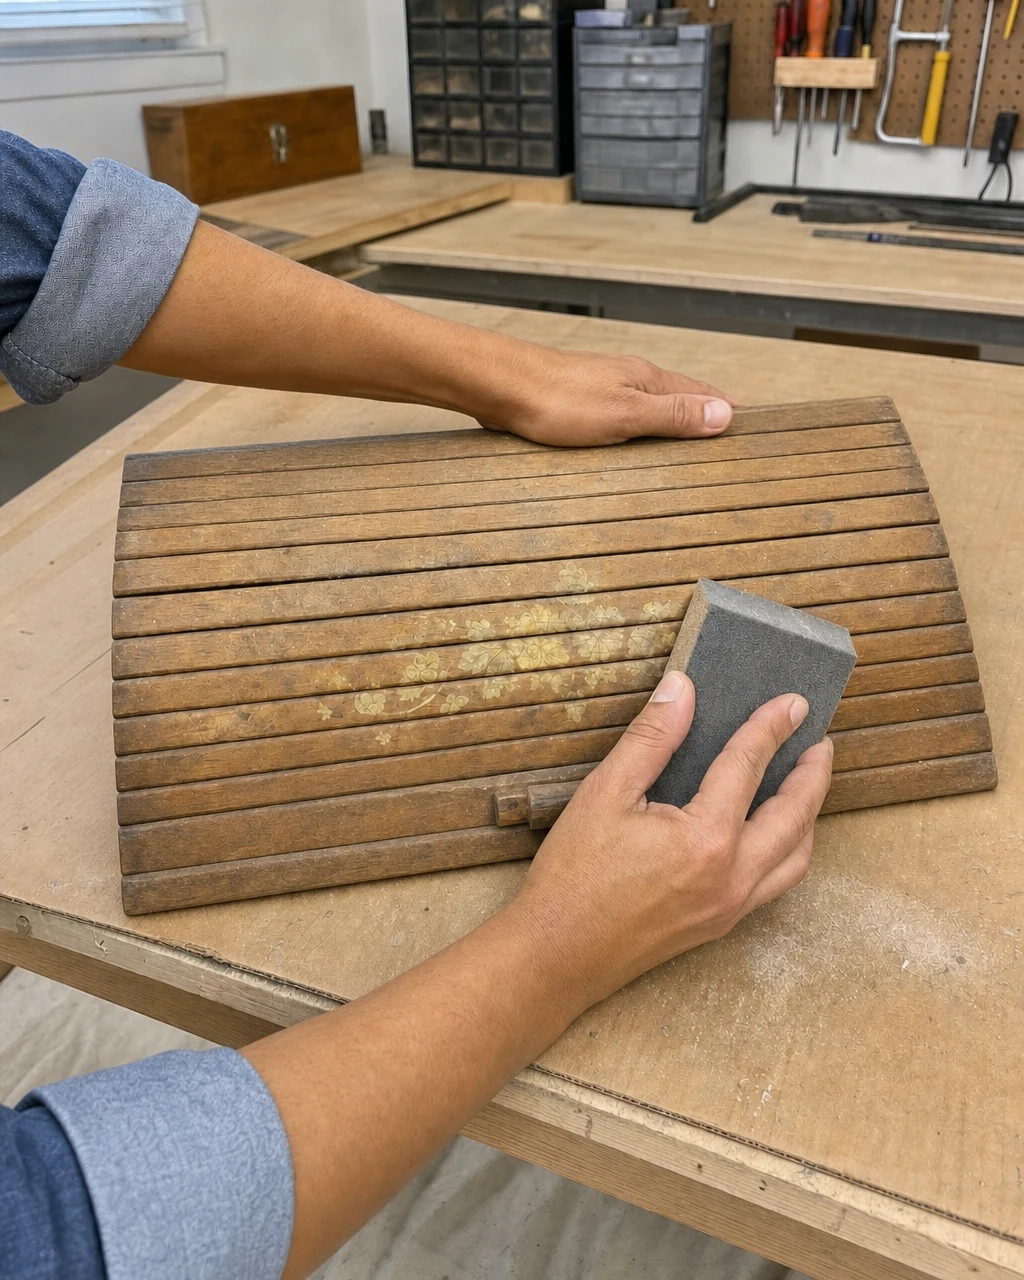
Rub a medium-grit sponge back and forth across the wooden slats to erase the peeling yellow floral decals. Sand the wooden slats thoroughly to scuff the remaining clear coat for better paint adhesion. Wear a dust mask when sanding old finishes to protect your lungs during this messy stage.
Preparing the Bare Wood
Once finished, the slats will be bare wood with no remaining decal residue, ensuring the new paint will adhere perfectly to the detached slatted tambour door. Removing the outdated surface decoration immediately strips away the 1980s visual clutter, preparing the canvas backing and wood for a modern update.
Step 3: Paint the Slats
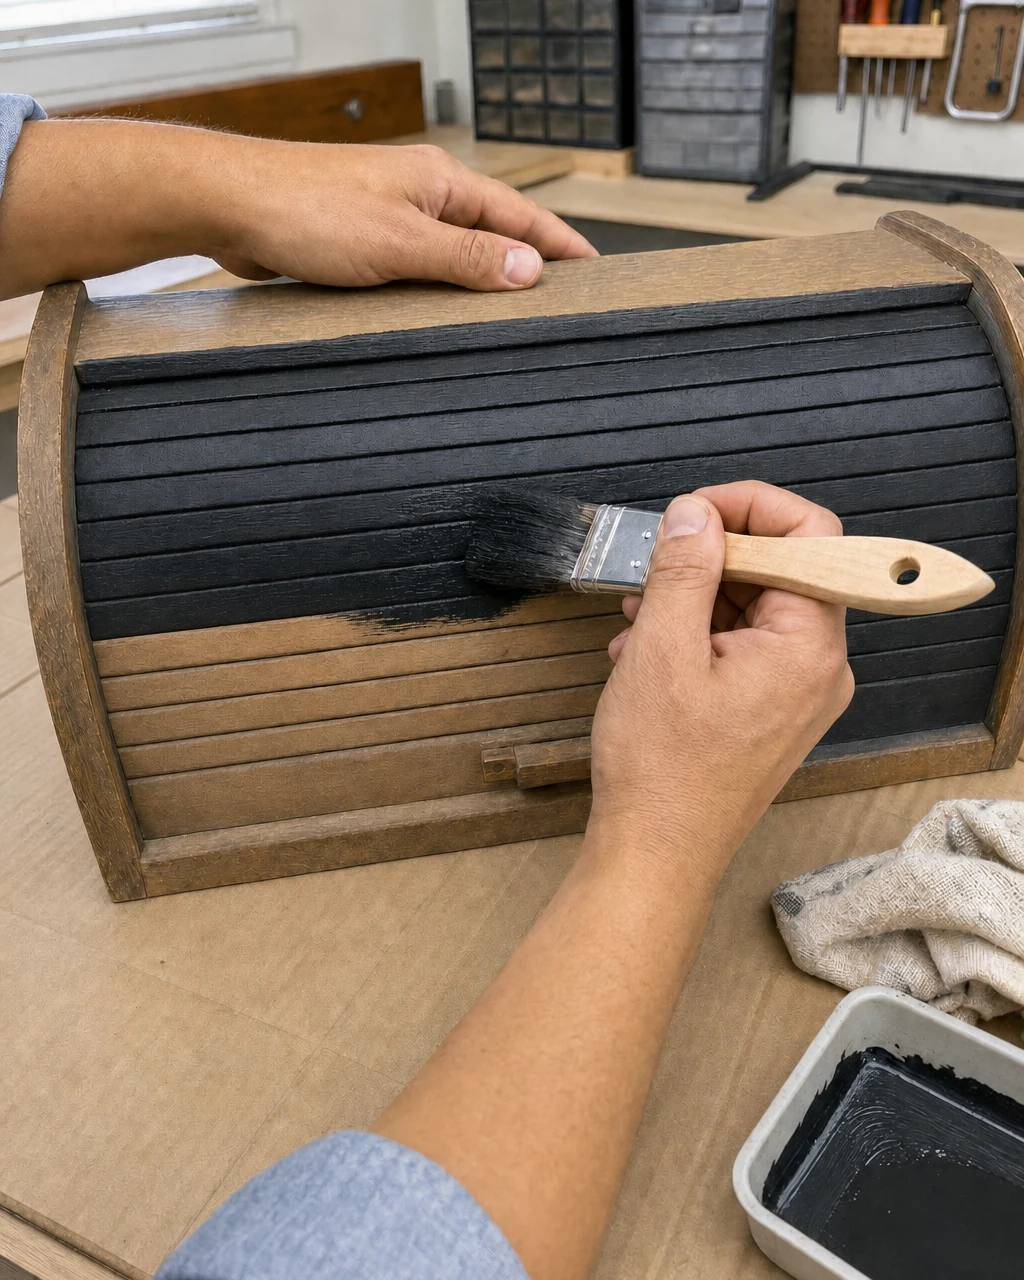
Apply two coats of matte black acrylic enamel to the slats using a synthetic paintbrush, allowing two hours of drying time between coats. Brushing an even coat along the horizontal wooden slats provides a durable, wipeable finish for kitchen use. Paint in a well-ventilated area and protect the workbench with a drop cloth.
The detached tambour door is now coated in solid matte black paint for a high-contrast look that covers the bare wood completely. This dark finish will eventually contrast beautifully with the seamless botanical fabric wrap planned for the exterior shell.
Step 4: Decoupage the Fabric
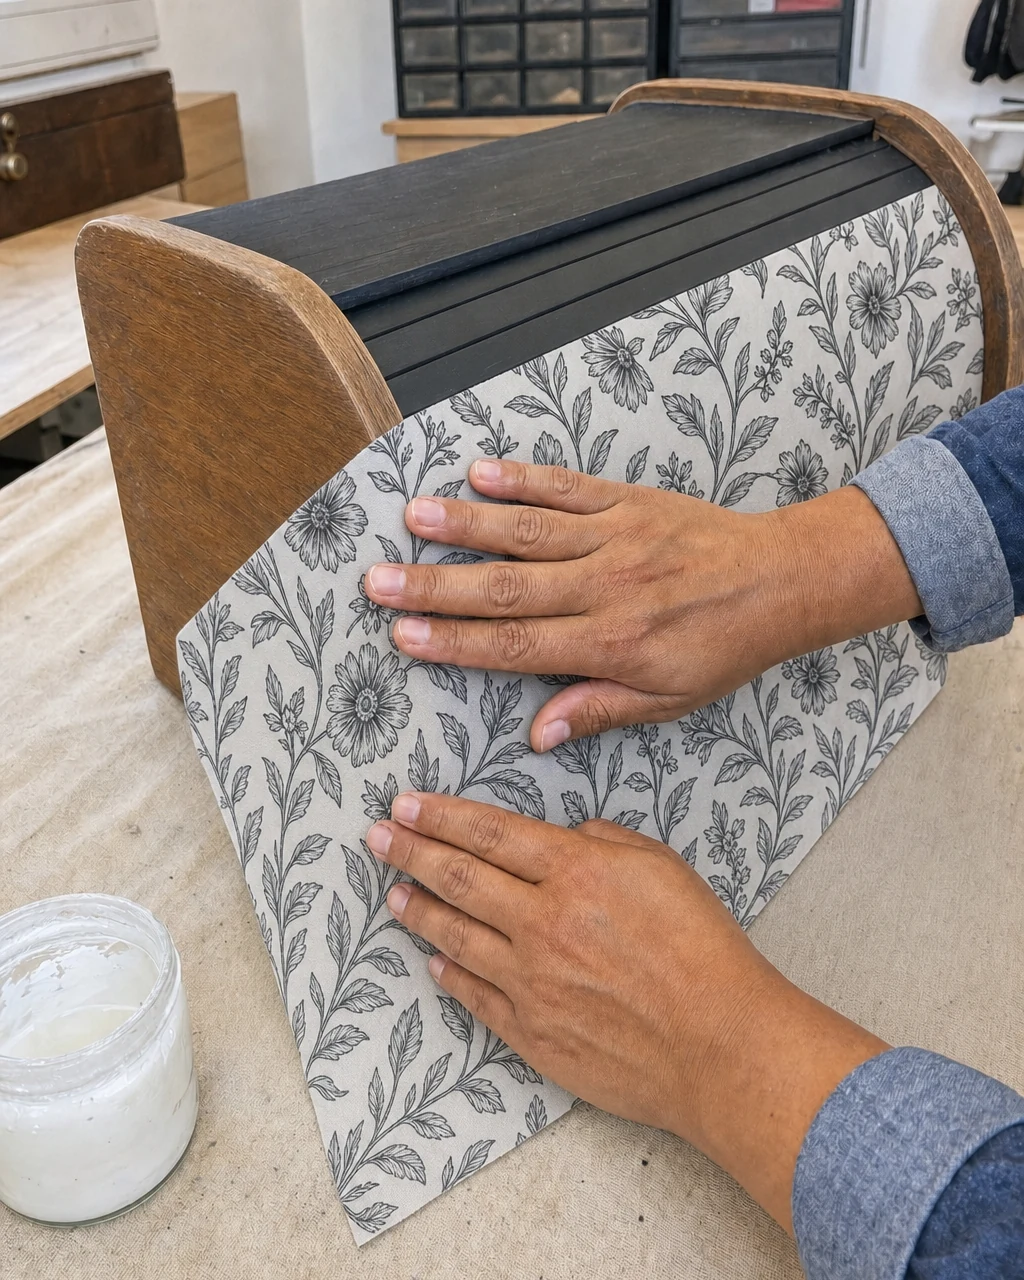
Brush a thick layer of heavy-duty decoupage medium onto the exterior sides and top using a foam brush. Smooth the botanical cotton canvas over the surface with a smoothing tool. Work quickly to position the fabric before the adhesive begins to tack up on the solid oak side panels.
The heavyweight cotton canvas resists wrinkling, leaving the fabric adhered smoothly to the exterior shell with some overhang at the edges. Using a bold black-and-white botanical fabric instantly changes the pattern, color, and material of the dated wooden bread box.
Materials checklist
Step 5: Trim the Overhang
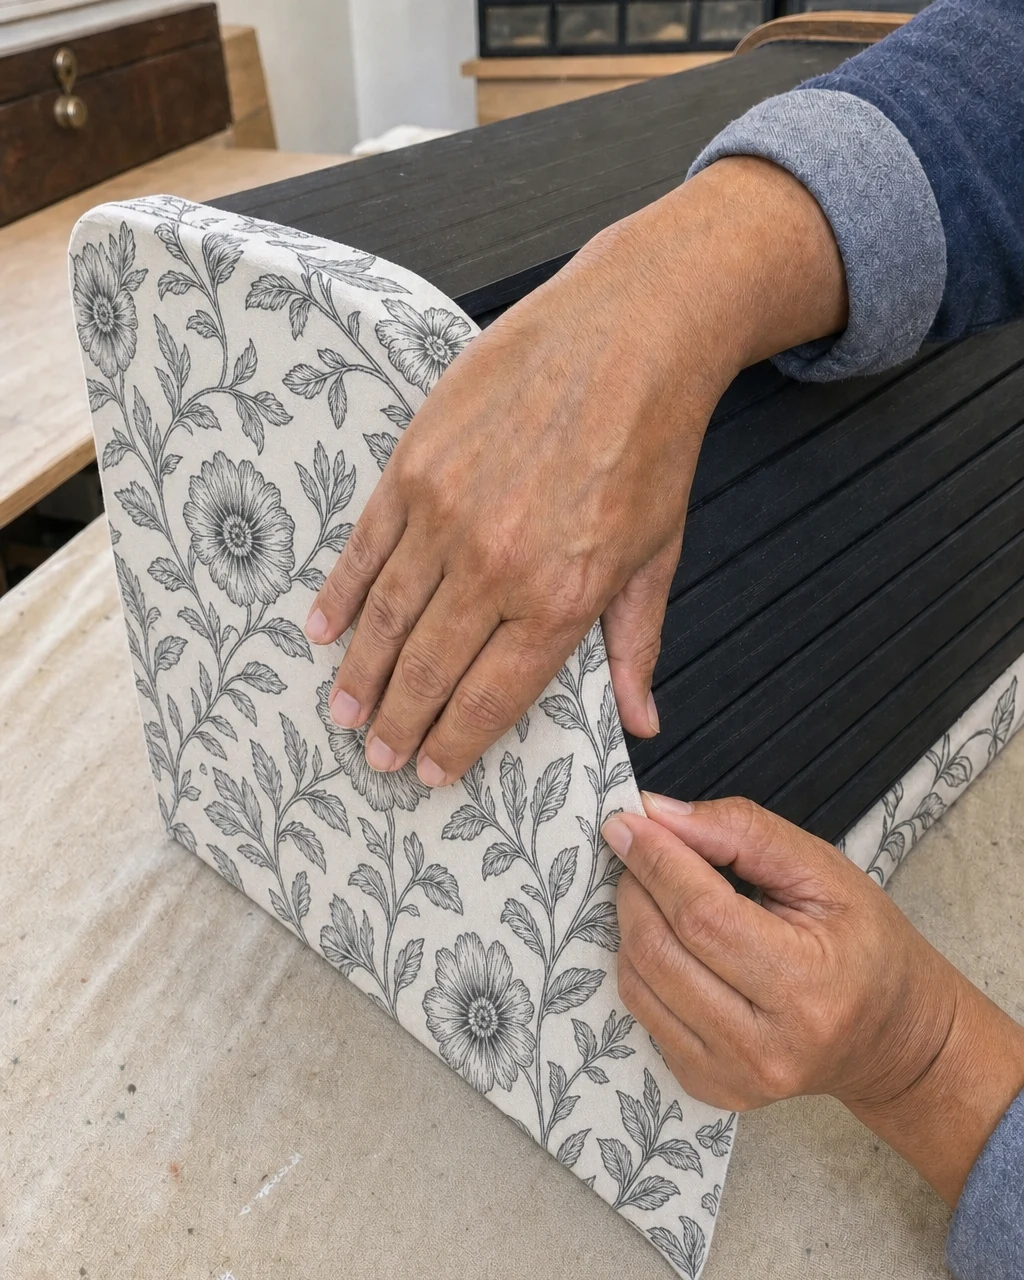
Run a sharp craft knife blade directly along the wooden edge to slice away the excess overhanging cotton fabric. Trim the excess fabric perfectly flush with the wooden edges of the bread box. Always cut away from your body and change the blade frequently to prevent snagging the fabric.
Achieving Clean Edges
A fresh blade ensures the fabric wrap has clean, flush edges matching the box’s curved profile without fraying the damp cotton material. This precise trimming step is crucial for making the decoupage fabric application look like a bespoke, high-end manufacturing technique rather than a simple craft project.
Step 6: Wax Tracks and Reassemble
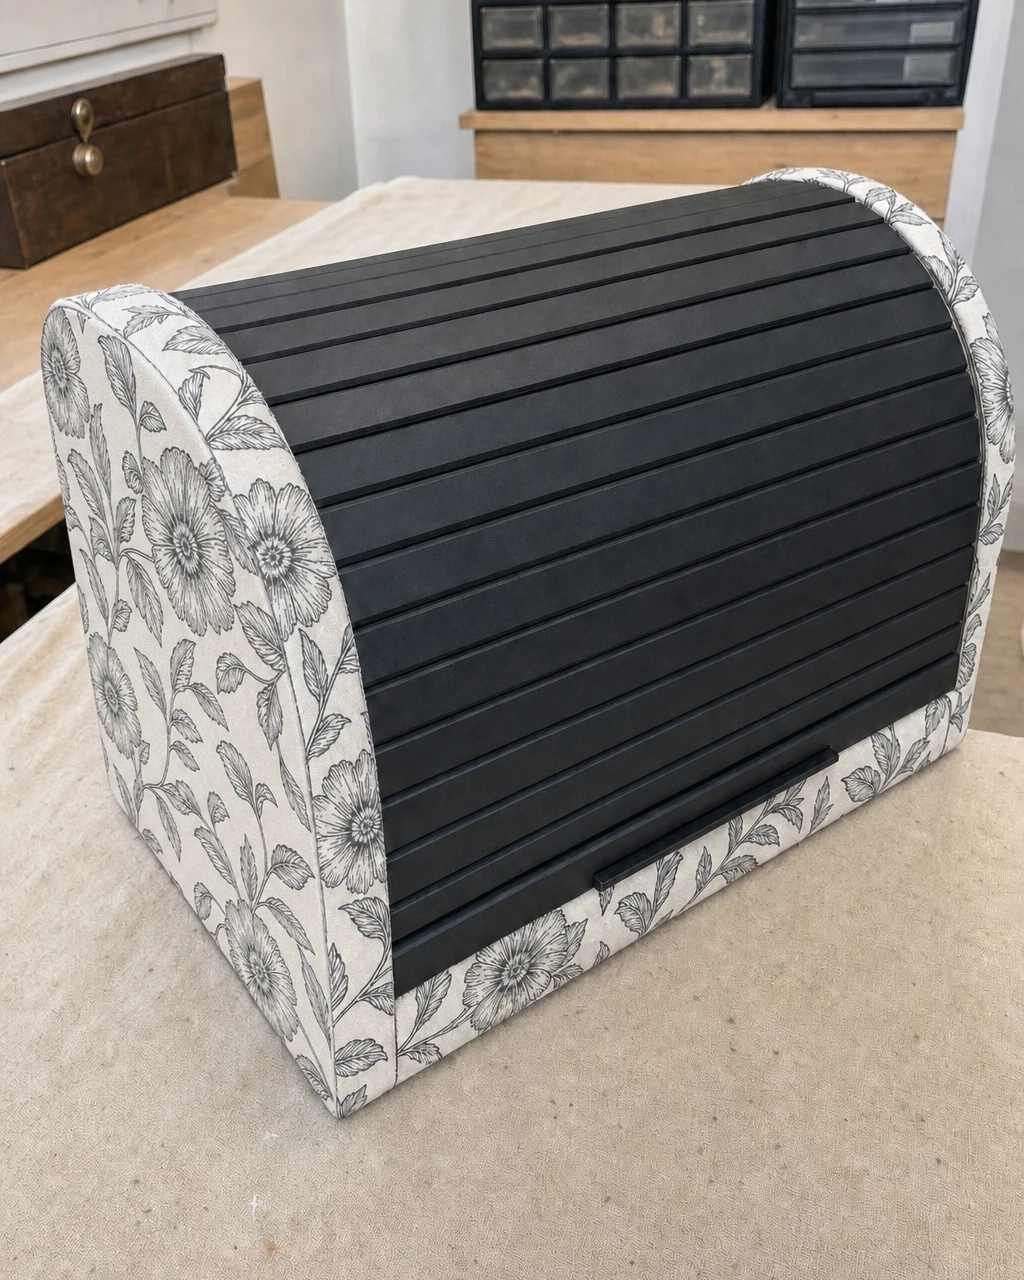
Rub a paraffin wax block into the curved side tracks to restore a frictionless glide. Slide the painted black tambour door back into the newly waxed tracks of the fabric-wrapped shell. Ensure the paint is fully cured before sliding the door to prevent scraping the new finish.
Securing the Back Panel
Screw the back panel into place with your Phillips screwdriver. The bread box is now fully assembled and the door sits smoothly in its tracks. Fixing the jammed sliding tracks transforms the piece from a frustrating storage bin into a highly functional, smooth-gliding kitchen essential.
Step 7: Style the Kitchen Counter
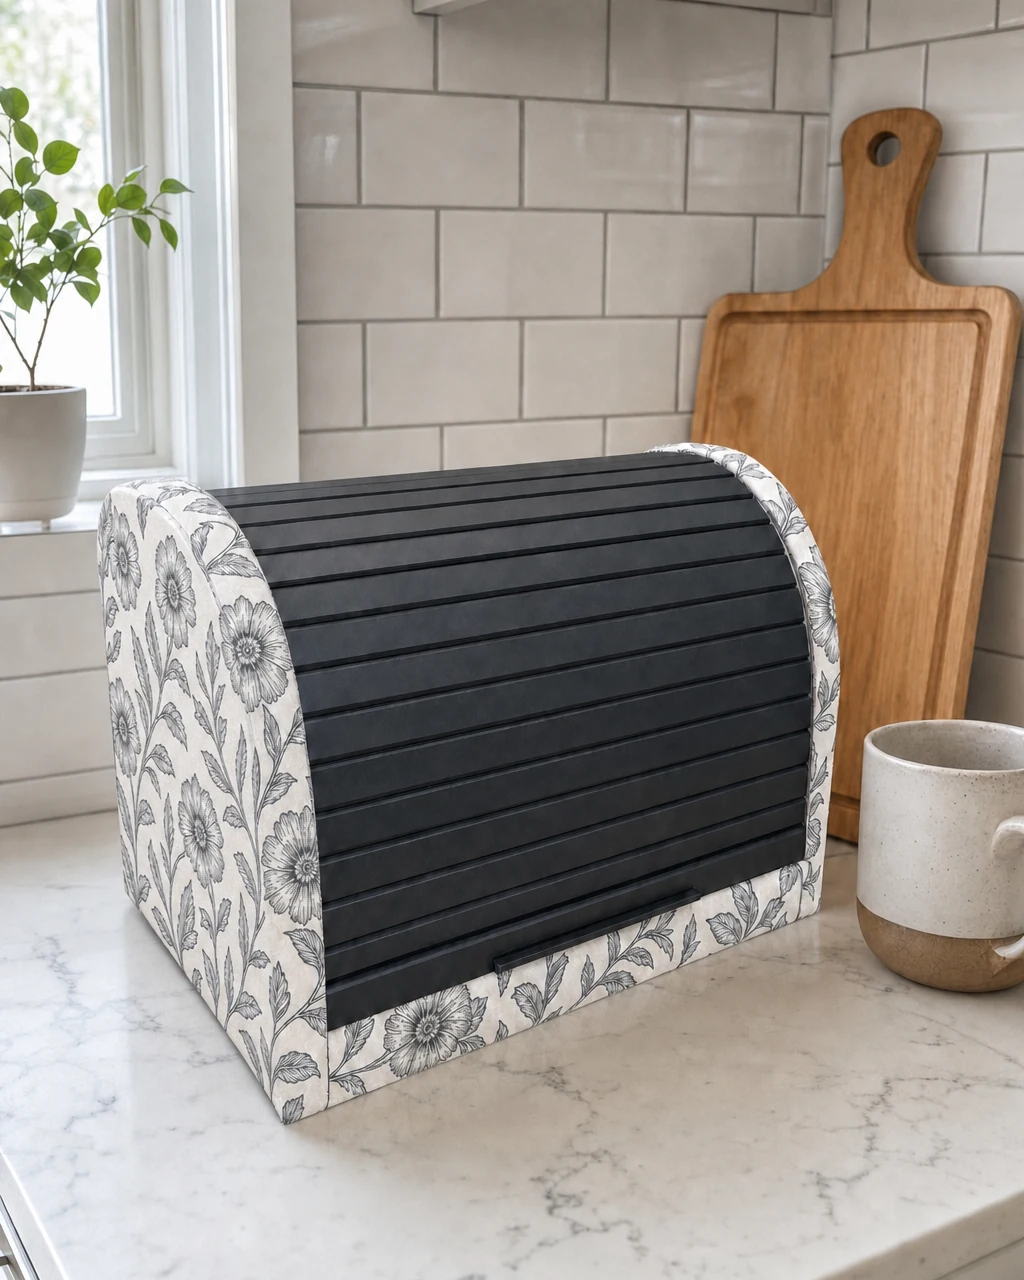
Place the modernized bread box on a tiled kitchen counter to provide stylish, concealed storage for fresh baked goods. Graphic patterns instantly modernize traditional wooden kitchen storage pieces. Keep fabric-wrapped items away from direct heat sources like stovetops or toasters to maintain the decoupage finish.
The Final Transformation
The finished bread box now sits in a styled kitchen environment, looking like a high-end, bespoke accessory rather than a dated thrift store find. The seamless botanical fabric wrap contrasting with the matte black tambour slats delivers a striking visual hook for any modern home.