
Boys Bathroom Design: The Heavy-Duty Material Cheat Sheet
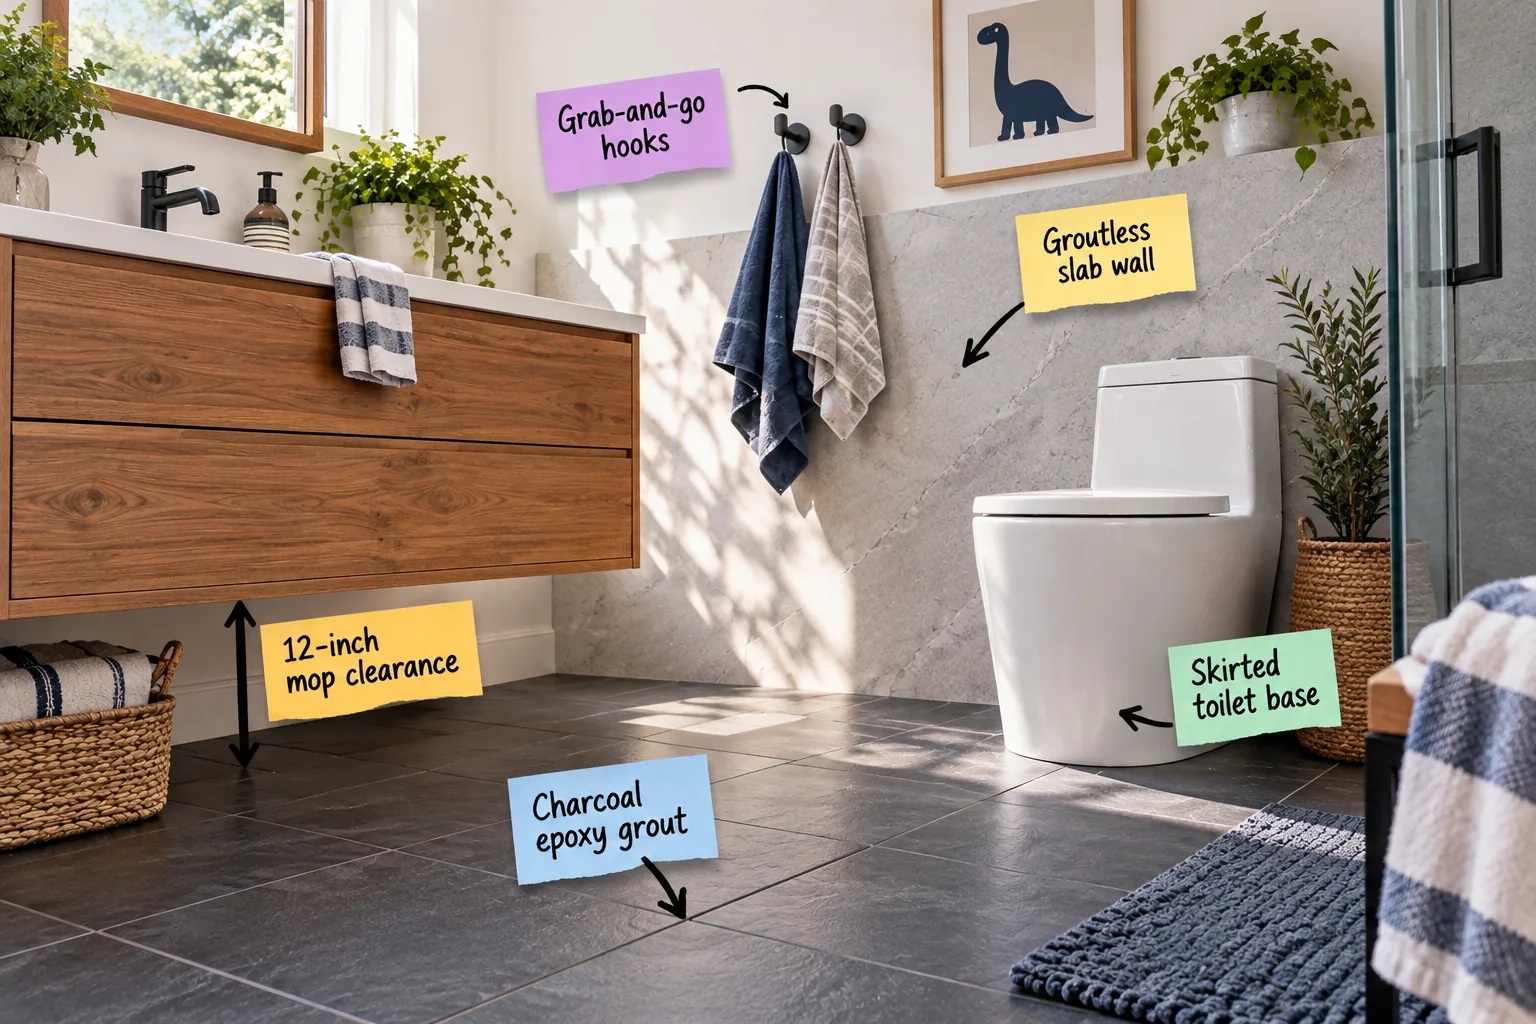
You can design a modern boys bathroom that practically cleans itself if you specify the right heavy-duty materials, measurements, and fixtures. This cheat sheet gives you the exact material specs and clearances needed to build a fully wipeable, low-maintenance space from the ground up.
Preparing the Subfloor for Heavy-Duty Tile
Before laying down any decorative finishes, you must establish a rigid foundation that prevents future grout cracking under heavy foot traffic. I always require my contractors to strengthen the bathroom subfloor to handle the immense weight of large-format stone and continuous slab walls.
- Install a high-density cement backer board over the existing plywood.
- Apply a waterproof isolation membrane to absorb structural movement.
- Level the entire surface with a self-leveling underlayment compound.
Securing this structural layer ensures your waterproof barriers remain intact and your grout lines never split over time.
Locking Down the Floor with Charcoal Epoxy Grout
Traditional cement grout acts like a sponge in a boys bathroom, absorbing uric acid and locking in permanent odors. Specify a 100% solids epoxy grout in a dark charcoal tone to create a completely waterproof and stain-proof barrier between your tiles.
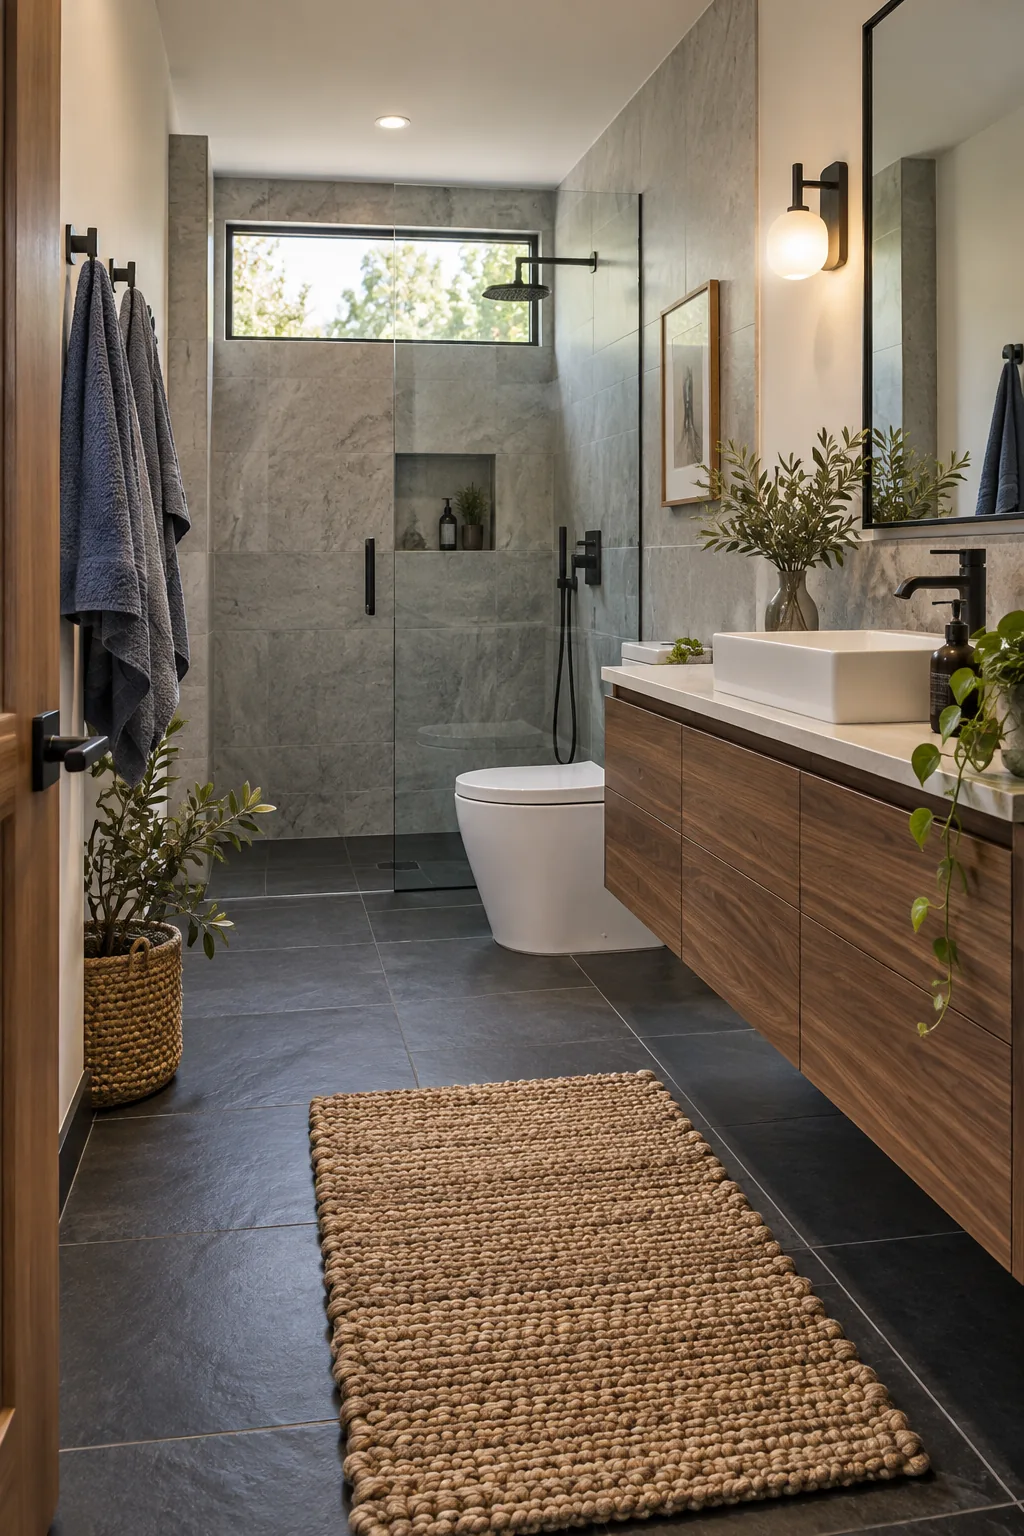
Getting the grout right from day one prevents years of scrubbing and odor buildup.
Sizing the Floor Tile to Minimize Seams
Even with epoxy grout, fewer seams mean fewer places for bacteria to hide. Choose large-format dark slate tiles, such as 12×24 or 24×24 inches, to drastically reduce the grid of grout lines across the floor.
Selecting a Slip-Resistant Slate Finish
Large tiles can become dangerous slip hazards when wet boys step out of the shower. Specify a cleft or honed finish on your slate rather than polished stone, providing essential traction without creating deep crevices that trap dirt.
Applying Penetrating Sealer to Natural Stone
While your epoxy grout is bulletproof, natural slate still requires protection from hard water and soap scum. Apply a commercial-grade penetrating sealer before the bathroom is used, ensuring water beads up on the surface instead of soaking into the stone.
Transitioning from Floor to Baseboard
Water frequently pools at the edges of the room, slowly rotting standard wooden baseboards. Run your floor tile directly up the lower six inches of the wall to create a waterproof sanitary cove base that easily handles aggressive mopping.
Upgrading to a Skirted Toilet Base
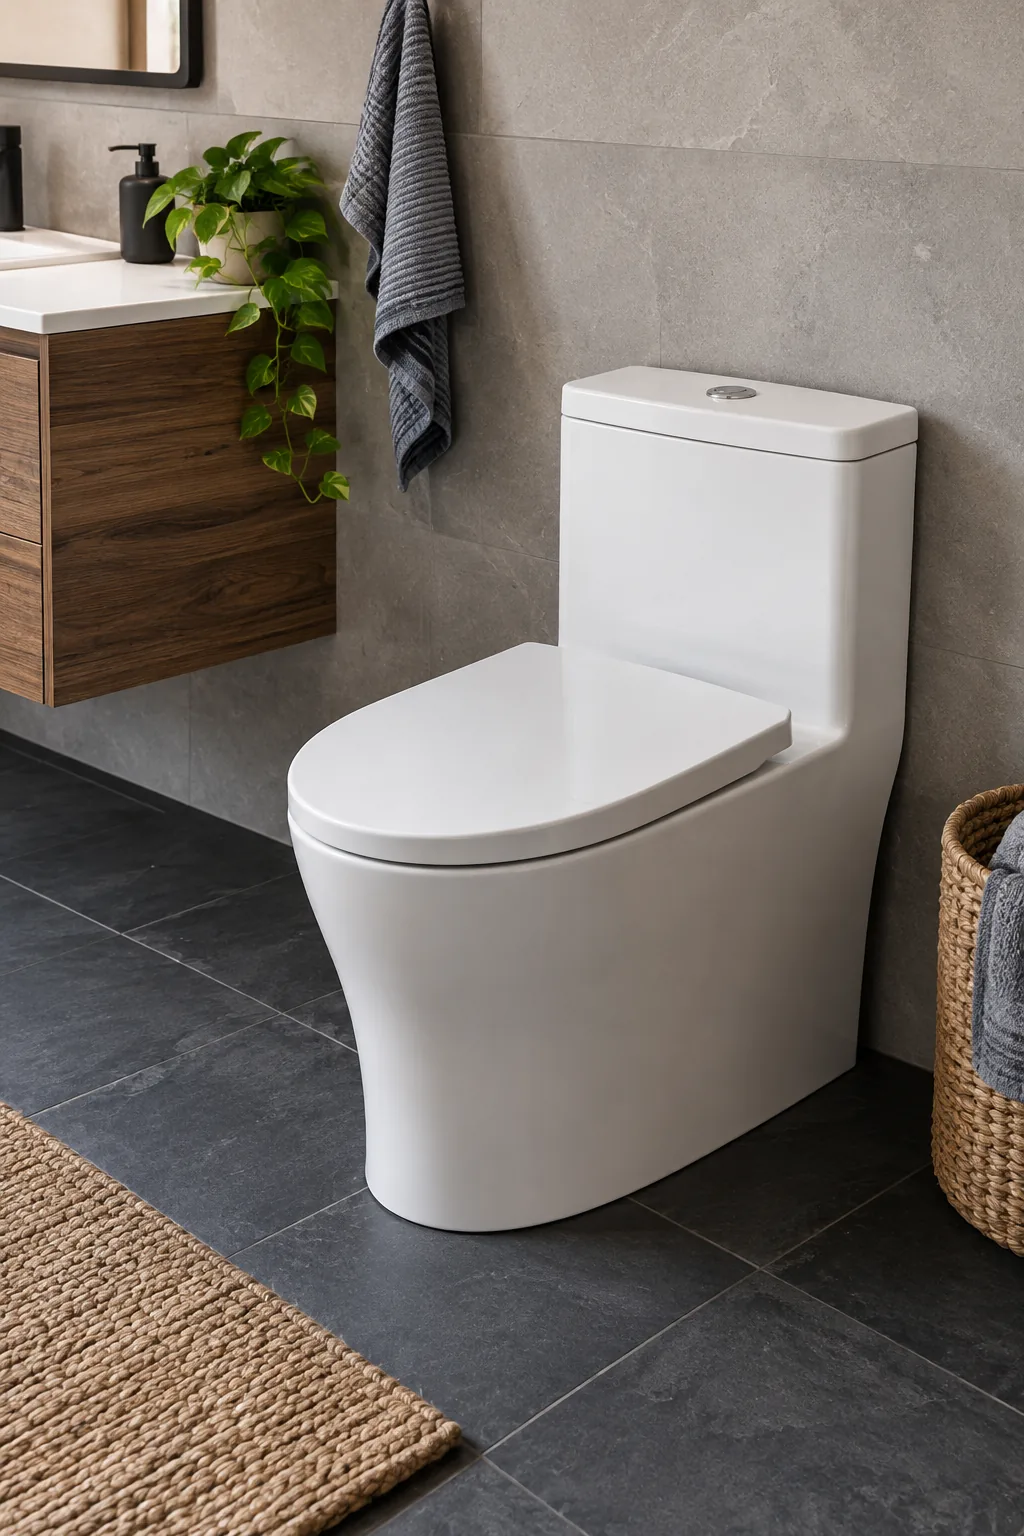
Cleaning around the exposed trapway curves of a standard toilet is a frustrating and unsanitary chore. I finally swapped the traditional fixture in my own sons’ bathroom for a skirted toilet featuring a smooth, continuous base that wipes clean in a single swipe.
Specifying a High-Velocity Flush System
A smooth exterior only solves half the maintenance equation if the internal bowl requires constant brushing. Select a toilet with a cyclone or tornado flush system, which uses powerful centrifugal water force to scrub the bowl interior completely clean with every use.
Positioning the Toilet for Maximum Clearance
Tight spaces around the toilet trap dust and make it impossible to maneuver a mop effectively. Leave a minimum of 18 inches of clearance from the toilet center to the nearest wall or vanity, far exceeding the code minimum of 15 inches.
Creating a Wipe-Clean Groutless Slab Wall
The wall directly behind the toilet takes the most daily abuse and splash damage. After seeing too many ruined drywall bases in client projects, I always run a continuous quartz or porcelain slab up the wall as wainscoting to eliminate wall grout entirely.
Extending the Slab Wainscoting to 48 Inches
Stopping your wall protection too low leaves the upper drywall vulnerable to errant splashes and wet hands. Extend your continuous slab to a height of 48 inches above the finished floor to create an impenetrable shield across the primary splash zone.
Capping the Slab with a Slanted Edge
Flat ledges at the top of wainscoting inevitably become dusty catch-alls for empty toothpaste tubes and discarded cups. Finish the top edge of your slab wall with a slight downward bevel so water runs off and clutter cannot accumulate.
Choosing Moisture-Resistant Paint for Upper Walls
The drywall above your slab wainscoting still faces daily humidity from hot showers. Coat the upper walls and ceiling with an acrylic mold-inhibiting bathroom paint designed to repel condensation and withstand occasional wiping without losing its finish.
Floating the Vanity for 12-Inch Mop Clearance
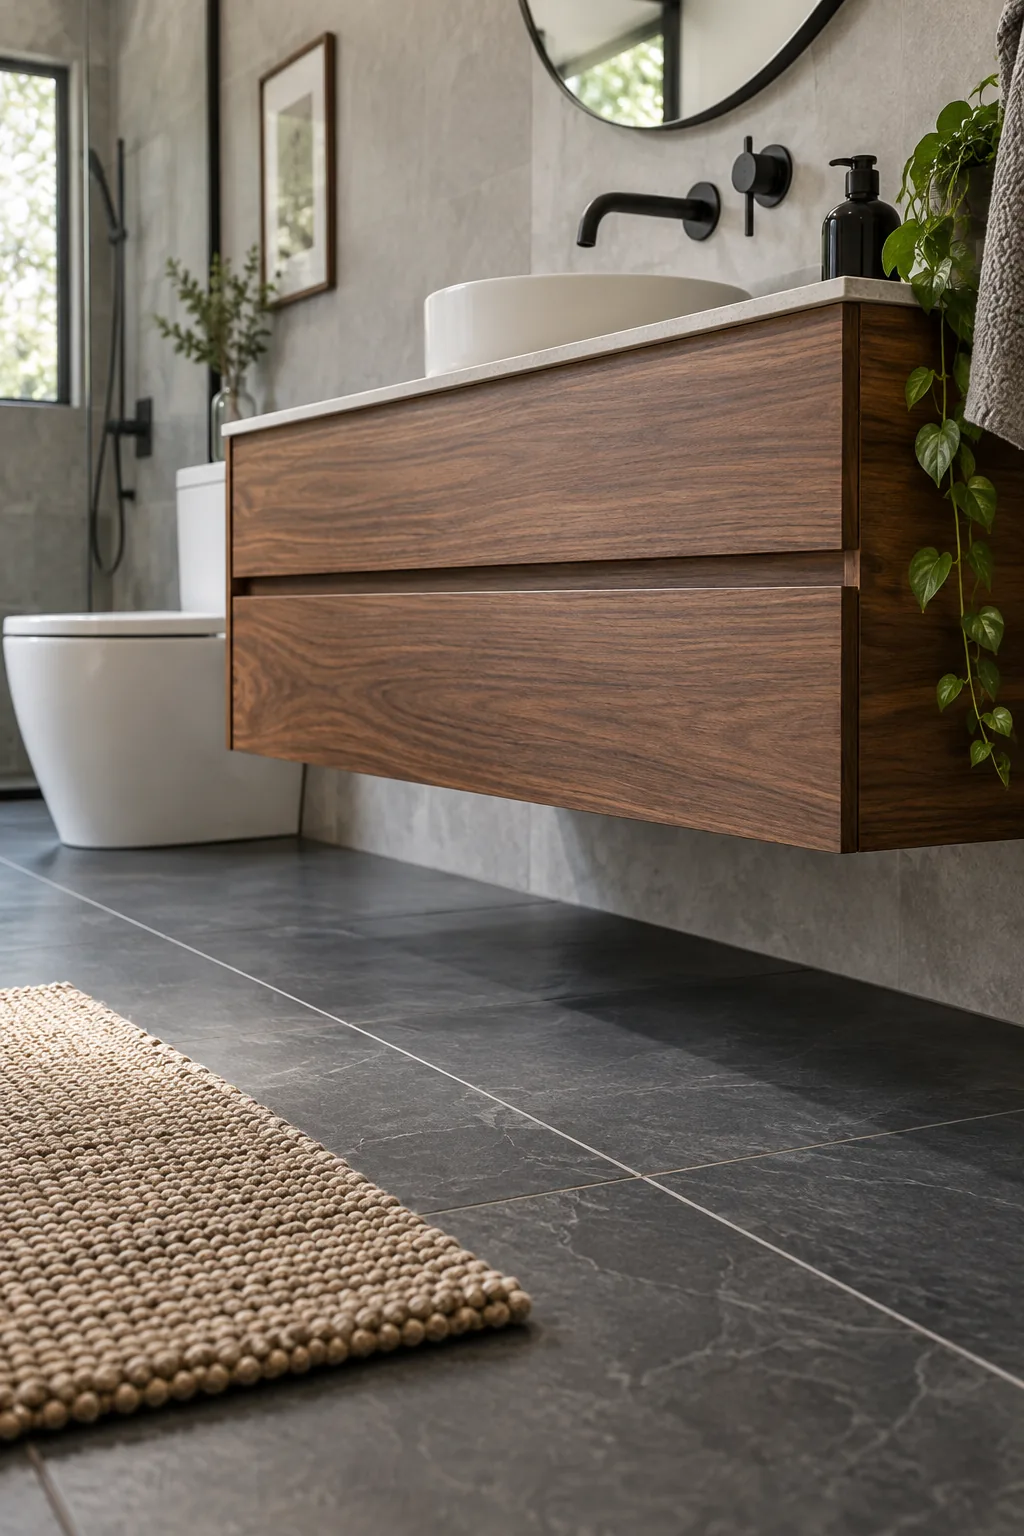
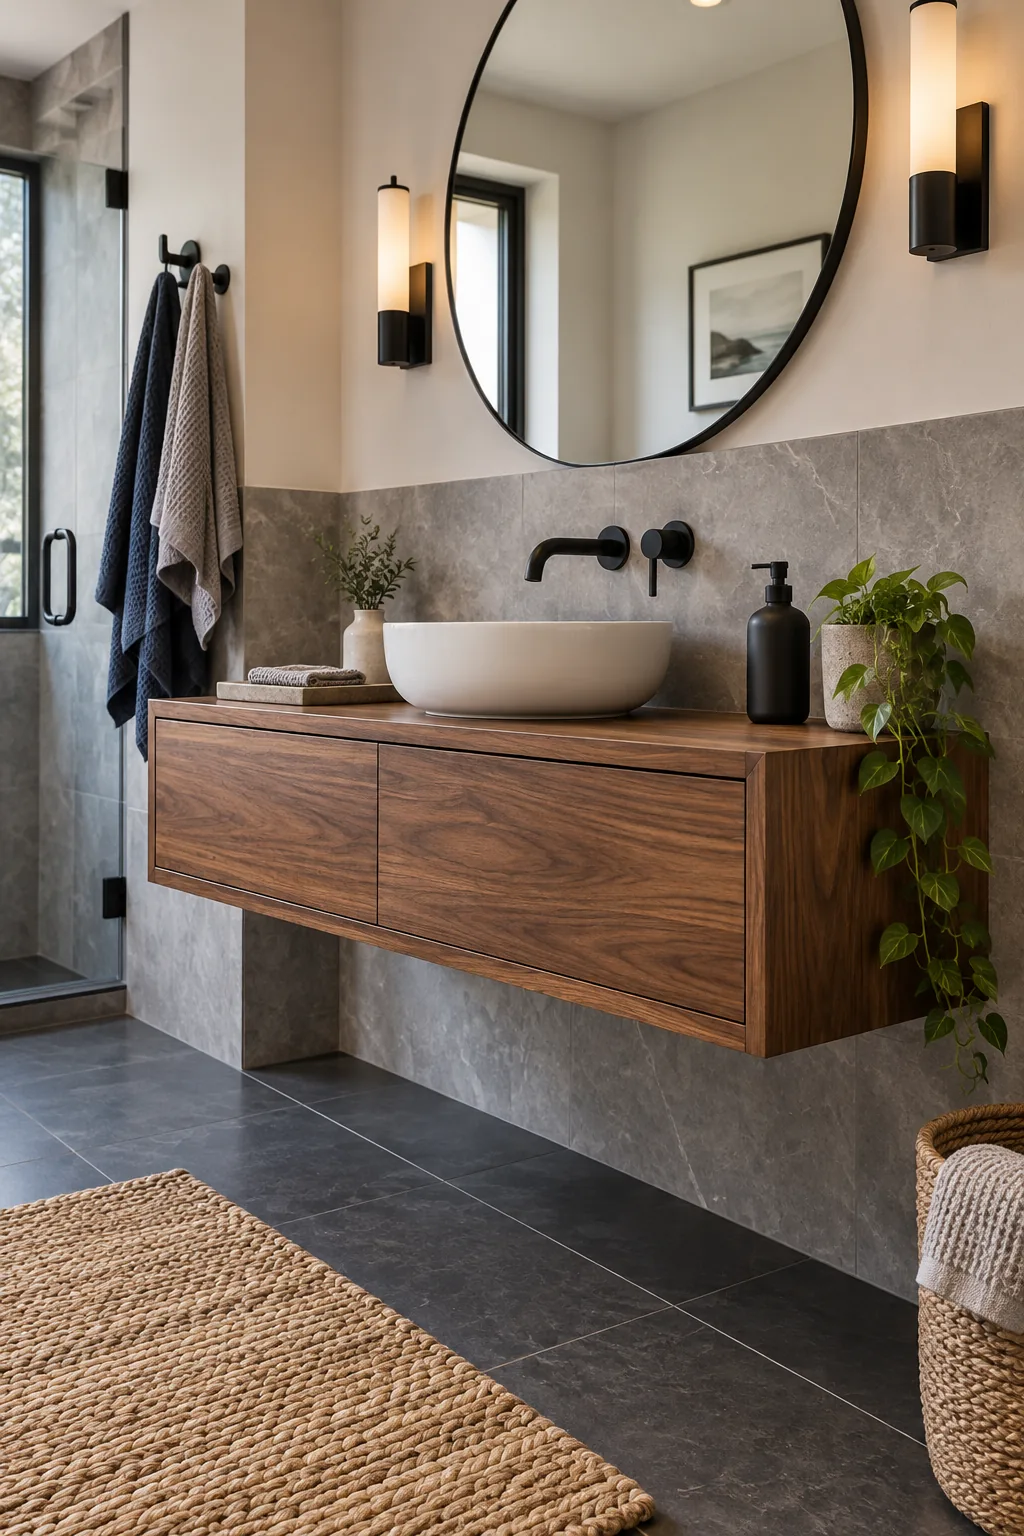
Floor-mounted vanities create tight corners that trap dust and risk water damage along the baseboards. Mount a floating wood vanity with exactly 12 inches of open clearance underneath so a standard mop or robot vacuum can pass freely across the slate.
Securing the Vanity to Wall Studs
A floating cabinet must support the weight of heavy stone countertops and leaning boys without sagging. Install heavy-duty steel support brackets directly into the wall studs before closing the drywall, ensuring the vanity remains perfectly level for decades.
Selecting a Solid Surface Countertop
Grout lines on a bathroom counter inevitably trap toothpaste and soap residue. Top your floating vanity with a seamless solid surface material like engineered quartz, which resists staining from mouthwash and requires zero annual sealing.
Integrating an Undermount Sink for Easy Wiping
Drop-in sinks feature a raised lip that catches water and breeds mold around the silicone seal. Specify a ceramic undermount sink so you can sweep water and debris directly from the countertop into the basin in one fluid motion.
Standardizing Clearances Across the Bathroom
Consistency in your spatial planning prevents awkward bottlenecks and makes the entire room easier to navigate and clean. I use a strict set of minimum dimensions to guarantee every zone remains accessible for heavy-duty maintenance tools.
| Fixture Zone | Minimum Clearance |
|---|---|
| Under Floating Vanity | 12 inches vertical |
| Toilet Center to Wall | 18 inches lateral |
| Front of Toilet | 30 inches open space |
| Towel Hook Height | 48 inches from floor |
Locking in these measurements before plumbing begins saves you from costly layout changes and ensures your robot vacuum never gets stuck.
Sealing the Vanity Cabinet Interior
Wet toothbrushes and leaking soap bottles quickly destroy the melamine interiors of standard bathroom cabinets. Line the bottom of every drawer and cabinet shelf with a ribbed waterproof mat to catch drips and protect the structural wood underneath.
Choosing Matte Black Hardware for Smudge Resistance
Polished chrome shows every water spot, but choosing matte black hardware encourages better habits while hiding daily smudges. I’ve learned from my own boys that a single-point hanging system provides a behavioral benefit, ensuring kids actually hang things up when you provide hooks instead of towel bars.
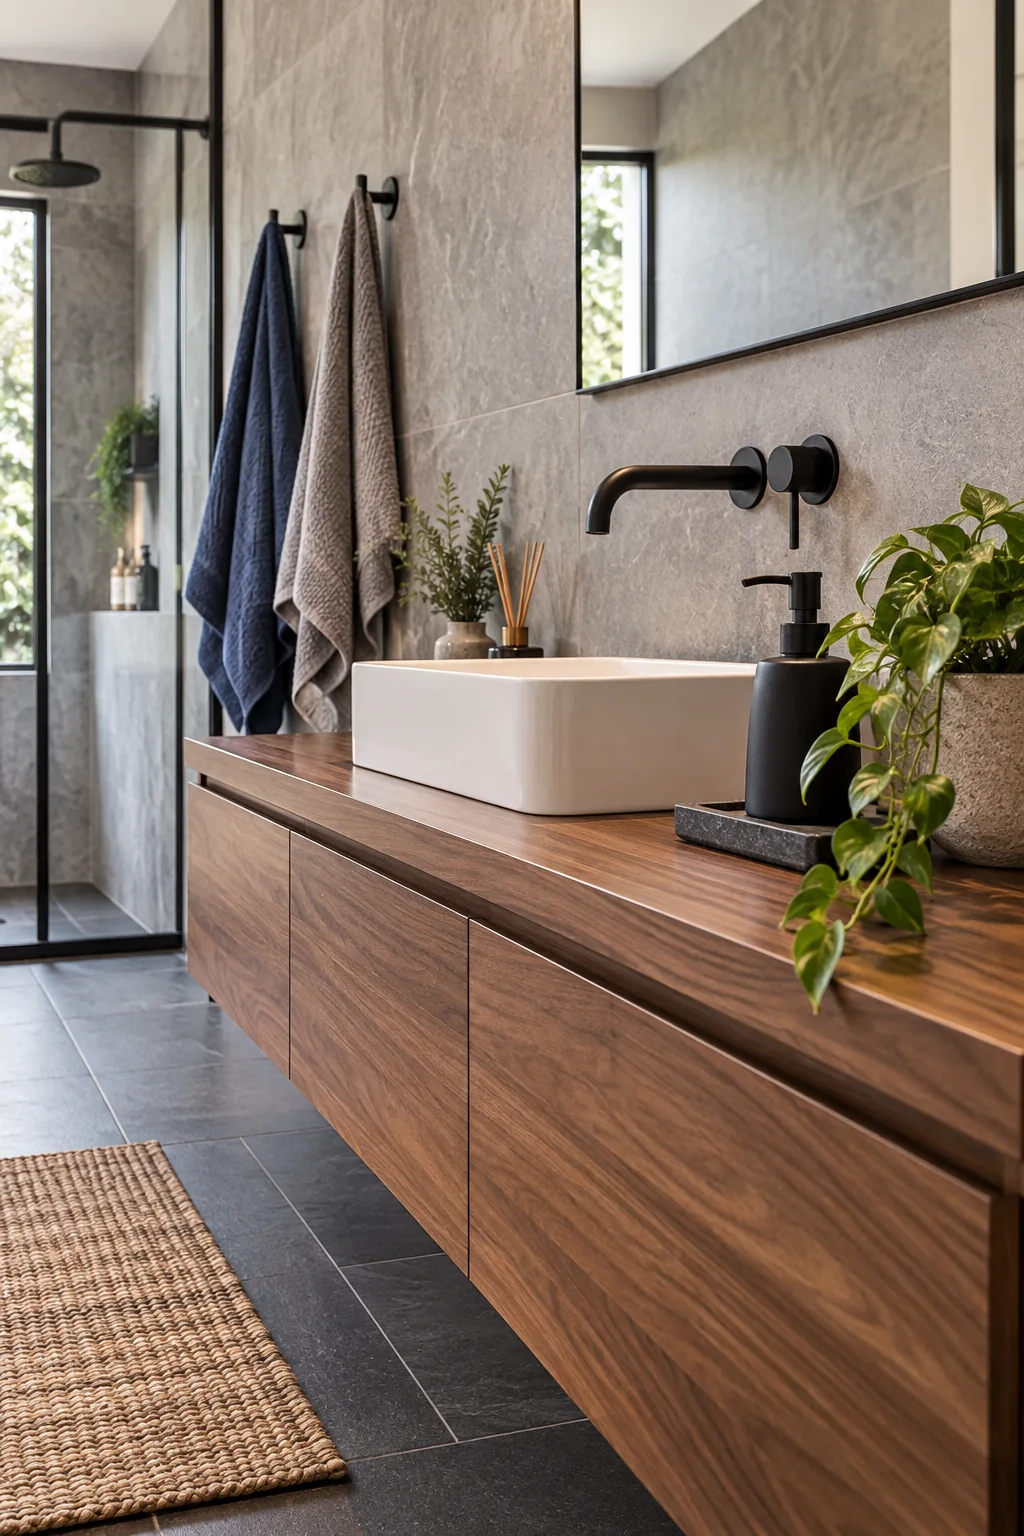
Swapping Towel Bars for Grab-and-Go Hooks
Kids rarely take the time to fold damp towels perfectly over a traditional bar. Replace them with heavy-duty matte black hooks mounted 48 inches from the floor, making it effortless for boys to hang wet towels and keeping them off your clean floor.
Spacing the Wall Hooks for Air Circulation
Bunching wet towels too closely together prevents drying and leads to a permanent musty smell in the bathroom. Space your grab-and-go hooks exactly 12 inches apart on the wall to guarantee adequate airflow between heavy cotton bath towels.
Upgrading to a Wall-Mounted Faucet
The cramped space behind a deck-mounted faucet is notoriously difficult to keep clean and dry. Install a wall-mounted faucet directly into your slab backsplash to keep the countertop completely clear, allowing you to wipe down the vanity in seconds.
Installing a Touchless Soap Dispenser
Pump bottles leave messy soap rings on the counter and transfer germs between siblings. Mount a battery-operated touchless soap dispenser directly to the wall above the sink to eliminate another countertop obstacle and reduce sticky puddles.
Upgrading the Exhaust Fan for Moisture Control
Lingering humidity is the primary cause of peeling paint and mildew growth in a high-traffic boys bathroom. Install a high-capacity exhaust fan rated for at least 110 cubic feet per minute (CFM) to pull moisture out of the air instantly.
Automating the Ventilation System
Kids almost never remember to turn on the exhaust fan before stepping into a hot shower. Wire your high-capacity fan to a humidity-sensing wall switch that activates automatically when moisture rises, ensuring the room dries out completely every single time.
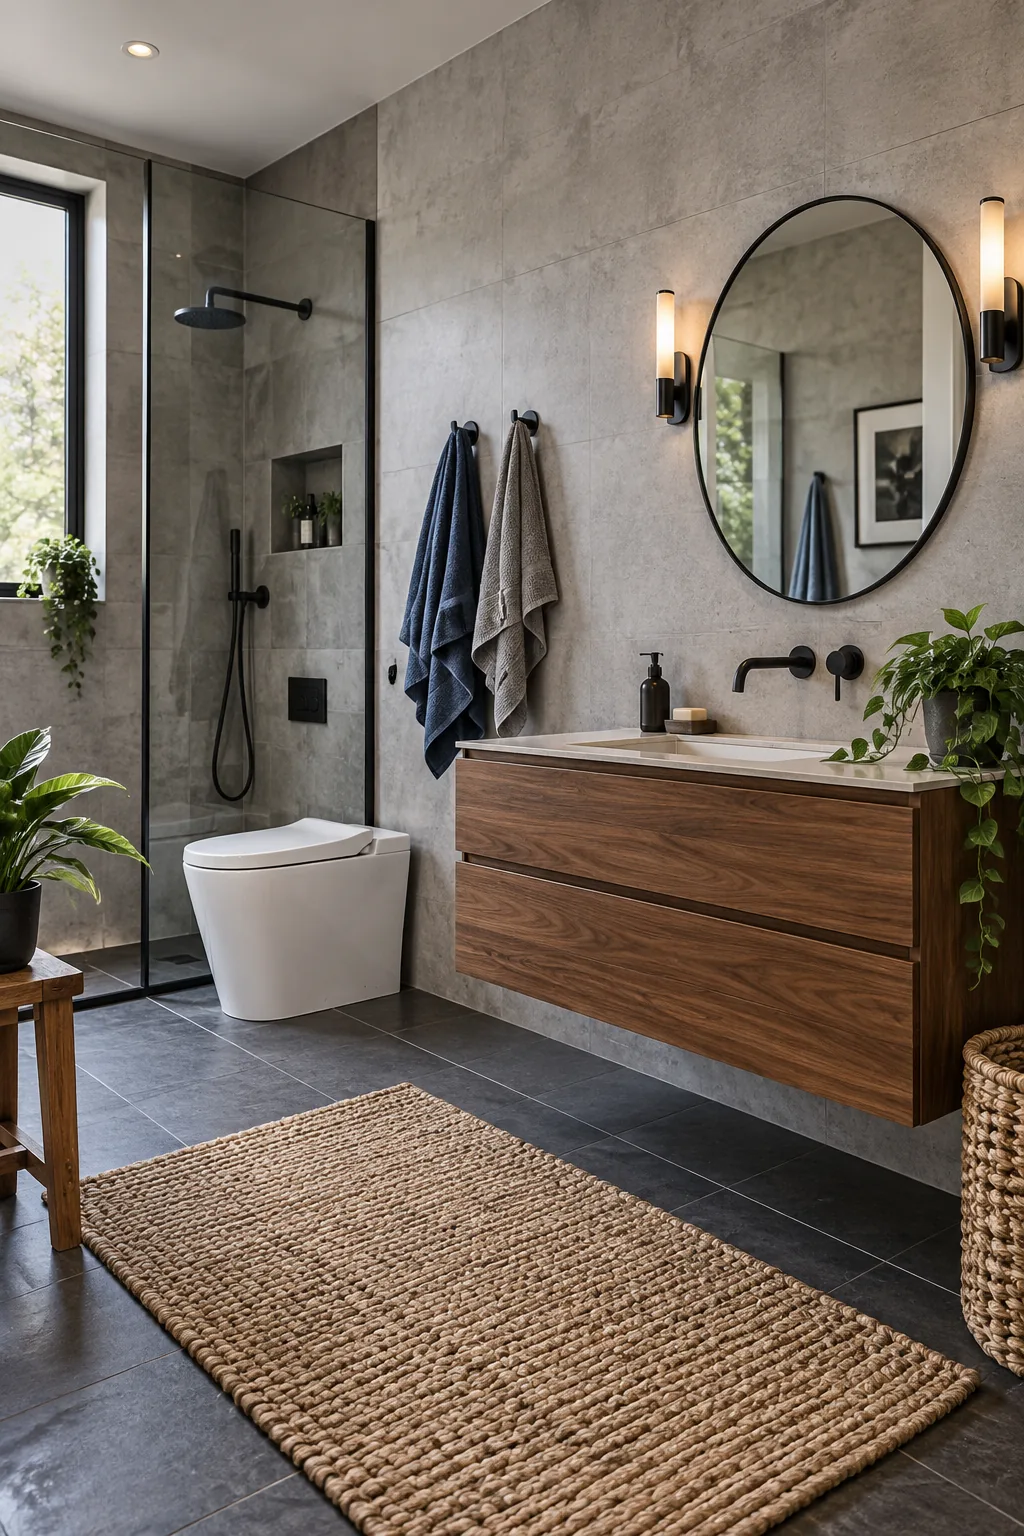
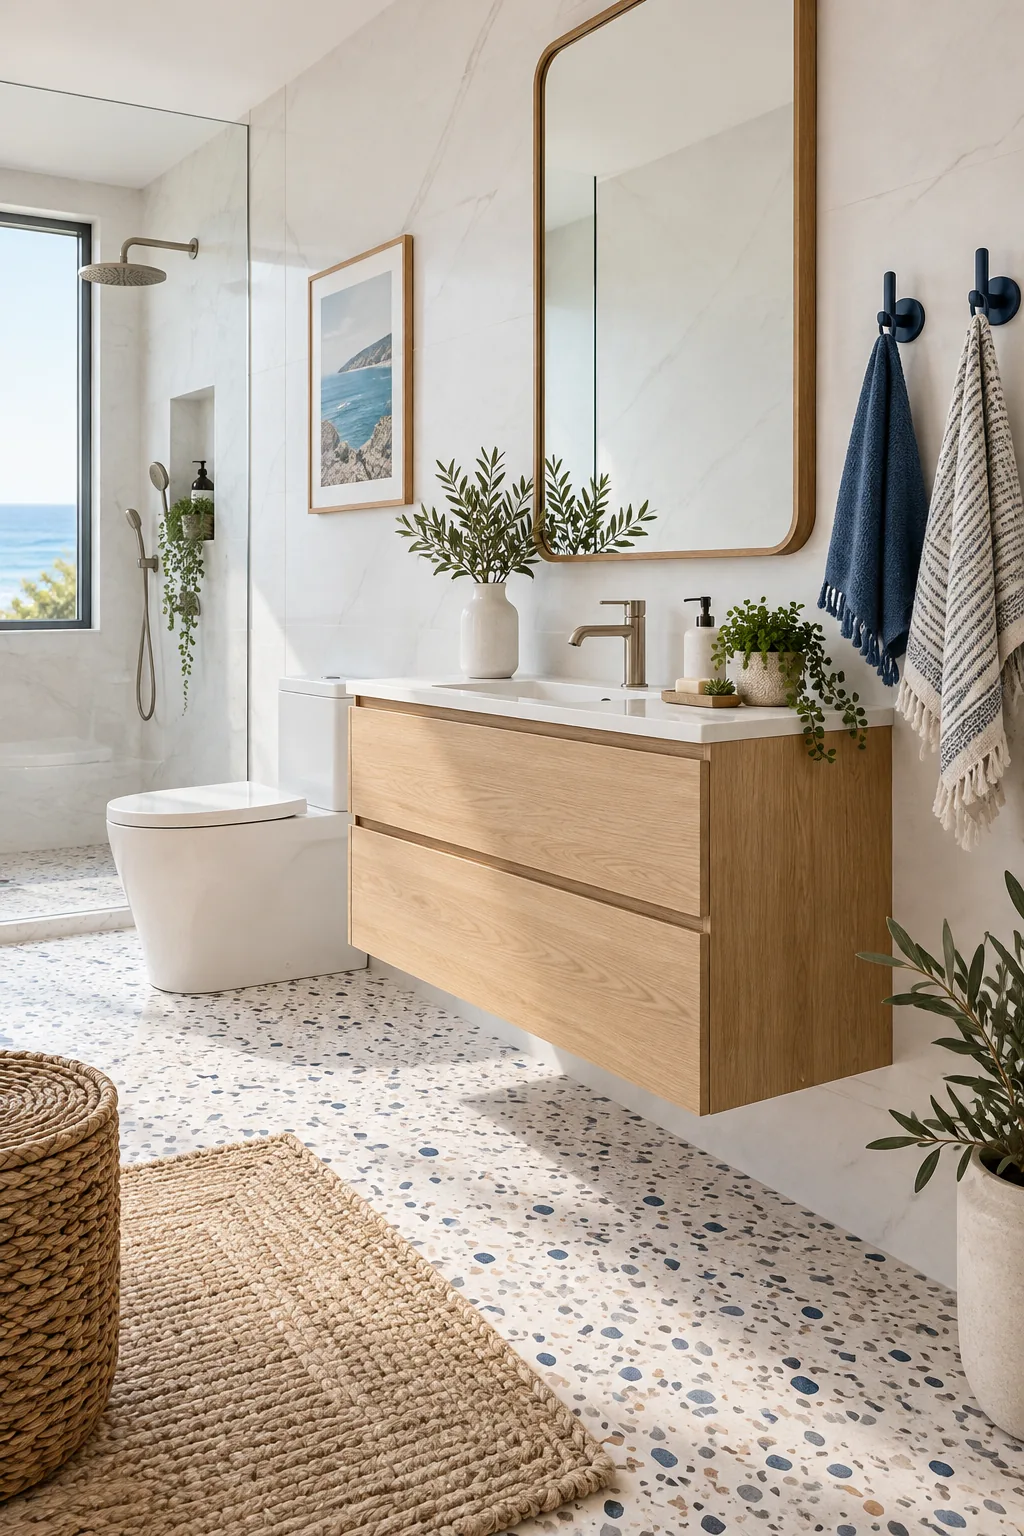
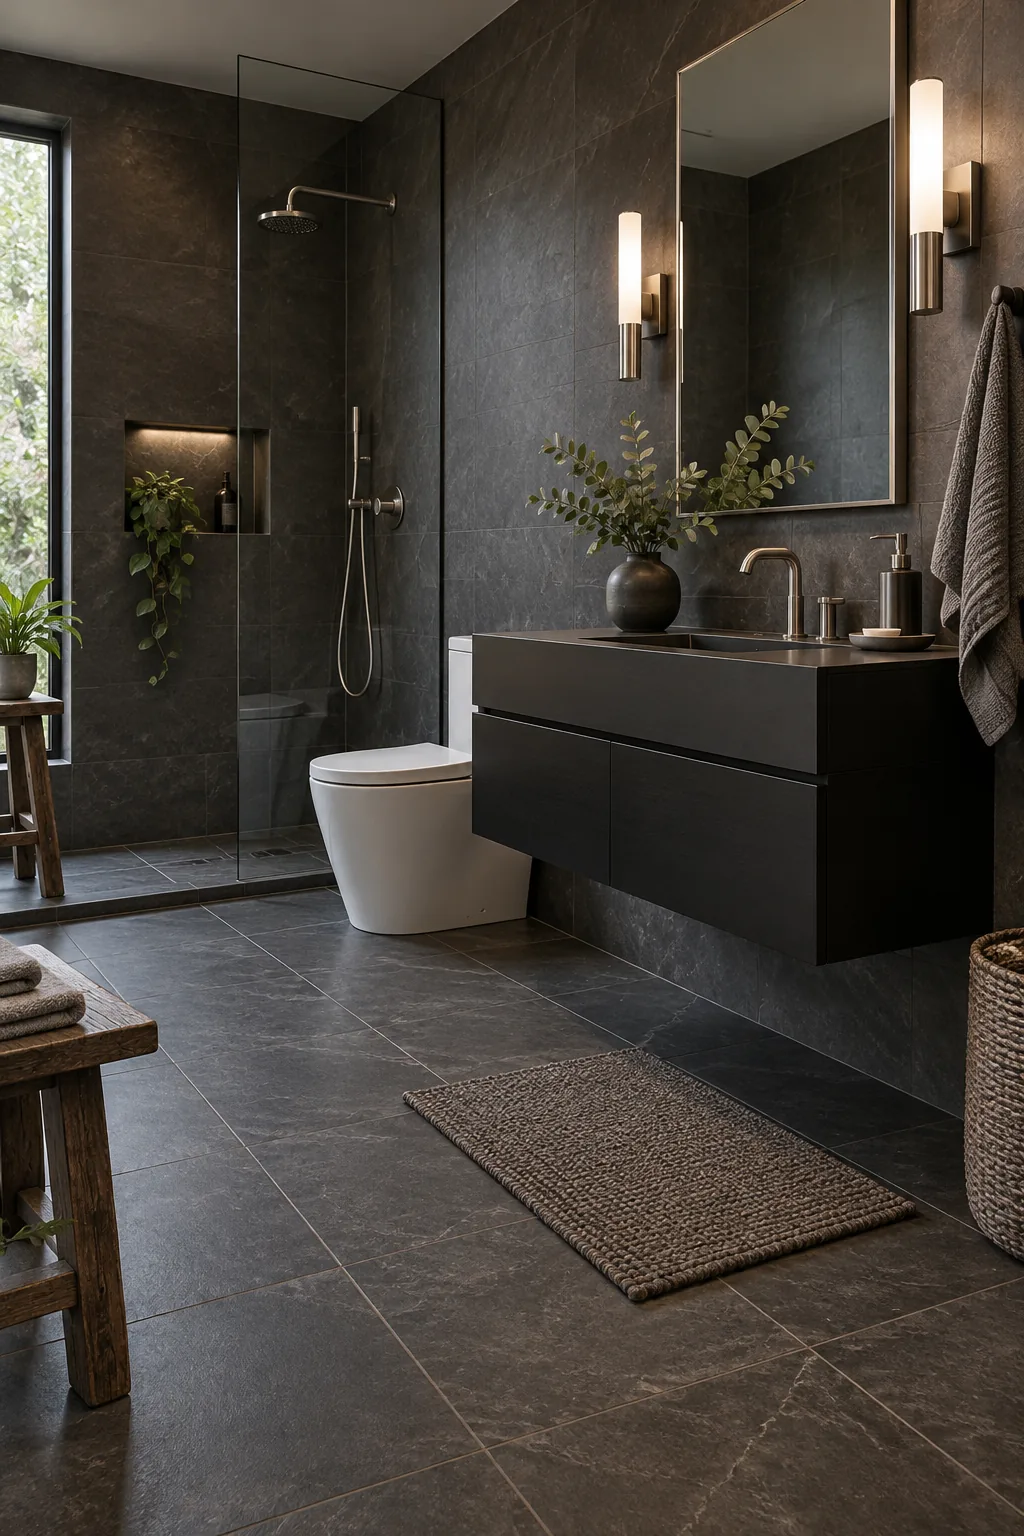
3 Ways to Style a Low-Maintenance Bathroom
Explore how these heavy-duty principles adapt to different design aesthetics.
Industrial Edge: Warm walnut cabinetry balances the cool tones of a concrete-look slab wall while maintaining a wipeable surface.
Coastal Bright: A busy terrazzo floor pattern hides daily dust perfectly, while navy blue hooks add a playful pop of color.
Modern Monochromatic: Wrapping the room in dark charcoal slate creates a moody, sophisticated space that easily conceals heavy wear.
The Heavy-Duty Material and Measurement Cheat Sheet
Combining these specific materials and clearances transforms a high-traffic boys bathroom into a low-maintenance zone. Use this consolidated list of specifications to ensure your floor, walls, and fixtures work together to resist stains and simplify your cleaning routine.
Bring these specifications to your contractor to ensure every detail supports a low-maintenance space.