
3D Christmas Classroom Door Decor: Templates & Anchor Tricks
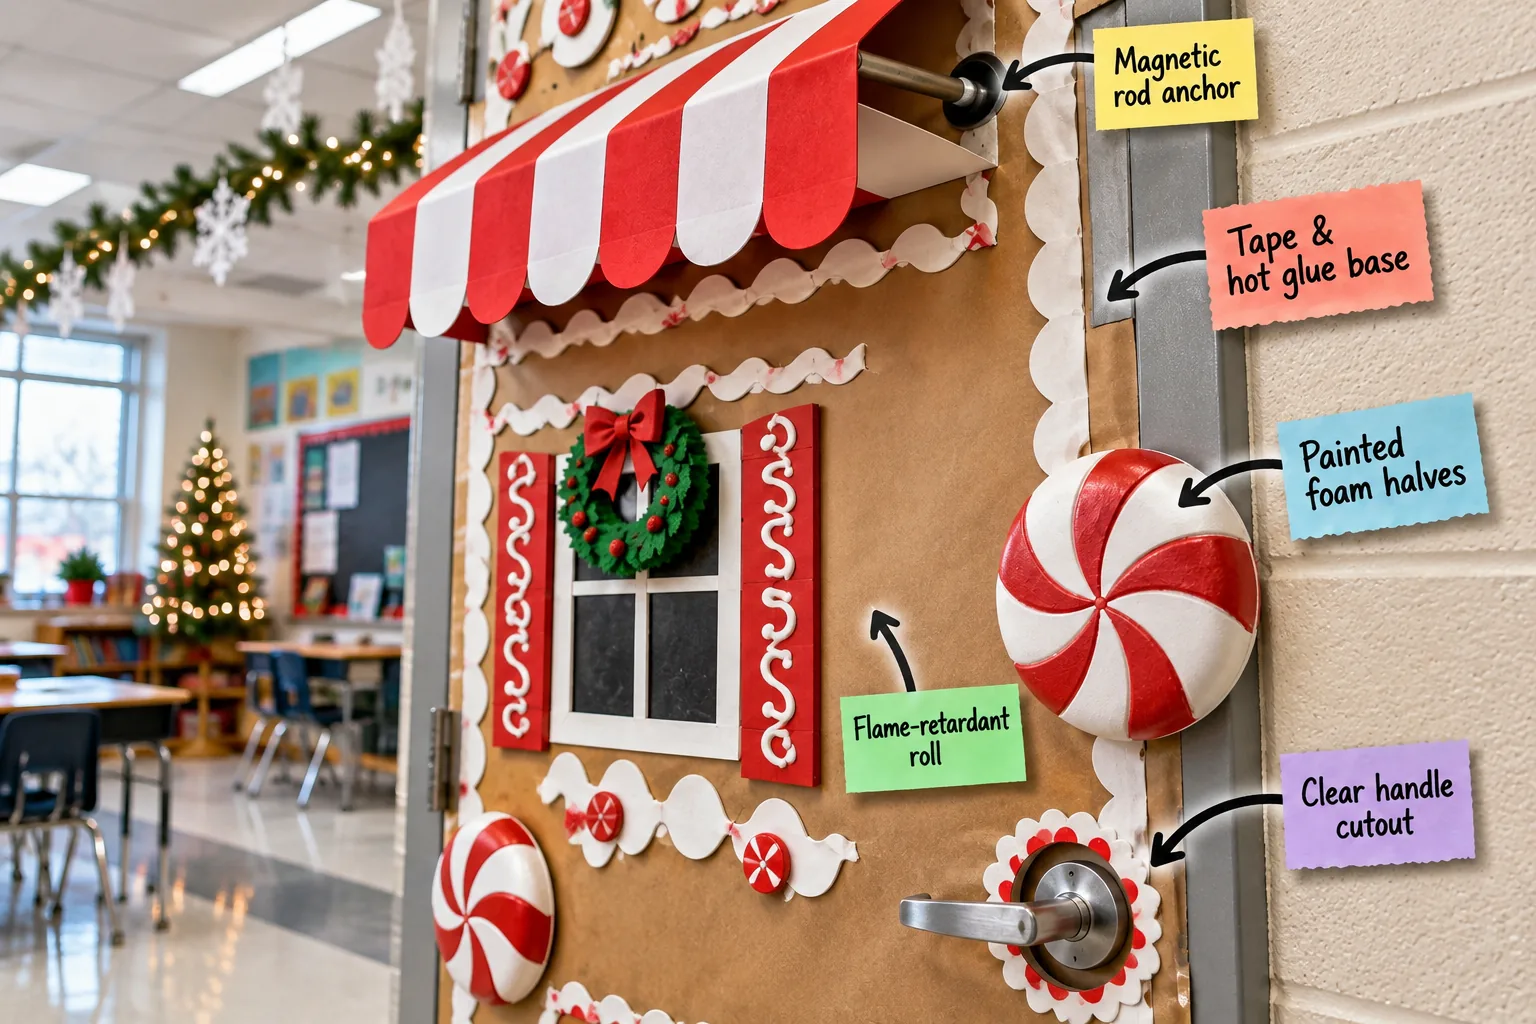
Transform your hallway by grabbing our complete structural supply list and standard school door measurement template to build a secure, code-compliant 3D gingerbread house. You will be able to measure your door correctly, gather the right structural supplies, and securely attach heavy 3D elements without damaging school property.
Structural Supply List & Door Template
Download the included measurement template tailored specifically for a standard 36×84-inch commercial school door to ensure your gingerbread house proportions fit perfectly. I learned the hard way during my first year volunteering that guessing hallway dimensions always leads to crushed cardboard and wasted effort!
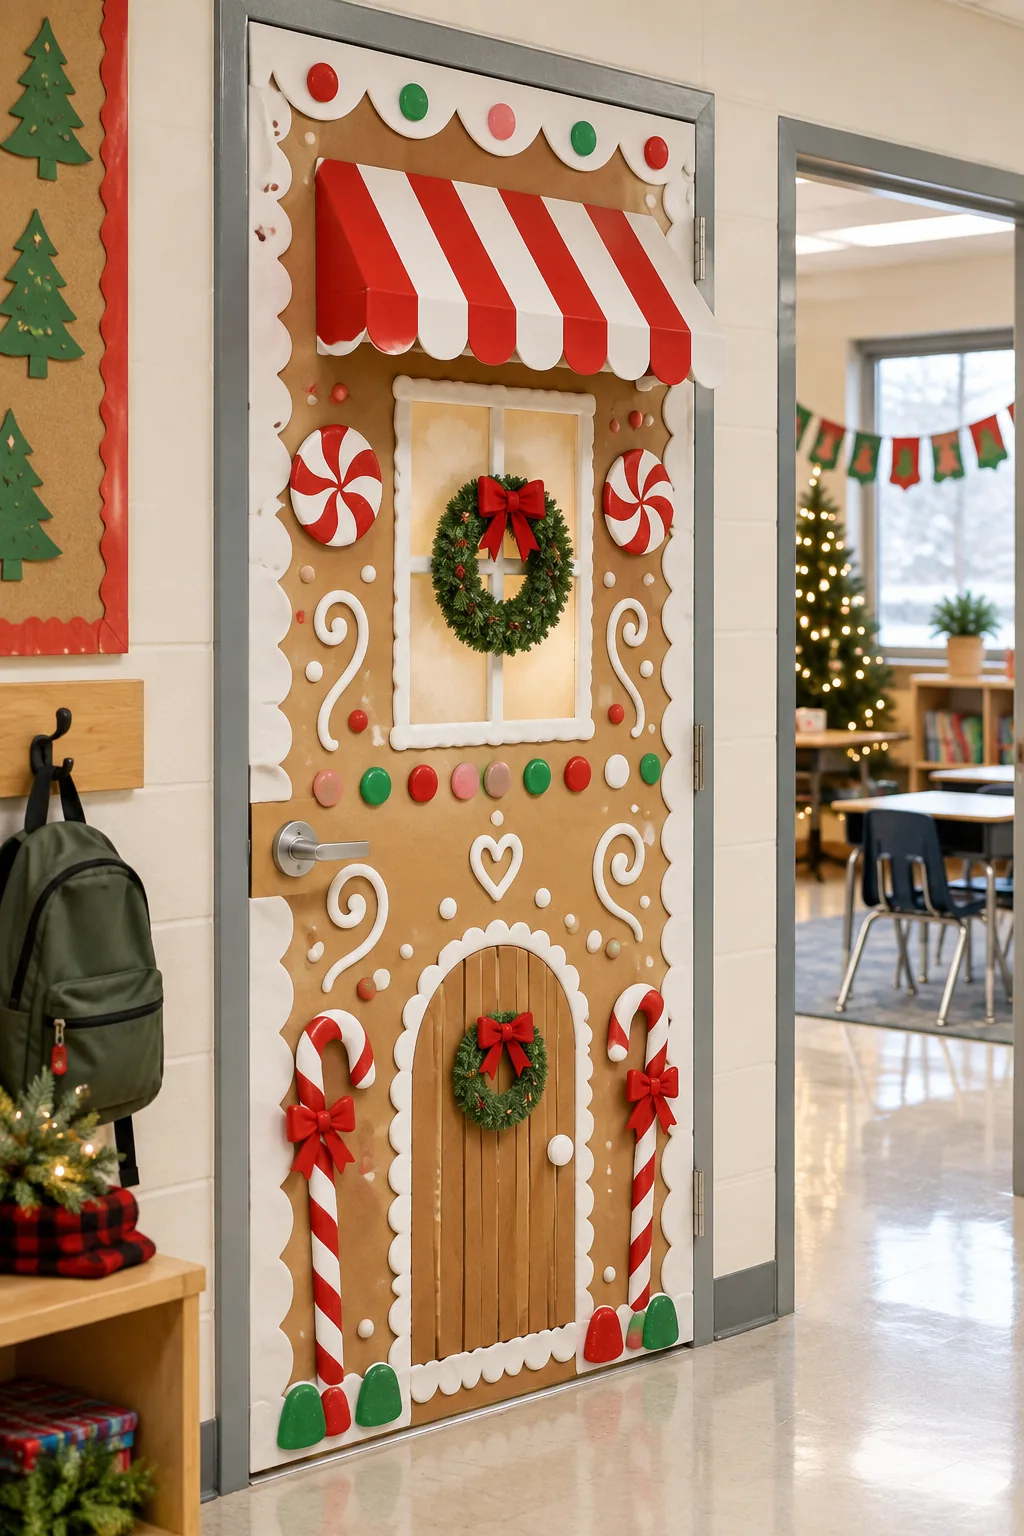
Use the printable supply list below to gather your essential structural materials, including heavy-duty magnetic rods, wide painter’s tape, and high-temp hot glue, before beginning the assembly process.
- Heavy-duty magnetic curtain rods with a minimum 20-pound weight capacity
- Wide professional painter’s tape for institutional surface protection
- High-temp hot glue sticks and an industrial-grade glue gun
- Certified flame-retardant kraft paper rolls in a natural brown finish
- 8-inch smooth craft foam spheres for creating the peppermint candies
Flame-Retardant Kraft Paper Base
Start with a foundation of certified flame-retardant kraft paper to comply with strict school fire codes and safety regulations. When I decorated my daughter’s classroom last winter, the strict fire marshal actually checked our paper’s certification stamp before letting the display stay up.
| Door Type | Width Needed | Paper Roll Size | Seams Required |
|---|---|---|---|
| Standard Classroom | 36 inches | 48 inches | Zero |
| Double Hallway | 72 inches | 48 inches | One vertical |
| Library Entrance | 42 inches | 48 inches | Zero |
| Office Suite | 36 inches | 48 inches | Zero |
Purchase a standard 48-inch wide roll to easily cover the entire 36-inch width of the standard classroom door without creating messy vertical seams that weaken the overall structure.
Verifying Fire Code Compliance
Always double-check your local school district regulations before purchasing supplies, as some municipalities require specific printed documentation for any large paper installations located in primary emergency exit routes.
Securing the Edges to the Metal Frame
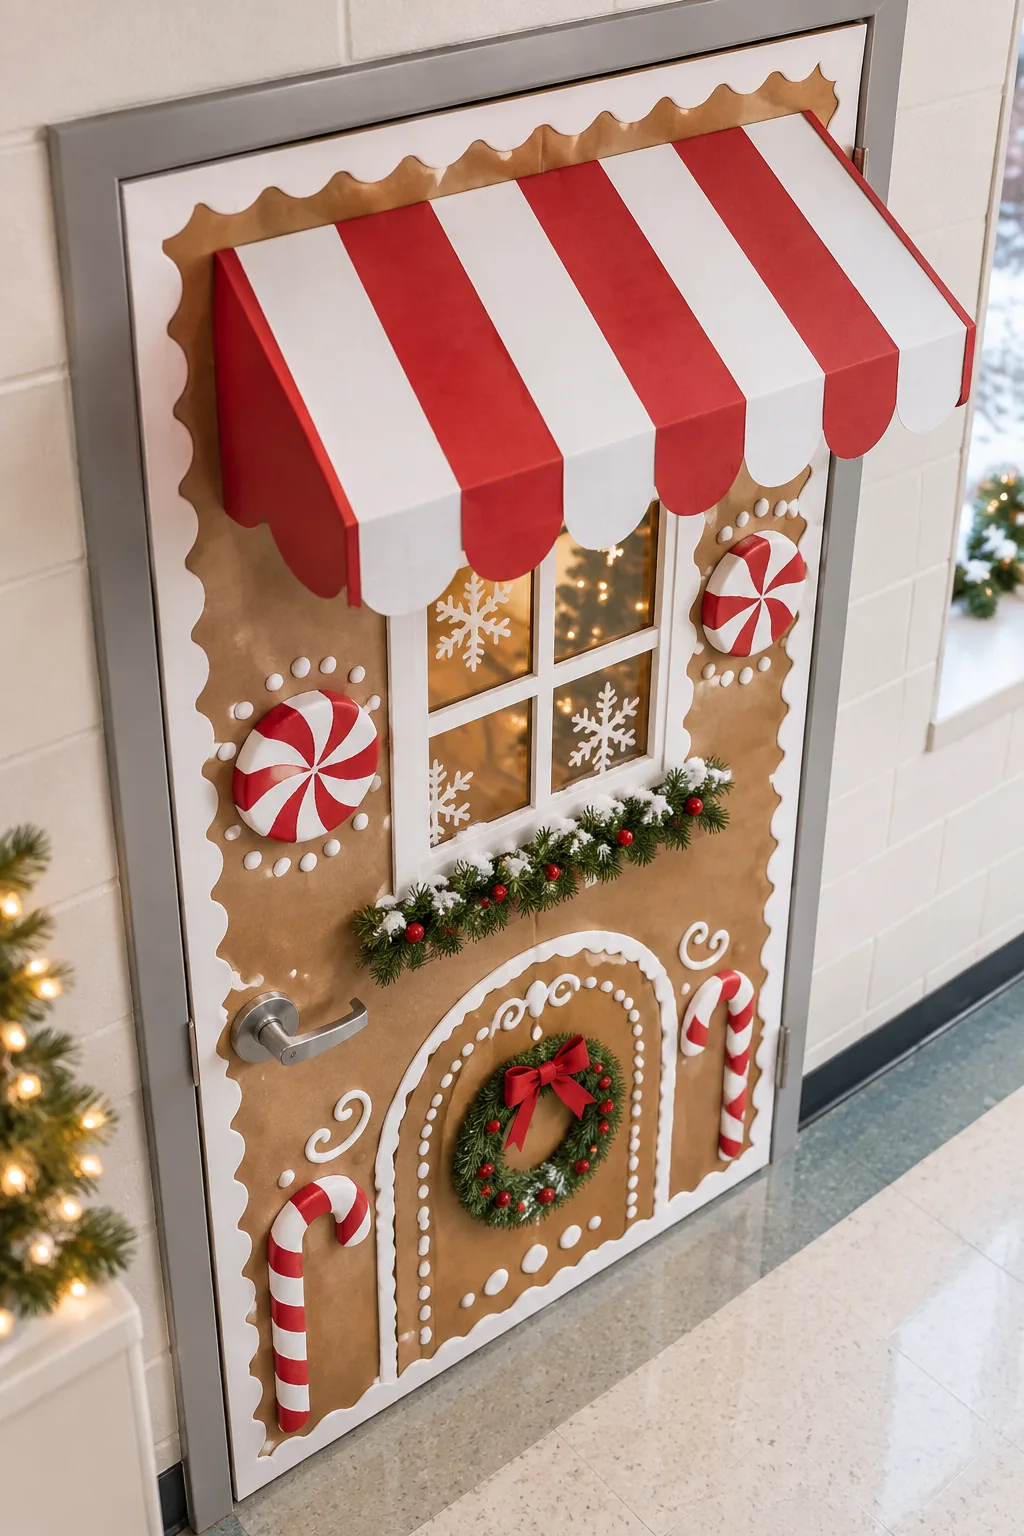
Attach the paper base using a damage-free, two-step adhesion method that effectively protects the institutional paint on the heavy steel frame from peeling or chipping during the winter.
Trust me, getting this base layer right is the absolute most critical step for a heavy 3D design; a weak foundation will inevitably cause the entire display to sag by the second week of December.
Applying the Protective Tape Border
Apply a continuous border of wide painter’s tape directly to the metal door frame, pressing firmly along the entire perimeter to eliminate any trapped air bubbles along the edges.
Adding the Hot Glue Bond
Run a thick, continuous bead of high-temp hot glue directly over the painter’s tape to secure the kraft paper firmly in place without ever letting the adhesive touch the bare metal.
Trimming the Clear Handle Cutout
Cut a remarkably neat 4-inch circular opening around the standard commercial lever handle before attaching any heavy decorations to the delicate paper background.
- Trace a precise four-inch circle centered on the door lever using a sturdy cardboard template.
- Score the kraft paper lightly with a sharp utility knife to prevent jagged tearing.
- Peel away the excess paper to expose the heavy metal latch mechanism completely.
- Smooth the freshly cut edges with a tiny dab of glue to prevent accidental fraying.
Maintaining Latch Accessibility
This dedicated clearance prevents the kraft paper from tearing during daily classroom use and ensures the heavy latch mechanism remains completely unobstructed for immediate emergency safety.
Building the Hidden Awning Anchor
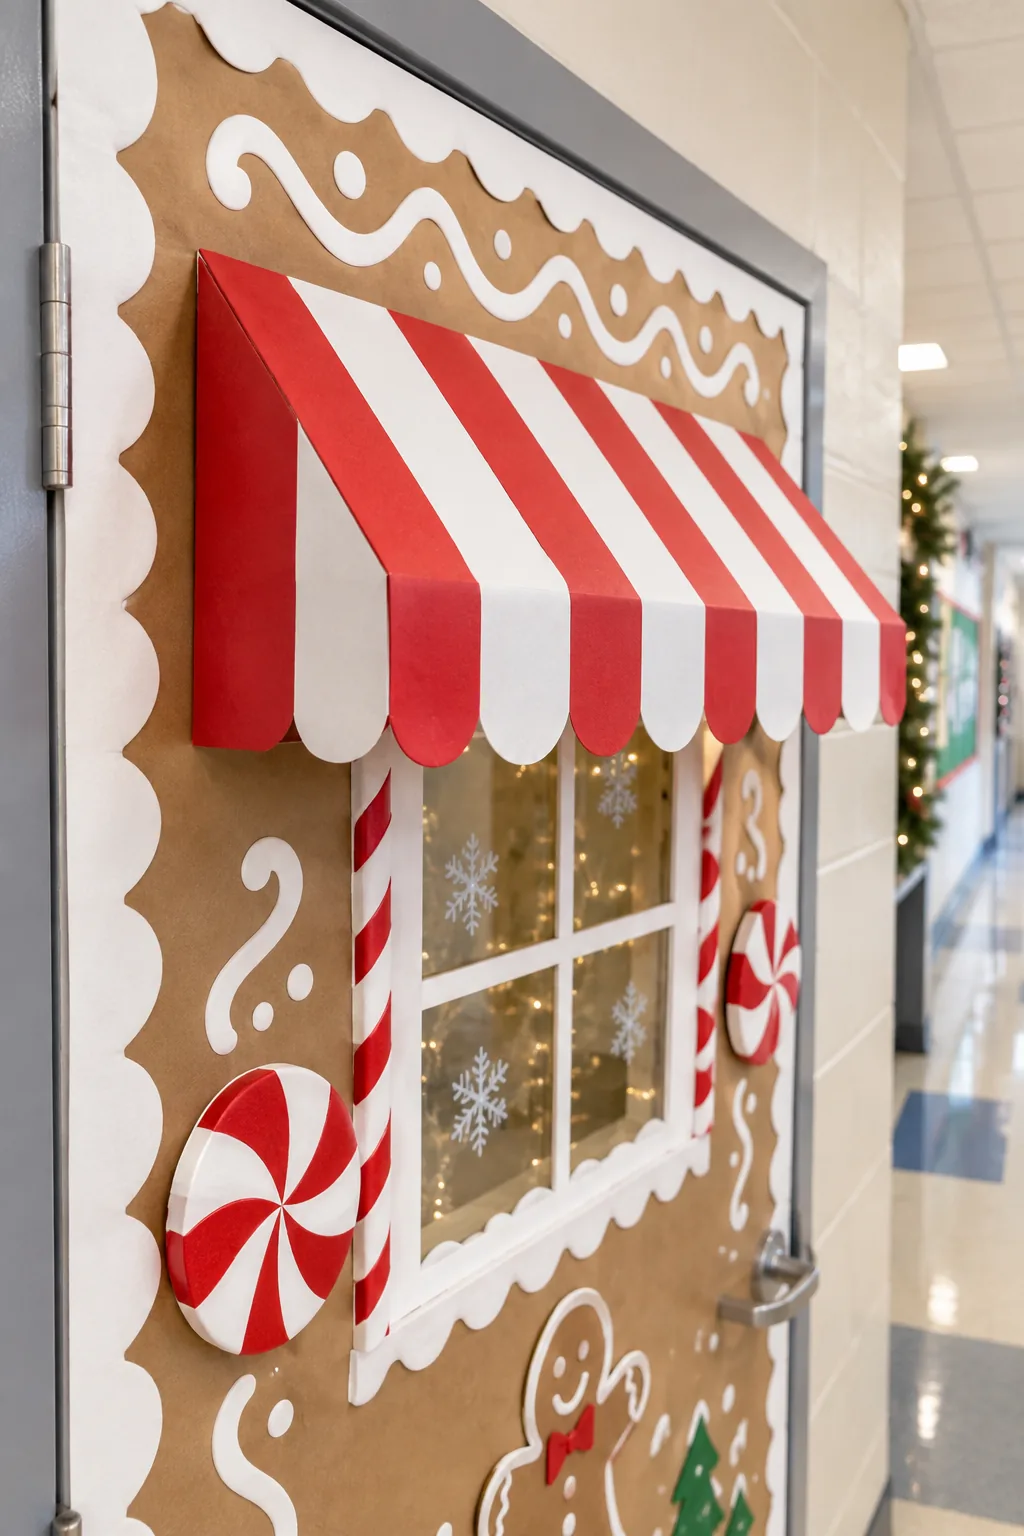
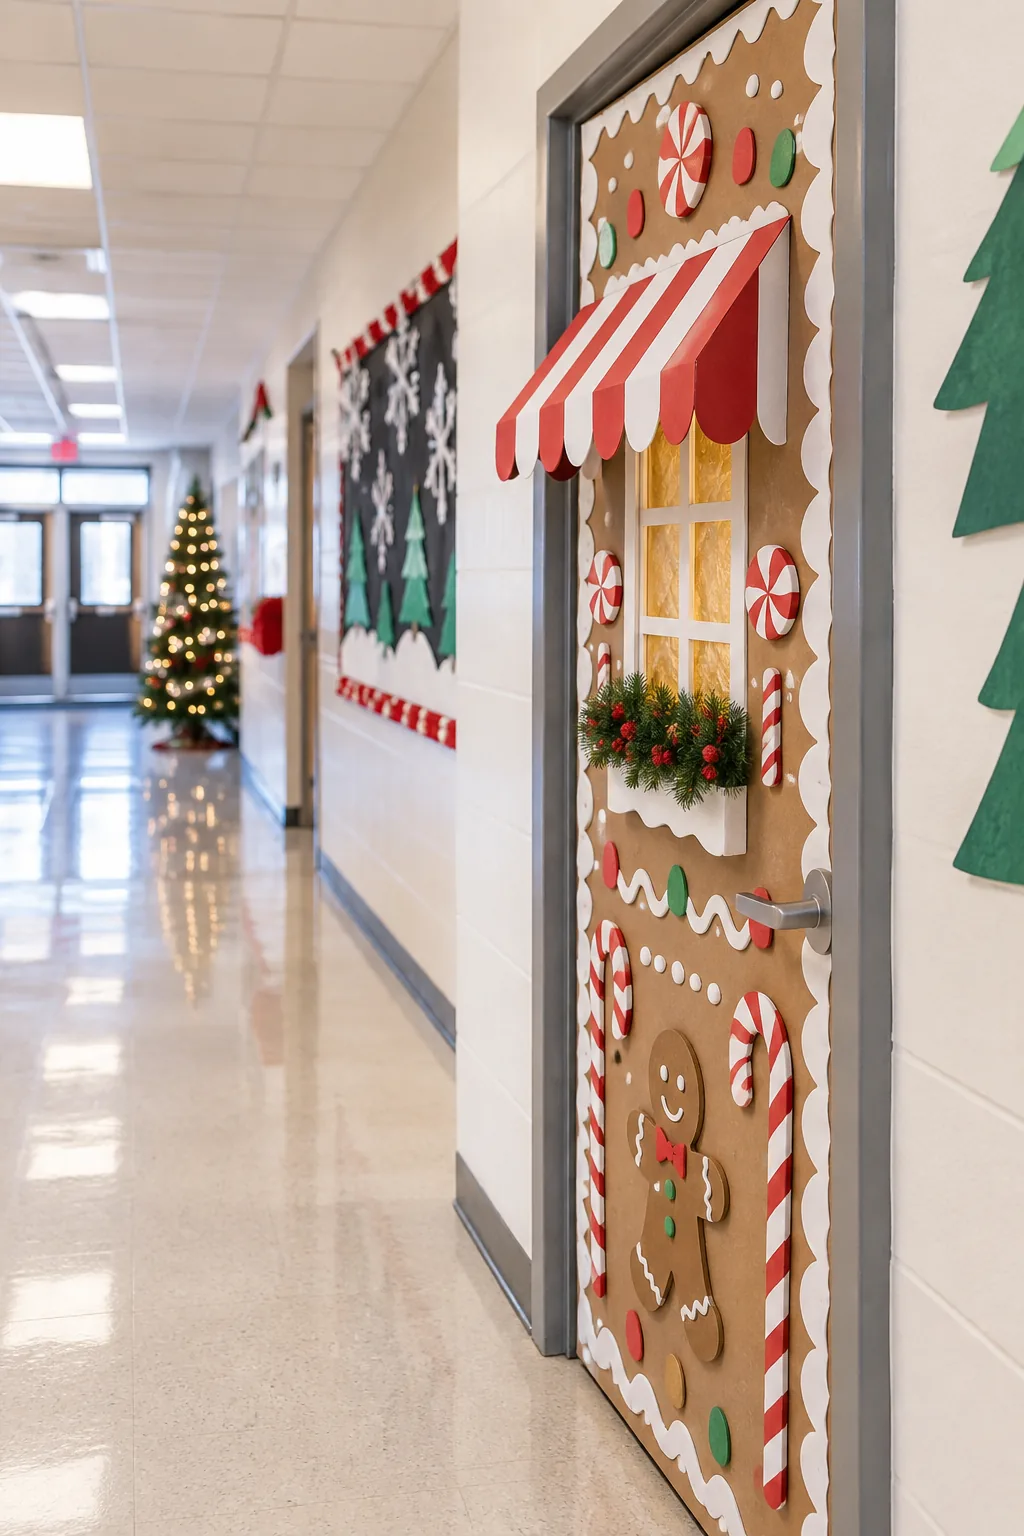
Create the dramatic 3D awning by mounting a heavy-duty magnetic curtain rod securely near the very top of the painted steel door frame.
The incredibly strong magnets grip the metal firmly through the paper base, easily supporting the rigid striped paper structure without requiring any drilling, screws, or permanent adhesive hooks.
Sizing the Magnetic Support
Extend the adjustable magnetic rod to a precise width of 34 inches, intentionally leaving a one-inch gap on either side so it absolutely does not catch on the door jamb when closing.
Folding the 3D Striped Awning
Score your heavy red and white striped poster board at exact two-inch intervals to create crisp, accordion-style folds that perfectly mimic a classic gingerbread candy shop roof.
Measuring the Awning Projection
Keep the forward projection of your striped paper awning strictly under four inches to ensure it does not dangerously encroach on the busy hallway traffic zone during chaotic daily class changes.
Securing the Awning Flaps
Fold the side flaps of the striped awning inward and secure them directly to the kraft paper base using a generous application of high-temp hot glue for crucial added structural stability.
Creating the Scalloped Roof Trim
Cut a continuous scalloped border from heavy white cardstock to serve as the snowy roofline, providing a beautifully clean visual transition between the projecting striped awning and the flat brown paper.
Attaching the Snow Accents
Layer the scalloped white trim directly over the awning edge, pressing it firmly into a fresh bead of hot glue to ensure it easily withstands the daily slamming vibrations of the door.
Crafting Lightweight Peppermint Candies
Build massive but surprisingly lightweight candy decorations by slicing 8-inch smooth craft foam spheres precisely in half using a long, sharp serrated bread knife.
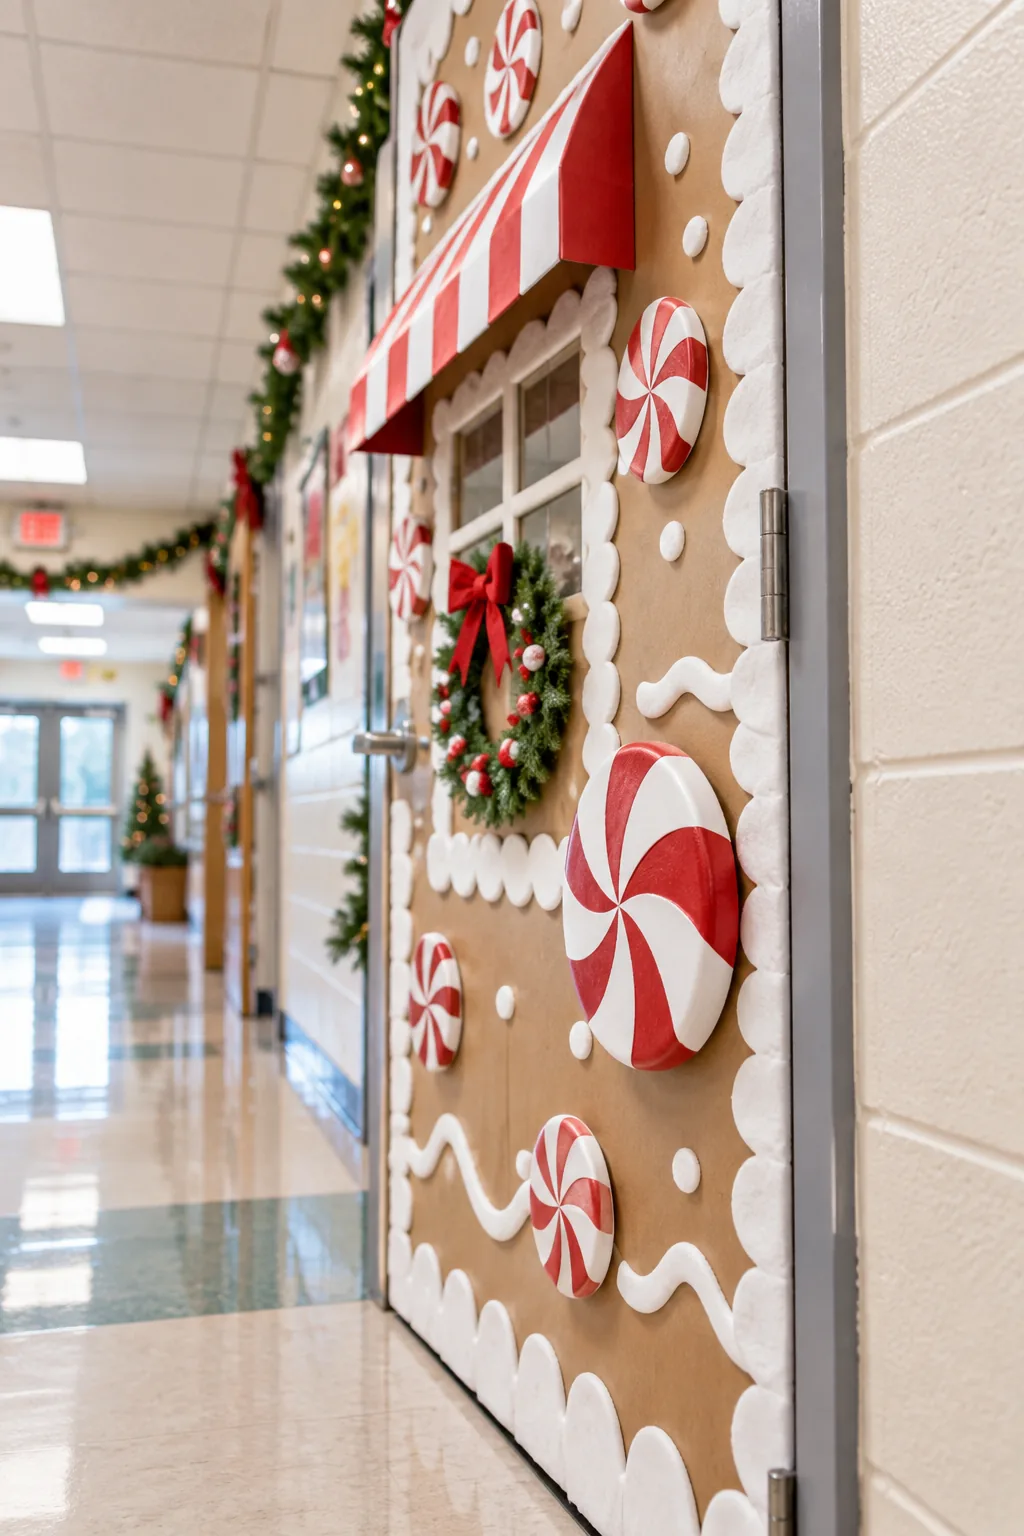
Paint the bright red peppermint swirls with standard acrylics, ensuring the vibrant colors are completely dry and cured before you attempt to mount them on the classroom door.
Mounting the 3D Candies Securely
Attach the completely flat back of each painted half-sphere directly to the kraft paper base using heavy-duty double-sided mounting tape for a flush, seamless fit against the background.
Designing the Window Shutters
Cut contrasting brown construction paper into tall, narrow rectangles to frame your faux window vision panel, perfectly mimicking classic gingerbread house wooden shutters with minimal extra weight.
Piping the Faux Frosting Details
Add highly realistic gingerbread house details using thick white dimensional fabric paint or lightweight interior spackle applied generously with a large disposable pastry bag.
Concealing the Paper Seams
Pipe these thick icing swirls directly along the window shutters, roofline, and scalloped trim pieces to hide any visible paper seams or tape edges completely from view.
Planning for January Removal
Keep the eventual takedown process in mind by ensuring your heavy-duty painter’s tape remains slightly accessible beneath the paper edges, allowing you to peel the entire foundation away cleanly next year.
Storing the Magnetic Hardware
Save your heavy-duty magnetic curtain rods in a labeled storage bin once the holidays conclude, as these robust anchors are absolutely perfect for supporting future spring or end-of-year 3D door designs.
More 3D Classroom Door Themes
Adapt these structural anchor tricks to create completely different immersive hallway experiences.
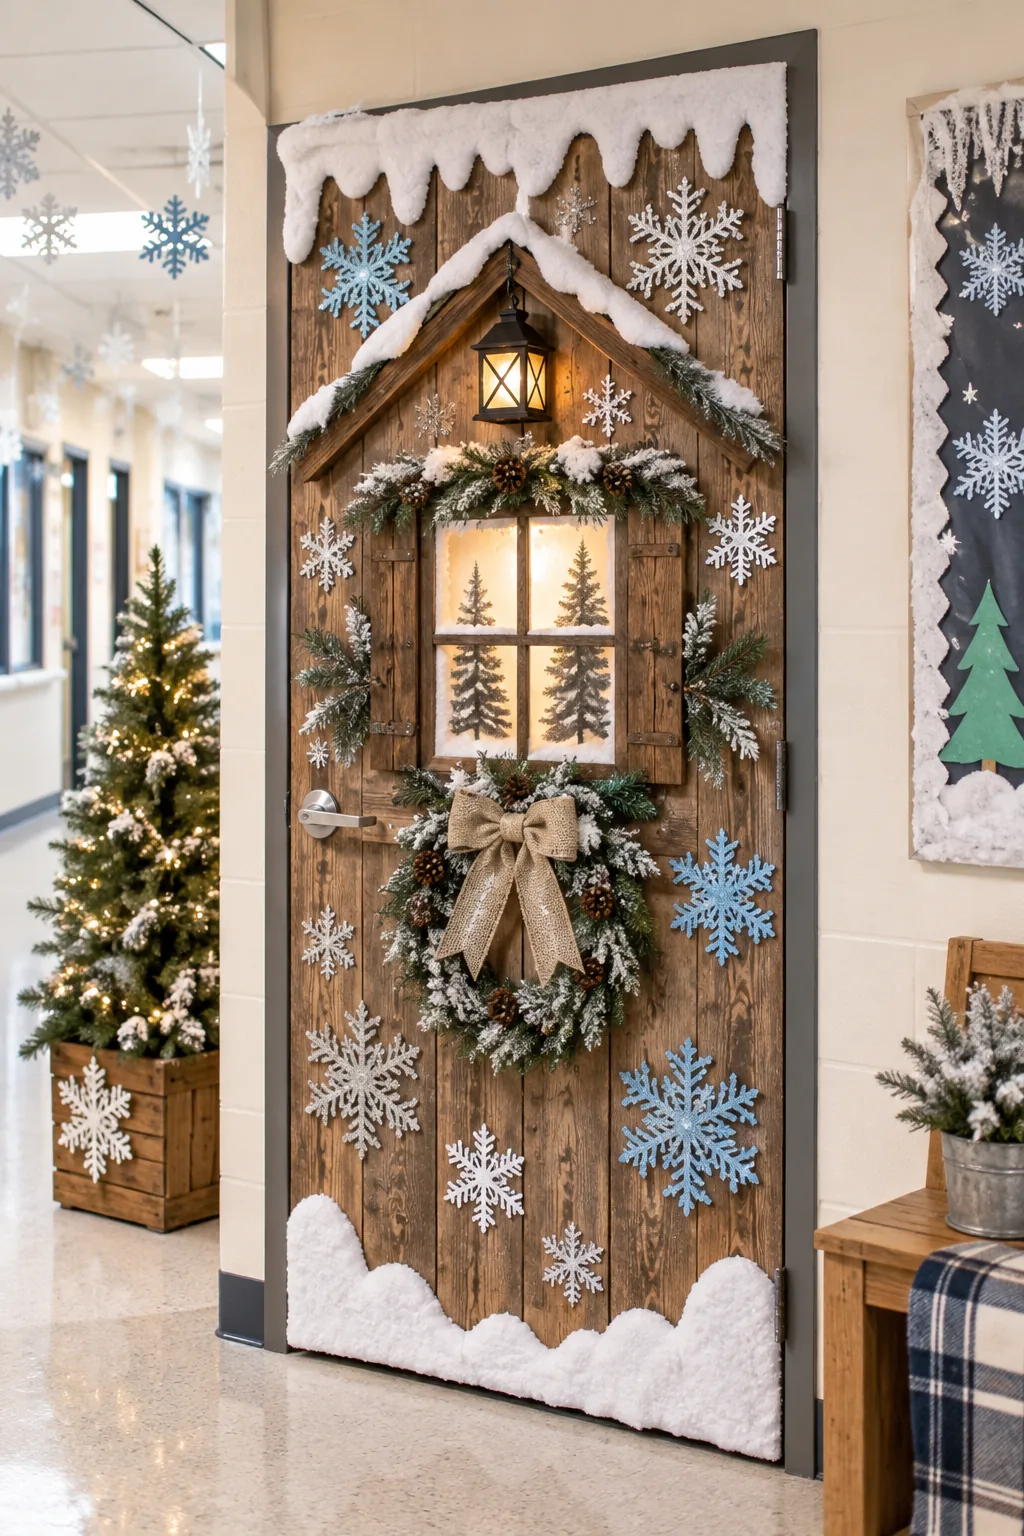
Winter Wonderland Cabin: Swap the gingerbread for rustic wood paper and silver snowflakes to create a serene, icy cabin aesthetic that lasts well past the holidays.
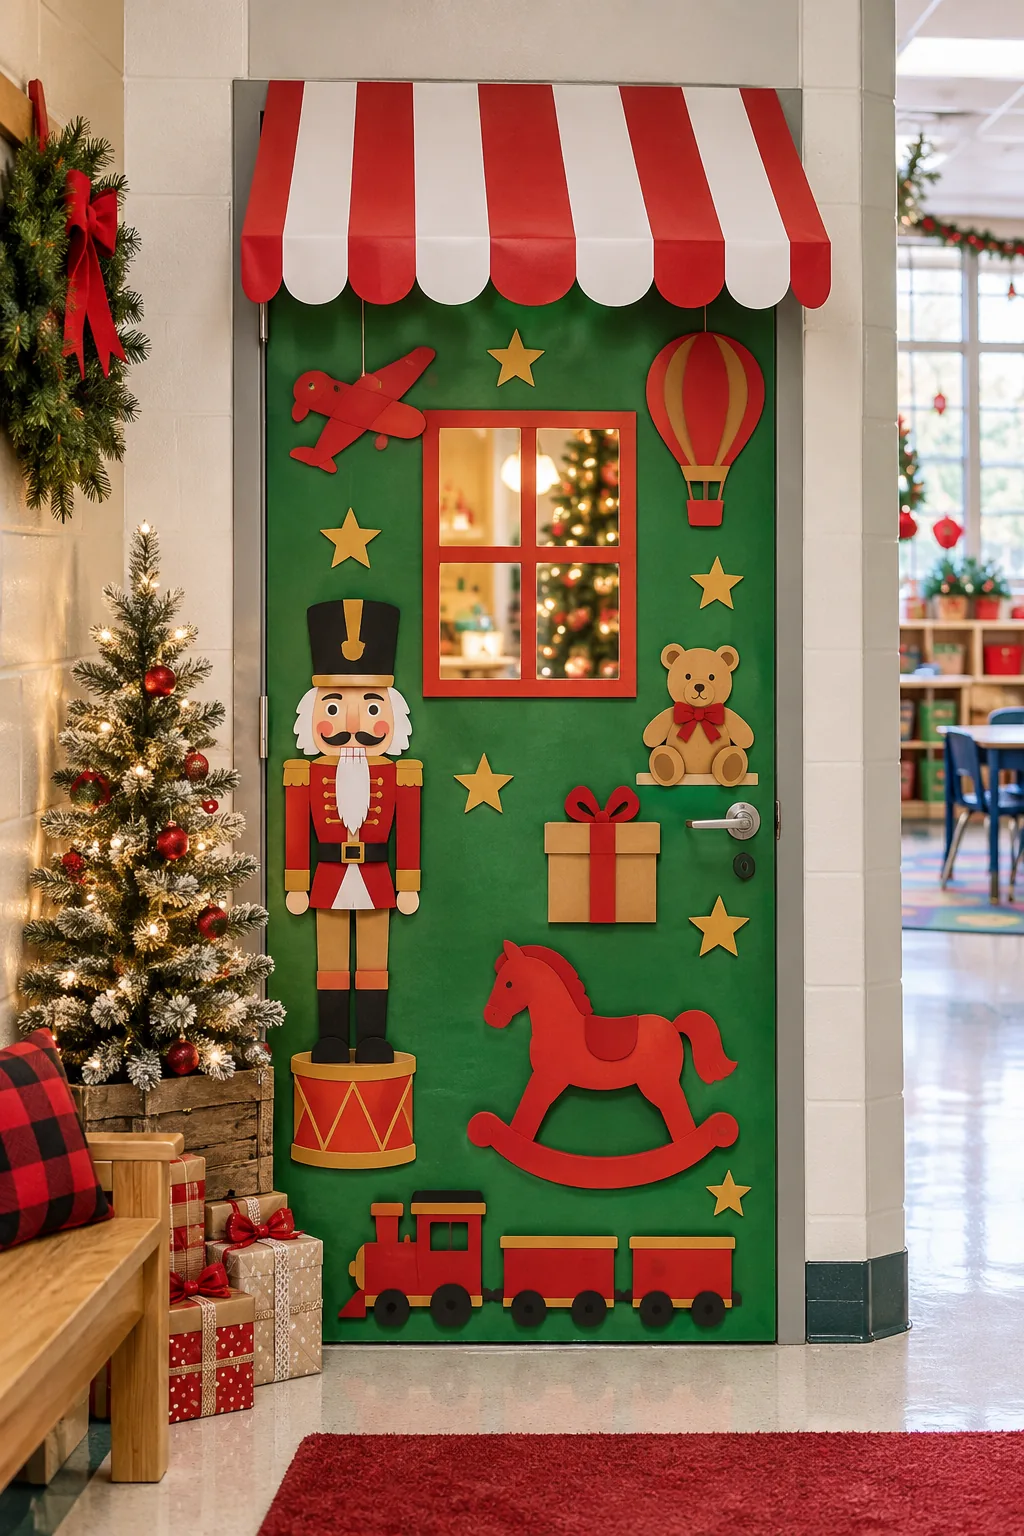
Santa's Toy Workshop: Use bright green wrapping paper and 3D cardboard toy silhouettes to turn the classroom entrance into a bustling, colorful elf workshop.
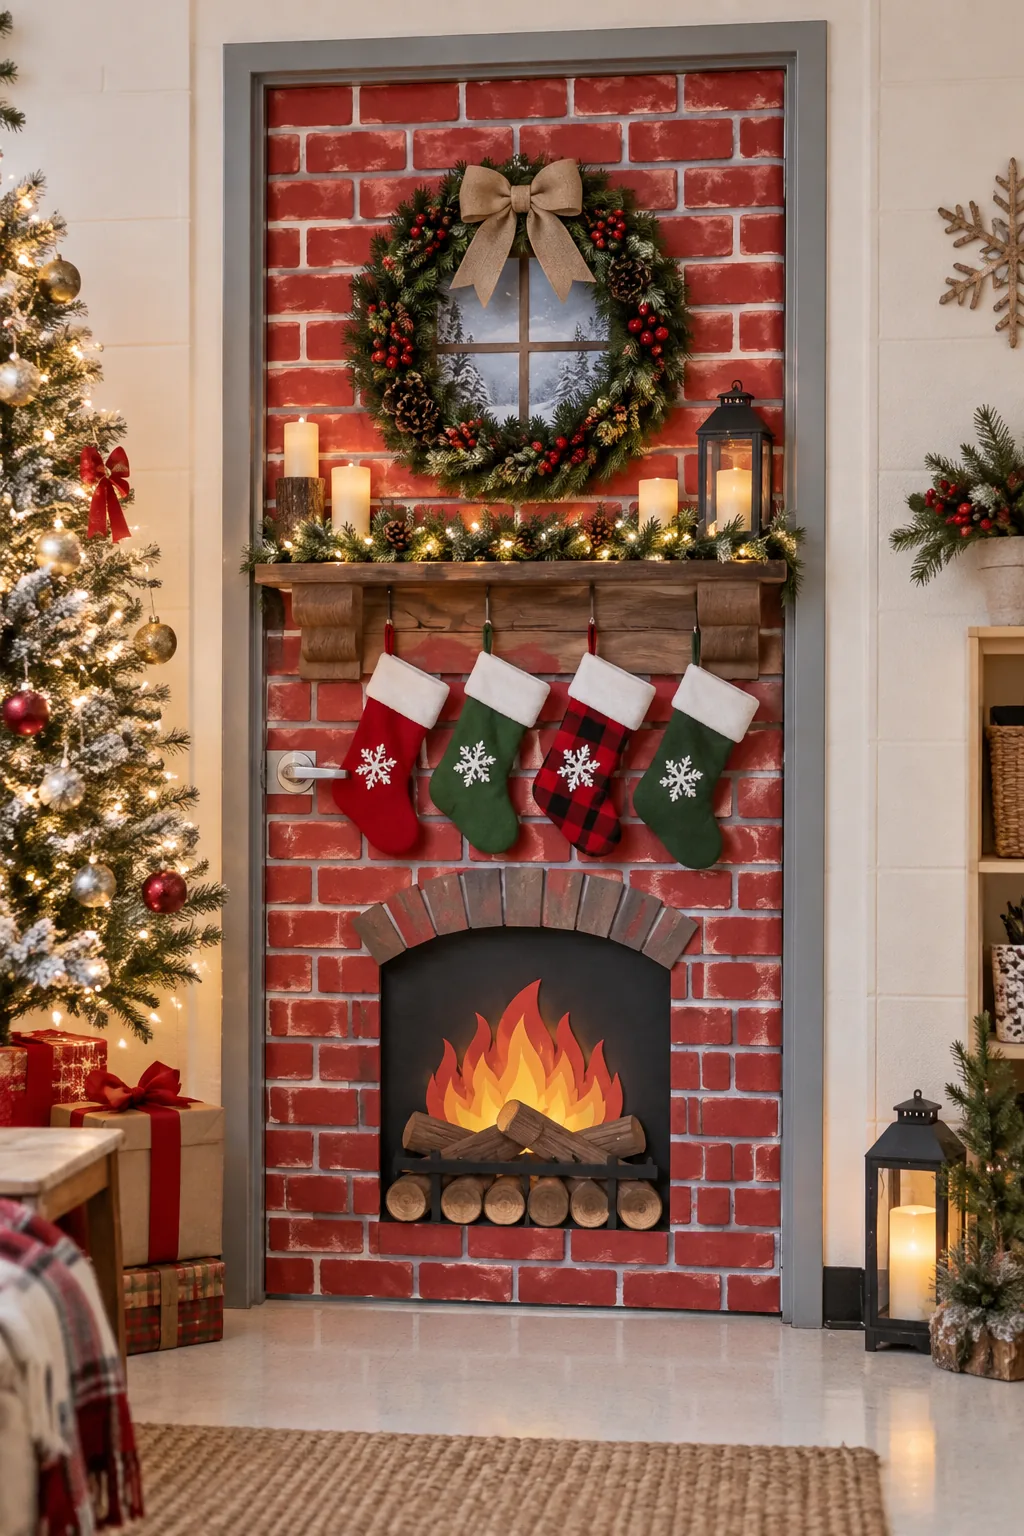
Cozy Fireplace Scene: Faux brick paper and a lightweight cardboard mantle create a warm, traditional hearth scene perfect for hanging personalized student stockings.
Final School Code Safety Checks
Perform a thorough final walkthrough to ensure the newly decorated door meets typical fire marshal standards for commercial educational facilities before the students arrive.
Before you clean up your crafting supplies, take five minutes to verify that your festive holiday display won’t earn a frustrating citation from the strict school administration.